Control one of the German AFVs in THC’s 2023 play-by-comment Combat mission game? Use the comment section of this password-protected post to discuss tactics with your comrades, and communicate orders to me, the GM.

Control one of the German AFVs in THC’s 2023 play-by-comment Combat mission game? Use the comment section of this password-protected post to discuss tactics with your comrades, and communicate orders to me, the GM.
Comments are closed.
Not sure if I’ve missed it, but do we actually know where this scout infantry squad spawned in?
Also, can it occupy buildings/climb to upper floors etc?
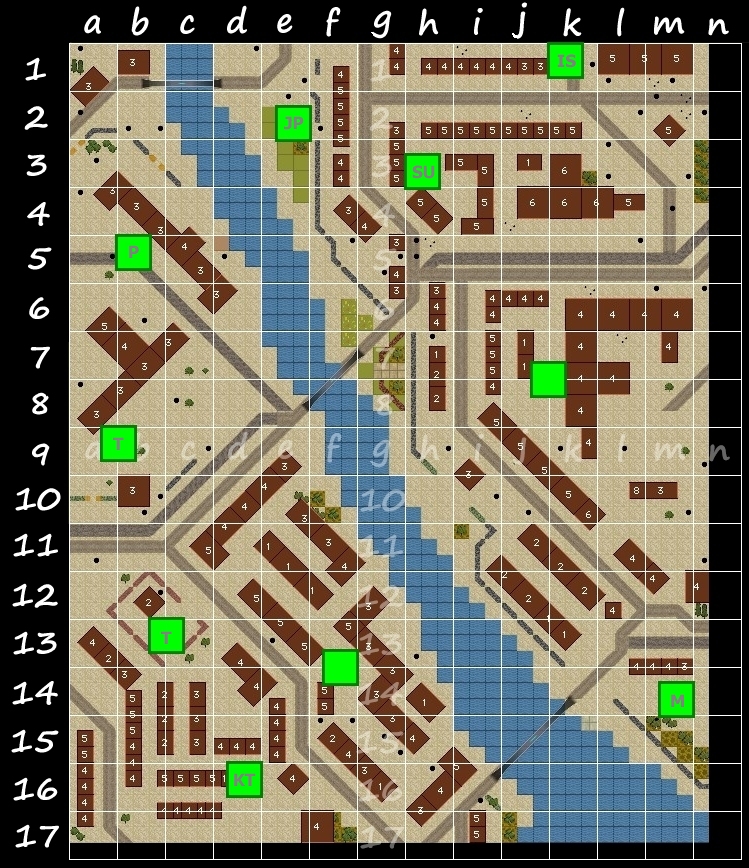
It spawned in a 2-storey building at a13SE (the red square with diagonal line on the side-by-side overhead views). Yes, it can occupy buildings (floor of your choice). Be aware, there are potentially more useful infantry teams on the way.
Tim,
On the report for last turn, I can see a new icon on the soviet side circa J8. Not being familiar with CM iconery, could you tell us what are they? Soviet Infantry?
I also would like to know if the Tiger, King Tiger and Panther can transport infantry?
Can any of the tank comment commander control also infantry?
That’s the Sherman crew at J8. They’re not a threat.
Tanks can transport infantry teams in CMRT.
>> Can any of the tank comment commander control also infantry?
I’d intended to move the infantry teams myself using simple pre-penned ‘scripts’ (“hunt nearest enemy AFV”… “occupy building at XXXX”… that sort of thing) but the early losses prompted a rethink. Once additional teams show up, everyone will get a chance to task one.
To all,
Quick comments for next turn:
I don t think a frontal clash between KT and IS is a good option.
The Tiger cant move forward. High risk of getting killed by the IS.
For now I think of moving Tiger either:
Meeting the scout team for a lift off, but i would lose a turn
Going circa F12 to flank the SU
Going circa H15 to flank the SU in two turns, assuming it goes south during next turn
I doubt the Tiger is in any danger from the I.S as it would have to reverse directly into the KT’s current field of fire.
The danger of a forward move comes from the SU as its pointing directly at you, a move to F12 is worth a try – can you fit through that narrow gap at F12NW?
There’s no value moving to pick up the scout team as they can move faster along these streets than we can when you factor in time taken to reach, load, travel and unload. It would also remove a valuable unit from the front line.
The KT will probably stay where it is, or move forward slightly to D10SW, the I.S is a tempting target. Its currently facing west so a side shot would take it out. However its more likely to move forward again to try and flank the Panther from the rear.
VFR
If you want to get back in the game now with the scouts, I would be happy to swap my infantry team later on (with Tim’s agreement) should they offer a more exciting/interesting command.
If you’re looking for a bridge the southern one is not covered by any of our units.
KT,
For the IS, it depends where it pointing out. From the screenshot, I believe that its cannon is on the south.
The Tiger can’t go through F12NW gap, it is too narrow for a tank. The tiger must take the longer road, which make it useless for next turn.
At the moment, I’m thinking going south, as I believe the SU will go that way. I don t think it would survive a direct combat with the Panther if it goes North. That’s why I was suggesting taking the scout at the same time. From the few test I’ve done, it looks possible without loosing too much time.
I would not recommend moving up to D10, as it would make your King Tiger an easy prey for the IS, if it ‘s pointing south. Staying into C10 seems more safe.
Tim,
Could you confirm the orientation of the IS? Is it pointing south as the screenshot suggest?
So this one looks like it’d be best placed to cover a bridge.
Not much use as scouts as we get an exact reports each turn and they have little AT ability. Maybe I just move them East as far as they’ll go, with a view to ending up in the top floor of the building at E9?
OK, so can we move the infantry squad to I16NW with a view to putting them in the top floor? Not sure what else we can give them other than maybe ambush orders?
Tim,
Sorry to be a pest but can you advise on the facing and movement status of the SU and IS-2 please.
I was wondering if there was some easy way of showing this at end of every turn (maybe omit the icons?) to save us bothering you with it in future.
The screenshot of the King Tiger appears to show it buttoned up, is this something the A.I commander has done maybe as a result of the recent tête-à-tête with the T34?
>>Sorry to be a pest but can you advise on the facing and movement status of the SU and IS-2 please.
No problem. I’ll try to include facing and motion info in all future turn reports (remind me if I forget). The SU is stopped and facing NWish. The IS-2 is stopped and facing SSW.
Not sure why the KT has decided to button-up. I’ll unbutton it ASAP.
TG.
Thanks for correcting my assumption about the I.S facing, it looks like it is pointing my way so I will take your advice and remain where I am.
However it looks like you may have an opportunity to attack the SU as it is facing NW by fast or maybe hunt move to E10E.
As it will need to rotate its body 45 degrees before it can fire you should have enough time to hit it from the side, can you test it?
VFR.
An alternative to the bridge move for you to consider – a quick move north along A column to occupy the university say A6. Then next turn depending on I.S location move to A or B4. You can’t damage the I.S but the commander’s head is always out of his turret – it would be a shame if he lost it.
KT,
Sorry for the late reply. After several tests, I couldn’t even take a single shot at the SU from E10E. For some reason, the Tiger can’t spot it, even when the SU stays in its starting position. If I move further, the IS kills the Tiger instantly.
The only time I was able to get a shot was by moving to F10. The SU was stationary and the IS was not looking toward the Tiger. I doubt things will go that way.
For next turn, I m not sure what the IS will do. Stay in place or go back to cover? During my tests, unless it is targeting some specific area, it’s almost impossible to knock it off. Looks like it can stay there a bit.
For the SU, if it moves forward and Panther doesn’t move, the SU usually get killed. I expect him to reverse to safety.
For the Tiger, I plan to go back to E12 next turn. Then decide where I can flank best the SU, if possible. Let me know if you have other plan to suggest.
VFR, the scout team can reach the building in B10, C11, D12 or D13 in one turn, moving Quick.
TG.
Thanks for running the tests. I agree you shouldn’t move beyond E10E to take a shot.
The only thing I can suggest for now is the move E12 but try and get to F12S or F12.
Perhaps the SU may not realise your targeting difficulties so may stay where it is, and just turn to face E10. This could give you a chance at flanking next turn.
Tim
KT ORDER.
Open hatch. Set target arc D1NE – F1N. Change facing to NE ( if not already doing so). T+30 Clear target arc. End of orders.
ORDER – Turn 8 Tiger
Reverse to E11N. Then Fast move to E12 through D11.
TG,
Sorry I dont understand why you are stopping at E12- its too far from any potential flanking move next turn.
Tim
If VFR doesn’t submit any ORDERS can I quick move the scouts to A8 1st floor please.
ORDERS
Move the scout infantry platoon as quickly as possible to I16N or NW – not sure from the picture if N is considered part of the building or not, so whichever is part of the building with a view out over the southern bridge.
Face out over the bridge. Get to the top floor for the best view.
TG.
I have to ask – did your testing predict that movement result for the Tiger?
Its irrelevant now but I would like to understand why you didn’t try to move to F12?
ALL,
One thing the last turn has shown is we need to discuss/agree our moves including the actual movement orders much further in advance. Can we agree to have the next ones done and dusted by 1200hrs GMT Monday?
KT,
Yes, during my test, I was not able to go any further than E12. I must say that the routing is a bit tricky, so that’s why I ended up D11. I’ve done some test and the problem lies in the reverse manoeuvre, which slow down the Tiger quite a bit. The only want to reach F12 quickly was going along the river bank. The Tiger would have being knocked out in this case.
Okay with me to discuss order for Monday. Just so you know I wont be around before Sunday Morning GMT time.
For the moment, I plan to move the Tiger circa H15 or I16 for next turn. I would like to avoid a direct fight with the SU by going to F12. The odd in my quick tests were not great.
TG
Thanks for letting me know you wouldn’t be around hope you had fun!
The route I thought you would take to E12 or F12 was a simple reverse to D11, (10-12secs) change facing to SE (15-17 secs) then fast move SE with about 30 secs remaining.
The issue with E12 (and with H15 and I16) is they do not possess any sort of threat to our enemy. We outnumber them and should be pressuring them every turn whenever possible, before they do it to us.
Looking now at the SU it can take a shot at our Panther by moving to I10 or I10E in the first few secs of the next turn. We cant stop that from our current positions, hopefully the Panther sees it and reverses, even then it may not survive.
At the moment the only useful options I can think for the Tiger is back to E10E, I agree F12 might be to risky now.
I’m thinking of the KT going to E9ish after the IS.
KT,
Well, the event I was supposed to attend was cancelled at the last minute. So, I was back earlier.
I’m pretty sure I tested the move you suggested and at the time it was not more effective than the one I used. Just test it again today and darn, it worked like a charm. Too bad I didn’t realise my mistake sooner.
Anyway, I was looking at what the next move would be for the Soviet.
For the SU, I think it can go:
– circa H10 or I10: good view on the Panther rear, but let its left flank open to the Tiger.
– circa I9: Still good view on the Panther rear, and protected from Tiger by the building in I9-I10
– circa K10 or K11: Can’t see the Panther, but offer a good position if the Tiger shows up at E10 or F12.
First and third moves seems less likely to me than the second one.
For the IS, I think it can go:
– reverse circa E1: waiting for Panther to take the bait.
– circa A3-A4: it did that move before, not sure it will repeat it. Still, the IS would have a good chance to kill the Panther in this case.
Between the two, the second one is more likely to me.
I agree that we need to be more aggressive for next turn. So, I was thinking that we could attack the SU by two side. For the Tiger, it could go to F12 or G12NW. For the KT, it could go either circa E9N-E8S or circa C8.
I would not recommend going directly after the IS next turn, as the SU could knock the KT by the rear. I also tried to go back to E10m but it is too slow compared to going to circa F12. Let me know what you think.
TG,
Re the SU – would agree the most likely move is circa I9 area.
Think it will change face immediately SW to face your attack via F10, then probably reverse NE possibly I9/J9SW this wud protect it from an E9 or 10 attack, also gives it an option to keep an eye on the Panther in following turns.
An advantage you have this turn is speed-as you finished last turn moving you can now go twice as fast (12m/s) this turn. Have you tested a fast move to F12SW – no need to change face, but you must do target arc to get your turret in position before arriving there. Probably too risky but that would be you best chance to get there before the SU turns.
Here is a plan to think about and test with your speed, which could well end the SU. Fast move south down Fish street and across the bridge ending circa L12. By my calcs should be able to make it around 50 secs and will catch the SU facing the wrong way.
What do you think?
KT,
I’ve tried to reach L12 but it didn’t work. After two hours of tries and optimisation, the best I could achieve is I16.
I also tried to reach various other points:
– H15: possible, but the LoS is so small it doesn’t work. Not worth it.
– G12: possible, more time for the gunner to aim. But the LoS is not good either and if the SU reverse toward K10, the Tiger is dead.
– Between F13NE and F12S: possible, more time for the gunner to aim. Offer a decent LoS if the SU is still there. Also far less exposed.
– E9: possible, takes more time and more risky. If the SU is aiming toward C6, the Tiger can kill it.
In the end, the F13NE-F12S and E9 are the only one that can gives results.
Now the hard part:
If I want to play safe, I think F13NE-F12S is the best move.
But if we want to be more aggressive, then E9 is definitively the best spot. With KT going circa D9 (D9S?), we could be a real threat to both the IS and the SU.
What do you think?
Tim,
I have two questions for you:
1. Is it possible for the scout to “guide” or “pinpoint” enemy troops and/or armour to friendly tank which can’t see said enemy troops/armour? To be more precise, could the german scout team become the “eyes” of the Tiger or the King Tiger, indicating them where is enemy is, even through said tanks can’t see them directly yet, in order to be ready when they make visual contact?
As I imagine this could be a complicated action, could you just tell me yes or no:
Yes meaning its possible and easy to do.
No meaning that it is either very complicated or simply impossible.
2. Is it possible to request to follow a specific line when a tank takes a corner, like a race car line? To give an example, if the Tiger takes the corner between E12SE and F12S, is it possible for you to trace an arc using 5 consecutive line?
I know it sounds a bit ridiculous, so if it is too hard to implement, I will look for another solution.
>> could the german scout team become the “eyes” of the Tiger or the King Tiger, indicating them where is enemy is, even through said tanks can’t see them directly yet, in order to be ready when they make visual contact?
I believe so. IIRC the scenario is being played on ‘Basic Training’ difficulty, so, if a friendly infantry unit has eyes on a threat, it should mean the tanks spot and engage the threat faster.
>> Is it possible to request to follow a specific line when a tank takes a corner, like a race car line?
It’s possible to create curved waypoint strings in Red Thunder. Whether the waypointed AFV will follow the curve perfectly is another matter.
TG
RE L12 move. I suspect you are testing assuming a stationary position from D11 – in which case your top speed will be limited to 6m/s. As you were still moving at the end of the last turn your top speed will be double that in the coming turn. My simple calcs were based on the distance travelled/speed (12m/s) plus an allowance for turns. I don’t own CM so cant advise how you test starting from an already moving position, maybe begin the test from the previous turn E10 and see how long it takes to reach L12?
The F12 move is the most risky for you in my opinion, E9 will only work if SU stays in place which I very much doubt, it also risks a possible IS attack. If the KT moves to D9 I don’t think it can see anything?
You could move to E10E by just reversing- ok you will have rear leading but in terms of taking a hit it makes no difference to the outcome as a hit to your front would still be fatal.
I am considering moving to E9SW to target the IS but if it moves forward I will miss it, so still thinking.
KT,
I forgot to mention it but all my tests were based with a Tiger still in motion from previous turn. The only thing I can t say is what is the speed at the start of the turn.
Going to L12, while theorically possible, would require a lot of tries and optimisation. The main issues to me are the fact that a wrong placement makes the tank brakes and the turn at the bottom of the map slows it too. I also suspect that the crossing of the bridge may slow down the Tiger ( or any tank really). Based on previous tests, I can say that tanks can use weird move when crossing a bridge.
If KT goes to D9, it is to cover a retreat of the IS. That the only thing you could do from there. If you want to have a go at the SU, going to E9 or C8 are the best spot.
I also forgot to mention it, but it takes around 20 seconds to get to circa F12 for the Tiger. Depending on how the SU moves, there is a good chance for a kill.
Last, I m a bit worried for Panther, as the IS could corner him and knock it next turn. Unfortunately, I don t think there is much we can do about it. To reach Panther or get a good position on the flank of the IS, we need to knock out the SU first. Possible in the first 30 seconds, but we will need a lot of luck.
If you go for E9ish, I think I will go for F12ish.
If you are happy with F12, I’ll go for E9. I do think you can make it in less than 20secs a fast move to F12SW hunt up to F12NE. Use target arc before turning the corner to point turret in right direction.
ORDER – Turn 9 Tiger
Keep momentum from previous turn. Adjust trajectory to corner to D11SE, then strait to E12SE. Add Target Arc at E12NW from I9NE to K10S.
At E12SE, keep momentum and adjust Target Arc from J9 to K10S.
Turn slightly to the junction between F12SW and F12NW. Stop at F12NW and adjust target arc from J9NW to K10S.
KT, I will not connect until tomorrow. Wish you good luck.
TG I think you have mixed up F12NW for F12NE! You cant reach NW. Can you change please.
Good luck to you also.
Tim.
ORDER KT.
Fast move C9SW. Target Arc B1-D1N. Fast move to C9. Target I.S-2.
If target not visible or when destroyed change target arc to K11E-I9NE. Pause 15 secs. Change facing NW but keep same target arc. Clear target arcs. Slow move D8NE.
Tim,
I made a mistake in my order. If it is still possible, can youtcorrect it?
Here goes the correction:
Turn slightly to the junction between F12SW and F13NW. Stop at F12SW and adjust target arc from J9NW to K10S.
Sorry for the late notification
In case you need it, infantry to continue moving as per pervious order..
Tim
Have just realised I have mixed up my ORDERS. C9 should have been E9. If its not too late please change but if you have already run it then no problem.
*German inf units*
3-man scout team (SMGs) fourth floor, tired, spotting, i16N .
3-man scout team (SMGs) first floor, stationary, a16SW.
Tim.
Thank you for trying to correct my FUBAR move last turn. Looking back at my correction request I can see it should also have included changing C9SW to E9SW which would probably have changed the outcome considerably.
Apologies if the late correction created any extra work, I strongly suspect it will be my last.
TG.
I won’t hide my disappointment with your late (not discussed) move change to F12SW, that SW quadrant has such a limited area of visibility the chances of success was always going to be slim, then add a meandering route to reach it all but guaranteed failure. I would not have risked my E9 destination on such a sub-optimal move.
Had you stuck to the agreed plan of F12, or if you had you followed my recommendation of F12NE, we could have had a very different outcome.
I’ve radioed HQ with my report.
You are hereby summoned to firing squad (target) duty at your earliest convenience.
KT out.
KT,
I really don’t know what to answer to that.
I’m sorry, but I have to ask what will you do for next turn?
Independence and imperfect coordination/execution have always been part of play-by-comment CM. If the SU-100 had stayed put this turn, it’s quite possible the Tiger would have bagged it from its new position at f12SW.
>>Thank you for trying to correct my FUBAR move last turn.
No problem. For future reference, I’d recommend everyone keep orders as simple as possible. Implementing this part of your last order was a challenge – “If target not visible or when destroyed change target arc to K11E-I9NE” – as CM’s WEGO order system lacks desirable subtleties like target prioritisation, and “if x then do y”.
Tim,
I understand that CM can be cruel, we have seen it in the previous installment of this game. But I must say that the last message of SunderLad is hard to accept, even through my lasts commands were far from perfect. I also understand that this is just a game, and that we don t have to call names for this.
I have a few question:
1. Can you tell us if the IS and the SU can have an LoS on the King Tiger?
2. If I remember correctly, the King Tiger can t reverse, no matter the situation. Could the King Tiger execute an emergency reverse manoeuvre despite its trait?
3. I m pretty sure you mentioned it before, but could you confirm that the King Tiger can pop smoke? Would it mask the tank from the IS and/or the SU?
4. From the last comment of SunderLad, I got the impression that he want to stop. What would happen to the King Tiger, should he decide to retire?
1. Can you tell us if the IS and the SU can have an LoS on the King Tiger?
The IS-2 and SU-100 start turn10 with LoS to the KT.
2. Could the King Tiger execute an emergency reverse manoeuvre despite its trait?
I guess so.
3. I m pretty sure you mentioned it before, but could you confirm that the King Tiger can pop smoke? Would it mask the tank from the IS and/or the SU?
It can pop smoke. The screen would probably take a turn to fully thicken and will form relative to turret direction.
4. From the last comment of SunderLad, I got the impression that he want to stop. What would happen to the King Tiger, should he decide to retire?
Things are far from bleak for the KT. There’s a fair chance it will, at the very least, kill the IS-2 before the IS-2 has time to realign its turret. There’s a fair chance the SU-100 will stop reversing and engage, but if it misses with its first shot, the KT could clobber it too.
A clarification on 2. While SunderLad’s trait means he can’t order a reverse move, if CMRT’s TacAI kicks in and decides to back up, obviously I’ll let that go.
***IMPORTANT CORRECTION***
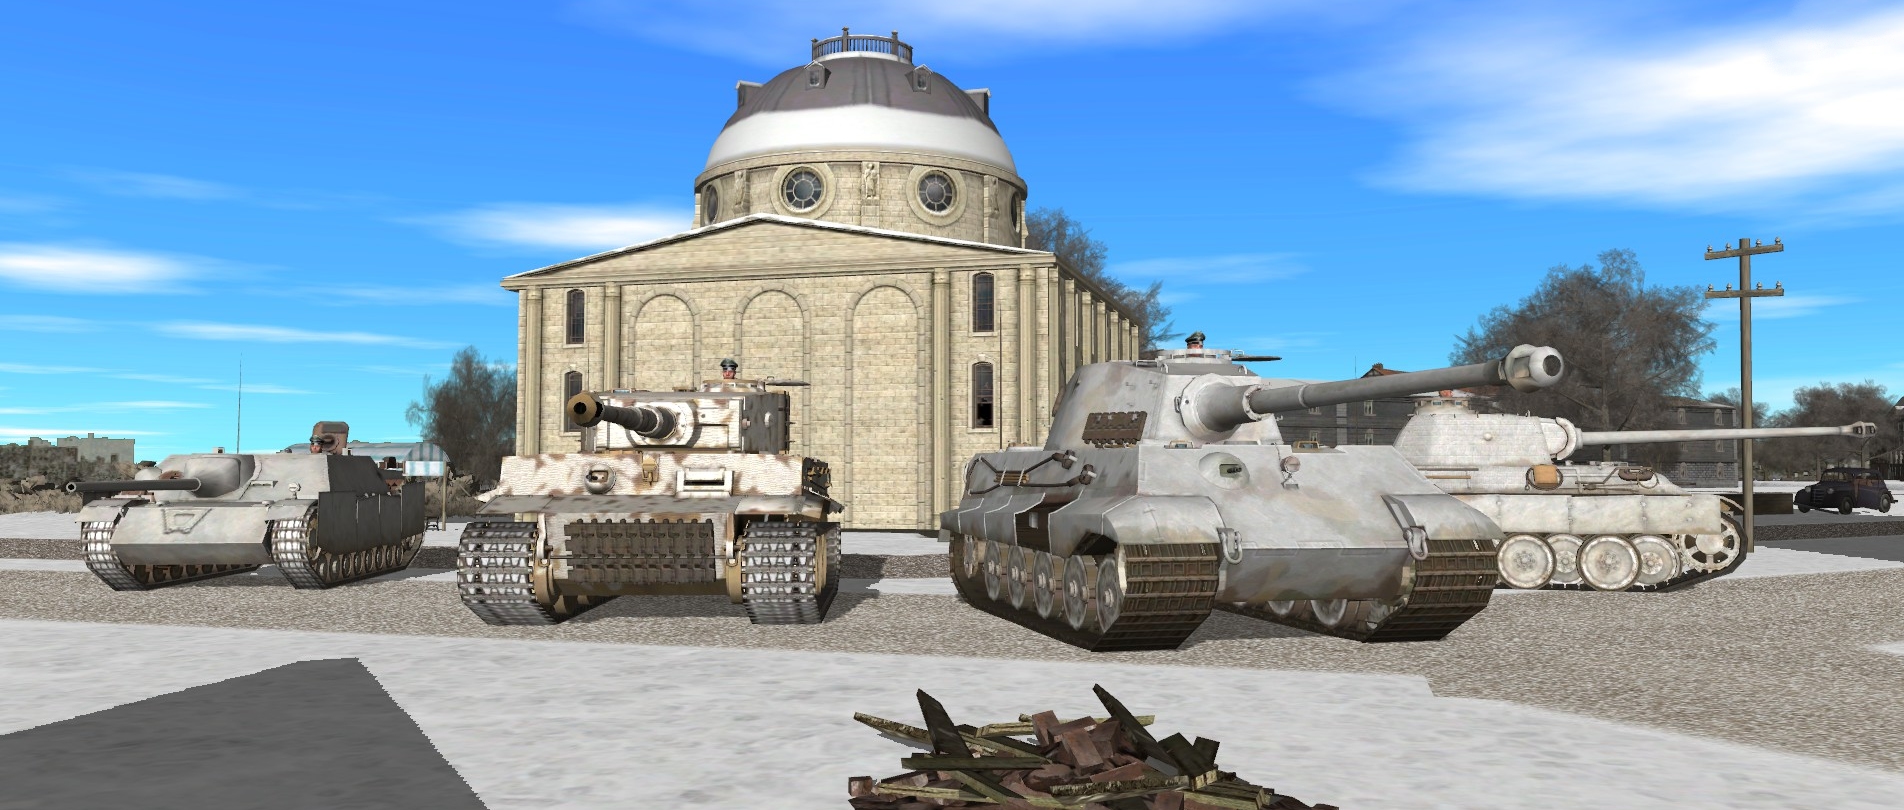
Apologies, after taking another look at the replay in response to a Soviet query, although the KT has spotted the SU-100, its gun remains trained on the IS-2 at the end of turn 9. If you examine pic lodowice09f.jpg closely, this is shown.
The turret shift reported earlier was me getting confused with the result of an earlier, abandoned order experiment. (In the end, I couldn’t figure out a way to get the KT to shift its focus to the SE /after/ ensuring the IS-2 was no longer a threat)
Tim,
Hope you dont mind the rant below.
SunderLad,
I ll be direct: I know very well that I screw up big time and I m not happy at all with the current situation. I don t want to enter a game of who did what and when, that s useless.
We knew that we had to takes risks, and it didn t paid off. That unfortunate, cruel, call it whatever you like. Now, I wont pursue this rant, again it is useless.
We are still alive, so even if the odds are against us, we have to fight. Together. I wont make it alone, especially with all my previous mistakes. Nor will you.
It is not garanteed that both the IS and the SU will attack you directly at the start of next turn. Granted, your chance are low, but it could happens. With luck and some discussion, obviously. Also don t forget that the King Tiger may very well knock out the IS and the SU if they are too bold.
I plan for next turn to move forward to G12, and have a go on the IS while keeping an eye on the SU. Unfortunately, unless the SU moves forward, the Tiger will not be able to attack it during this turn.
For next turn, I expect the IS to stay still, or reverse, while the SU moves backward to relocate in K13 or K11.
Let me know what you think for next turn.
A Monk.
I will be direct in turn. We both agreed on high risk moves – me to E9 you to F12. After the move deadline passed you changed your order lowering the risk for you and consequently increasing the risk for me.
I don’t think it unreasonable that I express my disappointment at that and explain why/how that late change impacted our teams chances of success.
That is not name calling, or a rant, just facts.
I thought I’d made light of the situation with my firing squad comment but maybe my sense of humour doesn’t travel very well or perhaps it just wasn’t funny.
Anyway moving forward – It wasn’t my intention to drop out, though realistically its difficult to see the KT surviving beyond the next turn.
The G12 move is a good one. BUT there is only one way to do it to maximise its success.
You must Fast Move immediately and directly to G12N, no change of directions. You can change facing if you wish after you arrive.
See my 9.03pm post to Gobser for more background.
If you agree to this move we can discuss further details.
This will allow me to take care of the SU.
See my answer below, with the order I plan for now.
Be aware that the SU is out of Tiger’s reach unless it moves forward, which I doubt it will. But we never know.
An alternative move would be for the Tiger to aim at the IS while you deal with the SU. Possible, but for that we need the SU to stay where is it while not aiming directly to KT.
Tim, what exactly are the Infantry squads armed with? I thought they carried AT grenades but now can’t find the comment that says it.
I’m torn for the next turn. Part of me wants to move the infantry squad across the bridge to the buildings at K13, with a view to if the SU reverses being in an ambush position – that of course being dependant on the squad having at least some AT capability.
If it reverses immediately I could find myself halfway across the bridge, so the other part of me wants to stay put in case the SU then crosses the southern bridge!
Also, has Gobser now got access to this forum in case he wants to command an infantry squad? Assuming that’s still the plan to allow that.
Each scout team is composed of three individuals. All personnel carry an SMG and two standard stick grenades.
Hey guys! I, honestly, did my best, trying to entangle everybody. It was fun to read how you tried to calculate my moves as much as I did try to anticipate your priorities and solutions 🙂
A pity I had to go for a gamble this last turn, but it seemed as the best tactic at the moment, even though it was 50/50. Oh well.
At the moment Tim has bestowed upon me control over a scout team in the SW corner, so I am open to suggestions on how to best employ them.
I assume that the scout team is equipped with something along the lines of SMGs/Rifles/Hand Grenades?
At the moment my general idea is to try and place my guys somewhere in the northern building of the University, to maybe have a chance of a potshot at the IS commander should he unbutton, either KOing him (best case scenario) or at least forcing him back to BU, restricting his vision and reaction times (I assume that is how it works, I’ve hardly ever played CM2, to be frank). This is all, of course, time dependant and the idea revolves around IS moving along the southern bank of the river. I think it is quite possible, as the Panther’s wreck must block the northern entrance to the University’s courtyard.
I am not sure I will have enough time to reposition there from SW corner of the map, before the IS leaves the danger zone, however it seems to be a good idea to try and make this approach a little more troublesome for my heavy nemesis. It may also by you some time to deal with the SU in an organized manner.
However, as I’ve stated before, I am open to suggestions, if you have good idea on how else the scouts can be of use, considering almost full information on AFV movements
Hi welcome to the mess. I’d get you a drink but there doesn’t seem to be anyone around at the moment.
Apologies for not coming to your rescue sooner.
I think your CM experience matches if not exceeds everyone else here.
My belief is the scout is armed as you say, ie no anti tank ability.
The move you suggest to the Uni is one I recommended some turns ago so it has my support. Hopefully I can hit the IS before the SU targets me next turn saving you the bother, however holding the north bridge preventing subsequent enemy infantry infiltration will be useful.
Btw what was your trait?
My trait was “Lone Wolf” – I was not given the mess password and had to issue my orders to Tim via e-mail, hence the lack of communications.
I must say that it was very stressful but almost equally entertaining trying to read everyone’s intentions.
Do not apologise, I was in a nice defensible location and you had a quick T-34 to worry about. Even if I could communicate with you, I’d never ask you to leave a highly mobile 85mm gun in your rear. Initially I assumed that most of the Benny Hilling could be avoided, but this guy proved quite slippery and deceived my anticipations.
Now that your rear is secure, I’d say our side has good chance at this. IS is in a weird position, and I am almost certain it will try to move fast to put the Uni building between the Tiger and itself. But from there it will be in an even weirder spot, as from there there will be no good LoS to the southern bank, and the only suitable vantage point is quite obvious. If it does that, the Soviets will be quite disjointed and will find it hard to mount an offensive action.
I don’t think that IS is going to retreat north, as there is almost no cover an it will have to traverse so much open ground without its most effective armour to deflect any incoming shot. Mobility may be considered a form of defense, but I suppose that angular speed of the KT (about 6 degrees per second) is quite enough to catch up to IS and the 88mm gun is quite accurate at longer ranges too.
If IS decides to stand and fight, I’d say that most likely he’d be toast. Weaker armour, turret rotation, buttoned status and not as straightforward ballistics of the gun all play against the IS.
But honestly, I’d reverse if I were KT, or at least reverse as soon as the one shot is fired. SU has a potential to halt, pivot a little and throw a shell at KT, which at these ranges can have a pretty good chance of penetrating even the frontal armour. Should it hit the side of the turret, and it is no contest.
I have a weird suggestion on a global tactics scale: As IS is probably going into a well protected area where it is going to be quite harmless for a minute or two, and considering the fact that SU is soon to be lodged in its stone hole, all but eliminating the disadvantage of lacking a turret, how about you both retreat, face forward, obviously, a bit deeper into the city?
The purpose of such a maneuver is as follows: the Soviet AFVs are at the moment able to support each other, despite being on the different sides of the map, and you have no good option on how to effectively flank them without crossing the river. If you can lure them into offensive action, there are several advantages. 1) They will surely have trouble synchronising their actions and supporting each other 2) there will probably be some period, where they are on different banks of the river 3) if SU tries to get closer, it will be forced out of its hidey-hole and is way more likely to be defeated, as you will always have an advantage of your guns being able to rotate 4) You can be almost certain, where to expect IS 5) Neither of you loses much denying them an exchange at the moment.
Considering the infantry orders – I hear you, but I will wait a day or two, in case there is an even brighter idea or another global plan that I could support even better
I should have mentioned my trait prevents any reversing and the Tiger can’t unbutton.
Agreed the IS will probably head west asap, it doesn’t have to move far to break LoS. However it may stop very soon after that, re-adjust its target arc, open hatch and reverse back to take a shot at my rear- on the assumption the KT will be engaging the SU. That’s what I would probably do.
When I decided to move to E9 the priority was to take out the IS even if it resulted in the loss of the KT as this would give our team an advantage (on paper at least) of turretless SU v Tiger.
Now having missed the first shot on a large stationary target at relatively short range, (which may disappear before my 2nd shot), I’m beginning to wonder if it might be worth reprioritising targets before the SU targets me. It has slightly further to go to break LoS assuming it wants to do that. I also suspect the Tac AI may target it anyway as it perceives it as a closer threat – so I may as well save time and go after the SU immediately then turn turret to face any IS threat. If the IS returns to quickly or worse, stays to fight then its IS v Tiger or IS+SU v Tiger, not very good odds.
Any thoughts ?
KT,
To me, the best move is still to shoot at the IS. The KT is still on him, so, you have a decent chance to knock it off at the start of next turn.
The tricky part is dealing with the SU. From where it is, it can (and most likely will) shoot at you at the start of next turn. It doesn’t need to adjust its position for me to do so.
For next turn, you could use a target order (no target arc) on the IS, then after the first 5-10 seconds, turn KT front to face the SU. Once the IS is either dead or outside your LoS, KT would automatically turn to the SU.
It takes about 20 to 30 seconds to reload the KT gun, minus 7 seconds that have already elapsed since the shot.
The only chance for KT to bag the IS if it stays where it is or moves to the eastern bank. First is possible, and it may have a first shot, as I assume it has already reloaded or about to do so, but very risky. We know, that this guy is okay with taking risks, but he has no reason to, as moving towards the western bank will break contact quite effectively.
The SU is more likely to take a shot, but you can’t rotate KT’s turret in time to do anything about it.
But there is an option to consider. You can pivot to face SU as you pop smoke. It will not be immediately effective, but it is a good cover in case something weird happens again or if tries to hide – a smokescreen will give you options for the future.
There is an even weirder option – you can overpivot your hull, and instead of facing SU, which is likely to pen the front regardless, add your hull movement to the turret rotation speed to quickly bring your gun to bear with SU. If it misses, retreats or takes too much time aiming you are likely to have it in your sights almost as soon as your gun is reloaded.
EIther way some smoke will help, if the situation is not somehow defused by the end of the next minute.
>>> It takes about 20 to 30 seconds to reload the KT gun, minus 7 seconds that have already elapsed since the shot.
I don’t think this estimate should be relied upon. The KT crew are old hands. They work quickly.
Possibly instructive. I’ve just run an experiment with the scouts in the SW. Given a ‘fast’ move order to the planetarium, they reached a11NE by the end of the turn, but were ‘tired’ as a result.
Thank you! This information will help greatly with scheduling
Ah, yes, unless you already do that, using an AI like ChatGPT or Bing to quickly cross reference some characteristics of AFVs and their relations is quite quick and useful. They do invent stuff sometimes, so it is wise to double check some of the things you find weird, but some more niche questions are answered way better and quicker using such tools.
Gobser,
Welcome to the mess!
To all,
For the infantry, I agree that we need to have some on the northern part, as we don’t have anymore force there at the moment.
For the soviet tank next turn, I believe that the IS will move forward. He is under the threat of the King Tiger, and moving North is the safest move for him. There is no need to engage KT since the SU already have an LoS on KT. That would also serve as a decoy to give more time to SU.
For the SU, I believe he will attack KT. He could then start to move after some time, either forward or reverse. I doubt it will go forward, but previous turn showed that we have to expect the unexpected. Reverse offer the possibility to get to a better angle. Possible destination for next turn would be K13S or K10SW.
For next turn, here are the order I plan for Tiger:
Clear any previous order
Move fast to F12 + Target Arc J8 to L12 then
Keep move fast to G12NW + Target Arc adjustment K11 to H8 + Pause 10 seconds then
Move fast to G12N (avoid going too close to the bank) + Target Arc adjustment M12 to K14
Possible alternative move could be:
to stay at G12NW,
reverse back to F12,
move to G11SW + target arc adjustment A2N to E1N to shot at the IS, if it stays there.
Let me know if you have suggestion.
Are you sure about visiting G12N? It seems to be quite open to a flanking from IS, both from where it is at the moment and where it can possible be during the next turn. G12NW seems a bit safer, but I’d be cautious due to some of the inherent wonkiness that can be encountered there. This building’s corner can be a little bit off from we see it on the map and that could be disastrous. This position can also be very dangerous depending on what point of the AFV is going to be over the destination point. Even a little hull protruding from behind the wall could catch a shell, and as this shell is likely to be 122mm…
Going to G12N is necessary if I want to face a move of the SU coming from K13.
Obviously, there is a risk of taking a shell from the IS. Since it is a specific move hard to anticipate, I think it’s not that risky.
Tim,
I am an idiot and managed to post my orders for my scout team in the comments for the last turn, instead of this thread.
Can you please help me and delete it? I can’t seem to find an option to this myself.
ORDERS for scout team Gobser for TURN 10
Hold fire, then
1) Move to A13W
2) Move to B10
Standard move speed
If someone has seen this – it is not much of an issue, but I will be thankful if Tim could delete the copy I’ve mistakenly posted in public comments regardless
I just saw it and was about to comment something to the effect of to many schnapps on a bank holiday weekend! They may think its a double bluff, its a pretty safe move still, tho future intent may have been signalled, maybe change to fast move towards planetarium?
Frankly, I think that if my intents are read, it only benefits our side. If IS gets cautious about moving along the southern bank and/or getting too close to the buildings, it either has to choose to go back to their side of the river through so much open ground, blaze through the danger zone before infantry arrives which should expose it to AFV fire or to stay in this corner being mostly useless and afraid of the infantry it can’t spot very well.
I did not do this bit of psychological warfare on purpose, I promise.
I am also quite wary of staying in the open for too long for the fear of attracting some kind marksman/sniper fire
All.
Thanks for your comments. My latest thoughts in no particular order.
Reload time- From some limited research based on Soviet testing of a captured Tiger1 gives it as a fraction less than 8secs (its a similar gun/shell size to KT) ; several wargaming sites use 8-10secs for a KT. This complicates more than helps as if it were lengthy then its a no brainer because the I.S should disappear from my view in 2- 3 secs anyway.
Tiger move G12NW.
As we have unanimously agreed the IS is going to move west I don’t see the purpose of moving there. Looking at it’s predicted LoS, it can’t see anything west of the G column? – what am I missing?
Tiger Move G12N.
This I like. But needs to be done asap. It has several advantages:-
1. Its unexpected. I imagine they will have spent a lot of time considering my demise/their survival to consider the Tiger popping up in what I accept is a risky position.
2. The IS will be fast moving and continuing west (Gobsers theory). Whilst I don’t own/play CM I’ve dipped into the manual to find Quick/Fast moves -“emphasises arriving at the waypoint over returning fire”…. “decreased awareness of what is happening around the vehicle”. This gives a golden opportunity to engage it on favourable terms.
3. Full disclosure – it could also help me should the IS immediately stop out of my LoS, prepare itself ie target arc/unbutton and renter the fray (Sunderlads theory) – it did something similar after the “non truce” turn prior to attacking the Panther. We could catch it reversing or maybe rotating, even if it takes me out with that tactic, because of reload times it will leave itself open to a risk free shot.
4. At the moment I’m leaning towards prioritising the SU utilising some of Gobsers suggestions. So the IS will have to dealt with one way or another. Better now on our terms rather than later on its.
All,
I tested the maximum shoot for KT (aka SunderLad’s King Tiger) in one turn (it was aiming at a building). The result was five shell shot in one turn. Obviously, it is a theoretical number against an AFV.
We need to remember that the Soviet doesn’t know (yet, hopefully) about KT’s trait. If so, they should expect it will reverse to safety at the start of the turn. On this basis, there is no point for them to attack KT for the most part of the turn, only for the first 5 to 10 seconds. Instead, we should see them moving for more favourable position to attack either KT or TG (aka my Tiger).
We also need to remember that the Soviet have a sniper team that should be soon in position. Don’t know what they are capable of, but I assume that their preferred position will be the church at L10. They also have at least one team of scout. KT, you have to keep that in mind if you don’t want to loose your tank commander from an ambush of the soviet infantry.
To reach G12N or G12NW, the TG (aka my Tiger) need around 15 seconds.
Regarding TG move to G12NW: That position is to be able to knock out the SU (Target Arc K11 to H8), should he move forward. Also, in order to avoid a delayed move from the SU, I think I should stay there at least 10-15 seconds.
Regarding TG move to G12N: That position is to be able to have a look at the SU (Target Arc M12 to K15), should he move backward to K13. The downside is that the Tiger would be exposed to a rear attack from the IS or a flank attack from the SU should it delayed its forward move circa I11E.
For an attack on the IS (assuming it stays around), I could go to G11SW or reverse to G12N, using target arc A2N to E1N.
Possible moves I see for the SU next turn:
– Forward to have a good angle on KT, then after 10-15 seconds, reverse to safety.
– Stay where he is at the end of previous turn, attack of KT, then forward in a delayed moved (30 seconds after the start, for example) circa I11E, to attack TG.
– Reverse circa K13, so it could attack the Tiger by the flank/rear.
– Reverse to L13, then forward to circa K10 through road L12-K11 to attack the KT
– Forward directly to circa I11, then reverse to circa K10. Weird move, but possible if we consider previous moves.
What move do you see for the SU? Considering previous turn, all of them seems possible to me.
For the IS next turn move, it should be west, then going south. Reverse back to the bridge is also a possibility, if they want to regroup with infantry.
For KT’s next turn, a possible move could be to pop smoke (no need to adjust the turret angle) and turn the chassis so that the front face the SU at the start of the turn. No need to move far from the current position, it is possible to stay in E9 for that. If it works, the KT could survive, but would loose the LoS on the SU.
For you info, I tried a (very bold) fast move of KT through the central bridge (going to E8E, then to H5), but unless both Soviet Tank looks the other way, it is a fast way for a knock out.
Tim
There are two new icons on the eastern boarder of the latest map. I assume those are trucks.
Are they already deployed? or are they in for next turn?
Also, could you tell us what’s inside?
ORDER – Turn 10 Tiger
Clear any previous order
Move fast to F12 + Target Arc J8 to L12 then
Keep move fast to G12NW + Target Arc adjustment K14 to J8
I remove the last part for now, as I m worried of a flank move by the SU.
Will try to stick around and post an update once KT has posted its orders.
The SU is either going to stop immediately to target me or continue to reverse and break the LoS. There is no reason for it to come forward this turn. Remember it has no turret-it would have to emerge from the street and change its facing almost 90 degrees to engage you. Your turret is far far faster than that.
If the I.S stays where it is (or moves west then reverses back) it is going to fire at me not you. It has a reload time of about 20-30 secs so it would be a sitting duck. If it continues to move west then its no danger to you.
I believe we have a good chance to take out both enemy AFV’s (even if the KT doesn’t make it) by you fast moving to G12N turret pointing NW.
Tim.
ORDER KT. Pop smoke. Fast move E9E. Target SU. Fast moves E10E, D11. D12NE.
Order updated as promised, finger crossed. Good luck everyone!
Tim,
ORDER – CANCEL AND REPLACE – Turn 10 Tiger
Clear any previous order
Move fast to F12 + Target Arc J8 to L12 then
Keep move fast to G12NW + Target Arc adjustment K11 to H8 + Pause 20 seconds then
Reverse to G12N (avoid going too close to the bank) + Target Arc adjustment A2N to E1N
Tim
Is there new infantry troop incoming?
There are two new icons on the eastern boarder of the latest map. I assume those are trucks.
Are they already deployed? or are they in for next turn?
Also, could you tell us what’s inside?
More infantry are en route. IIRC there’s at least one tank hunter team among the reinforcements to come. The two icons near the western edge are empty trucks. I guess there’s no reason to make them ‘off limits’. Make use of them if you like/dare!
Tim,
Thanks for the offer, but I’ll pass on this turn.
Two more questions:
– Does those trucks have drivers? Or do we need to put someone behind the wheel? In this case, can any infantry trooper drive it?
– Does the soviet IS completely block the north bridge? Or could some infantry or vehicle pass it?
The trucks have drivers. Truck-sized vehicles can just about squeeze past the IS-2. Not sure about the Tiger and SU-100.
Mr. Tiger Man, do you have any suggestions on how a scout team with SMGs could assist you in cornering SU? We are obviously no longer needed North, but I can’t really see how we’d be able to cross the bridges to harass the SU – I am almost sure that central and southern bridges are under overwatch.
Having said this, don’t you think you’d do well to spend some time without an offensive? The air recon kind of diminishes your turret advantage, as SU can pivot far in advance. Maybe we would try to pressure with infantry (Tank Hunters imminent)? This is very slow, but we are not in a hurry, strictly speaking. I would also advice against advancing forward unbuttoned, as my, ehhh, FUBAR Sense (it is a thing) tells me that there might be a sharpshooter waiting for you.
I plan to retreat the Tiger from its current position next turn. For the moment, I’m thinking of going back circa F14NW. I’m open to suggestion.
About cornering the SU, I also think that we could wait for the infantry to appear. On the other hand, I suspect that the soviet will have more infantry reinforcement than us, so it could be dangerous to wait for too long. I must say that I don’t have a strategy to knock off the SU yet. Should we use a bait? should we go straight for him?
The Tiger crew can’t unbuttoned as a trait. So no worries on this side.
On a more global scale, I was thinking we should keep an eye on each bridge and the other side of the river to prevent enemy surprise movement. I m not too found of leaving the northern part early on. We could have a team circa C5, one circa E9 and keep the last one at I15-I16. On the other hand, we could also retreat in the south east part of the map and ambush the soviet.
Thing is, we don’t really know what we are up against and we don’t have a clear objective, apart from killing all the enemy AFV. I guess it is up to us now to decide whether we go for the offence or the defence. With our current forces, going for a full offensive seems too risky. We could try a small raid from the south bridge to have some idea of the current soviet forces. Again, let me know what you think, I open to ideas.
Sorry, I had an awfully busy week and forgot to check the mess – Lone Wolf habits die hard, I guess.
I think my team will be moving towards the middle bridge from cover to cover. I t will be slow as I don’t want to exhaust my men before any combat encounter, but, hopefully, I will soon be able to either observe the enemy movement or try and infiltrate the other bank.
If you can’t unbutton, hmmm, you may be safe-ish if you keep distance from the buildings, but there is nothing to do about the SU anticipating your moves.
Maybe it is possible to blindfire HE nearby SU to make it button and/or panic? This might give you some time to move or at least prove you can do it again to hinder its reactions
No Problem! I assume that the SU will change its position, maybe try an attack. So I choose to move the Tiger to cover while keeping an eye on the rear. We will see how it goes.
ORDER – Turn 11 Tiger
Clear any previous order
Target Arc K12 to J8 + Move fast to G12NW (avoid the building in G12)
Keep move fast to F12NE + Pause 15 seconds then
Move fast to F14N + Clear Target Arc
Orders for Scout team Gobser for turn 11:
Clear previous orders.
Normal Move to B10
Tim,
I’m a bit confused with our infantry force. Is the list below correct?
A6 – Infantry – surviving crew of the Panther?
B10 – Scout team
I15 – Scout team
A16 – LMG Team and Infantry (aka tank hunter team)
Also, is the SU moving forward or reversing?
With the arrival of the infantry, is there new victory conditions?
To all,
With the arrival of reinforcement, I think we should select the team we want to manage. Then we could decide what we want to do next. Chasing the SU? Going for the offensive? Build a defensive perimeter and wait for the Soviet?
Let me know what you think.
Tim,
Did you have time to look for my questions above?
Apologies, I missed this. You’ve IDed the various infantry units correctly and the SU is moving forward. KOing AFVs remains your primary aim.
Thanks for the update, Tim.
I still have question:
– What is the infantry team circa A6? Is it the crew of the Panther?
– Which direction is pointing the SU?
– Which direction is pointing the Tiger?
The A6 unit is indeed the Panther crew. Both the SU and Tiger are facing in the directions suggested by the travel lines on the map above (NE and S respectively).
Hiya,
I’m happy to keep charge of the infantry down by the south bridge. Hopefully if the SU tries to go that way we can take a pot shot at the CO if he unbuttons.
Personally at this point I’d probably lean towards the defensive. Might be better to get the AT team near the central bridge in the longer term so it can move where it’s needed quicker, but initially a team covering each bridge sounds like a good plan.
While I agree that the defensive option is more risk-averse, I think we should not expect SU to go for offensive action. I expect the SU commander to be very aware of the limitations of his platform, as he lived to be the last AFV on their side. I must also note that its commander always looked for a secure position previously.
If I were to guess, the Soviet side might also lean on its new infantry capabilities. No to score kills, but to recon and goad out Tiger into advancing at disadvantage.
I’d say the best option for now is to position Tiger so that it pins SU in place, and try our luck finding and neutralizing the enemy infantry.
VFRHawk,
Thanks for the feedback. Be careful with an attack of the SU, as he is capable of returning fire.
Gobser,
I agree that we should not let the soviet without pressure. The thing is I don’t really know how to pin down the SU at the moment. I can send the Tiger chasing behind him, but as you pointed, it will not wait for us. I also would like to avoid excessive exposure to soviet infantry, as I suspect that they also have an anti-tank team under way.
At the moment, I see two possibilities for Tiger’s next move : South circa H17 or North East circa C11.
Both options have virtues, however I’d go for C11 one.
H17 could help us distract the enemy from infantry crossing, but it will leave you unable to quickly move to react to interdict anything to your north.
Having said that, I think we have a little advantage in the fact that the Tiger is better suited for anti-personnel role. If the Tiger will be able to support the infantry in case it is spotted and pinned, we could inflict some damage on the enemy and possibly untie our hands.
THose are big ifs, of course, but I think it is worth a consideraation.
I agree that going for combined arms is the best strategy. But our forces are thin at the moment, so we need to choose our strategy carefully. Attacking by the central bridge may be too obvious and quite exposed, so going South have some interest.
It would help us to have a glimpse of where the soviet forces are. In order to achieve that, we could move the rest of the Panther team toward C5 building to have a view on the northern shore.
I don’t like the idea of leaving our scout team in the South alone, if the Tiger does North. Should we move the two new infantry teams (LMG team and tank hunter (PF) team) East to the building in E16, toward the South Bridge?
Or North East toward the brewery in B12?
By the way, would will take care of the two new infantry teams (LMG team and tank hunter (PF) team)?
Tim, ORDERS for scout team Gobser for TURN 12:
Normal move to F9S
It could be interesting to specify which floor your scout team should move to.
For next turn, I think the Tiger will move to C11S, so it can provide some cover to scout team Gobser.
But, if we decide to move the two new infantry teams toward the north east, the Tiger could go south to offer some support to the scout team.
I am not sure that we even control the new groups?
Thanks for the tip, yes, it will be smart to try and spot for trouble over the smoke
Yes, I think so. Tim also told us that we can take the trucks in A13 and A15. We could use one to move the two new teams, by the way.
I was also thinking that we should give names to each infantry team:
– Team Gobser for your Scout Team
– Team Panther for the surviving crew of the tank?
– Team Hawk for VFRHawk Scout team?
– Team Condor for the LMG Team?
– Team Eagle for the anti tank (PF) team?
We could also gives name to the trucks. Maybe something like Arnold and Lothar. Other possibilities could be: Erwin, Friedrich, Günther, Heinrich, Karl, Leopold.
Tim, ADDITIONAL ORDERS:
2) The scout group is to reach the highest floor (not the roof though) of the destination building. I am not sure if some orders would help them observe, but I would like to try and spot the enemy on the other side of the bridge
ORDER – Turn 12 Tiger
Clear any previous order
Move Fast to E14N (avoid the building in F14)
Keep move Fast to C11S + Target Arc C6 to H7
Move Slow toward corner at C11 (avoid exposing the Tiger) to provide support to scout team Gobser.
I would like to move the Panther crew to the building in C5, facing North East, observation only, to survey the northern shore. If it’s okay with everybody, I will post the order later.
Tim,
Last minute orders for the infantry.
———————————————————–
ORDER – Turn 12 Panther Crew
Move quick to C5N
Face North-East, avoid attack, only observation
———————————————————–
ORDER – Turn 12 PF Team in A16
Move quick to truck in A15
Climb in truck. Dismount at F16N
Take cover in G16 House
———————————————————–
ORDER – Turn 12 LMG Team in A16
Move quick to truck in A15
Climb in truck. Dismount at F16N
Take cover in G16 House
———————————————————–
ORDER – Turn 12 Truck in A15
Wait 15s for infantry to embark
Move Fast to A16E following the road, then turn left to F16N, keep Fast speed, via C17.
Avoid the burning soviet tank.
Dismount troops at F16N
Tim,
I was wondering if the LMG and PF teams were able to climb into the truck. If I believe the picture you added above the map, they seem to be on board. Is that correct? Or are they still on foot?
I also see that 1 or 2 new icons appeared on the map circa A16W. Are they new reinforcement? Or is it the infantry inside the truck?
Both units are aboard. Ignore the a16W units (they are passenger icons for the nearby truck).
Well we nearly got the SU’s CO… 🙂
Wonder if he’ll decide trying South again is too risky now? I doubt he knows that the infantry is only a scout team, and he knows there’s someone there. Also wonder if the lack of return fire from their infantry means there’s none covering the bridge yet – maybe that’s where the halftrack is off to next turn.
“Well we nearly got the SU’s CO…”
You did indeed and there was a ‘PENETRATION’ hit label displayed at one point, which possibly indicates a round or two actually went through the open hatch and ricocheted about inside the vehicle.
Well, that’s good news if we got the CO of the SU! But we have to keep in mind that the tank remain functional. So beware of the response.
If they come back, they will have a little surprise, as the LMG and PF teams are on their way to give a hand to your scout team. If you want, you can take their command.
Thanks, I will do.
TIM, orders for the LMG and PF teams (I’m assuming PF is Panzerfaust?):
ORDER
LMG Team to take position on the top floor of the building in I16NE (where the scout team is now), target arc over the southern bridge and K13/L14
PF Team to take position in the building opposite in I17N, again top floor and target arc to cover the southern bridge and K13/L14 too. Can the Panzerfaust range across the bridge? Wikipedia indicates 200m range so I guess they can?
My thinking is that from that high up maybe the PF team may have a downwards shot in to the SU’s top armour if it tries to cross.
Once the LMG team is in place, there doesn’t seem much point in the scout team also being in the same place. Does anyone else have a use for them? If not and the SU doesn’t try to cross next turn I might try pushing them across the bridge. With the LMG team in high cover behind them for support it might flush out any infantry on that side of the bridge. If we don’t encounter any opposition, maybe they could set up in the building at L12S.
AMENDED ORDER
As per a_monk’s note, dismount the truck at F16N, then proceed with the rest of the orders as above. Sorry, hadn’t realised the units were in a truck at the time.
Your plan is good for me.
For your orders, I have to mention that the LMG and PF (aka Panzerfaust) team are onboard a truck. To reach your destination, they will have to dismount first. At the moment, the truck will stop at F16N.
Regarding your idea of sending the scout team across the bridge, I have mixed feeling. On one hand, we need to have an eye on the enemy move, so going there will help. On the other hand, we don’t have much troop at the moment, so I’m unsure we can afford to loose them.
If you still want to get the team across the south bridge, I could suggest to use the truck and go circa M14. This way, the truck will be provide a fast way to travel while being protected by the houses in L14-M14. It will also help the scout team escape if the situation goes wrong.
Lets see how this next turn plays out. We may have more info on what is down here afterwards so we can adjust accordingly.
Thanks for the info on the truck, I’ve added an amended order to cover dismounting.
ORDERS for scout team Gobser for TURN 13
1) Move Fast to E10NW
2) Hunt E9S 2 floor.
We need cover and concealment first, then maybe we will be able to have eyes on the shooters and maybe even someone else.
ORDER – Turn 13 Tiger
Adjust Target Arc F3 to I8
Standard Speed Move to C10SE following the road
At T+45s, reverse move to B10S
What are peoples thoughts on the PF team? Now the two enemy vehicles have moved back north it seems pointless having them cover the South bridge, so I’m leaning towards having them go back to the truck and head towards D11SE, with a view to them dismounting and heading for the buildings to the north of there – depending on what the enemy does next turn.
Perhaps they’re planning on trying to run the half track across the bridge with the SU covering? Not sure why else to move their units back central, unless that is the point, to get them to the centre where they can respond in either direction?
As for my other 2 units, I plan to move the scout team across the road to take the building the PF team were/are heading to once the LMG team is in position.
I agree that the PF team will be more useful where the enemy AFV’s are. Moving it North is okay with me. To accompany them, we can take the scout team or the LMG team or both. But I don’t like the idea of leaving the South bridge without surveillance. A solution could be to move the remaining crew of the King Tiger to the South (circa G12 or G14?) and regroup our main forces on the central part of the map.
I doubt the soviet will launch a full scale assault on the central bridge. For that, they need to have a lot of troops. On the other hand, the half track is a good support for the infantry and we don’t have many solution to fight it. If they move first, we will see them coming.
The only objective we have at the moment is to kill the enemy AFV. So I wonder if they are not trying to ambush the Tiger. Or at least gathering forces to fight it.
An alternative move could be to leave the Tiger with a scout team to defend the central bridge as a decoy. We could move the King Tiger crew South to survey the bridge. Meanwhile, the PF team, the LMG and a Scout team use the south bridge and move with truck to K12. Then, they move using the buildings as cover and try to ambush the soviet AFV. But such expedition is very dangerous, as we could loose our main infantry force at the moment.
Another idea could be to retreat our forces on the south west part of the map and wait for the soviet to come. Possible location could be circa D14 or F14.
I have not decided yet what will be the next move for the Tiger. I could :
– Leave it where it is
– Move it to B9 and see if it can have a shot at the enemy infantry (not much cover there)
– Move it to E10 and see if it can have a shot at the enemy infantry
– Move it South as a decoy to lure the enemy AFV’s
– Move it North and see if I can have a shot at the enemy AFV’s
Let me know what you think.
Orders for scout team Gobser for TURN 14.
We are staying where we are for this turn
ORDER – Turn 14 Tiger
Clear any previous order
Move Reverse to A10S
Move Quick North, Set Target Arc F2 to J9 at A10N
Move Quick to B9SW
At T+50s, reverse move to A10N
———————————————————–
Tim, If possible, I would like to move the King Tiger Crew
ORDER – Turn 14 King Tiger Crew
Clear any previous order
Move quick to G12 Building, top floor
Avoid bank, go via E10-F12
Once in position, observation only, survey H9 to L14
Infantry orders:
PF team return to the truck they came down in, board, and then head to D12N. Dismount when they get there and the PF team to head to the top floor of the building in E9 with a target arc covering the central bridge and its eastern approaches. Truck can back south east down the road until its in cover.
The LMG team to continue with their previous orders. When they are in place the scout team to cross the road to the top floor of the building in I17 – again target arc across the south bridge and covering the eastern approaches.
So was it the truck with the pf team in it that blew up? Or another one?
The exploding truck was a Soviet unit. It expired in k2N.
ORDER – Turn 15 Tiger
Clear any previous order
Move Fast to B11, then C12SE using road
Turn Left, Move Fast to E10
Set Target Arc H4-L9
———————————————————–
ORDER – Turn 15 PF Team in A15SW
Move quick to A14
Climb in truck. Dismount at F16N
Take cover in G16 House
———————————————————–
ORDER – Turn 15 Truck in A13
Move fast to A14
Wait 15s for infantry to embark
Move Fast to A16E following the road, then turn left to F16N, keep Fast speed, via C17.
Avoid the soviet tank.
Dismount troops at F16N
———————————————————–
If possible
ORDER – Turn 15 King Tiger Crew
Move quick to G12 Building, top floor
Avoid bank, go via E10-F12
Once in position, observation only, survey H9 to L14
———————————————————–
So does anyone have any ideas on how we can inject some excitement into proceedings without taking fool-hardy risks – given Tim’s latest update? I can’t realistically think of anything useful we can do, other than to try and push scout teams across the bridges where we have cover from overwatching units – so certainly across the south bridge. But that could prove very costly if they’ve set up to cover the crossings as we have, and I can’t see why they wouldn’t have.
@Tim maybe some sort of radical unexpected event? A large airdrop that lands in the middle of the map on the middle bridge, first to secure it and get it back to a predesignated square on their side wins? Needs x people or a vehicle to move it. Can’t think of anything that would be thematically accurate, though if you fancy humour a Kelly’s Heroes style gold bullion stash being washed up against the bridge might do it! Or all the dead armoured vehicles are suddenly revived, but with a proviso that the crews have got to make there ways back to them?
I can see this limping to a sad end as detailed in the last update otherwise.
I like the idea of a “radical unscripted event”. The nature of CM means I’m unable to add new units or restore dead ones on-the-fly, but if both teams agree I could restart the scenario (random spawn points, no traits) with a new ‘golden goal’-style victory condition. First team to KO an enemy AFV wins.
The alternative is to call a halt and declare a draw which would, I think, be a fair result.
(I’m going to post your suggestion – with the odd redaction – and mine in the Soviet mess and see what the reaction is)
@VFRHawk With our current infantry forces, I agree that it is hard to launch a full scale assault. Now, the best plan I can think of is to take most of troops through both bridge (central and south) using the trucks. The Tiger would provide cover then, once the troops reach the soviet bank, it would follow to help/attract enemy forces. That would mean 2x Trucks, the Tiger and most likely the 2x Anti tank team and 2x scouts team. If anything goes wrong, it we would loose pretty much all of our forces. Not ideal.
@Tim, I agree that a “radical unscripted event” would bring urgency. But I can’t agree with a reset of the scenario. I think it would be against the spirit of the community CM (hope that make sense). A draw would be a fair result, even through it would also fell like (at least to me) a partial defeat.
Possible “radical event”:
The Soviet General is not happy with the situation, so they will bring a strategic bombing in x turns, unless the current Soviet forces can push back the German.
The German General, fearing to loose the city, plans a full scale barrage by artillery in x turns, unless the current German forces can repel the Soviet.
Or anything else of that kind. It could be the same reason or a different one for each side.