
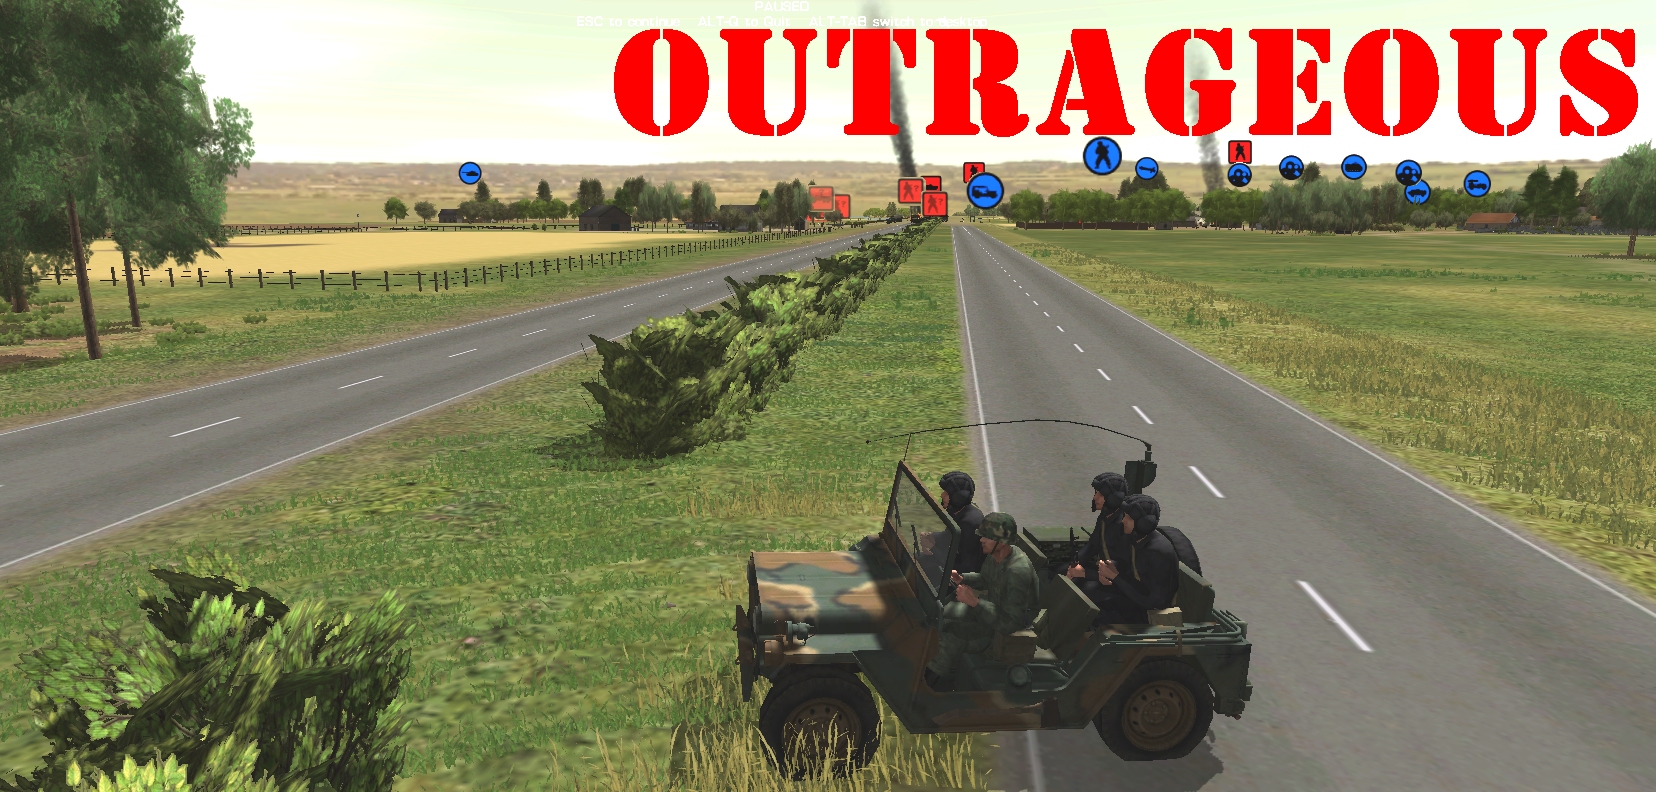
Two vehicles perish during the course of Turn 7. One expires quickly on the highway embankment, the other… well, read on and you’ll find out.
(Operation Oryx is an open-to-all game of Combat Mission: Cold War set in 1981. The commenter-controlled Zendoran forces are attempting to ambush a column of Podrabian vehicles bound for Zečin, the Zendoran capital. Each turn covers one minute of WeGo action. For a scenario outline and summaries of earlier turns, click here).
In the 20+ years Milan Lesov Snr has spent in the ZAR (Zendoran Army Reserves) he’s held, aimed, and, on one occasion, field-stripped an RPG-7, but never actually fired one. “How hard can it be?” he thinks to himself as he moves to the open window, winks impishly at his seventeen-year-old son, and levels his souvenir.

Although the wheels of the PT-76 are obscured by vegetation and portions of the hull are hidden by tree trunks, its turret and triangle-emblazoned midriff are right there, begging to be crosshaired. Milan obliges, and, recalling something he once heard about RPGs and weathervaning*, sends his one and only AT rocket on its way.
* “Due to the configuration of the RPG-7 sustainer/warhead section, it responds counter-intuitively to crosswinds. A crosswind will tend to exert pressure on the stabilizing fins, causing the projectile to turn into the wind.” (Wikipedia)

The rocket passes close enough to one of the fir trees in box 76 to scorch bark and spook squirrels, but not close enough to spoil its trajectory. That trajectory is a tad high, however, it does intersect with the PT-76’s turret. For a few seconds it appears the tank has survived the hit.

Then, moments before our advancing BRDM establishes LoF and needlessly opens fire, a shocked crewman scrambles through the hedge and CM crimsons the unit’s selection halo proving it’s dead.

While the Lesovs are scrutinising the PT-76 for signs of life, on the other side of the agri merchant’s yard Recon Team Alpha are laying down the LAW. Having recovered from its grenade funk, the New Farm BMP ascends the embankment for a second time and quickly regrets it.

Keen to finish a job they started in Turn 5, Alpha opt to fire both of their LAWs almost simultaneously. One is wayward, the other clouts the IFV in the jaw, instantly KOing it.

We’ll never know whether that kill saves Viktor’s bacon. Even if the New Farm BMP had been operational at T+50, I doubt it would have been vigilant and quick enough to engage the cheeky Mutt that speeds northward across the highway ten seconds before the clock stops.

I left pathfinding in the hands of the AI driver. Evidently a bit of a daredevil, he opted to go through the box 71 fence rather than round it!
Elsewhere this turn…

Muttley tried and failed to establish LoS to the remaining BMP (At turn end, only the Lesovs, the Snipers, and the LMG team have eyes on it)

The Forward Observers debussed and began their eight-storey climb.

Lesov Junior turned ‘Guskov’s squad’ into ‘Guskov’.

The westerners – Dragon Team, Droopy, the Light Mortar Team – expended no ammo. (The Pods in box 62 seem to have retreated.)

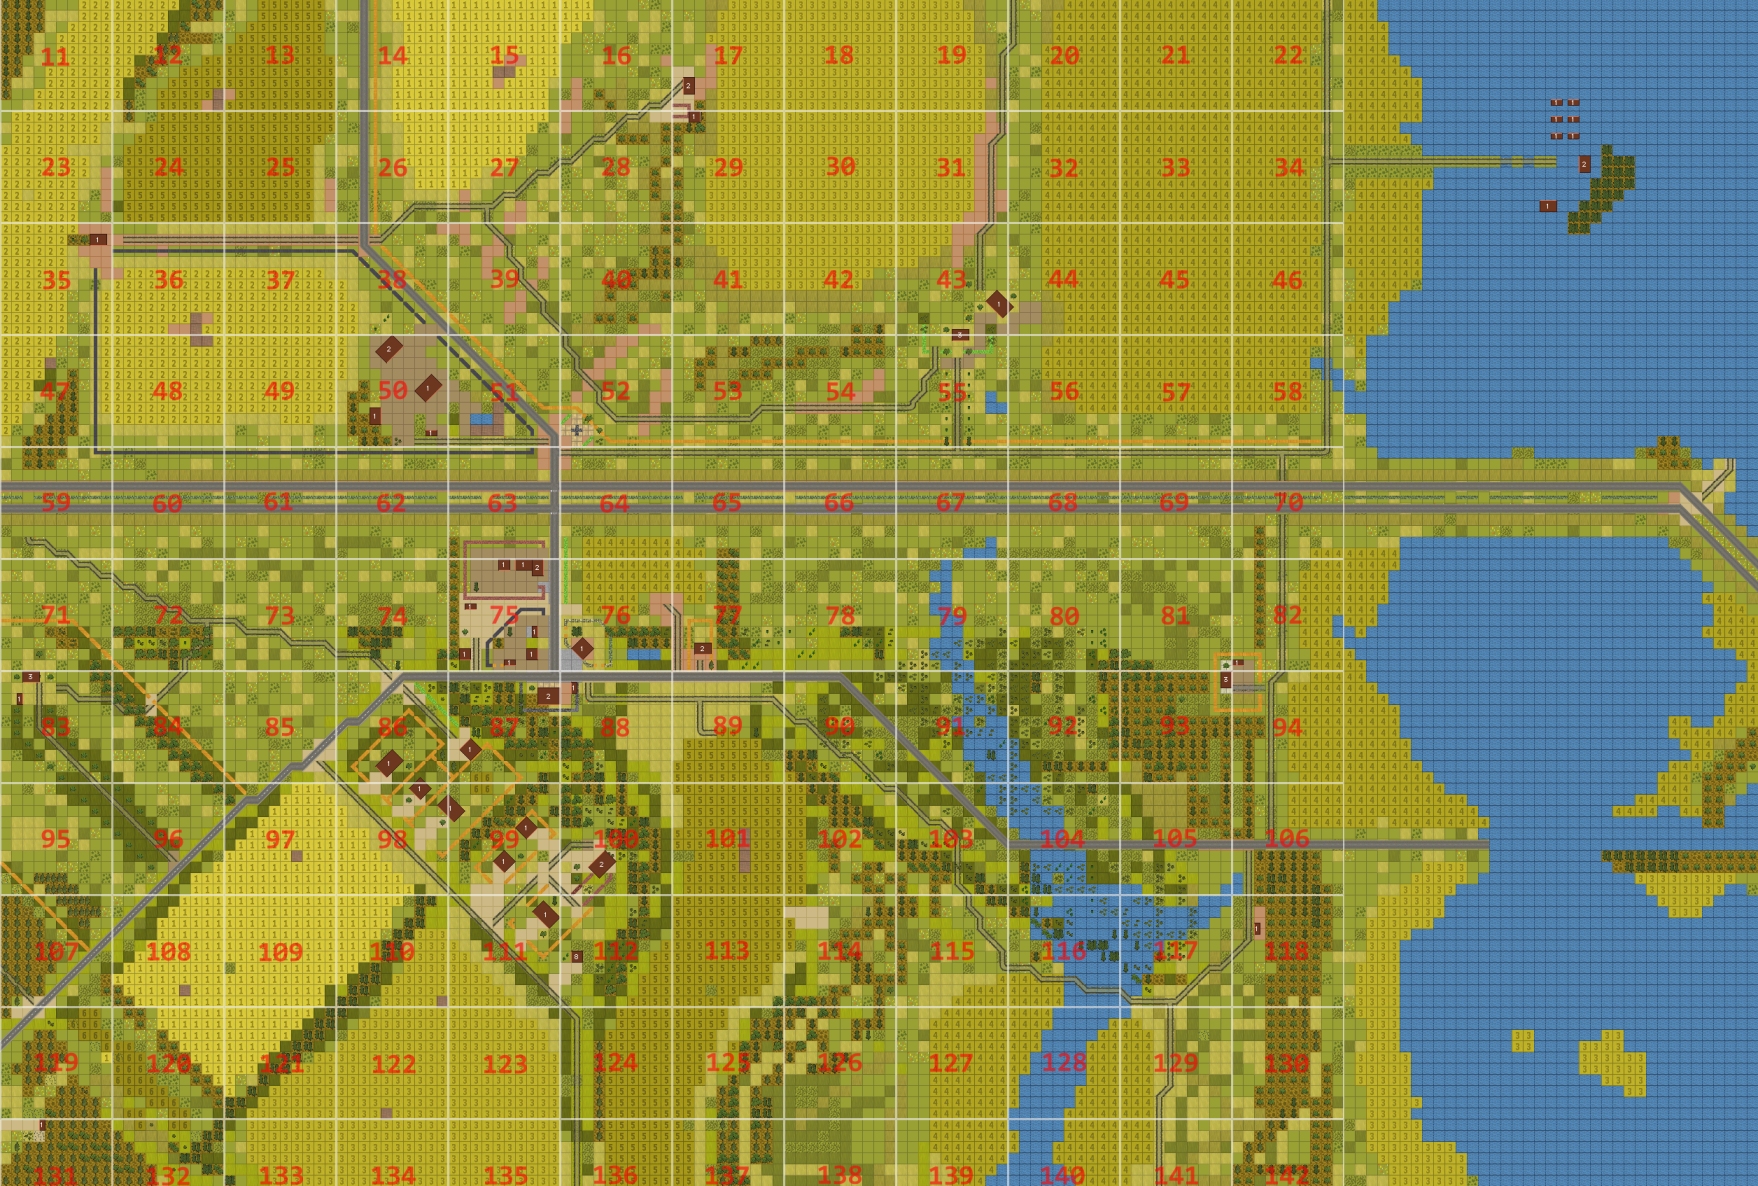
Turn 8 orders here, please. Commenters are cordially invited to suggest moves for the following units. (A maximum of one unit per commenter (subscribers can move two if they like). Embarked infantry and their taxis count as single units until separated.) Turn execution: probably early Wednesday morning.
(See screenshot for exact unit locations)
****anyone****
Light mortar team [BOX 84, weapon deployed]
MG team [BOX 86, prone]
Dragon team [BOX 72]
Recon team A (2 men, 0 x LAW) [BOX 74]
Recon team B (3 men, 2 X LAW) [BOX 75]
Recon team C (3 men, 1 X LAW) [BOX 87]
Otto and Branko (sniper team) [BOX 112, top of dovecot, holding fire]
Forward Observer Team [BOX 112, halfway up dovecot)
TOW Mutt ‘Muttley’ (8 x ATGM) [BOX 100]
TOW Mutt ‘Droopy’ (8 x ATGM) [BOX 84]
Mutt ‘Scrappy’ [BOX 112]
****subscribers only****
The Lesovs [2 men, BOX 77]
BRDM-2 [BOX 102]
M113 [BOX 74, buttoned, 1 x LAW aboard]
Truck [BOX 98, contents include 8 X RPG-7 ammo]
Trajanov [BOX 112, still (!) ‘tiring’]
Mutt ‘Scooby’ [BOX 59, Viktor’s T-72 crew aboard]
Please start all order comments with ‘ORDER’ and any later revision comments with ‘REVISED ORDER’. This will help me distinguish firm instructions from suggestions and advice.
ORDER
Mutt Scooby to absolutely floor it to behind the cover of trees in SW corner of box 12.
But not before letting out some whoops of delight and high-fiving each other.
REVISED ORDER
Following a short period of whooping and high-fiving, Scooby to move quickly behind the trees/building cover at top of box 35.
ORDER
Otto and Branco to stop hiding, if they are? Give them a Target arc from Box 50, x1, y10 to Box 52, x10, y10. That should hopefully give them some targets around the junction area. Maybe the New Farm too.
It would be justice if they delivered a pointy painkiller to Guskov’s hungover head. Serves him right for helping himself to the last of the Old Strunkovice as distilled from a mash of mystery fruit in a secret still outside Strupnic.
Since the tank Recon B was waiting for has gone to meet Marx, let’s move them up north to cover the highway.
ORDER: Recon Team B to move north through the trees to square 63. Once at Y1, move cautiously up to Y2 and set a nice wide target arc up the highway from square 62 to as far east as they can crane their necks. Be great to keep the “target armour” logic going – i trust they’re smart enough to return fire if an enemy infantryman takes a shot.
Do they still have any LAWs on them? They expended 2 on that BMP and might just have small arms.
EDIT: I got them confused with Team A, disregard this comment.
Yep, they’re still fully loaded. Heading up to cover the north hopefully will also give Recon A a chance to re-up.
As the common consensus is for the Lesovs to get out of town, I’ll roll with that. Doesn’t make me any less nervous about this order, though.
ORDER: Lesovs to wait 20 seconds (to see if they can’t turn “Guskov” into “OSCE footnote”) then exit the house and QUICK to the eastern treeline at box 100,10,4, staying out of the way of Muttley as best they can. If they have time, move W from there to 99,9,2.
Any subscribers want to get the truck moving from 98 to 99 to meet them?
I’d certainly like the Lesovs to get pulled back, but not necessarily this turn – I’d rather they move *after* the BMP has been dealt with, and ideally riding something mechanized. My point below was more that if we do plan to move them, bringing the truck up is a bit superfluous. The choice is yours, of course!
Ah I see! I was under the impression that everyone was thinking of getting them out as soon as possible. Should we let them sit tight for a turn, then? Anyone else want to weigh in with their opinion?
Maybe it would be best for the BMP to be disposed of first, but on the other hand between the BDRM and Muttley I sense the BMP will already have their hands full and this turn may be a good window of opportunity to escape. After all, if the BMP gets hit now and disgorges some crew things may end up even dicier. But I don’t fully know the capabilities of the BMP, so I will defer to greater minds and cancel the order if it’s clearly doomed.
ORDER: Recon Charlie enter the hotel through the back door, get to the top floor and look north.
I figure they might see a tiny bit of the new farm from there, and can at least check out the agri merchant for any lingering surprises.
ORDER:
Mutt-TOW `Droopy` briskly moves NW behind the treeline to 83 X6 Y10. Please reverse slightly before doing so, if that would help.
Then make a slow, long right turn, aiming its TOW in a wide arc towards where the last BMP is on the highway at the moment. I think that would be the HUNT command. Its path would be something like -> 71 X7 Y2 -> 71 X8 Y4 ->71 X9 Y5.
What I want is to edge my way forward into LOS while already facing our intended prey. (I am not sure how much you can move the TOW tube laterally anyways.)
ORDER: Recon team A [BOX 74]
1) cancel any current Target Armour arcs or similar
2) I don’t know if there’s a Withdraw command that would get them to pull back while looking out for enemies to the north of them.
Pull back at normal pace to the M113 and take the last LAW.
3) Run to enter the house at [box 75, x2, y2] and take positions with a view that prioritises east (with north as the secondary alternative).
Given Scooby seems to have got over the highway unnoticed, I think it’s fairly low-hanging fruit to continue its journey.
Getting from its current location at the top of box 59 to a desired location of behind the trees in box 12 looks to be about 350m across open ground. That seems doable in a minute to me so I’ll make the order.
If CM experts chime in to say that won’t be long enough (or I’ve got my distance wrong) and we risk getting stranded out in the open then we can break the order up into two parts and someone can revise the order to hide behind the couple of trees at the top of box 35 instead.
Actually, now I’ve given that order and had another look at the map, there does appear to be a dirt track from the top of box 36 all the way to the tank.
It does run closeish to New Farm, but offers a potential different option – head to cover of 35 this turn, then try and bomb it all the way to the tank along the track next go.
Thoughts?
My preference would be using the track to reach Tereza, Scooby would be able to drive much faster on the track rather than through the field. But I think we need to get eyes on the the new farm infantry before we risk moving out in the open.
Yeah – I’m leaning that was as well – the track is too convenient not to use, but we need to fully know the status of the New Farm crew before moving.
Well, the driver already drove straight through one fence, maybe we don’t need to go through the gap in Box 38?
Quietly smug that my “just floor it!” order panned out 🙂
If there ever was a time for smugness this would be it. 🙂
That went well. It’s just a shame Muttly couldn’t get eyes on the final BMP, KOing all three enemy AFVs in one round would have been quite something. I don’t know about anyone else, but I distinctly heard a shrill Yeehaw coming from Scooby’s back seat as he sailed cleanly over he hedge in the middle of the highway!
Out-bloody-standing. Three cheers for the Lesovs! I’ll admit I underestimated them, and now that Lesov Sr. has figured out which is the explodey end we need to get them the other RPGs ASAP. But which is the quickest and least dangerous way to get there? Load them from the truck into the Mutt next to the dovecot and have Trajanov hand-deliver them? Or is it quicker to keep them in the truck and have it go around the back way?
Also, we need someone to let Otto and Branko know that it’s time to rain down some pointy hell. I believe that Tim said last round that we need to remove their short firing arc, or assign them individual targets, to get them into the mix. Apart from the BMP, what else do they / could they have eyes on?
I’d have the snipers look North to the junction, and maybe across to the new farm. If we’re about to storm the village, any remaining Pods are liable to flee in that direction.
Good plan. The snipers are now open to all commentators, so feel free to give the order yourself if you want to!
Do we bring the ammo to the Lesovs, or the Lesovs to the ammo? Personally, I feel that they are bit exposed in their current location particularly since regular reloads will be required. If we can find a nice keyhole for them, I’d like to draw them back to prep for the convoy. The next phase is likely to be holding off infantry from the north, for which they aren’t very well suited anyway.
You might well be right. Maybe while the truck is in transit to the dovecot Trajanov could get into the FO mutt, pick them up, then bring them back to meet the truck.
I concur. Having two guys be our point-men is asking a bit much. I say we get them south-west into the woods and pick them up with the truck. They can be re-deployed easily from there. Let´s avoid the village centre for now.
The Lesov’s are responsible for me laughing at Tim’s writing: “Lesov Junior turned ‘Guskov’s squad’ into ‘Guskov’.”
I’d say we keep the truck clear of the village centre for a bit, even if it means sending the Lesov’s on a wander. The truck is a soft chunky target so it’d be nice not to lose all the RPGs. Indeed, I’m wondering if we ought to switch Recon B into the spot Recon A currently occupies and send Recon A back to grab a couple.
For the snipers I’m going to suggest a different option: Get the spotters on the top of the dovecote, and get the snipers back down and heading into the village. They don’t feel they’re getting many targets up there, so sticking them in the village (e.g. on the Lesov’s roof) would give them many more opportunities to upset surviving crewmen.
It would also avoid drawing fire on the spotters, which may become important if big tracked armoured things with long pointy guns turn up.
What remains a mystery is why the Mutts all have names but not the other vehicles.
This is going surprisingly well! Shame Muttley couldn’t get eyes on that last BMP. The BMP-1s have shockingly bad optics (in CMSF2 at least), so I’m not too fussed about leaving Muttley out to continue spotting.
Am I right in saying we’ve only take a single casualty, our trigger-happy grenadier from the Recon squad?
Worrying well. Tim’s custom encounters are usually fine tuned to feel a close run victory so these early successes make me fear for the future.
Yes, I think we’ve also had a combination of good positioning and good fortune. In theory, 3 BMPs with dismounts and a PT-76 are more than a match for our rag-tag force.
If Recon Team A had missed with both their LAWs, for instance, we would have been in a stickier situation.
I’ll be a lot happier when that last BMP is dealt with. I recall from CMSF2 that BMP-1s have abysmal spotting (I once had an enemy Leopard blithely drive over a slope and THROUGH a position of three Syrian-crewed BMP-1s without them spotting it), so I think Muttley has an advantage in the spotting race, but the next turn will tell.
The RPG dismantle video looks like (i.e. is identical to) World of Guns: Gun Disassembly: https://store.steampowered.com/app/262410/World_of_Guns_Gun_Disassembly/
It’s a simple game, and the video shows the core of the gameplay – taking guns apart and putting them together, along with various ‘in a certain amount of time’ and ‘in the right order’ type challenges. Then you get to fire them, in optional slow motion, with a choice of x-ray and cut-out views.
I still haven’t even done basic field stripping of all 236 guns, let alone the full dismantle. They keep adding more too..
I´ll just take a moment to point out how incredibly satisfying it was to read about the transition from “Guskov´s Squad” to “Guskov.” Inwardly I was hollering at him to run home to mum. And tell his friends not to come back to Zendora.
Also: We absolutely need to paint some sort of eagle on Scooby´s cowl. Yee-haw.
We’re at the stage where w can probably start talking about what we want to do with our shiny 2nd-hand T-72. Tim has said repeatedly that the convoy is tasked to head East-West without stopping, so the ideal firing position would be one that targets the sides and rear of the convoy as they pass as that would minimise the chance those 30 T-62s spot and engage our moveable pillbox. The houses at 50 and 43 are occupied still, so I don’t think those are the best options.
If we take out the last BMP, we probably have the fire support and the time to clear out the village at 75, which opens up the whole southern portion of the map to stage our ambush.
For the ambush, one possibility is to have the Dragons / LAWs at the far Western end engage the lead vehicle, then our 2 TOW vehicles and our T-72 can roll up into firing positions and engage the main body of the column as they stall out, perhaps from the tree-line and village.
What does everyone else think?
Maybe we don´t need to move it all that much. Assuming the remaining mech infantry is neutralized or too far away to matter when the convoy arrives, I imagine our final kill-zone to be along a stretch of the highway from box 62 to 65.
If the T-72 operated mostly on its own in box 28 or 16 it would be hidden from the eastern highway and still have a flanking keyhole to 63 and 64. With the option to easily switch targets to the rear of the convoy by simply driving north around the light woods into box 17 once the convoy has slowed down.
Staying would mean it could help in taking out the former New Farm occupiers, if neccessary, and take its intended ambush position without re-locating hastily, should the convoy arrive ahead of schedule. Turn 15 was an estimation.
I see the Mutts + T-72 as our primary convoy attackers. Have one Mutt cover the front and hit the lead vehicle, and then our other Mutt and T-72 hit both flanks at once to ensure we clear convoy members.
The LAWs are there to make sure the front of the convoy doesn’t escape us, but I don’t think we should rely on them as our primary means of knocking out the front.
Finally, our Dragon gets 2 shots with no reloads, so I prefer to keep it hidden unless the front of the convoy breaks past our LAW teams. It’s either our last stand weapon, or one we can pop up if a Mutt gets caught reloading or double-teamed by enemy tanks.
I kinda like the idea of having one TOW Mutt in the trees way out east so it can ping a few vehicles early on before charging west to the better cover. I feel like it would be nice to at least wipe out a couple of targets before they get to the western side of the map, especially because from what i understand, side/rear hits are more effective than front hits. I worry if we have everyone loaded on the western side, we’ll only get the chance to take out a handful of enemies and the rest of the column will just power through off the edge of the map, which might leave us with a failed mission.
Got to say I’m loving the story telling in this encounter Tim.
Also, it’s all going a bit too well isn’t it?
Quick bit of LAW-rithmetic. In turn Zero Tim wrote:
“Each scout team carries one LAW. They can acquire additional ones from the non-TOW Mutts (one per vehicle) and the M113A1 (three available).”
Recon A and B each helped themselves to an additional LAW on dismounting the M113.
So there should be LAWs available in:
M113 – one
Mutt ‘Scrappy’ [BOX 112] – one (brought in the FO team, I think)
Mutt ‘Scooby’ [BOX 59, Viktor’s T-72 crew aboard] – one
Turn execution underway.