
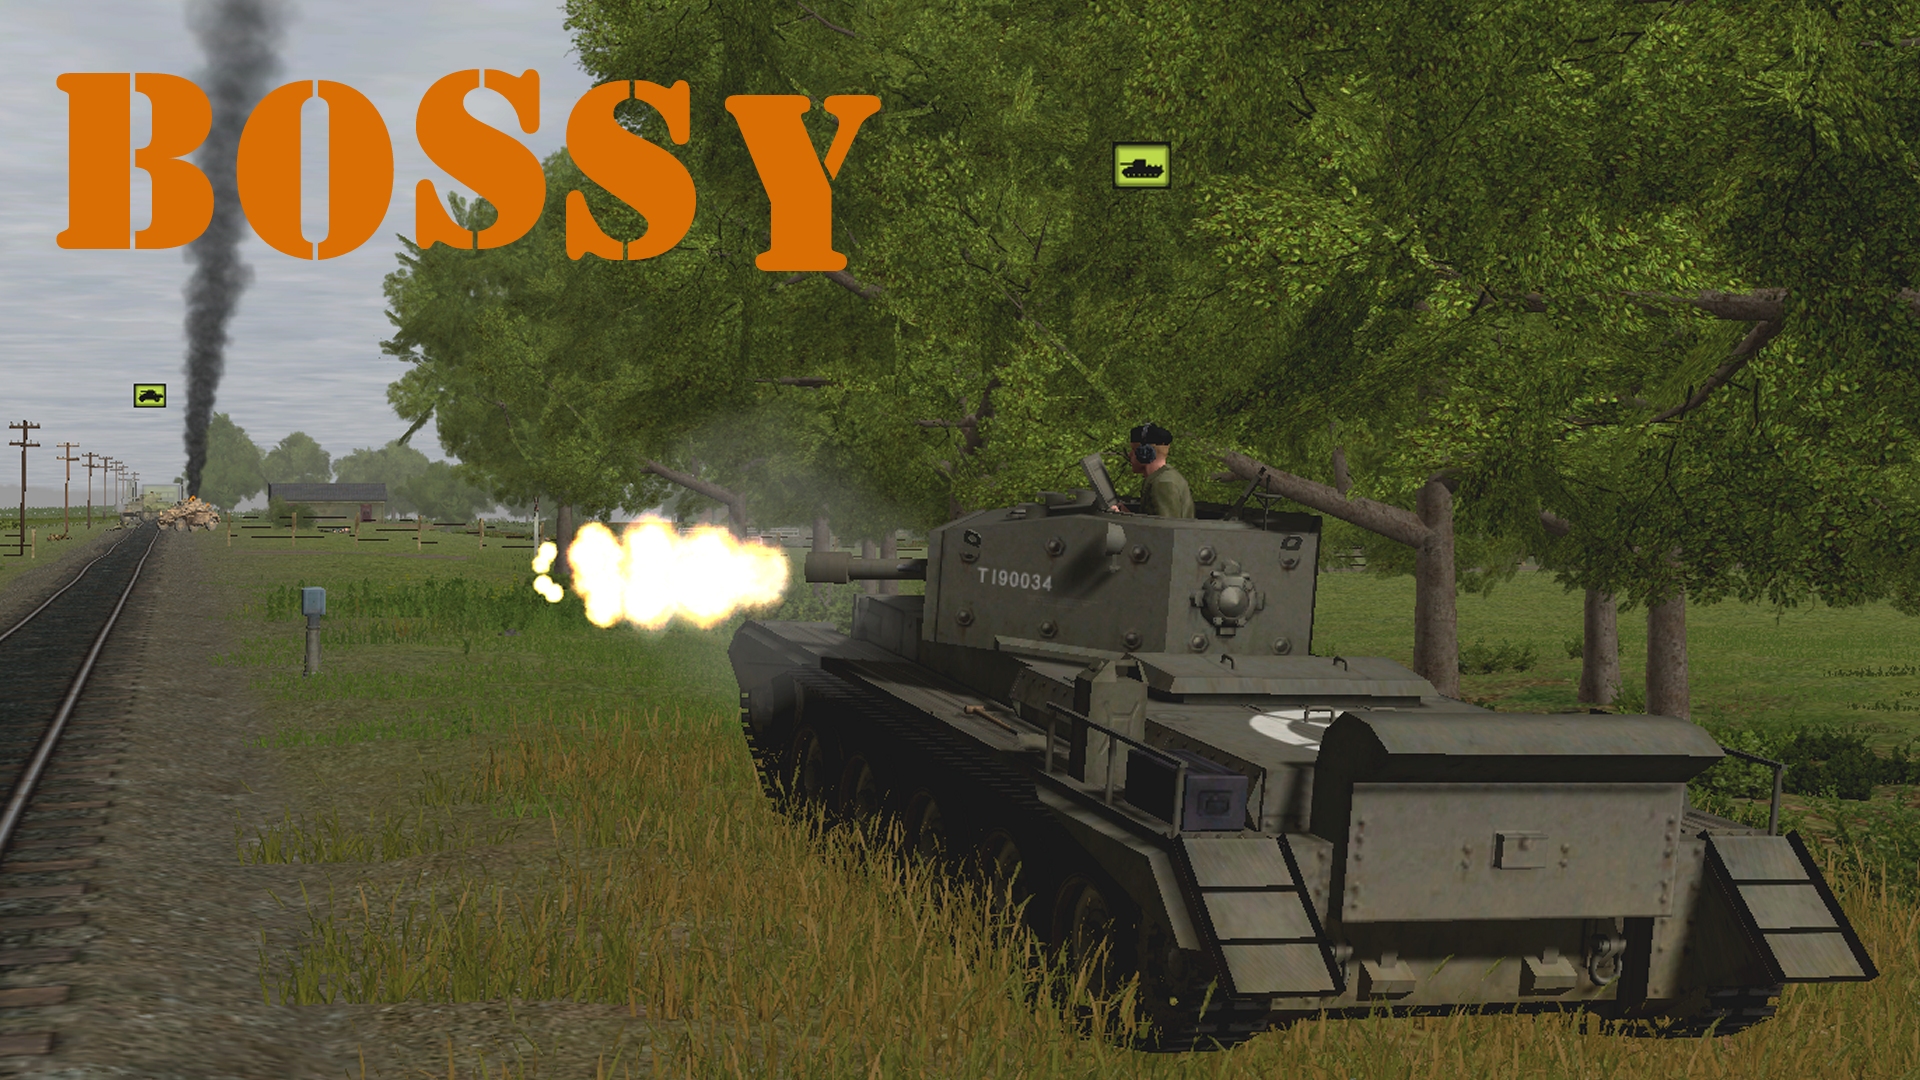
An exploding British tank lifts pantiles and deglazes windows this turn. Unfortunately for the Comment Commanders the tank in question is the previously KOed Sherman not the cruel Cromwell. Brace yourself for a turn report light on good news.
(Brinkmann’s Bridge is an open-to-all game of Combat Mission: Battle for Normandy in which the commenter-controlled Axis forces are out to recapture a Dutch canal spanner recently snatched by Red Devils. Each turn covers one minute of WeGo action. For a scenario outline and summaries of earlier turns, click here).

Light but not totally devoid. 6 Squad’s dash to the monastery wall goes well…

…despite the unexpected – to me at least – reappearance of three hardy foxholers (Apologies for giving the impression that the gardens had been cleared).

And the combined firepower of Griess, Brinkmann, and the Panther silences two Sten guns in the thicket south of the Koffiehuis de Onionmancer.

But for a gnarled oak bough, the turn replay probably would have featured a Staghound slaying too. About ten seconds before the clock stops, our pillboxed Panzer notices the Allied armoured car halted on the tracks near the railway bridge. It only has time for the one shot.
We take casualties in four separate locations this sixty.

In the space of five torrid seconds, the never-say-die marksmen in the monastery grounds eliminate what’s left of the pumphouse posse.

Smoke bombs fired by our medium mortar arrive too late to save the geezer in the corpse-strewn red z41 foxholes from the Cromwell’s 95mm death dealer.

The Rolls-Royce-engined Lord Protector then edges north and begins knocking seven bells out of the white house. Masonry mobilised by the vandalism clobbers Griess’s light machinegunner.

And at T+57, 2 Platoon’s HQ takes its first casualty of the game. The sharp-eyed Staghound is the scalp taker.


Our StuH, Pz 35R, and SPH searched in vain for targets this turn.


Turn 24 orders here, please. Commenters are cordially invited to suggest moves for the following units (A maximum of ONE unit per commenter. All units now available to all Comment Commanders. Embarked infantry and their taxis count as single units until separated. Split squads also count as single units.)
*Fusilier HQ (3 men) pinned, foxholed, PF [red t37]
*Griess (2 men) pinned, rattled, tiring, upstairs [red p41]
*Fusilier squad 2 (4 men) tiring, foxholed, PF [red r41]
*Panther Ausf G, immobilised [black o39]
*StuH 42, unbuttoned [black l36]
*Self-propelled howitzer (2 HE, 2 HEAT, 1 SM) commander incapacitated [red i25]
*Panzer 35R (27HE, 22AP, 1CAN), buttoned [black v50]
*Kubelwagen [black b24]
*Truck near conifer plantation (passengers = Platoon HQ + 1 straggler) [black j23]
*Brinkmann [red o41]
*Fusilier squad 6 (9 men) split into two teams, PF + 2 x AT grenades [black q44 & black w48]
*Medium mortar team (4 men) (NO AMMO) and ammo bearers (2 men) LoS to monastery [black l34]
Please start all order comments with ‘ORDER’ and any later revision comments with ‘REVISED ORDER’. This will help me distinguish firm instructions from suggestions and advice.
ORDER: StuH commander button up again (too many allied troops with LoS on the commander)
I’m so tempted to order Fusilier Squad 2 and their HQ to surrender.
Surrounded on three sides, under attack from armour and they’ve lost almost everybody in the platoon and that started the fight with them. They can’t even hope for support, their own armour hasn’t even made it to the monastery.
At this point needlessly throwing away the lives of the few survivors feels wrong.
Have some heart, we’re not dead yet! It’s not clear if FS2 has been spotted, and (if the overhead map is to be trusted) there is an escape route for FHQ in the foxhole one square to the north, where the garage might block the view of the Staghound.
ORDER: FS2 [red r, 41] same as last turn. Stay completely still, imagine yourselves a Hessian bag filled with the finest Waddensee silica, keep target arc to the east at Panzerfaust range only. Pray that that Brits come a little closer. There’s only 2 minutes to go!
Ah, hang on, the Staghound is the chap up by the rail bridge, not the immobilized tank. Why can’t these pesky Brits use simple, instantly recognizable vehicle names like SPW U304(f)-10, eh? Anyway, if those foxholes are exposed to the armored car, that’s a bigger problem, since none of our west coast vehicles even have a hope of getting eyes on him. Guy wiped out our mortars in a flash too. Not sure where you can retreat to in that case. Slither into the canal? Fire the Panzerfaust in a Hail Mary? Stay strong, sirs!
The Panther took a shot at the Staghound late in the turn and should fire again early in the next one. Its view of it is slightly obscured by the tree at blue e27, but I’d say the chances of a hit/kill are pretty good. Advancing won’t help the AC as the Panther has pretty good LoS to the fields east of the garage:
//tallyhocorner.com/wp-content/uploads/2021/04/bridge24o.jpg
Interesting. The howitzer hasn’t noticed the Staghound yet, but it does seem to have LoS to its location. An area fire order might do the trick.
This is a morale-boosting update, thanks!
I think playing this game has taught me that my brain doesn’t operate very well on vehicle-scale distances. I think if I were in the military, I’d just potter around on foot until my sudden demise at the hands of a vehicle that might as well be a million miles away for all the good my pea shooter would do.
You were ready to surrender 15 turns ago when ordering your light mortar team to trudge cautiously toward the bridge rather than run over it. He could be hiding like a withered pansy in a foxhole on the other side of the bridge by now.
Correction: They could be hiding like withered pansies in a foxhole on the other side of the bridge by now. But dey all dead.
Thank you for the mid-battle feedback on why you think my orders were sub-optimal, even though they were discussed and justified at the time.
Might I also at this point take the opportunity to commend you on your quite magnificent performance in this battle, with insightful and compelling orders that have almost assured us of eventual success.
At this point it feels like the questions isn’t “can we hold the bridge” as much as it’s “will we have anything left on the other side of the river to oppose them? If we aren’t getting the VPs for holding the bridge anyway we might as well not take any more casualties than necessary.
It’s tempting in a single scenario to just throw every last man into the grinder before the clock strikes zero, but I think it’s more realistic to imagine our troops falling back and delaying the enemy instead.
We might be able to count on the Panther taking out the Staghound, but if Brinkman is going to have a safe path to retreat, we will still need to clear the monastery grounds.
Tim, how’s the LOS from the howitzer towards the Staghound and the Cromwell? Is it in a narrow window of safety, or will those riverside trees probably protect it as it moves north?
Also, how’s the LOS from the Pz 35 and both halves of half of Squad 6 towards the unkillable monastery guards?
Our original orders:
> Your task, Comment Commanders, is to retake [the bridge] within 25 turns without accidentally killing one of Germany’s most famous and highly decorated fighter pilots in the process.
To me that implies we are supposed to be holding the bridge, and we just need to make sure Brinkmann isn’t in the white house when the baddies level it.
If my understanding of CM is correct (and I’ve been playing it for almost 20 years now, so I’ve got some confidence in this) then holding the bridge generally means having enough unbroken troops planted on the location to secure the victory points. We’ll probably get some for denying our opponents the bridge, but it’s asymmetric, so we don’t know how much each of our scores depend on victory locations, damage to enemy forces, and status of our own troops.
Given that we have two turns left, I don’t see us as being able to occupy the bridge environs. We’d likely have to send all the troops from the white house there and have none of them or the HQ killed in the next 120 seconds. To me that sounds impossible.
Likewise, maybe the paras have some victory points for occupying the monastery, or for damaging our forces. Unless Tim wants to give up the secret of the other side’s objectives, or judge our success on his own understanding rather than the games’ scoring system, then we’ve got to assume it’s not as simple as “they have the bridge vs. they don’t.”
All that in mind, I want Brinkman to have an escape route from the house. We’ve lost the bridge, so let’s not lose him too.
When Turn 25 ends, your GM rather than CM’s internal arithmetic will decide who controls Brinkmann’s Bridge.
“Tim, how’s the LOS from the howitzer towards the Staghound and the Cromwell? Is it in a narrow window of safety, or will those riverside trees probably protect it as it moves north?”
The howitzer hasn’t spotted either unit but seems to have LoS/Lof to their current locations (If the Cromwell keeps moving north it will soon disappear behind the garage). Speculative ‘area fire’ shots might produce results.
“Also, how’s the LOS from the Pz 35 and both halves of half of Squad 6 towards the unkillable monastery guards?”
All three units can see the foxholes where the pumphouse posse killers were last seen. However, there’s no sign of the occupants at the moment.
Also, am I reading correctly that we are back down to ONE command per commenter?
To be fair we’re running out of units to command. (But we’re also close to scenario end, so we never were going to have a full roster at this point.)
I’ve reinstated the one unit per Comment Commander rule and lifted the east bank/west bank rule so no-one is forced to twiddle their thumbs during the last two turns.
Don’t worry chaps I’m sure those new Wonder Weapons we have been promised will soon come into service and help win us the war…
Some initial thoughts to get the ball rolling.
Former east infantry- no change other than move Griess to the relative safety of the ground floor.
Brinkmann-move to ground floor if not there already. Wouldn’t move him out of the building just yet as the Staghound appears to have a good view of it.
Fusilier squad 6.- Since the Brits have reappeared in the monastery foxholes, I can’t see how they can reinforce the bridge (reach garage/café ) in the time remaining. Little choice other than to engage the new foxhole targets. I wonder where Best is?
Pz.35 – Manoeuvre to gain LoS on the canal bridge (may have it already) then to engage any soft targets that try to cross it during the next two turns.
Panther/Pillbox- hopefully takes out Staghound – then as with StuH maintains overwatch on canal bridge.
Medium mortar –no ammo therefore now a small rifle team. Move to engage monastery foxholes.
Truck carrying Platoon HQ –despite having orders to occupy the pump house it appears intent on heading back towards Berlin and a firing squad! We could try to march them back, but in time available doubt they could do anything.
Howitzer-Target Cromwell. If nothing else it may distract it from firing on our bridge defenders and if the Panther takes out the Stag as well then happy days.
These are all good ideas! I’ve already used up my order but I hope you and other commanders can enact some of these by Sunday.
Thanks.
As a first time commander and particularly one who came late to this scenario I usually put my orders in at the 11th hour to allow others with more time invested to choose their commands.
Incidentally from my very limited experience playing CM I don’t think you need to repeat the same order each turn, i.e. the unit will follow its last order. So this turn you could command something else as could @Cederic. Whilst technically someone could “take over” your former unit, at this late stage and with limited realistic order options that’s unlikely.
Alison and I have swapped command of multiple units through this battle. Although she can claim innocence for the demise of the East bank half-track.
I have no orders I wish to give this turn as I’m continuing to constrain myself to only the units that started East of the canal. I could for instance instruct the Fusilier HQ unit by the bridge to hide or to retaliate or surrender or make a suicidal charge on the monastery but they’re already pinned and will return fire when they feel it’s safe to do so.
ORDER: Howitzer to area TARGET Cromwell’s position. With any luck that vehicle commander is leaning out of his hatch…
ORDER:
Pz.35r Hunt to Black Y50. Then target any enemy infantry units attempting to cross the canal bridge.
ORDER: Truck near conifer plantation [black j, 23]
– Move to [black z, 18]
(On the assumption that it’ll take some time to make the 3-point turn to face the correct direction, I’ll direct the driver to start his hero run this turn with the possibility of cancelling it next turn, should he survive)
– Move fast to [red l, 41] where passengers should disembark.
– Passengers to face SSW.
– HQ to cautiously occupy the SW of the ground floor of Brinkmann’s former abode [red m, 40].
– Straggler to target the six-pounder at [red j, 41].
Turn execution underway.