
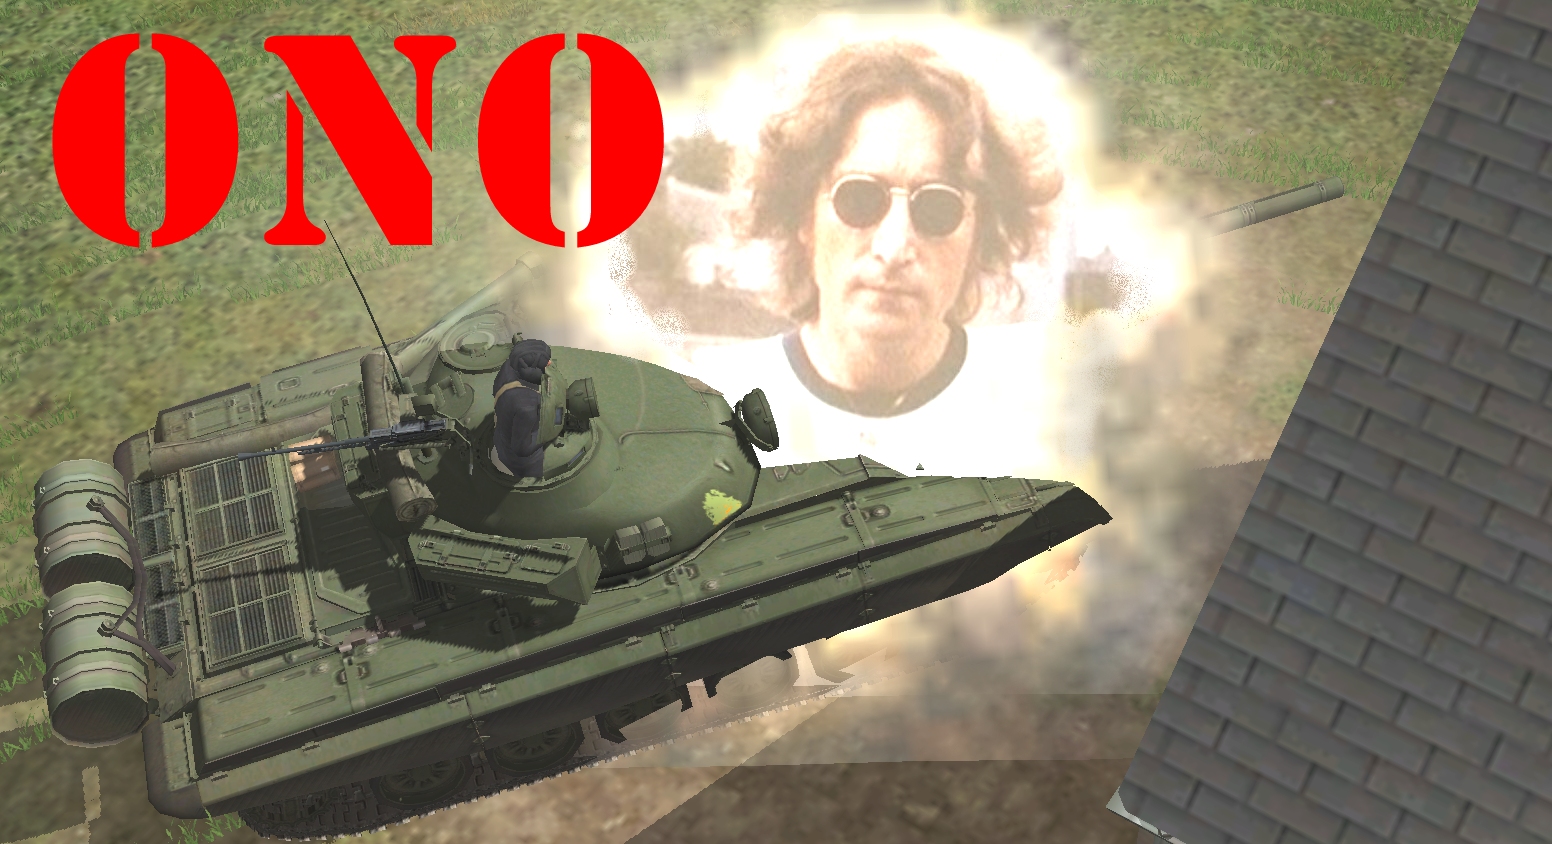
The turn in which a tiny steel meteorite tears a diamond-shaped hole in Viktor Somlac’s John Lennon t-shirt, then tears a diamond-shaped hole in Viktor Somlac.
(Operation Oryx is an open-to-all game of Combat Mission: Cold War set in 1981. The commenter-controlled Zendoran forces are attempting to ambush a column of Podrabian vehicles bound for Zečin, the Zendoran capital. Each turn covers one minute of WeGo action. For a scenario outline and summaries of earlier turns, click here).

Circa T+15, through seething murk, one of Tereza’s crew spots something nasty in the vicinity of box 43. Our T-72 pivots clockwise smartly to face the danger. It’s impossible to say for sure what they’ve seen (no red icons light up) but chances are it’s either one of the advancing T-55s, or…

…the RPG team our sharpshooters observe heading westward early in the sixty.

Viktor, Georgi, and Simona are still scrutinising box 43 in search of the glimpsed foe when, 25 seconds later, Tereza is rocked by a crunching upper hull hit.

RPG? APFSDS round? Whatever struck them is sufficiently powerful to damage Tereza’s optics, tracks, and radio, injure her commander and persuade him to button-up and bellow “Reverse!”. By the time the clock stops our unnerved MBT has retreated a good fifty metres.
Besides this scare, turn 21 passes uneventfully.

Droopy’s TOW team dismount but, due to the way CM’s order system works, can’t begin deploying their weapon.

A Pod truck racing for the western map edge, hesitates after drawing fire from our LMG team.

The T-80 leaves the embankment, angling southwestward towards the treeline where a T-55 and a UAZ loiter.

Our two-tube off-map mortar battery springs into action after receiving a request from the dovecot.

Near the Lesov’s place, the outnumbered-two-to-one BRDM commander continues to swap lead with foes on the embankment.

Turn 22 orders here, please. Commenters are cordially invited to suggest moves for the following units. (A maximum of one unit per commenter (subscribers can move two if they like). Embarked infantry and their taxis count as single units until separated.) Turn execution: probably Monday morning.
****anyone****
Light mortar team (tube deployed) [BOX 47]
MG team [BOX 86]
Dragon team (ambushing) [BOX 72]
Recon team B (1 man, hiding, targets in sight) [BOX 75]
Recon team C (3 men) [BOX 87]
Otto and Branko (sniper team) [BOX 100]
Forward Observer Team (calling in bombardment) [BOX 112]
TOW Mutt ‘Muttley’ (5 x ATGM) [BOX 100]
TOW Mutt ‘Droopy’ (4 x ATGM, dismounted, deploying weapon) [BOX 23]
Mutt ‘Scrappy’[BOX 87]
****subscribers only****
Trajanov [BOX 87]
Truck [BOX 86]
Milan Lesov (7 x RPG)[BOX 74]
M113 (unbuttoned) [BOX 99]
Tereza (buttoned, light damage)[BOX 16]
BRDM commander [BOX 77]
ORDER:
Otto and Branco continue their cover arc command. I’d love for them to help out our BRDM commander, but I don’t want to lose them to that tank.
ORDER: Team Droopy QUICK a little bit north, maybe 1 square, or two north and 1-2 west, then FACE east, Deploy Weapon, and HIDE.
@Tim: I want to give them a bit better of an angle but still keep them from being in view of the whole road. If moving then up is going to expose them too much, then just have them Deploy where they are. I care more about handling break-through targets than trying to pick tanks off for maximum VPs
Does our last remaining member of Recon B having “targets in sight” mean he is about to shoot, or does he need an order? I suppose it doesn’t matter either way, so…
ORDER: Recon B to open fire on (presumably) the embankment team.
ORDER
Muttley stays where he is and targets armoured units only in a cone stretching from 64 to about 70.
(I don´t have the courage to move him out of the farm building´s shadow and go hunting for the T-55 or T-80 south of the highway. He might attract the attention of both at the same time.)
ORDER
As per alison’s suggestion below, get Recon Charlie upstairs so they get a better view of what’s going on, as it’s the safer option for now.
If the view is no good, then we can move buildings on the next turn.
Well that was a fun turn. How’s about we get our only MBT out of dodge and behind something solid and tall?
@Tim: How’s our sniper’s LoS towards the RPG team and the embankment troops? I don’t want our surviving commander eliminated, but I also don’t want the T-55 to go “that’s a bullet” and proceed to remove the top of the dovecot 100mm at a time.
@Tim: Also, talk to me about the LoS from our dismounted TOW team. What can they see from where they are, and what’s the total deployment time for their weapon? Did they manage to take all 3 (4?) rounds with them when they dismounted?
Otto and Branko (the snipers) have LoS to two enemy units – the T-55 in box 82, and the ravaged infantry squad currently swapping fire with the BRDM commander. Both are outside its cover arc.
The TOW will take 80 seconds to deploy and have three missiles at its disposal. LoS isn’t great I’m afraid. There’s a narrow sector (5-10 degrees) due east to the trees, and a slightly larger one south/south-east to the highway embankment. High crops might explain the surprisingly limited views.
I’m bad at the keyholes, but I’d really love for Teresa to reverse a bunch, keep buildings between her and the enemy tanks, and wait out a chance for some side-shots as they come around.
Any other comment commanders able to figure out a good location?
@Tim
Is there a chance that Muttley could draw a line of sight to the T-55 at tile 70, right next to the UAZ if he moved just slightly north of his current position?
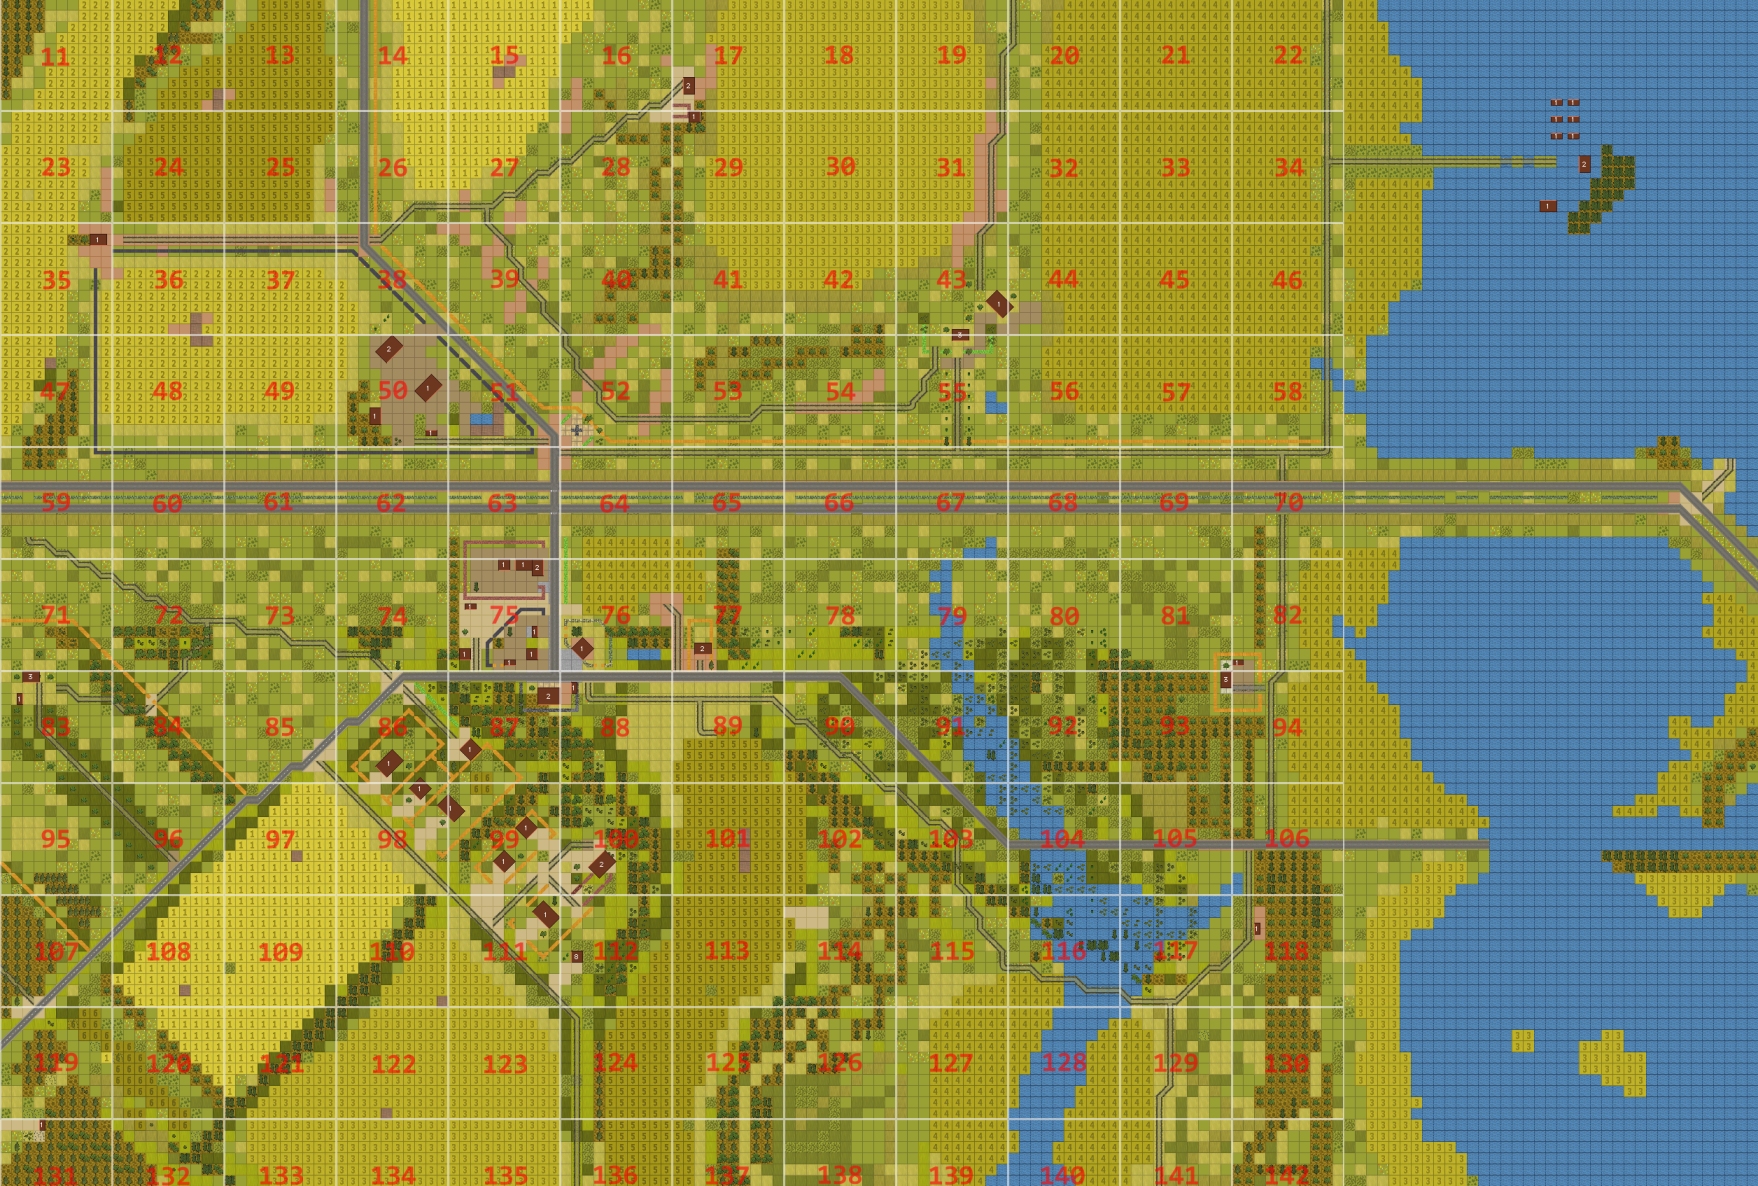
This pic, taken looking ENE, shows Muttley’s current position pretty well:
//tallyhocorner.com/wp-content/uploads/2022/09/oryx21l.jpg
On the face of it, he should be able to see both the box 70 and 93 T-55s through the gap in the berm, but in fact neither are in view. A short ‘hunt’ command NE or ENE could give him a firing opportunity, but obviously there is a risk he will be spotted by one or both of the tanks.
Is Recon C currently on the second floor of the building they are in? And does it provide them visibility over the building in box 76? Because if not, it might be nice to move down to the building in southwest box 76 to give us a bit of a wider view (in case Recon B or our BRDM commander don’t survive the next turn).
Recon Team Charlie (box 87) is downstairs in the hotel and can see no enemies. Recon Team Bravo (box 75) is upstairs up in the agri merchants, and has LoS to the foes in box 65, but is holding fire because of a (very) short-range cover arc.
Recon Charlie didn’t even go upstairs? No wonder they haven’t been up to much since the first tanks arrived. I’ll leave my first order back for Recon Bravo, but hopefully someone can step in and order Charlie either upstairs or across the road to get us some more eyes on the highway embankment.