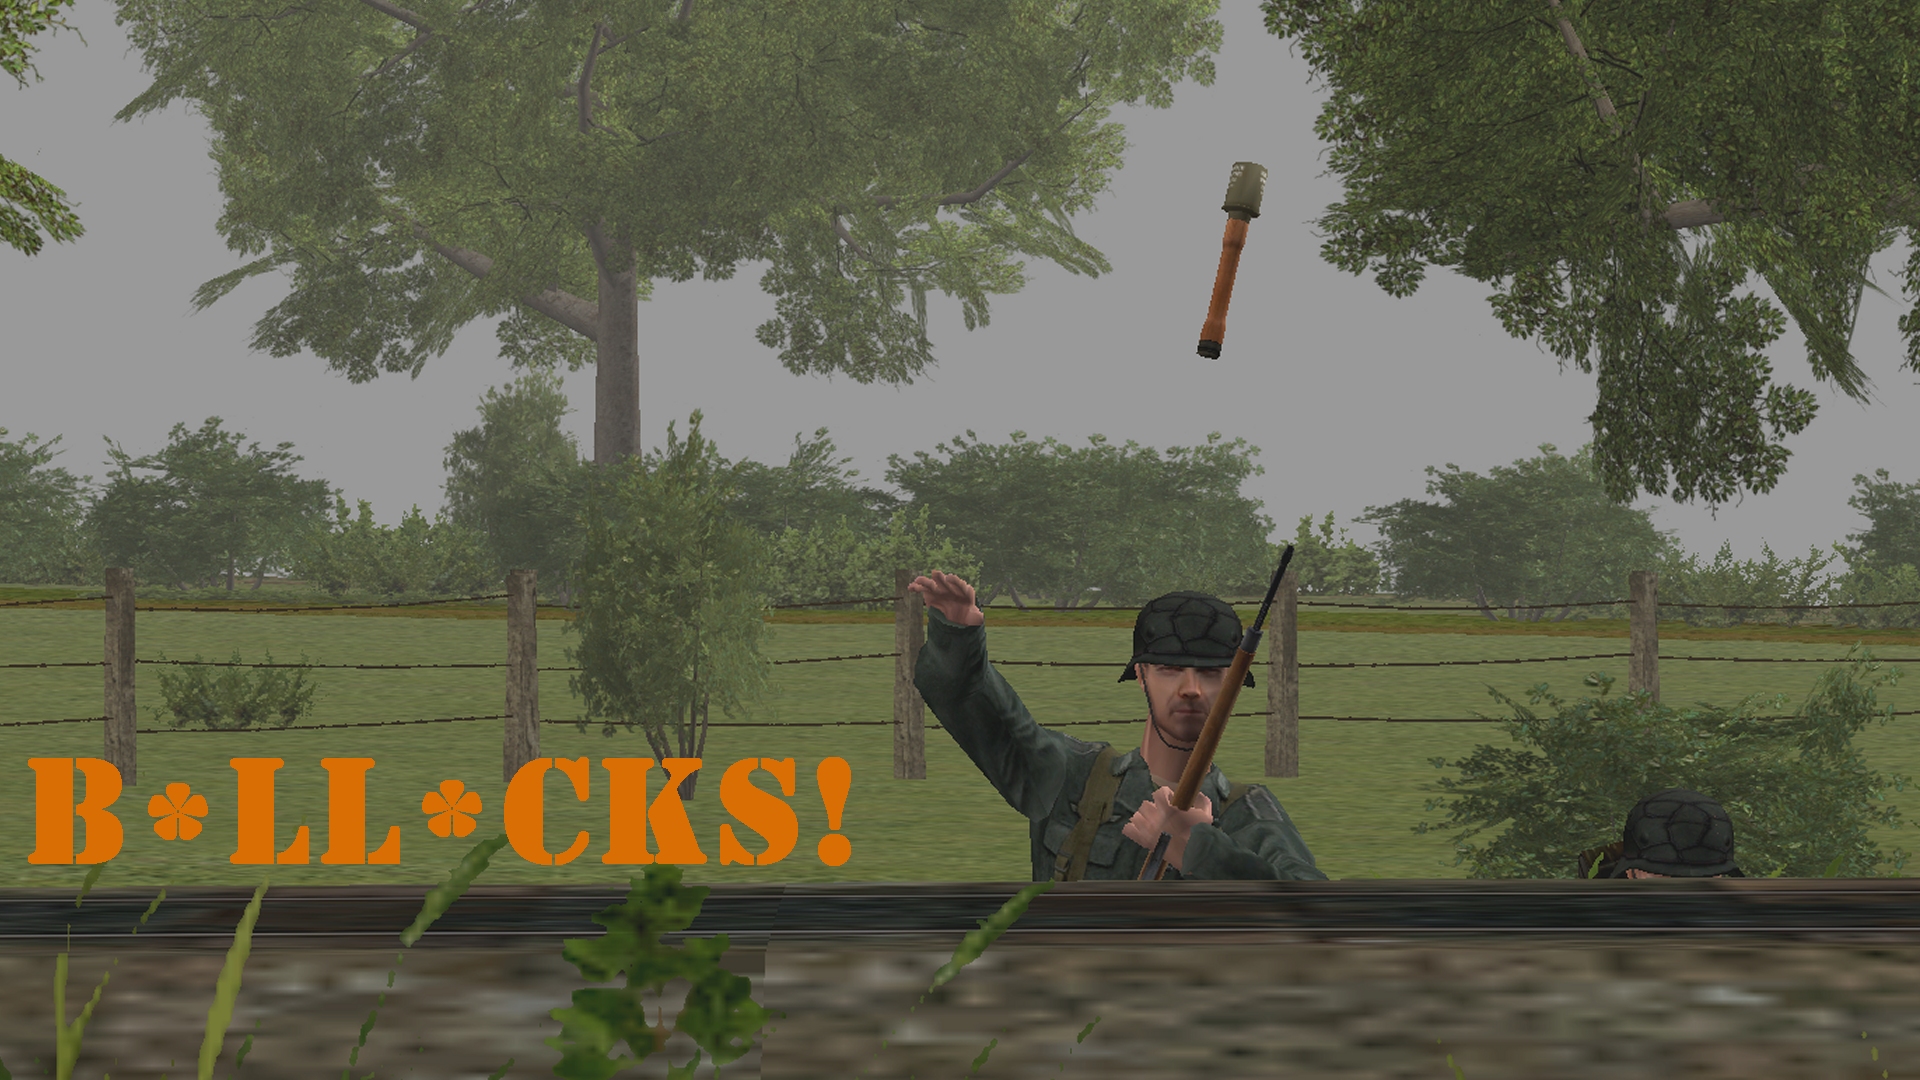
If you’re a wounded British paratrooper bravely battling to keep the Germans from crossing a railway line in THC’s first play-by-comment CM game, the scene above is the very last thing you want to see in front of you. In Turn 8 the players make progress at the embankment, but that progress comes at a price.
(Brinkmann’s Bridge is an open-to-all game of Combat Mission: Battle for Normandy in which the commenter-controlled Axis forces are out to recapture a Dutch canal spanner recently snatched by Red Devils. Each turn covers one minute of WeGo action. For a scenario outline, click here).

Imperious Mars decides Meister’s war will end in grid square blue o29. A brace of bullets from a blood-spattered Sten, drops Squad 2’s leader as he squints down the barrel of his MP 40 waiting for another glimpse of netted HSAT.

It makes no difference to the felled fusilier that his death is, in sporting parlance, “against the run of play”, or that the British submachine gunner responsible is cut down seconds later by an MG 42 emission originating at the green house by the railway bridge.

If I dished out Man of the Turn awards, Turn 8’s would have to go to the wounded Red Beret pictured above.

During the sixty, he weathers rifle, LMG, and SMG fire, continuing to use his two-inch mortar against the foes near the armoured car…

…until, in the final seconds of the turn, the blast from a stick grenade sends him rolling down the bank into the reeds.
When the clock stops…

The two British units on the embankment appear to have been neutralised.

Our three scouts near the buttoned Panzer 35(t) are pinned after a brief firefight with the same pumphouse party that softened up the unlucky SPW 251/1 in Turn 7. The pinners look to consist of two riflemen and two Sten toters.

Bulau’s scouts and the NE mortar team are both a stone’s throw from the windmill crossing.

The field behind the conifer plantation is a hive of activity. As the HQ team heads for the spruce straw, the medium mortar, with ammo carriers in attendance, sets up. Moving eastward, half of Squad 6 (Deych) has crossed the road near the badger cadaver, half has yet to cross.

Having completed the first aid and scavenged the MG 42, Elm’s ‘team’ (hereafter referred to by his GUI name, ‘Wilberg’) is now a veritable one-man army.


Turn 9 orders here, please. Commenters are cordially invited to suggest moves for the following units (A maximum of two units per commenter. Embarked infantry and their taxis count as single units until separated. Split squads also count as single units. Units on the west side of the canal answer to subscribers only.)
(anyone)
– NE group –
*SPW U304(f)-10 halftrack (63HE, 45AP) unbuttoned, [blue k14/15]
*Fusilier squad 1 (9 men) split into two teams – Bulau’s team (7 men) [blue n19/20] and Grill’s scouts (2 men) [blue l9]
*Light mortar team (31 HE) [circa blue m8]
– E group –
*Fusilier squad 2 (7 men) split into two teams – Meister’s team (4 men) [blue o29] and Woikin’s team (3 men) [blue m34]
– SE group –
*Fusilier HQ (4 men) [blue n42]
*Fusilier squad 3 (6 men) split into two teams – Hirsch’s team (5 men) [blue m51] and Wilberg (1 man) [blue t48]
*Light mortar team (38 HE) [blue n50]
(subscribers only)
*Panzer 35t (32HE, 22AP, 2CAN), buttoned, [black m42]
*Scout team (3 men, MP 40s) [black p44]
*medium mortar team (4 men) [circa black b25]
*Platoon HQ (4 men) [black f24]
*Fusilier squad 5 (9 men) [black h18]
*Fusilier squad 6 (9 men) [black i23 & l22/23]
*Kubelwagen(black b24)
*SPW 251/1 halftrack (black d23)
*Truck (black e19)
Please start all order comments with ‘ORDER’ and any later revision comments with ‘REVISED ORDER’. This will help me distinguish firm instructions from suggestions and advice.
@Tim
– Am I right in presuming that Hirsch still has uncompleted move commands queued up, or have they been cancelled by engaging the remnants of the British light mortar?
– The overhead map shows no enemy icons near Meister/Woikin. Has Fusilier Squad 1 eliminated the last man there (that we were aware of)?
– Hirsch is waypointless at present, but if you want him to continue crawling to blue k41 as per Turn 8’s instructions, you can have that order on the house.
– Both the light mortar half-team (?) and the paras near the armoured car seem to have been eliminated.
ORDER: Fusilier squad 3 (6 men) split into two teams
Hirsch’s team (5 men) [blue m, 51]
Crawl onto the railway lines [in the lower half of square blue k, 51].
“Rambo” Wilberg [blue t, 48]
Fast to [blue r/s, 50]
Fast to [blue n, 50]
Cautious to [blue l/m, 50]
Crawl to [blue k, 51]
Being presumptious again, I take it that SE mortar team still has unfulfilled orders from last turn.
“Rambo” Wilberg will show how he earned his nickname.
REVISED ORDER: Wilberg [blue t, 48]
Fast to [blue r/s, 50]
Fast to [blue n, 50]
Cautious to [blue m, 49/50]
Crawl to [blue k, 48/49]
I think it’s a mistake to have Hirsch’s team crawl all the way from m51 to k51. I’ve played this game and having infantry crawl anything longer than one hex exhausts them and takes forever. I’d suggest having them hunt to L51, then crawl the remainder to k51, so they aren’t exhausted when they reach the railroad tracks.
Bulau can hear the rumble of German armored vehicles approaching from the east. They will arrive any minute now. There is no way he is getting across the bridge before then. He boldly decides to order his squad across the rail bridge and onto the mainland. He yells to his scout team to continue advancing to the windmill and report back later.
ORDER: Bulau to cross the rail bridge (Quick/Fast) and to hunker down on the east side of the rail line on the mainland. In subsequent turns he will ideally maneuver his squad east to the hedgerows to hopefully ambush the approaching Germans (using Panzerfausts).
Umm. If Bulau intends to ambush the German armour then can you order him to take a short vertical swim in the canal?
ORDER: Since it didn’t seem to get much attention last time, I’ll dive in with the Panzer 35t: Advance cautiously into black o41.
I’m hoping being in that bit of forest can open his sightlines up a bit across the field while providing cover from any concealed AT guns that might be looking down the long road along 39. Worst case they get bogged down while under fire, but we’ll see…
The grid map is a little misleading in that neck-of-the-woods. The apparent tongue of woodland at black o42/43 has actually been felled so only consists of underbrush:
//tallyhocorner.com/wp-content/uploads/2021/03/bridge08r.jpg
As far as I can tell the Pz35 already have LOS to the pumphouse. Id rather it stay put until we can get some proper eyes on the western side and identify any AT-threats, and instead start hosing the pumphouse with indirect fire, covering the NW approach.
Thanks for the screenshot Tim and good point Brasshat!
REVISED ORDER: Panzer 35t puts suppressive fire on the pumphouse. I’m not sure if this Combat Mission has the ‘target with light weapons’ only option, but if it does I’d like that to save the main gun ammo – otherwise, blast away anyway 🙂
Assuming we’ve wiped out all the infantry on the east side of the canal, I’d like to try get a team into the house at [blue a, 37] to see if that will give us a good spot to snipe across to the west and also provide some sight lines back east for when the enemy reinforcements show up. Given our windmill scouts may not be there for another turn or two, I wonder if someone in the south could get to the hedgerow around [blue c, 47]? That should provide a bit of cover from anyone lurking on the west bank.
I did hope such moves would be possible but, with no-one really looking down between the canal and the railway*, I fear it might be a turn premature. I had thought we might get eyes there by the start of this turn, but as you can see a cussed Brit got in the way.
There are the sandbag emplacements SE of the canal bridge where the Bren gunner was for starters; I doubt he was on his own. Also, I’m expecting a second jeep.
* Perhaps we could ask Tim which grid squares the SPW U304 and Fusilier squad 1 have sight of and hence can be assumed clear of enemies.
Because of the embankment the men at the green house can’t see much beyond column blue k at the moment.
Potentially, the SPW U304 has excellent views of the western half of the map from its position on the railway line, but the fact that it’s A) moving, and B) facing south, reduces its spotting capabilities at present.
This collage is my attempt to illustrate the situation:
//tallyhocorner.com/wp-content/uploads/2021/03/bridge08q.jpg
What it doesn’t show is gaps in the ‘LoS fan’ caused by the poplars on the western bank of the canal and other obstructions.
Could I perhaps ask that we please don’t send the half track further south until we’ve got better insight into AT defences. It’s safe primarily and really only because it’s a long way away from anything nasty.
Agreed! It’s also not in a bad place currently, since it can potentially put fire on the eastern railway house and the western bank.
ORDER: Eastern half track to halt, unbutton, and face SW
@Tim
Is there a “hull down” command available for the armoured truck? That would leave the gunner exposed as opposed to the whole truck; his ability to fire on things might be affected, but hopefully his spotting would not.
There is a “hull down” movement order in CM, but I don’t think it would work in this situation as the HT has detected no AT threats.
Time to upset some paratroopers.
ORDER: Light mortar team [circa blue m8] move to rail line on Blue K8 (or k9 or k10, if it’s possible to sanity check LoS before setting up) and send a salvo of mortar shells across the canal to Black Z30.
ORDER *Fusilier squad 5 (9 men) [black h18]: normal move [black H24], from [black H24] Hunt to [black K32].
17 hours until turn execution. As we seem to be understaffed, I’m raising the unit cap to two units per Comment Commander from now on.
East of the canal only the HQ and Squad 2 are lacking new orders this turn. As the HQ shouldn’t lead the charge over the rail line I’m ok with them sitting in the shade and brewing some ersatz kaffee while they wait for the big push.
Unless Alison pops in to give superior direction to Squad 2, could I adjust the order they’ve probably forgotten they received last turn.
ORDER: Meister’s team (4 men) [blue o29] (absent Meister) to move to Blue L33(ish); precise location is ‘so they can touch the burning car with their left hand as they cross the rail line in front of them’.
That gives them a bit of cover when they do cross the rail line, and also clears some space that the squad crossing the rail bridge will appreciate.
If Squad 2 is a single unit then also:
ORDER: Squad 2 Woikin’s team [blue m34] to make their way carefully to Blue L36, ready for a dash for the house by the canal.
The additional scouting from the flanks and the distractions from the West will help us time that suicidal charge for a future turn.
(Alison is welcome to countermand the orders in this post, in which case follow hers)
Been a little busy with work and other things the last couple days, thanks for picking up the slack! The orders look good ?
Turn execution underway.