
Almost everyone knows that Mars owns a spear and shield. Relatively few people are aware that the god of war also possesses a device similar to a bee smoker. He uses said gadget to temporarily calm conflicts while he nips to the kitchen to fetch more beer or potato crisps. It’s possible Brinkmann’s Bridge receives a puff or two from the divine de-escalator at the start of the fourth turn.
(Brinkmann’s Bridge is an open-to-all game of Combat Mission: Battle for Normandy in which the commenter-controlled Axis forces are out to recapture a Dutch canal spanner recently snatched by Red Devils. Each turn covers one minute of WeGo action. For a scenario outline, click here).

The invisible sedative is slow to penetrate the L-shaped wood in the SE. Several mortar bombs and bursts of automatic fire fly in the direction of the burning PSW 222 before the granatwerfer servers and the fusilier HQ decide to give peace a chance.

Seeping through chinks in the Panzer 35(t)’s armour, the magic smoke persuades Thylin to retreat into the bosky bosom of the woods.

More resilient, 2 Squad…

…and half of 1 Squad use the unexpected ceasefire to gain ground.

For the scouts it’s a chance for further undisturbed observation. Circa T+45 their vigilance pays off when they spot a couple of Red Devils entering the strip of woodland south of the monastery.
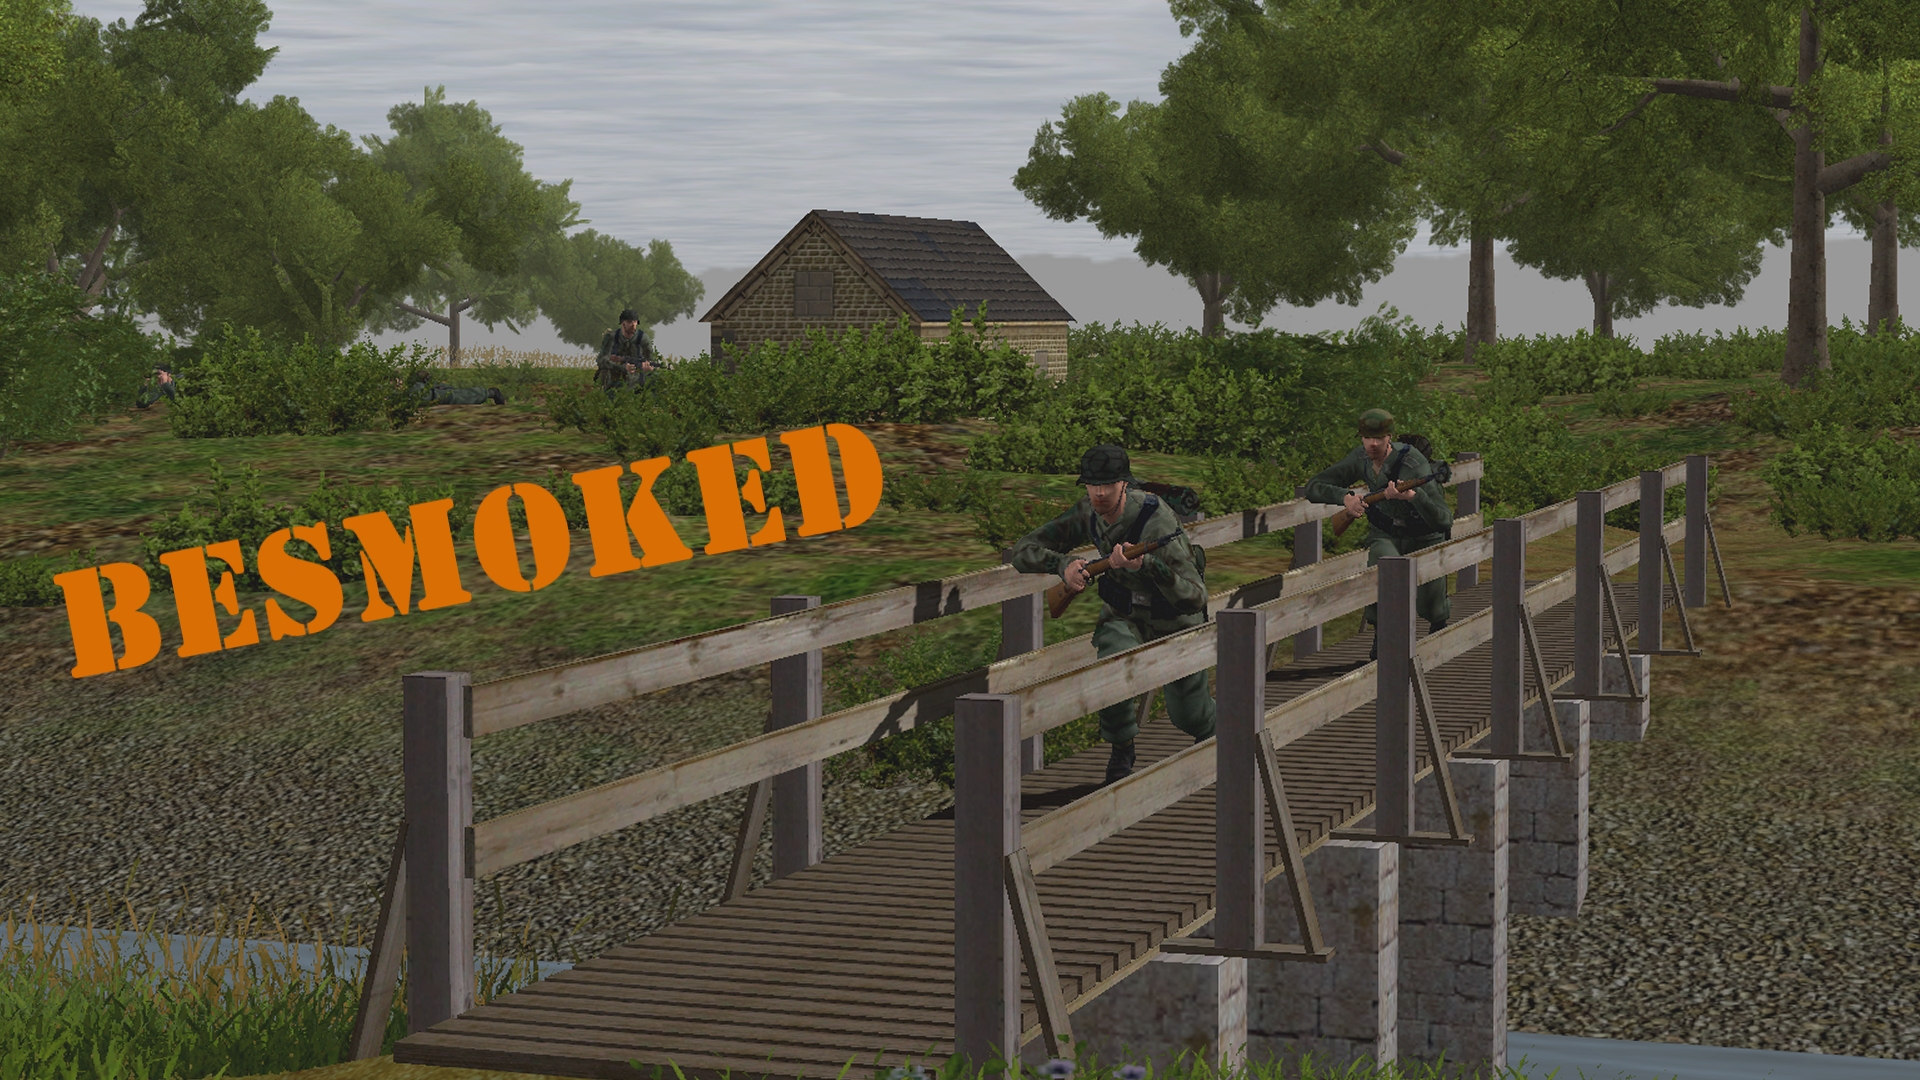
The situation at the start of turn 5:

The paras near the armoured car are no longer visible.

Hampered by undergrowth (the footpath route would have been no quicker) our support halftrack has yet to reach the windmill track. I estimate its caterpillars will quit the leaf litter in roughly fifteen seconds’ time.

Twenty metres of brush is all that stands between 1 Squad’s out-of-breath footbridge crossers and the safety (?) of the green house by the embankment.


Turn 5 orders here, please. Commenters are cordially invited to suggest moves for the following nine units (A maximum of one unit per commenter. Embarked infantry and their taxis count as single units until separated. Split squads also count as single units.)
(anyone)
– NE group –
*SPW U304(f)-10 halftrack (65HE, 45AP) unbuttoned, moving [blue w10]
*Fusilier squad 1 (9 men) split into two sections [blue o17 and blue v15]
*Light mortar team (45 HE) weapon deployed [blue u9]
– SE group –
*Fusilier HQ (4 men) [green a42]
*Fusilier squad 2 (9 men) split into two sections [blue x25 and blue x30]
*Fusilier squad 3 (9 men) split into two sections [blue y48, blue y46]
*Light mortar team (43 HE) weapon deployed [circa green a42]
(subscribers only)
*Panzer 35t (32HE, 22AP, 2CAN), buttoned, [black j42]
*Scout team (3 men, MP 40s) [black p49]
Please start all order comments with ‘ORDER’ and any later revision comments with ‘REVISED ORDER’. This will help me distinguish firm instructions from suggestions and advice.
No change for the halftrack’s current orders I think. Hopefully it will be in a more commanding position by the end of next turn.
I need those SW scouts to work in tandem with the Pz35 and be its eyes. I want to move them north to black Oscar 43. Any objections ill hear them out before I put in any order.
Sounds good. Want to keep the Pz35 back until the scouts are in position?
I do. The sneaking suspicion of a 6 pounder or something similar in the vicinity makes me want to keep it back until the scouts are in position.
In the NE, I’m torn over committing the 2nd half of the squad [blue W, 14] to support their squad mates’ approach or keeping them back to see what’s what. I guess we stand to lose both halves of the squad if we commit them both – if the house is occupied, and only save ourselves a little time if we keep them back – if the house isn’t occupied. I’m no good at sitting on my hands, but it would probably be best to wait.
As to the SE, I’ve not really followed what’s going on there very closely (trusting to fellow commanders), but it looks like we could start an advance westwards at the southern endge of the L shaped wood – to the other L shaped wood (row 48 ish)?
I agree. If that L-shaped piece is unoccupied it will be a key piece of real-estate for controlling main bridge eastern approach.
I also like the idea of advancing one team or even a full squad to the other L-shaped wood.
Right now squad 2 is waiting for squads 1 and 3 to get eyes a bit closer to the rail embankment before they move ahead. I’d like to leave one team facing WSW to open fire on anyone who pops their head up from the other side, but perhaps the other can look WNW toward the house by the rail bridge at [blue n, 20]. Would the team at [blue x, 25] provide enough cover? I think from their angle they can see the southern door.
ORDER: FS2 hedgerow team at [blue x, 30] to face the house at [blue a, 37] and be ready to fire anywhere along rail embankment or the northern end of the second L-shaped wood.
ORDER: FS2 canal team at [blue x, 25] to face the house at [blue n, 20] to pick up anyone fleeing out the back door if/when FS1 breach team goes in. This team’s order might change depending on what FS1 and FS3 do, but I wanted to get it in early in case I don’t have time to check later in the week.
ORDER: NE Group – Squad 1 – 5-man team (HQ) – FAST to blue o17
ORDER: NE Group – Squad 1 – 4-man team – PAUSE 1:00 minute, then QUICK to blue n17
ORDER: SW Scouts, hunt [black Oscar 43].
ORDER: Fusilier section @blue y48 quick to blue t48, then hunt to blue n48.
Unless someone has a good reason not to.
You could probably take both squads – if there were nasty people in the other wood they’d have shot at us already.
Either way you’ll be wanting some command support.
ORDER: Fusilier HQ to move at a steady pace to Blue Y42 to cover Fusilier squad movements and be ready to sprint to the next wood themselves once the squads pause (on a subsequent turn).
Comment Commanders, you’ve eleven hours in which to tweak orders or issue new ones. I believe the Panzer 35(t) and the mortar teams are still available .