
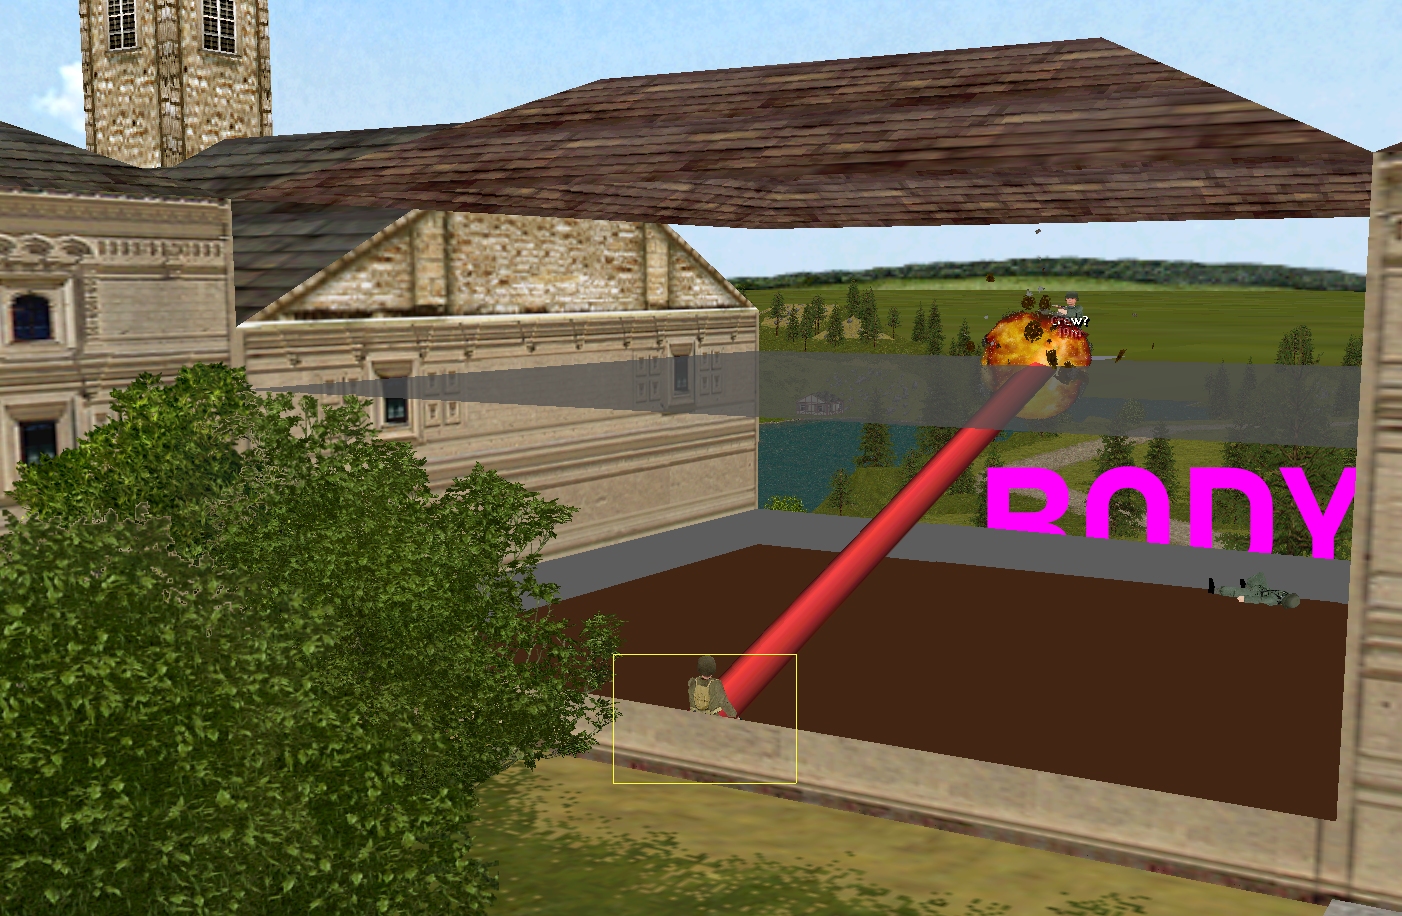
First blood to the bouncers! Captain Dale’s hurty half-dozen surprise a German sniper team halfway through the turn then find themselves hurling lead and stick grenades up one of Schloss Nottingheim’s ornately carved staircases.
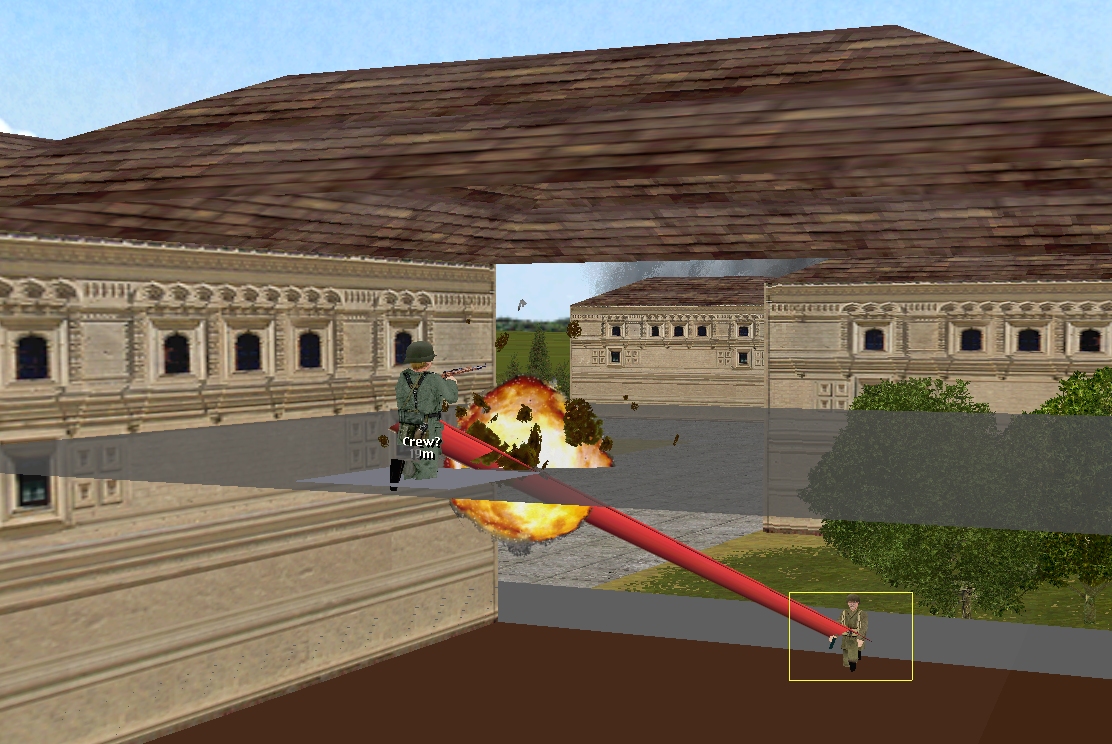
The bullets and bombs behead a carved eagle and blacken a bunch of gilded grapes but don’t appear to discourage or denude the enemy MG team (?) firing from the landing above. Perhaps another minute of American aggression will do the trick.

MG bursts from Scarlet’s armoured car fail to flush out any foxholed defenders close to the rail bridge during Turn 3. However, as the Brits cautiously close on the southernmost crossing, they realise its eastern end is screened by two barbed wire obstacles not one. Navigating the thorny chicane in a wheeled vehicle looks tricky but possible.
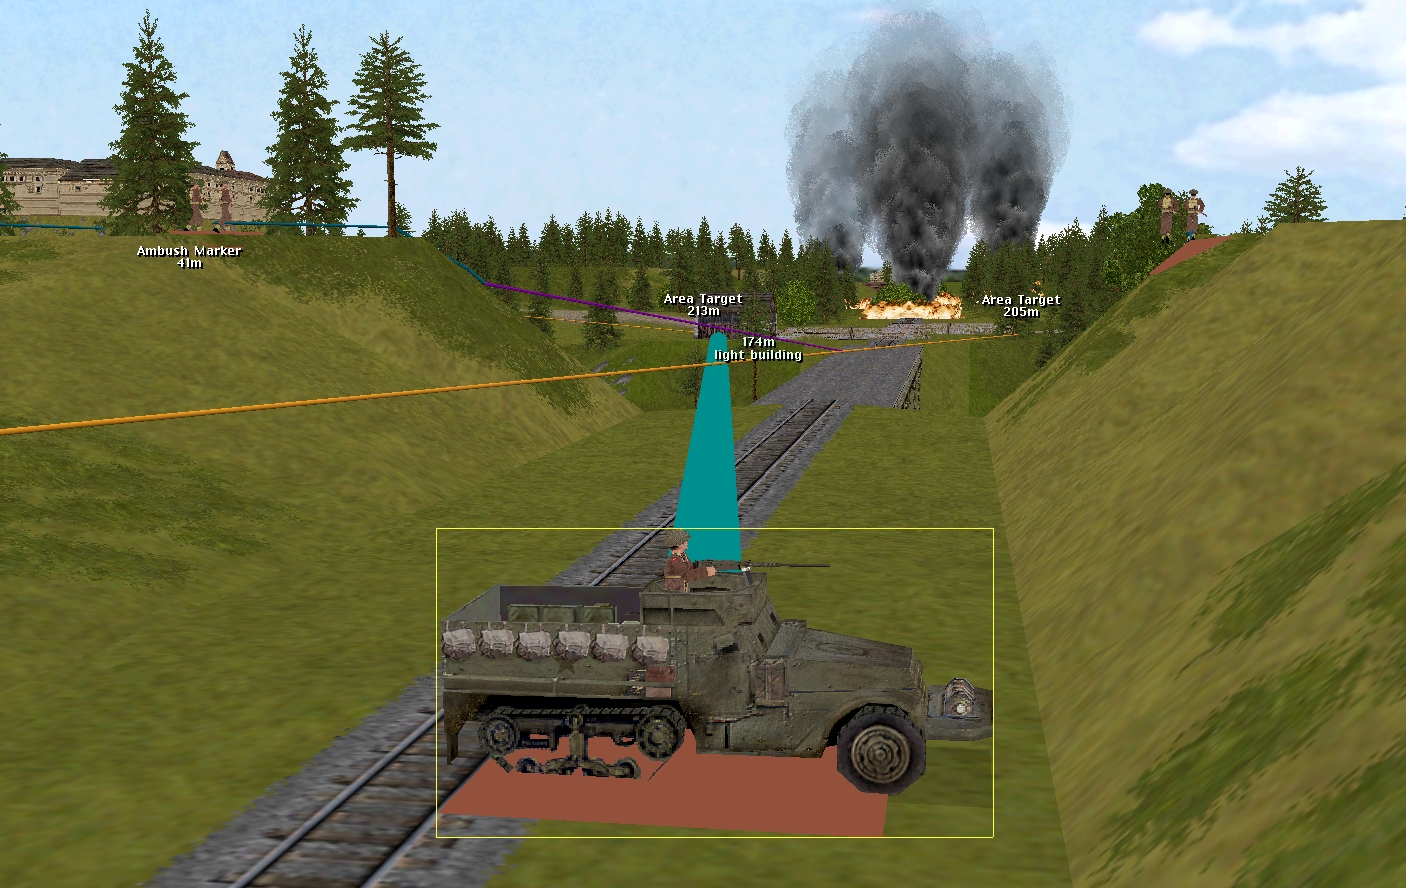
The closest thing to an Allied SNAFU this turn involves Fletcher’s halftrack. Frustrated by an unexpectedly steep slope on the southern side of the railway cutting, it fails to reach its assigned firing position, and finishes up flashing its left flank invitingly at the 3, 3, 5 building.

Shells from the off-map 25 pdr battery should begin landing in the vicinity of said building at the start of Turn 6. Possibly because he’s now reliant on secondhand spotting info (Hood is acting as his eyes) it takes artillery spotter Tuck the entire turn to switch targets.
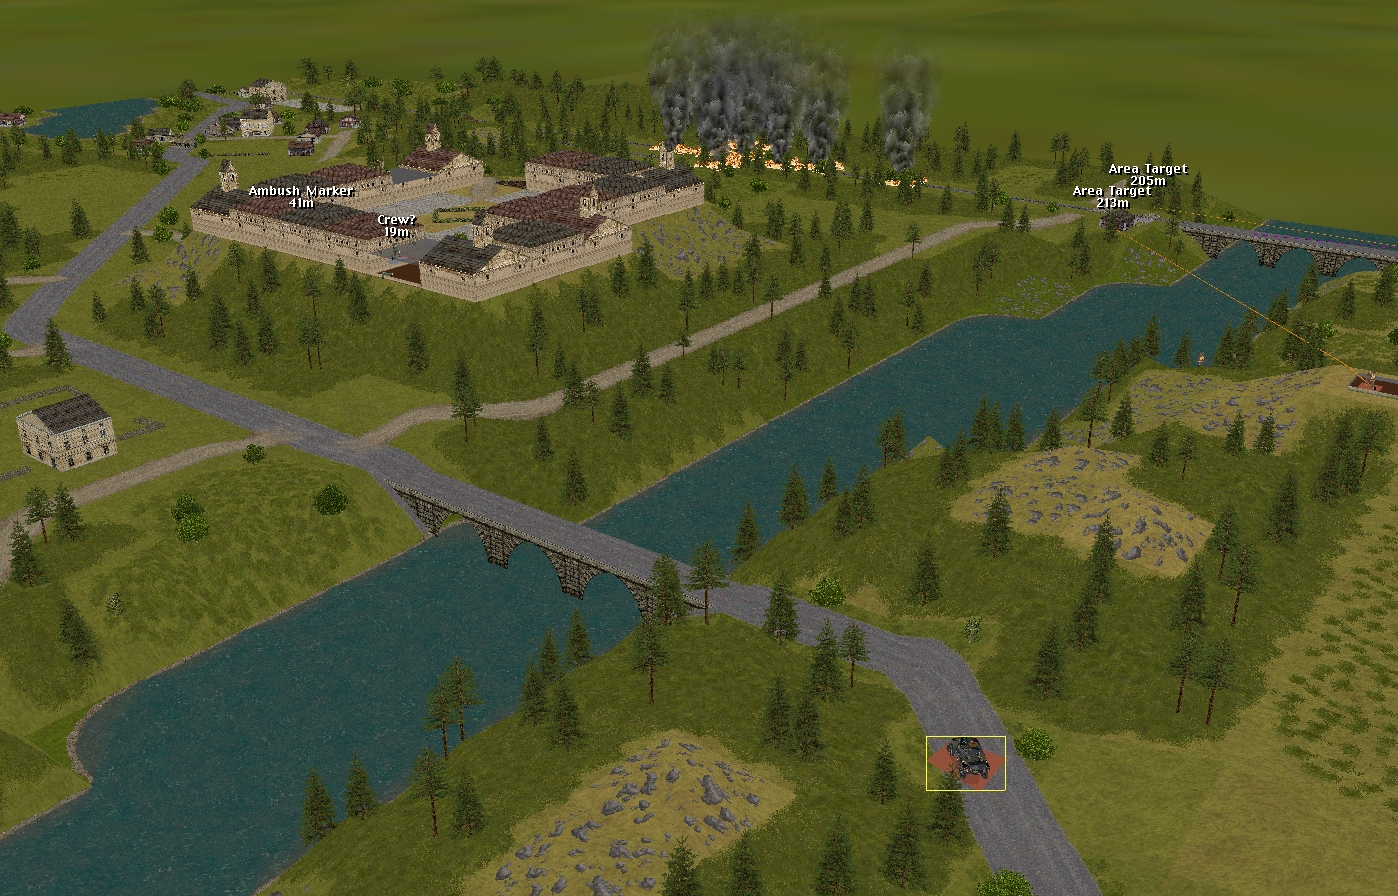
The situation at the start of Turn 4:
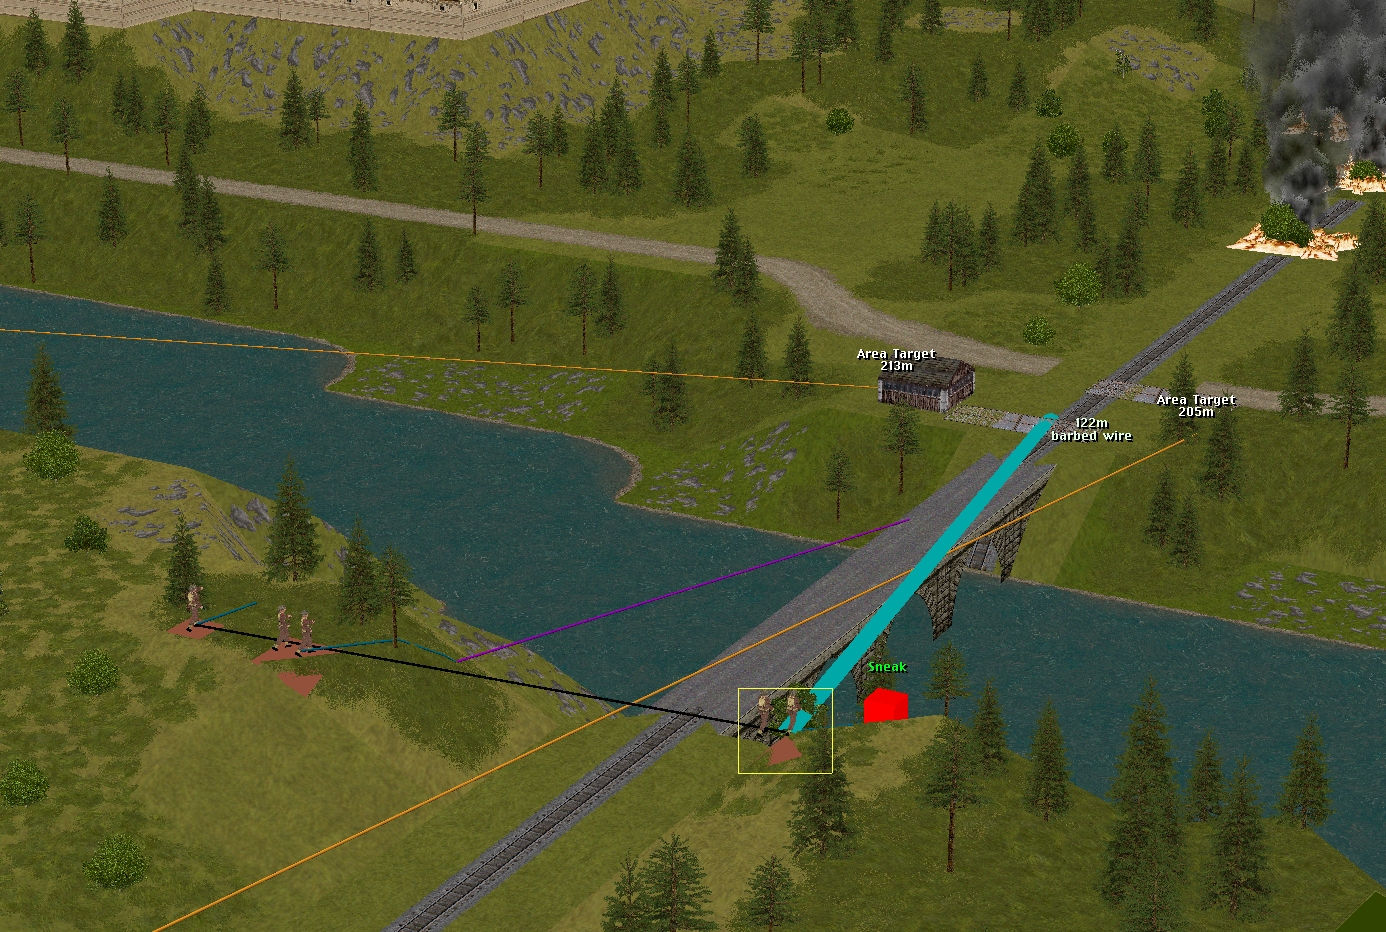
Merry and Venison’s two half teams can see the 3, 3, 5 building, and the two barbed wire entanglements from their current positions.
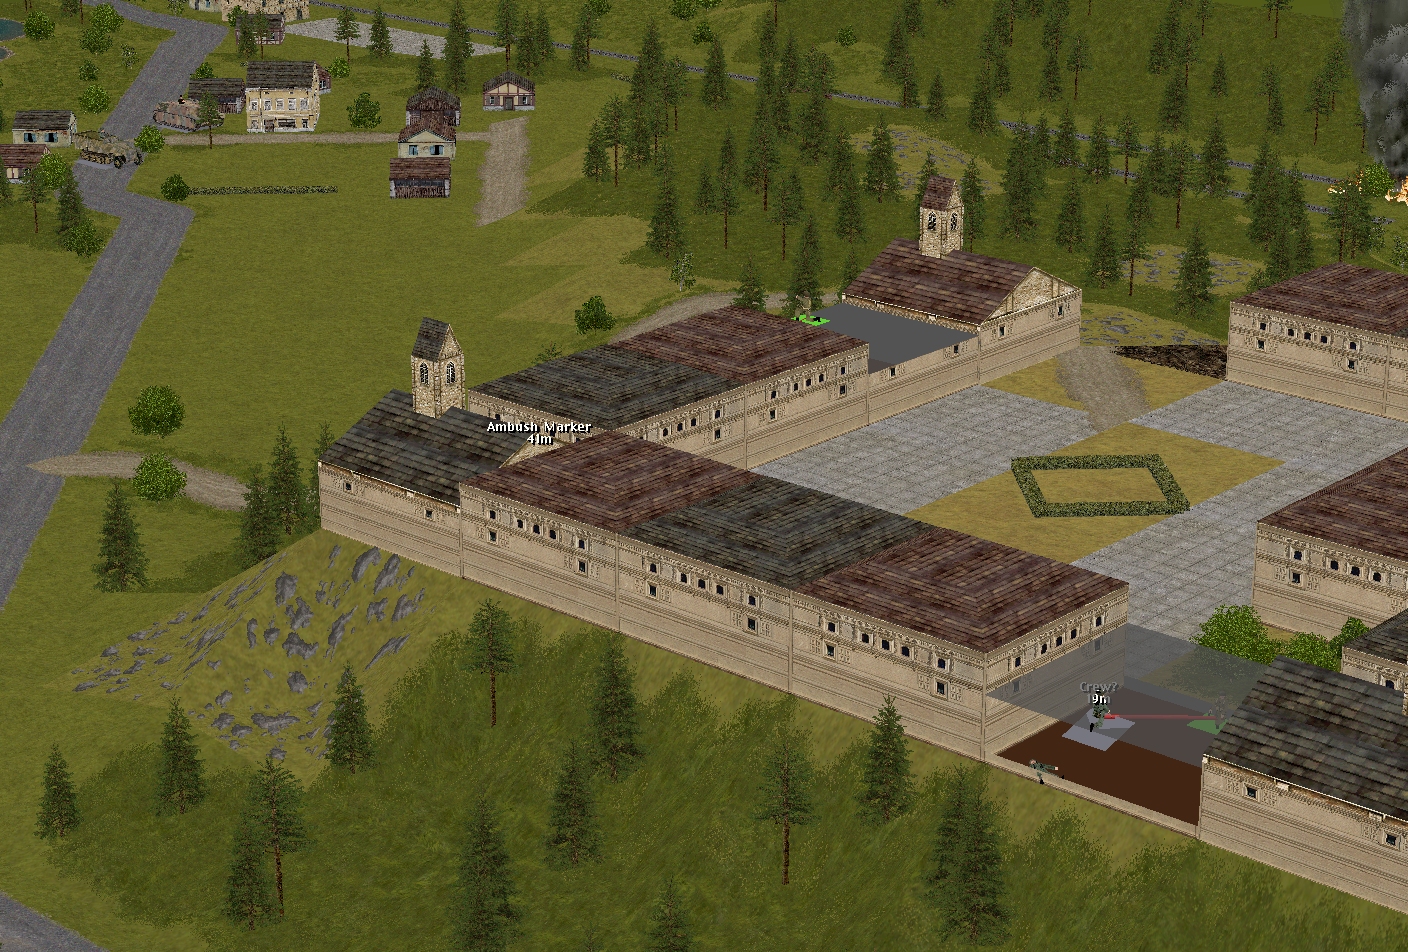
The Jagdpanzer and the halftrack in the village didn’t move in Turn 3.
Neither did the scout car.

Turn 4 orders here, please. Commenters are cordially invited to suggest moves for the following five unit groups (First come, first served. A maximum of one unit group per commenter. I’ll try to execute the turn as quickly as possible after all orders are in.)
(See screenshots for unit locations)
****anyone****
– Corporal Much’s Humber scout car
– Corporal Fletcher’s M5A1 halftrack + Sergeant Venison’s rifle squad + Lieutenant Merry (Four-man platoon HQ, Venison’s boss)
****subscribers only****
– Captain Hood (Six-man company HQ) and Lieutenant Tuck (Two-man spotter team for a battery of 25-pounders. 120 rounds)
– Sergeant Scarlet’s Daimler armoured car
– Captain Dale’s party (Six POWs armed with pilfered rifles and pistols) + Corporal Whitehand’s team (Two POWs armed with a pilfered Panzerschreck)
Please start all order comments with ‘ORDER’ and any later revision comments with ‘REVISED ORDER’. This will help me distinguish firm instructions from suggestions and advice.
I can’t speak to others’ rationale but I’m inclined to believe the propaganda that we’re only facing schoolboys, old men in bath chairs and Mad King Ludwig’s stuffed Potsdam Giants; armed with nothing more than letter openers tied to broom handles.
ORDER: Venison’s northern Fire Team
SNEAK from 2,2,5 onto the bridge at 2,4,4
ORDER: Lt Merry
Remove ‘hold fire’ command
SNEAK south to replace Fire Team 1 at 2,2,5 with view of cabin and foxholes
Sort-of Order: Fletcher’s halftrack
Pull your finger out!
I’ve heard their fearsome K9 unit is just two miniature dachshunds dressed up in fool’s caps. Apparently all it takes is a nibble of bratwurst and a tummy rub for them to switch sides, so I’d have those field rations within reach.
KIND OF ORDER:
No new orders for Dale and his men or the Whitehand duo.
(NON)ORDER:
No new orders for Hood or Tuck.
ORDER: Cpl Much – Reverse to 34, 2, 2.
Fast move via 17, 3, 4. 17, 1, 2 and 9, 2, 1. Stop @ 1, 3, 5.
Also kind of ORDER:
Scarlet to provide fire support for the rail bridge crossing.
(He’s already doing this, and since I’m writing this after some 4am EST baby maintenance, I suspect the turn may already be in progress, in which case there’s no need to change anything.)
Just checking, is it possible to make small adjustments to the bombardment location without incurring a full spotting delay?
Yes. If, for example, Tuck shifted his aim point to the middle of the western barbed wire entanglement at the start of Turn 4, the bombardment would still begin at the beginning of Turn 6.
Dear Commanders,
Some very good news – Sgt Scarlet’s original commander, M.I.A since turn 2, has very recently welcomed a new arrival to the Fishbreath household.
If anyone has a baby chair suitable for a Daimler armoured car please get in touch.
A new recruit! Congratulations to Fishbreath and family. I was already tooling around with a 386 by age 6 or 7, so I think we can sign up Fish Jr to 2031’s CCM.
Thank you, gentlemen! The little lady has already moved into a command role in the household, so I have no doubt she’ll be issuing orders in some future communal Combat Mission before I know it.
Congratulations!
Presumably too early to tell if she prefers piston aircraft (Neeeeyoww) to steam locos (Chuff-chuff-chuff).
Going by her noise machine preference, the rhythm of a good steam locomotive is probably more up her alley at the moment.
As an aero engine guy myself, we’ll see if her tastes change over time—although steam is about the only kind of rail sim I can really appreciate, since there’s a little more to do with my hands.
Now, would any CMBO veterans know if I need to do something further with Dale to give his half-dozen the best odds? Some kind of “take a deep breath and remember all that childhood practice at the farm in Iowa, plinking tins at 80 yards” command? Or do we just let them do their thing?
I’m not a veteran but would advise you let the tac A.I do its thing, any further intervention at this stage would risk confusing it.
The alternative – a rush up the staircase would entail moments when you are not firing or not firing very accurately while the M.G was able to work unhindered – not recommended.
Thanks, very helpful. I thought that might be the case.
Commanders,
I think we should attempt a crossing of the rail bridge this turn with an infantry half team. If nothing else it will draw fire and allow accurate return fire including a future arty strike. Hopefully casualties can be minimised by using the armoured car and half track to provide suppressing fire during the crossing.
Any thoughts/comments?
I like that plan. We have a lot of weight of fire behind the rail bridge, and haven’t yet heard anything back; between the halftrack, armored car, and incoming artillery, I think we may be able to push ahead with some success.
That also leaves us in position to support a push across the road bridge once the first batch of reinforcements arrives.