
Revered race sim Grand Prix Legends turns twenty-five today. To mark the occasion I’m publishing an Open October submission from long-time reader Colonel K. Beyond the break you’ll find the good Colonel’s step-by-step guide to installing, configuring, expanding, and modding one of Simulatia’s crown jewels.
The author is keen to stress he has only been playing the free (for-all-intents-and-purposes) GPL for two months, and doesn’t drive with all realism settings maxed out. As he uses a gamepad and competes exclusively against AI drivers, beginners with questions related to multiplayer or setting up wheels, will need to seek answers elsewhere. Over to you, Colonel K…
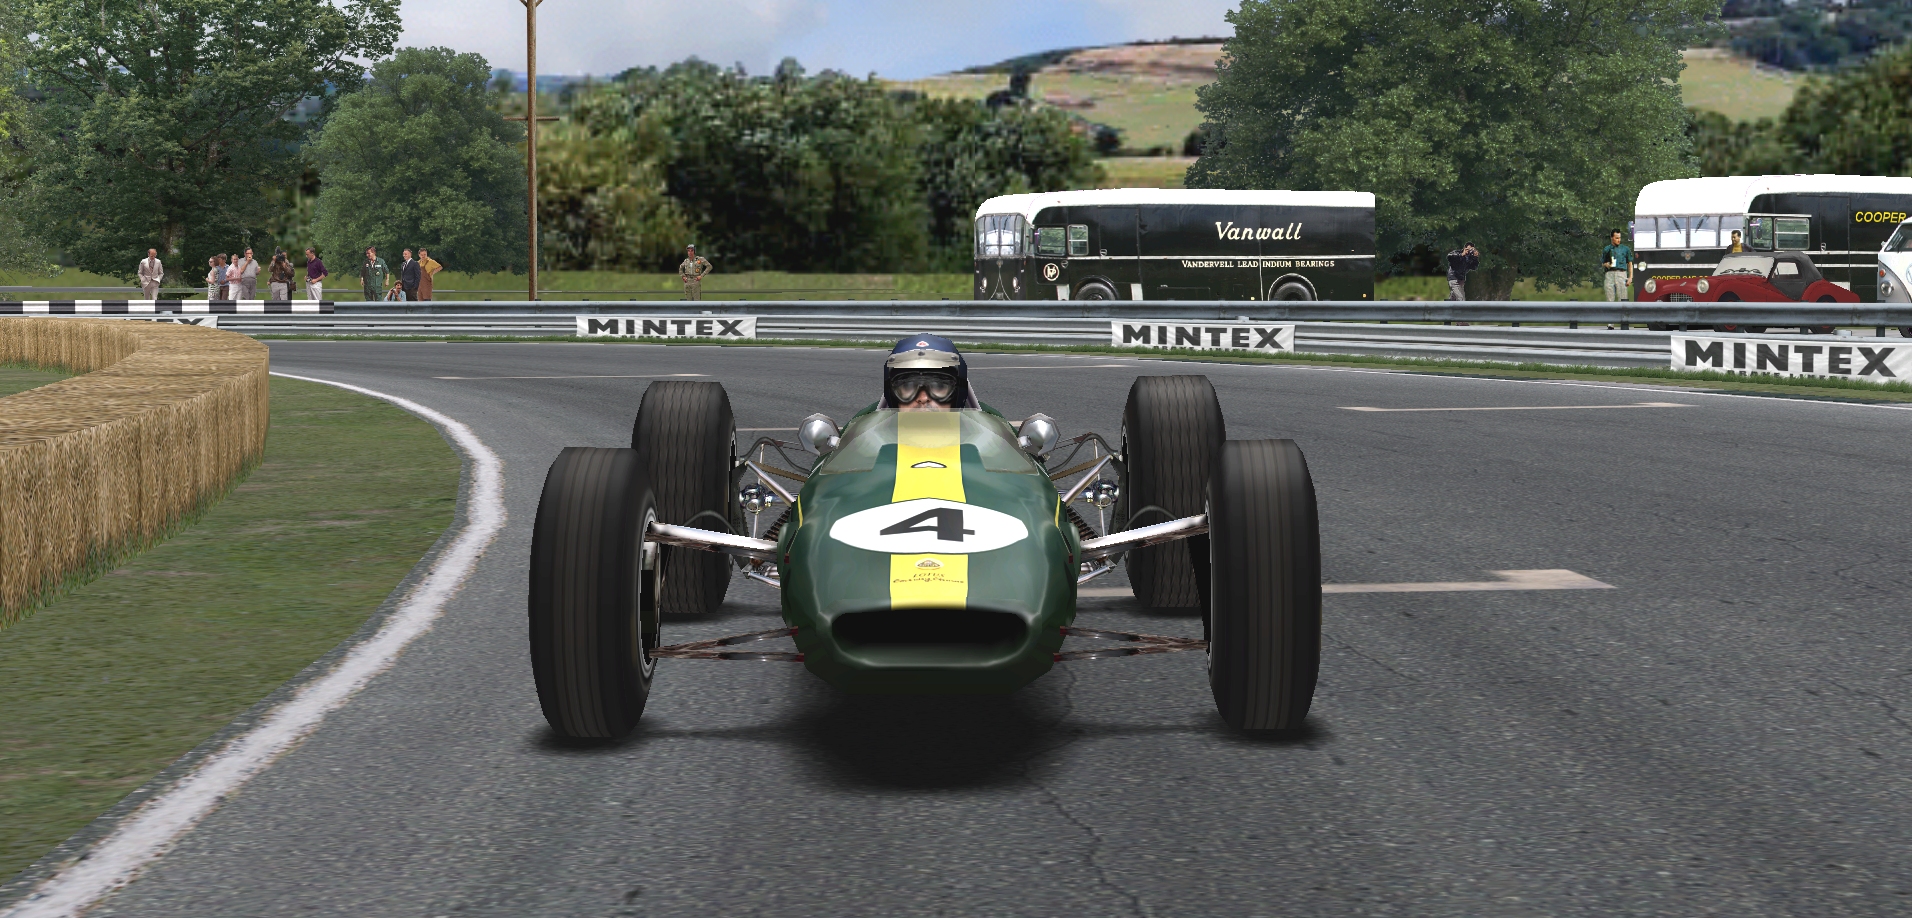
“A writer with talent would begin a guide like by saying something inspiring. I’m afraid you’ll have to make do with me pointing out that GPL has bags of personality, and driving flat out around the banked 180 degree turns of Monza 10k is an experience difficult to articulate.
Originally a simulation of the 1967 Formula One season only (modders have greatly extended its reach during the past quarter century), the sim has several advantages over newer games set in more modern eras. These include easier recoveries when you’ve gone off, and plenty of trackside detail which helps with spatial awareness.

As far as I’m aware, the free GPL 2020 Demo is compatible with all of the sim’s 3rd party content. The only catch is you will need to be comfortable with handling files and folders, and editing .ini files, in order to enjoy the wealth of add-ons.
GPL was made to run at 36 frames per second, and will doggedly do so (Modern hardware can run old games at hundreds if not thousands of fps though there’s a strong chance of some game physics going awry if you do – it’s recommended to limit fps when playing other old games). There is a patch to run at 60fps (and a newer one that reaches 144) but it has issues with altering AI behaviour; consequently it’s only recommended when chasing lap-times solo, or racing other humans online.
— Installing the GPL 2020 Demo —

1) Download from http://gplworld.de/en/grand-prix-legends/gpl-2020-demo
I used the 7-zip version. I have no particular recollection of unpacking it, so hope it should be equally painless for you. Wherever you install it, be aware that add-ons will add numerous gigabytes – I’m approaching 12GB. Mine is in “G:\GPL 2020 Demo” and that’s the path I’ll be referring to.
2) Peruse “GPL 2020 Demo Instructions.pdf” in your install folder.
3) Download the 4GB Patch from https://ntcore.com/?page_id=371
It allows 32-bit applications to access twice as much memory, obviating problems with large tracks and high-resolution textures.
4) Apply the 4GB Patch to BOTH “gpl2020demo.exe” and “gpl.exe”
5) If you used the 7-zip version like me, add a “gpl2020demo.exe” shortcut to your desktop.
— Configuring the GPL 2020 Demo —


1) Double-click the shortcut.
If you’re unlucky, you’ll get a black screen and crash back to your desktop. Changing the renderer to Direct3D7 v2 will hopefully fix it. From your GPL 2020 Demo folder go to “rasterizer config files” and then “D3D7” and copy app.ini into the GPL 2020 Demo folder, overwriting the one that’s there. Double-click the shortcut again.
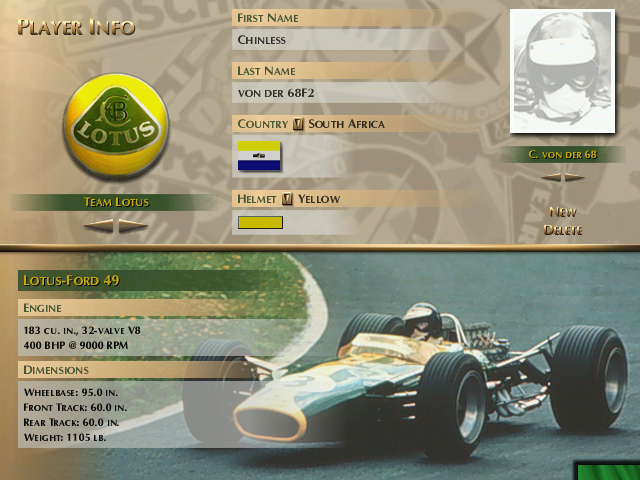
2) Click on ‘Player Info’. This is the screen you will have to return to every time you wish to change cars.
3) Click ‘New’ on the right-hand side and amend the details as you see fit.
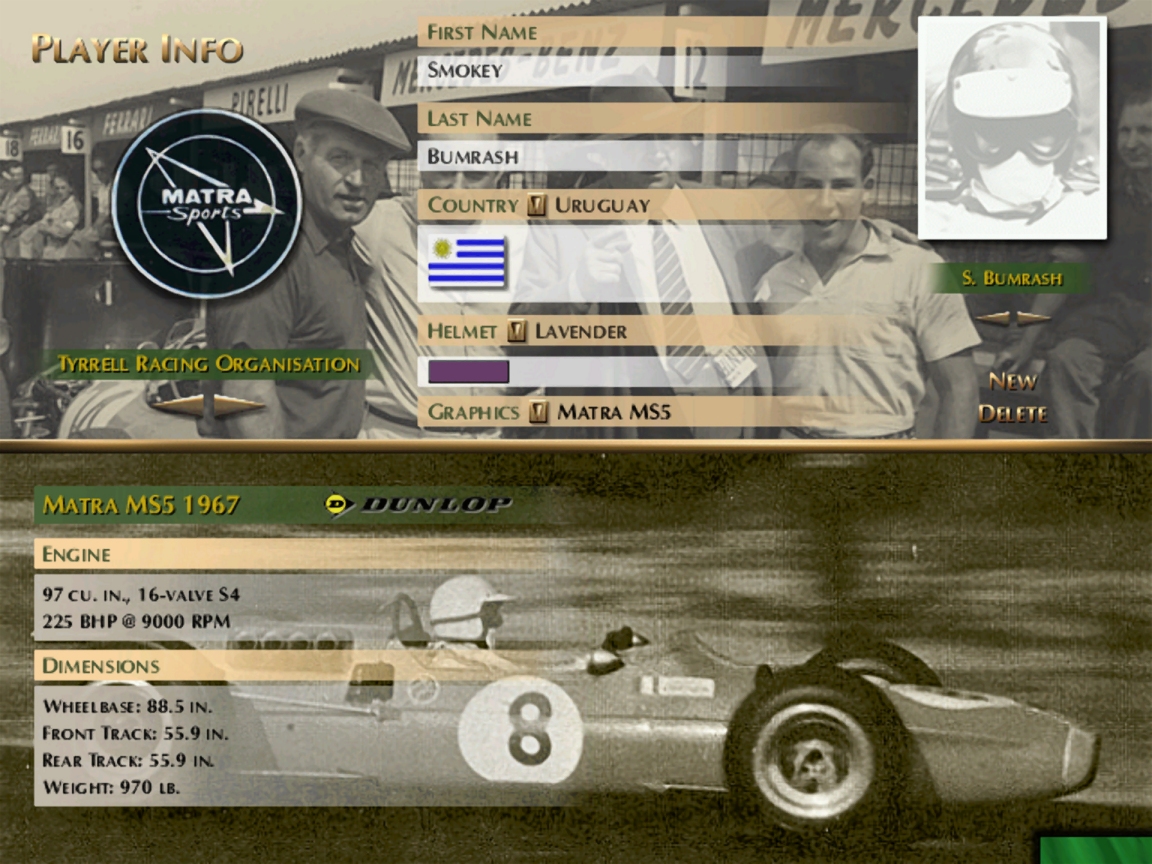
4) Use the arrows on the left to scroll through the available cars. I recommend starting with the Matra MS5 1967, as an F2 car it’s among the least powerful.
5) Click the green flag in the bottom right once done.
6) From the main menu again click ‘Options’.
7) Use the arrows at the bottom to scroll though the options pages.
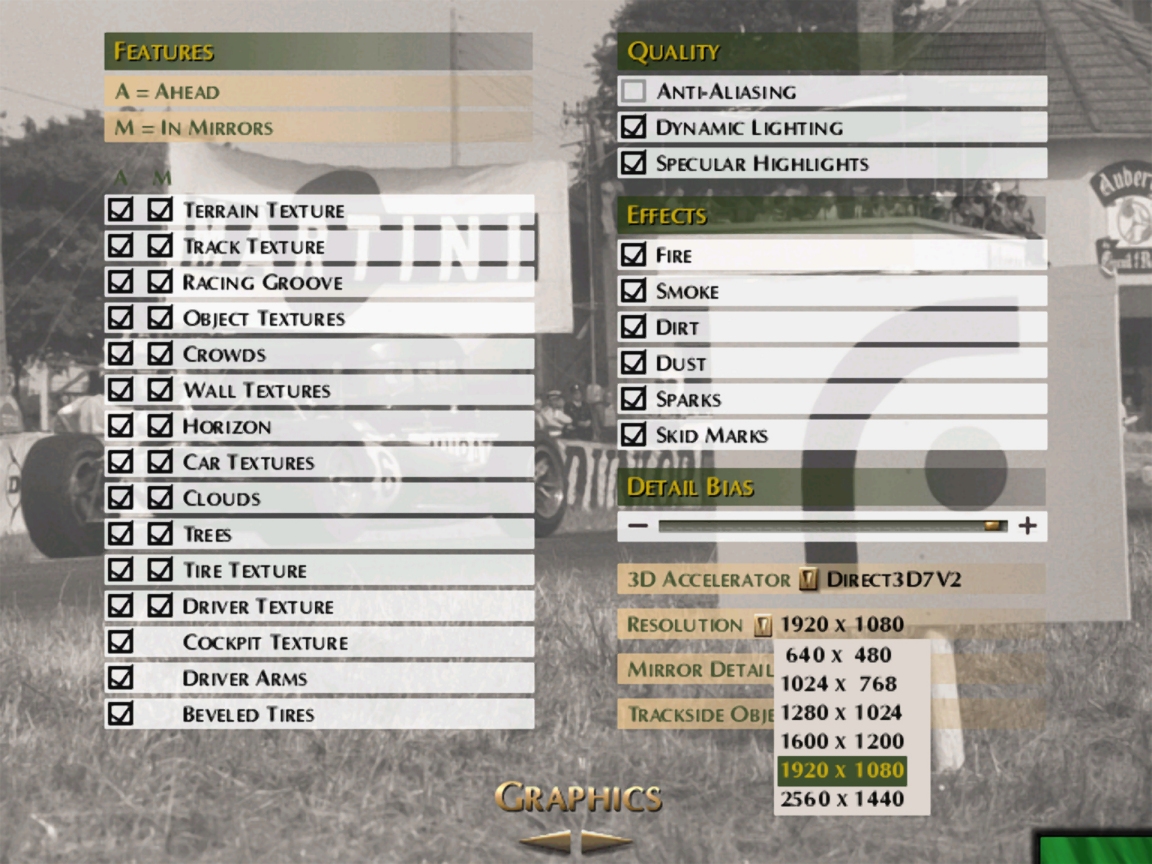
8) Graphics-wise, unless you’re using an absolute potato, you can leave everything checked on. For a first run, leave the ‘3D Accelerator’ and ‘Resolution’ at their default.
9) Under ‘Sound & Gameplay’ deselect braking and acceleration help. When starting out I’d leave automatic gear shifting on.
10a) Now for ‘Controls’. If using a gamepad, put ‘Steering Linearity’ all the way to the right, ‘Non-linear’.
10b) Click ‘Calibrate Joystick’ and move sticks/triggers through their range. Click ‘OK’
10c) In the ‘Set Controls’ section assign buttons/sticks/triggers as you wish.
10d) It may be necessary to go back and forth to ‘Calibrate Joystick’ for settings to take. I have the throttle set as my right trigger; it works as an axis, but for some reason it’s displayed as being a button.
10e) [Editor’s note: “No gamepad or wheel? Steering GPL rides with key presses isn’t ideal, but practise and respectable times are possible. Mouse-steering is another option. You’ll need vJoy and another free gizmo called MouseToVJoy to get it working.”]
11) Return to the Main Menu and use the arrows at the bottom to change race mode. Select ‘Training’.
12) Always ensure the bottom option, in this case ‘Grand Prix’, is selected as the car type. So far as I understand, selecting one of the trainers will keep the 3D model of your chosen vehicle, but it’ll have different performance.
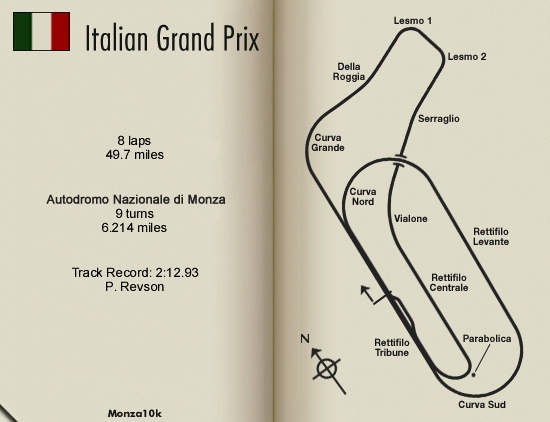
13) Use the arrows on the right to scroll though the available tracks. Clicking in the bottom right corner of the cover-page should open it to show the track layout. When ready, click the green flag in the bottom right to move on to the Track Session menu. This is when the track and its graphics get loaded, so there might be a delay.
14) Click ‘Car Setup’ at the bottom of the screen (YOU WILL NEED TO DO THIS WITH EVERY NEW COMBINATION OF CAR AND TRACK!)

15a) If using a gamepad, change the ‘Steering Ratio’ in the top right to 25:1.
15b) To make handling more benign, raise the ‘Static Ride Height’ to 4.5 inches and substantially reduce the ‘Roll-bar Stiffness’, both front and rear.
16) Click the green flag. You will be forced to save the profile under a new name, and return to Track Session menu.
17) Finally, it’s time to drive. Click the green flag once more.
18) You should now be behind the wheel of your chosen car on your selected track. If you need to recover from damage, rolling, or track departures, then hit Shift+R. This only works when stationary, so you may have to wait while you finish skidding along on your helmet! Once you’ve had enough it’s Escape followed by Enter to get back to the Track Session menu. The arrows in the lower mid-left will turn the page to show your lap times.
— Fine-tuning Graphics —
I hope you’ve been able to launch the game, and, after a few goes, maybe even completed a lap.
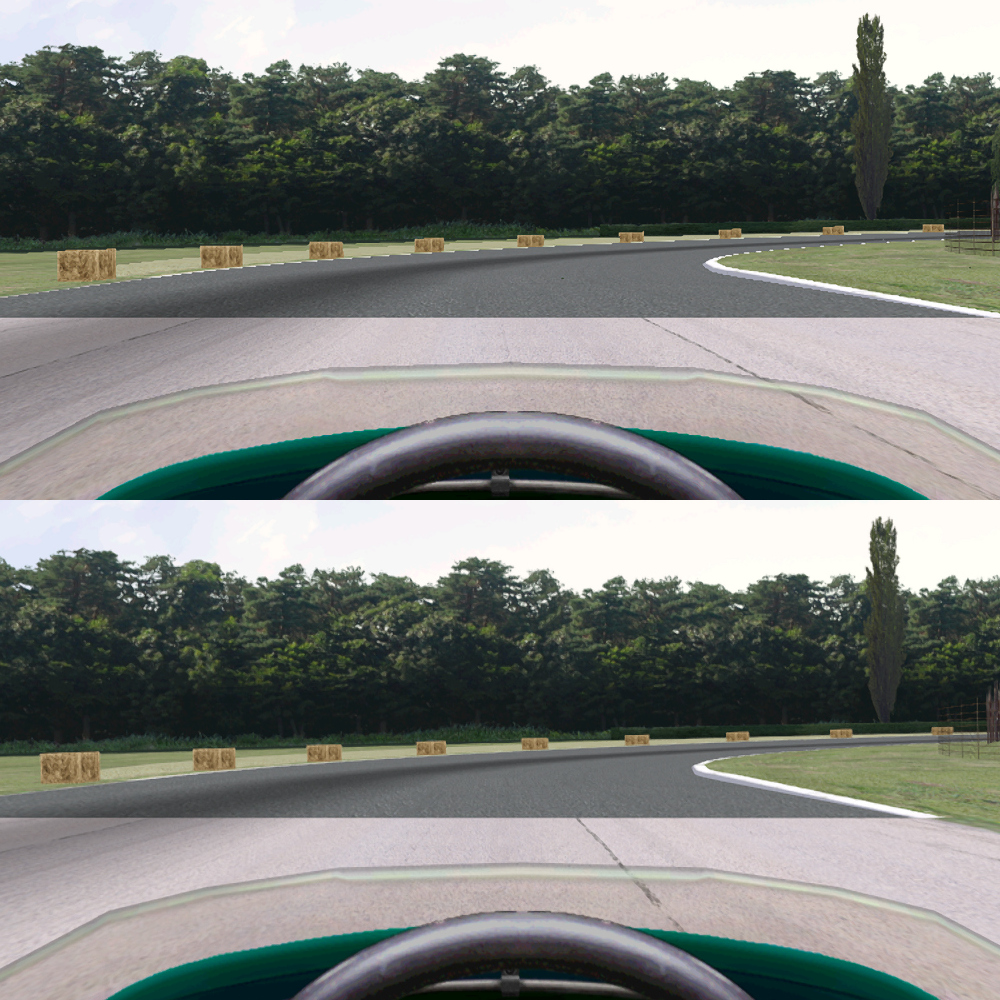
A) Widescreen?
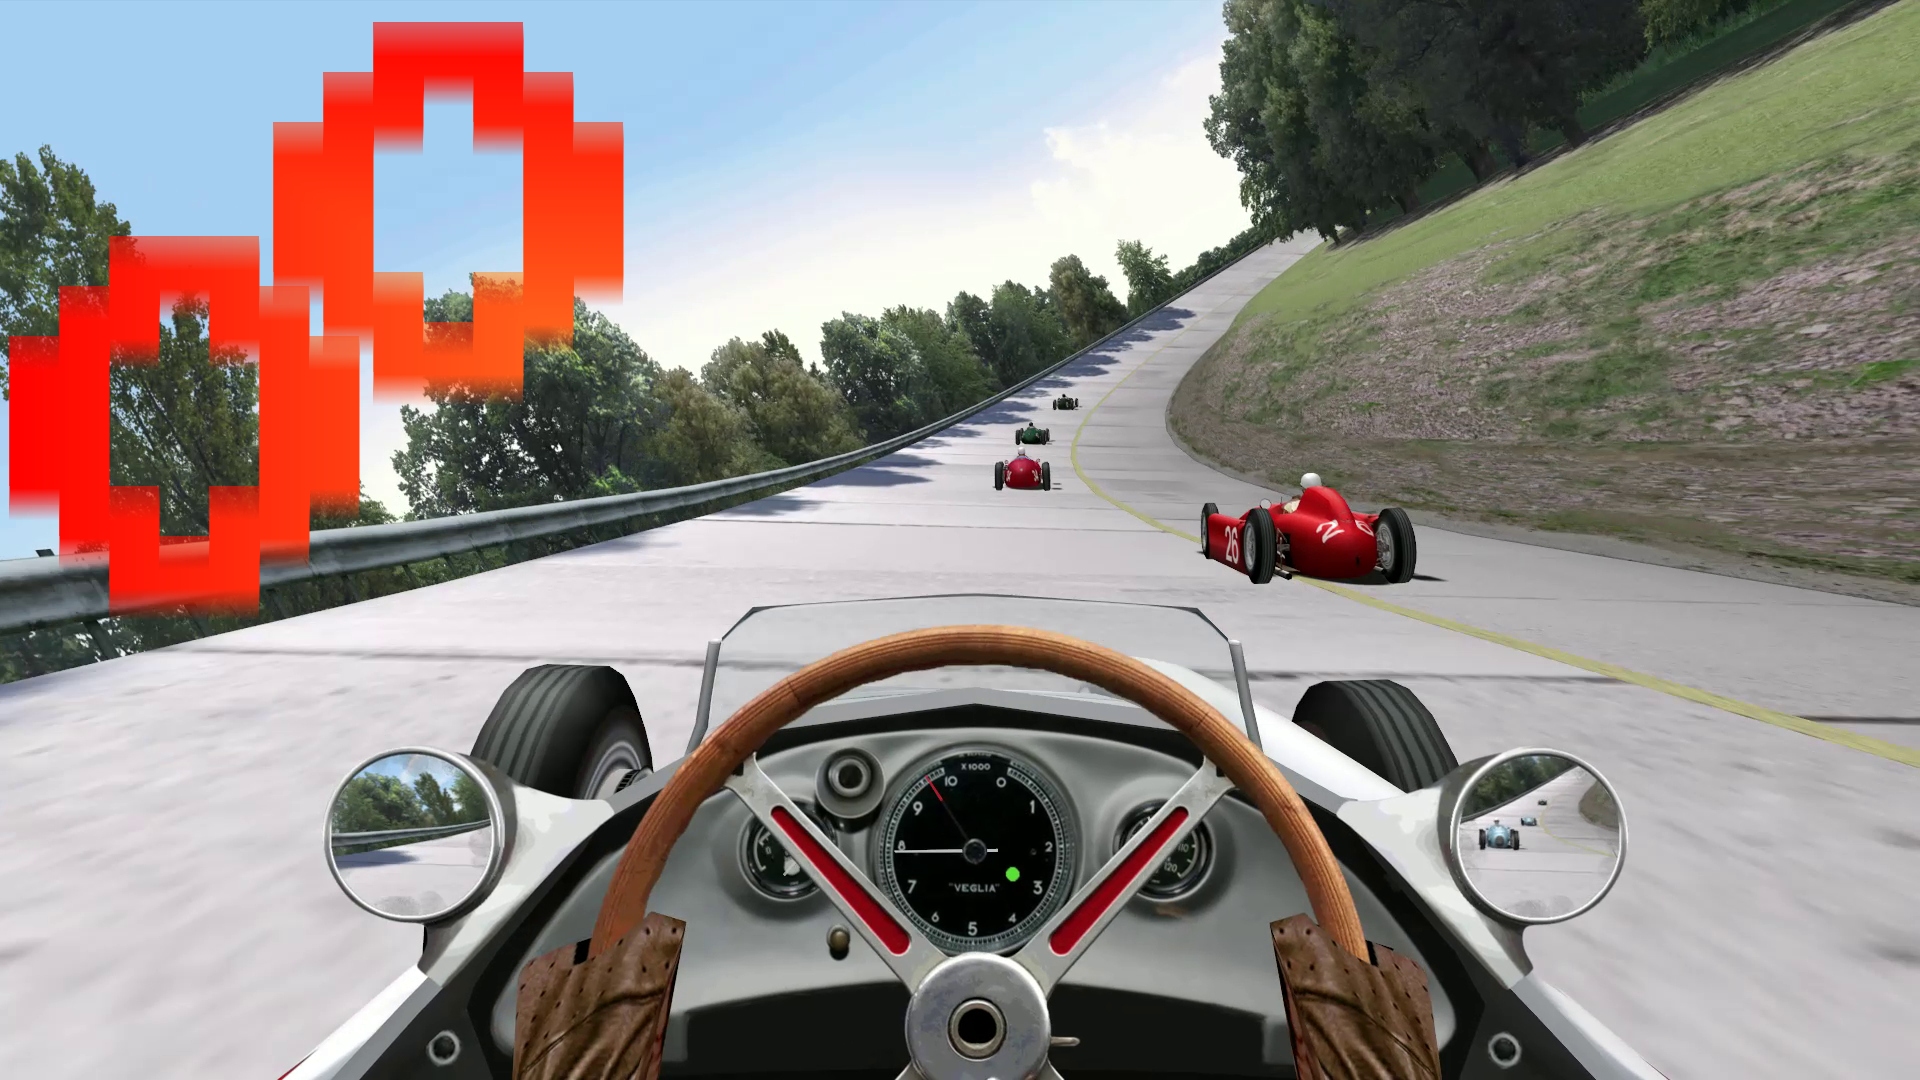
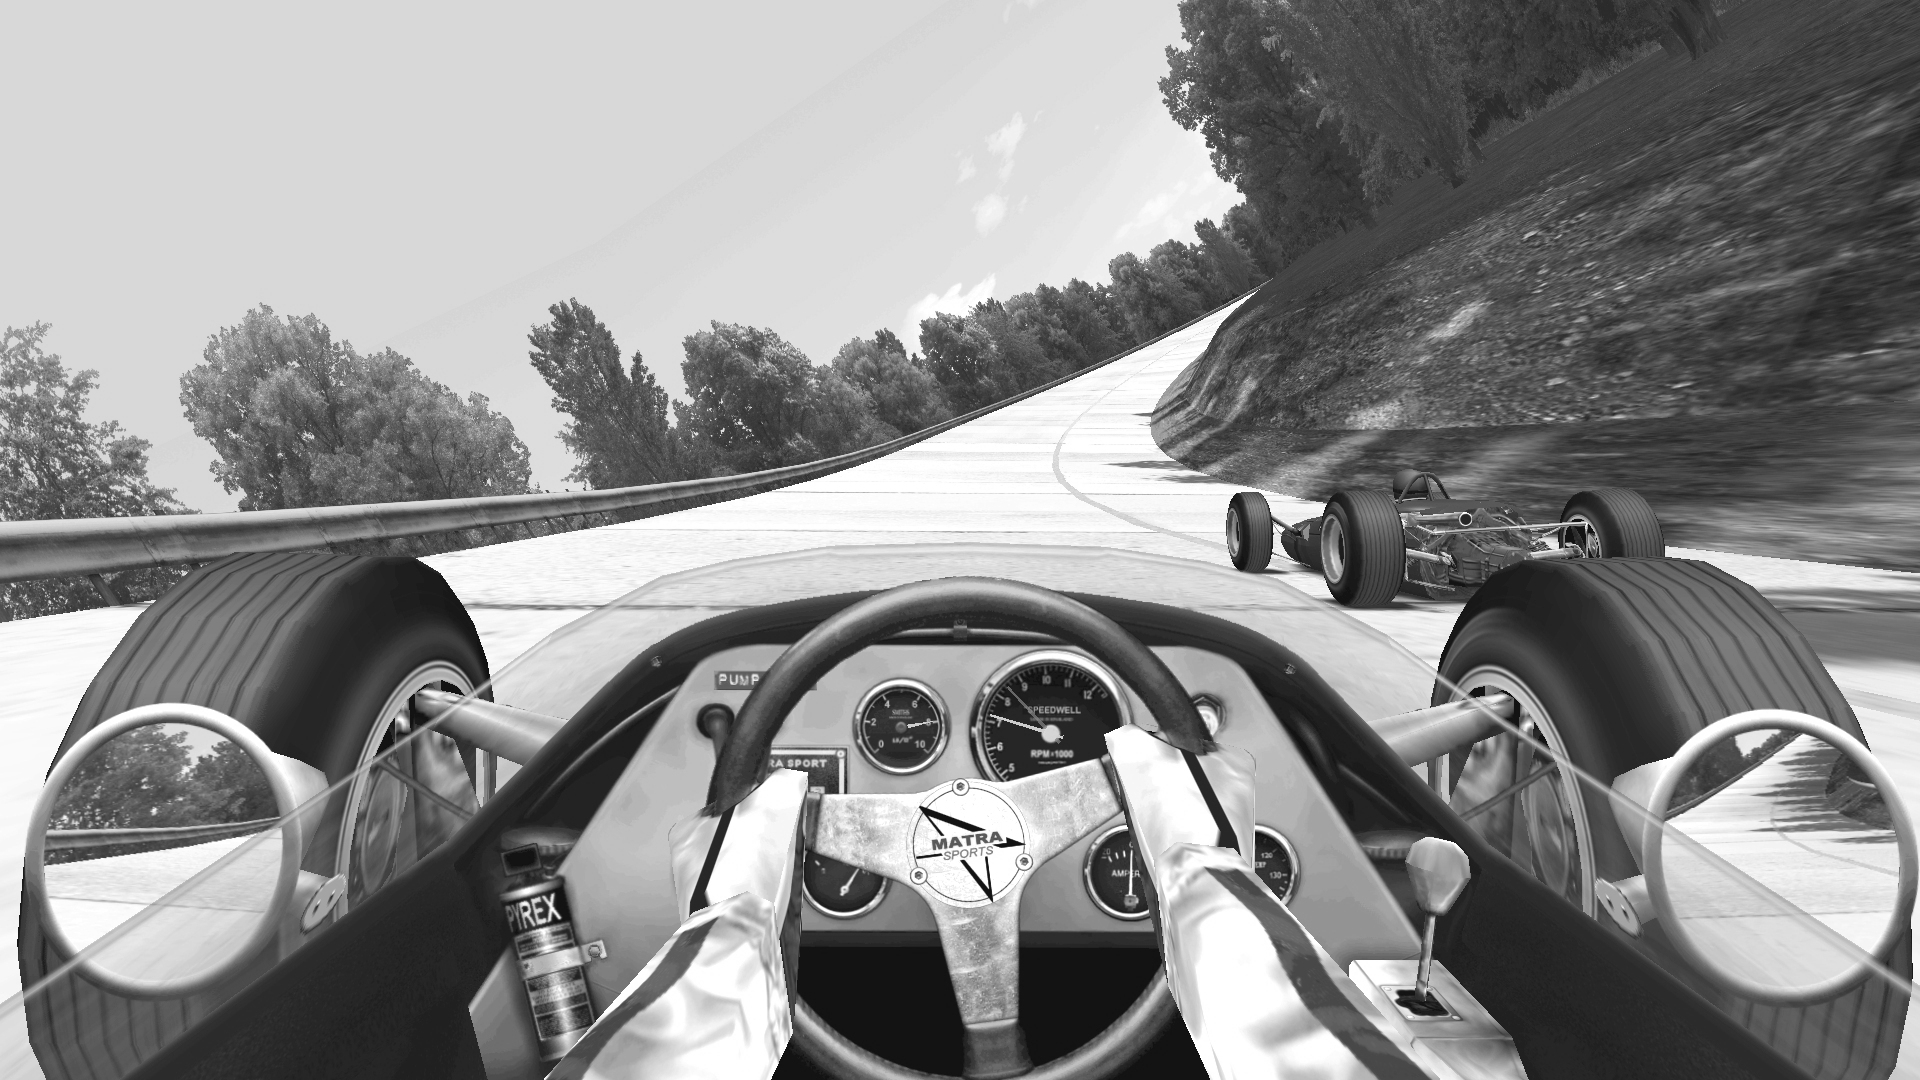
For computer monitors of the time, GPL was intended to display at a 4:3 aspect ratio, as you should have seen on the menu pages. Like old TVs showing films, the racing part of the game was ‘letterboxed’ with black bars at the top and bottom of the screen. The GPL 2020 Demo includes a NoLetterbox patch. If you choose a 4:3 resolution in ‘Graphics’, you will see more of the sky and car’s cockpit that you’re sitting in. Select 1920 x 1080 and you’ll get a 16:9 resolution that should fill most normal widescreens.
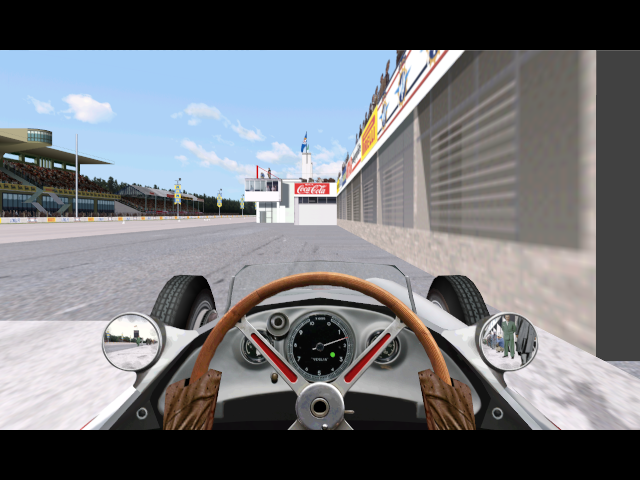
^ How GPL used to appear

^ GPL 2020 Demo in 4:3

^ GPL 2020 Demo in 16:9 Widescreen
1) Open the GPL 2020 Demo folder, find Core.ini, right click on it and select Edit.
2) In the “[RasterV2]” section there should be two lines: Width and Height, both currently set to zero.
3) Change these to a widescreen ratio: Width= 1920, Height= 1080
4) Save your edited Core.ini
5) Re-launch GPL 2020 Demo and select Options from the main menu.
6) On the Graphics page open the resolution drop-down menu; your widescreen resolution should now be available.
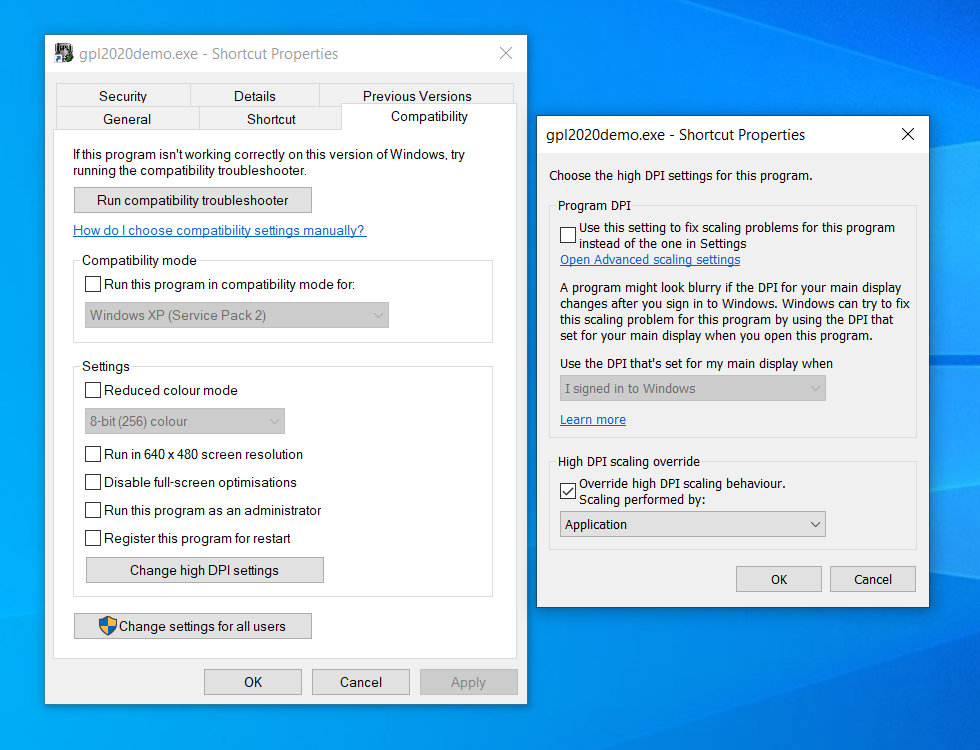
It is possible that your view of the car will not be centred (ie. you cannot see both wing mirrors equally, the vanishing point is shifted), it happened to me. This is caused by having scaling at a figure other than 100% – I like my text and icons larger, so have it set to 125%. This can be countermanded:
- right-click the GPL 2020 Demo desktop shortcut and select ‘Properties’.
- click on the Compatibility tab at the top, then “Change high DPI settings”.
- check the box “Override high DPI scaling behaviour”.
B) Anti-aliasing?
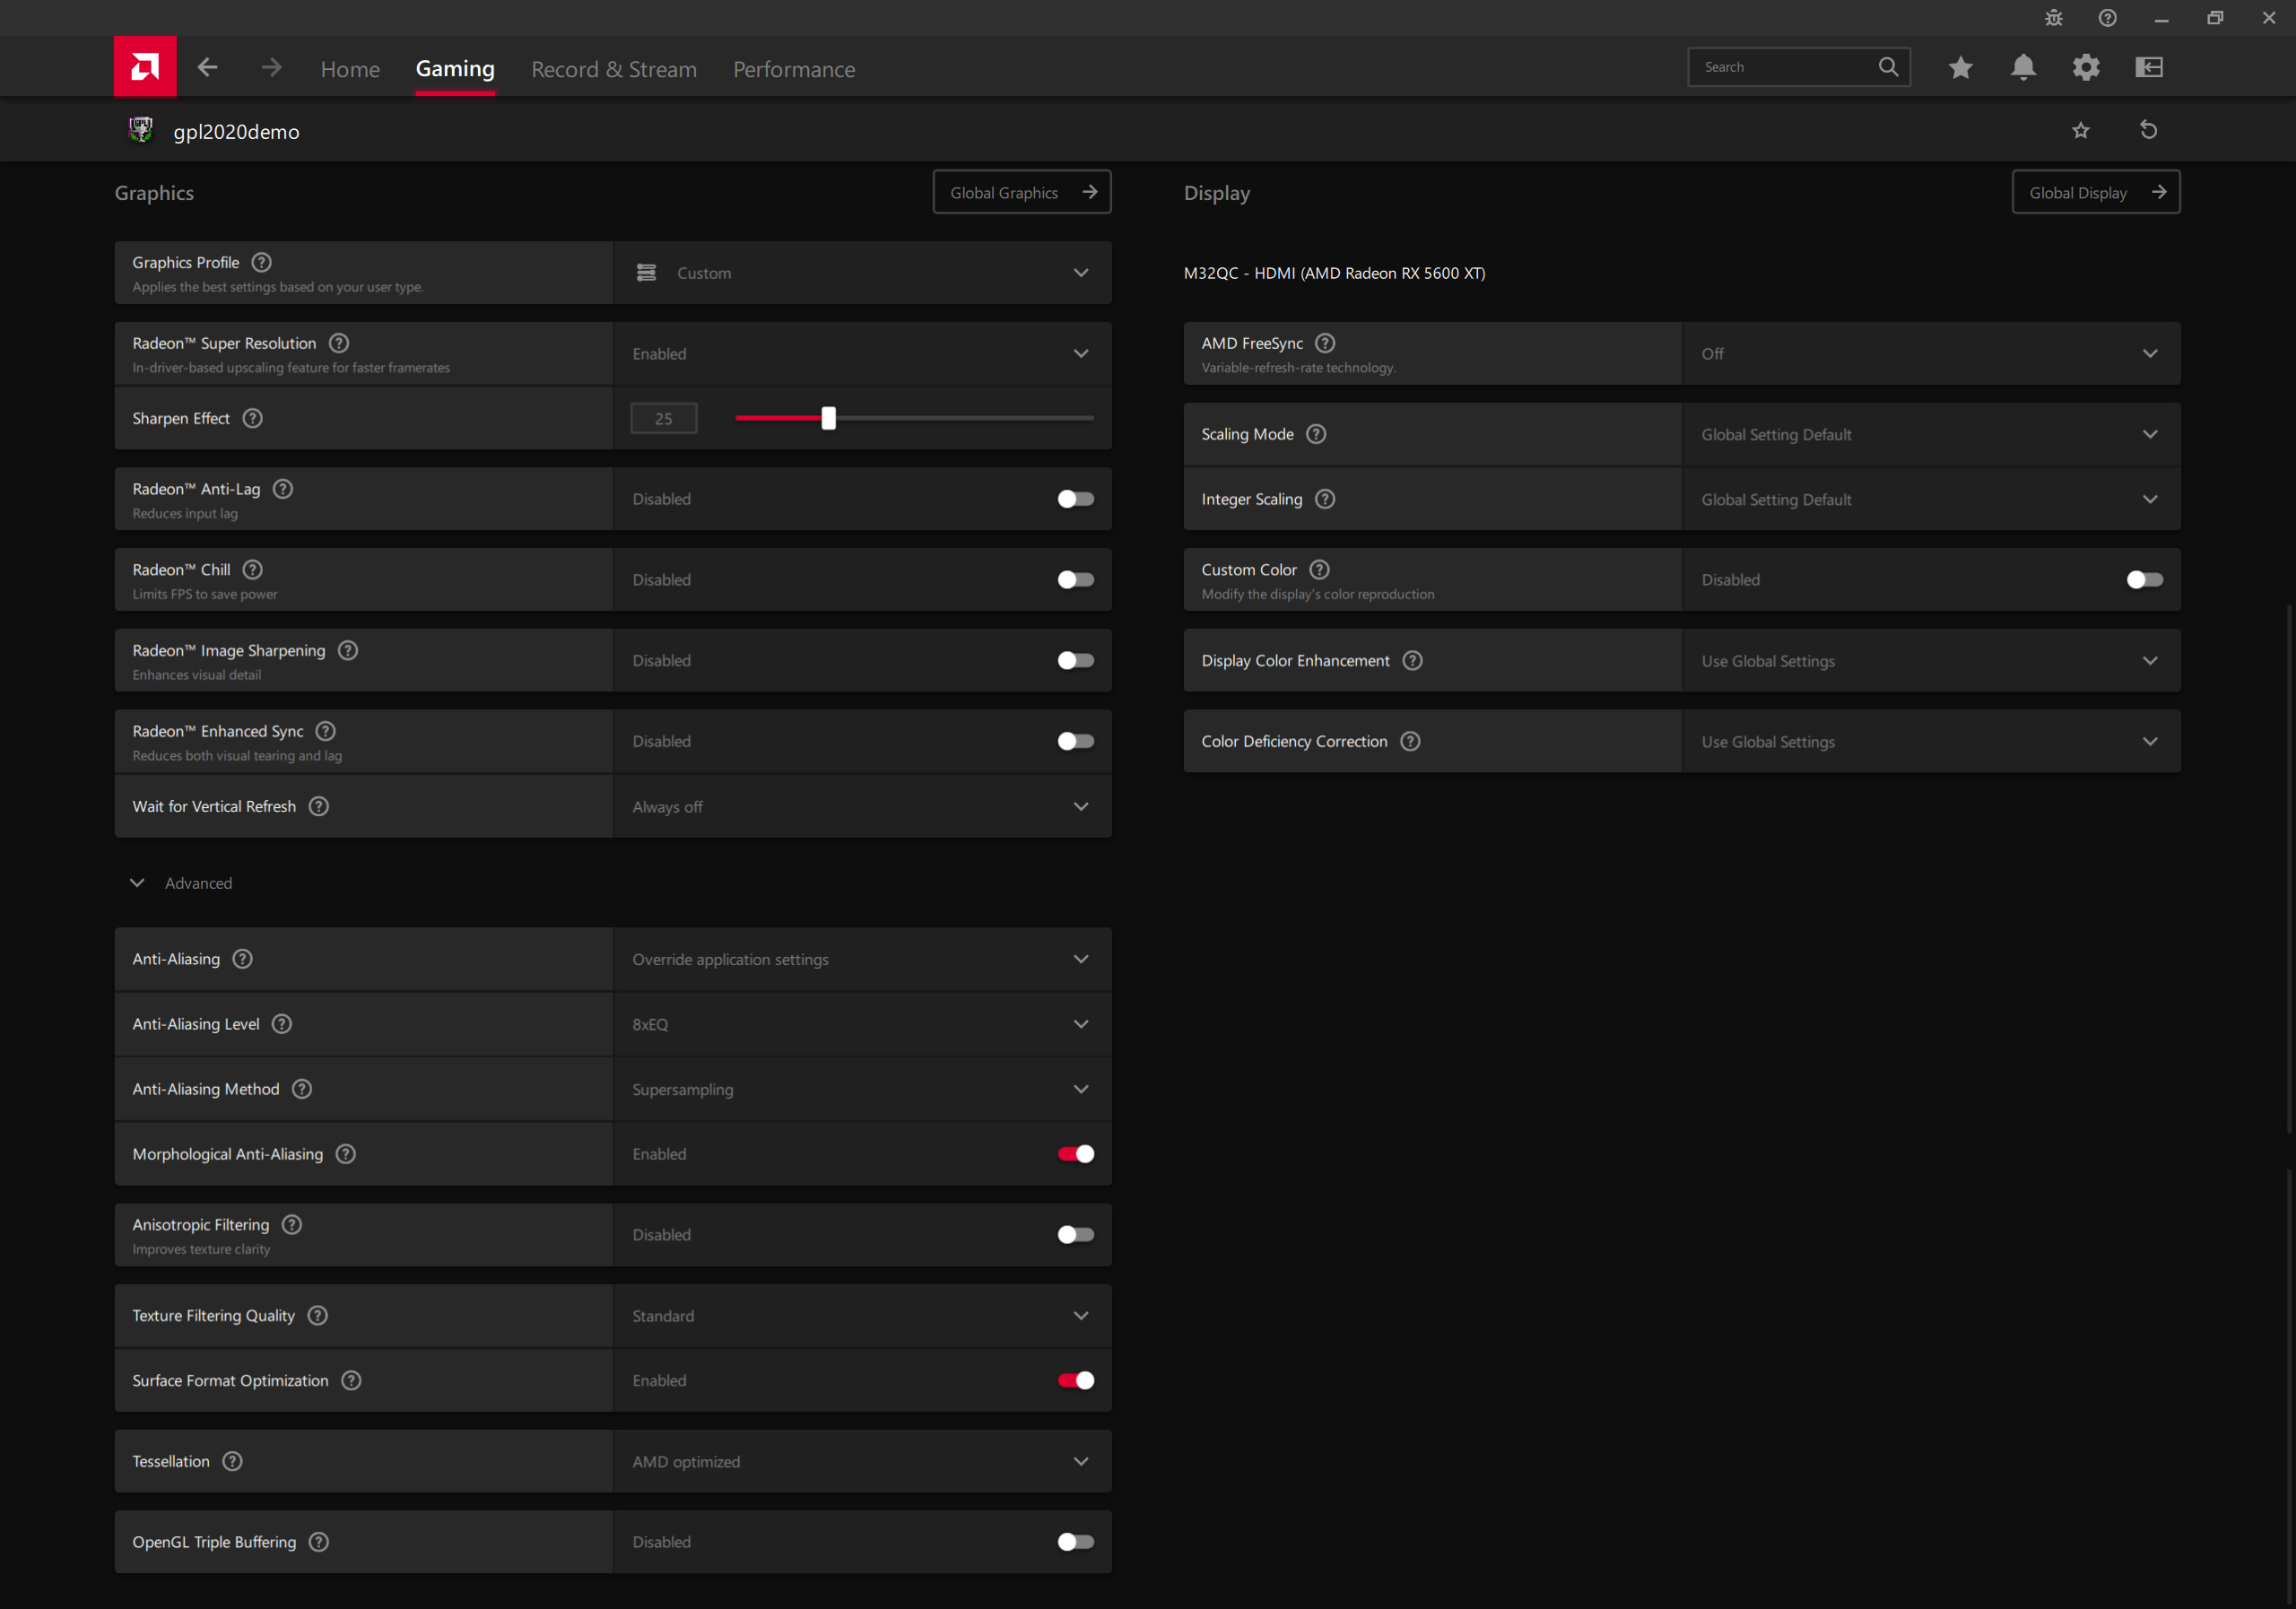
As seen earlier, the Anti-Aliasing setting in Graphics Options is greyed-out. To get it to work you’ll need to use the software package from your GPU provider that installed alongside with the driver. I have a Radeon card and so use ‘AMD Software: Adrenalin Edition’. The principle ought to hold for nVidia, but I have no experience with the specifics.
AMD’s article: https://www.amd.com/en/support/kb/faq/dh3-012
1) Launch ‘AMD Software: Adrenalin Edition’ and click on the Gaming tab at the top left.
2) Your installed games should be displayed, including ‘gpl2020demo’. If it’s not then the three dots in the upper right should open a drop-down allowing you to “Add a game…” Navigate to the GPL 2020 Demo folder and select gpl2020demo.exe
3) The relevant settings are at the bottom in the Advanced drop-down. My settings are show below:
— Adding Tracks —
It’s finally time to add some tracks! The crucial files will be found in the “G:\GPL 2020 Demo\seasons\” folder. They are 67season.ini, LGseason.ini and, to a lesser extent, c18.ini. (I don’t remember if 67season.ini exists in a fresh install of GPL 2020 Demo or if it’s created when you add a track, so don’t panic if it’s not there.) As a rule, third-party tracks have .exe installers, though are typically packaged in zips and rars for sharing on the internet.
1) Unpack the zip or rar to a temporary folder.
2) Run the .exe – the example in the GPL 2020 Demo Instructions.pdf is for the Spa ’67 track and is named TrackInstall.exe
3) The first time you run such an installer, it will ask you to locate gpl.exe. Your system should remember the path next time, but it does occasionally forget. Accordingly, point it at “G:\GPL 2020 Demo\gpl.exe”

4) Make sure ‘Update 67SEASON.ini’ remains ticked. Using the GPL 2020 Demo, you do not need to have the installer update any other .ini files. ‘Replay’s are sometimes included, but these may or may not run depending on the car used.

5) Press ‘Next’ and the track data gets written in it’s own folder in G:\GPL 2020 Demo\tracks\ and the key to access it is added to 67season.ini
Remember those crucial files I mentioned earlier? So far as I understand it LGseason.ini is the list of tracks available for individual races and c18.ini lists tracks for a championship ie. sequence of races. I believe GPL 2020 Demo Instructions.pdf has it the wrong way round. Depending on how you want to play GPL, you should copy that key info into LGseason.ini OR both LGseason.ini and c18.ini.
6) Following along with the example of Spa ’67, open 67season.ini and copy the entirety of the “[Event1]” text.
[Event1]
name=XXVII Grand Prix de Belgique
shortname=Belgian GP
trackdirectory=spa67
month=6
day=18
numberOfLaps=28
startingGrid=5
7) Open LGseason.ini and paste this information at the end.
8) Change the numeral in the “[Event1]” you pasted to read “[Event5]”. Obviously, this iterates by 1 with each track you install.
9) Scroll back up and amend “numEvents=” with this new number, in this case, “5”.

10) Save the updated LGseason.ini
11) Repeat step 7) to 10) for c18.ini if appropriate. Close any open files
12) Time to check it has worked. Launch GPL 2020 Demo and from the main menu choose ‘Best Laps’; your newly added track should be listed at the bottom.

— Installing Mods —


(Disclaimer: I’ve installed considerably fewer mods than I have tracks, so this section is written by someone much less practised.)
The utility needed to run mods is GEM+. This takes gpl.exe and, amalgamating chosen settings, configuration options and the mod’s own physics, produces a modified version with a name in the format GPL???.exe. ??? are three characters that indicate the mod, eg. c55 is the ’55 Mod, cf2 ’67 Formula 2, and 8f2 ’68 Formula 2.
GEM+ is available here: http://gem.autosimsport.net/ and comes as part of a bundle of 4 programs:
- GEM+ 2 – launcher of GPL and GPL 2020 Demo; enables mods (carsets)
- GPL Setup Manager – tinker with set-ups outside of GPL
- iGOR – more commonly used online race lobby, with chat
- WinVROC – (Virtual Racers Online Connection); rarer online service for joining/hosting races, with chat
The version I used is 2.5.32 and relied for some optional features on the now defunct smrz.net.*
1) Download and run GEMPackage_2.5.0.32.exe
2) Install outside GPL 2020 Demo. Mine is G:\GPLSecrets\
3) Ensure indexing is enabled on the drive with GPL 2020 Demo.
4) Check the GEM+ shortcut to see that it runs with administrator privileges.

5) Download your chosen mod. Links to mods are here: http://www.gplworld.de/en/grand-prix-legends/gpl-mods
6) Install the mod. It is recommended to do so as administrator: right-click the .exe and chose ‘Run as administrator’. Quite a few have updates and prettier models; generally these have the same layout of files and folders, so they just need to be dropped into the appropriate directory and let the newer files overwrite the older.
7a). To keep settings/mods/setups organised, it is advisable to create a uniquely named Player for each mod. Run gpl.exe NOT gpl2020demo.exe. (Remember, this is one of the two files to which we applied the 4GB patch after installing the Demo).
7b). Click on ‘Player Info’ and particularize a new character; the car doesn’t matter at this stage. Click the green flag to finish.
7c). Exit: click on the red flag and quit.
8) Launch GEM+ and, without making changes, exit (red flag).
9) Now that GEM+ has initialised, launch it again.
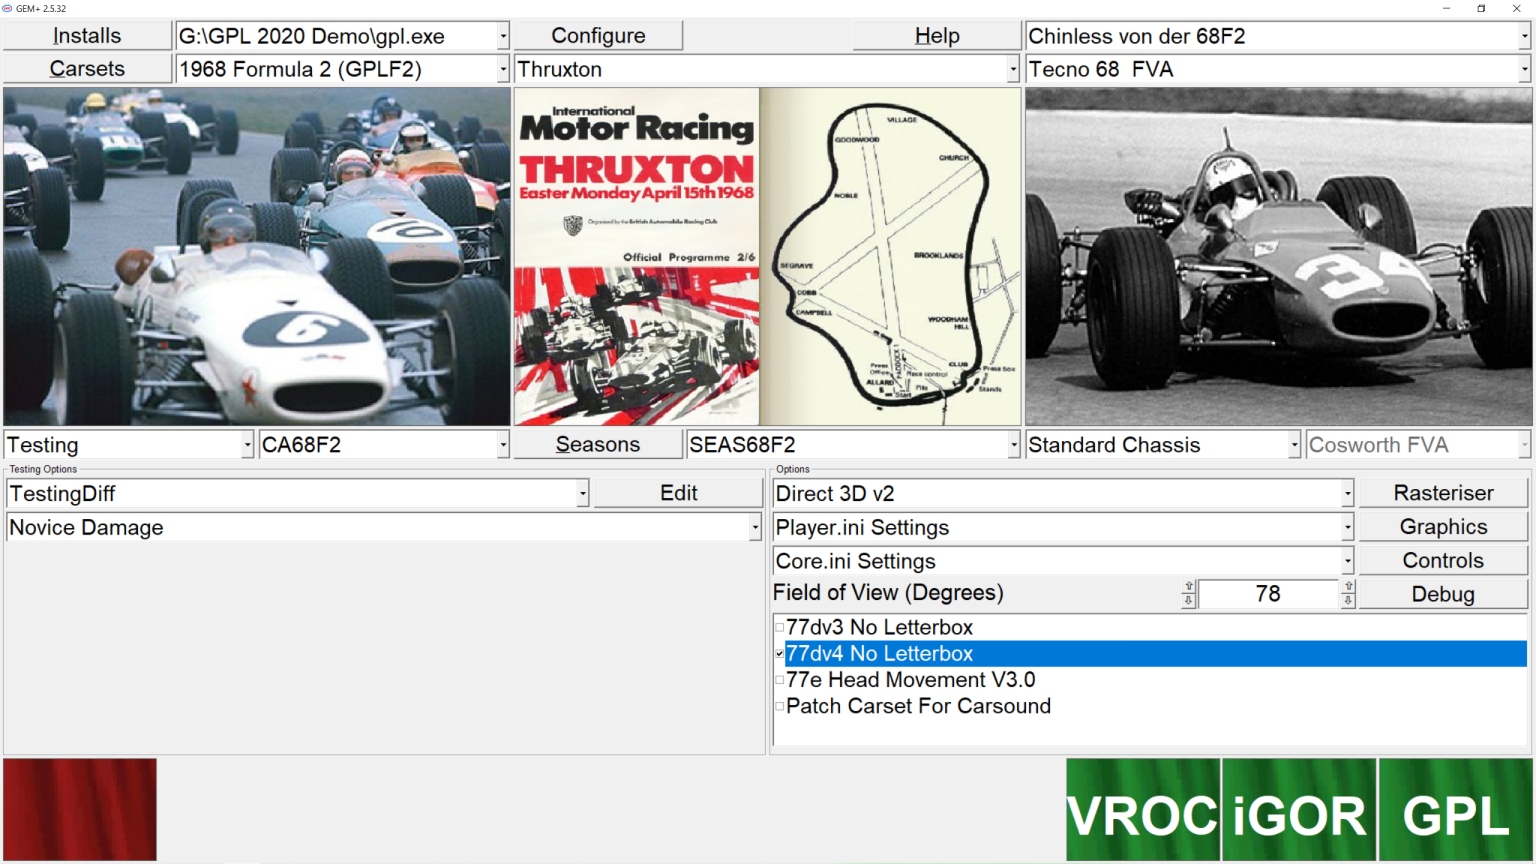
Beginning with the top row…
10) The ‘Installs’ box should be pointing at your gpl.exe
11) Let’s start by configuring GEM+ itself; OK when done.
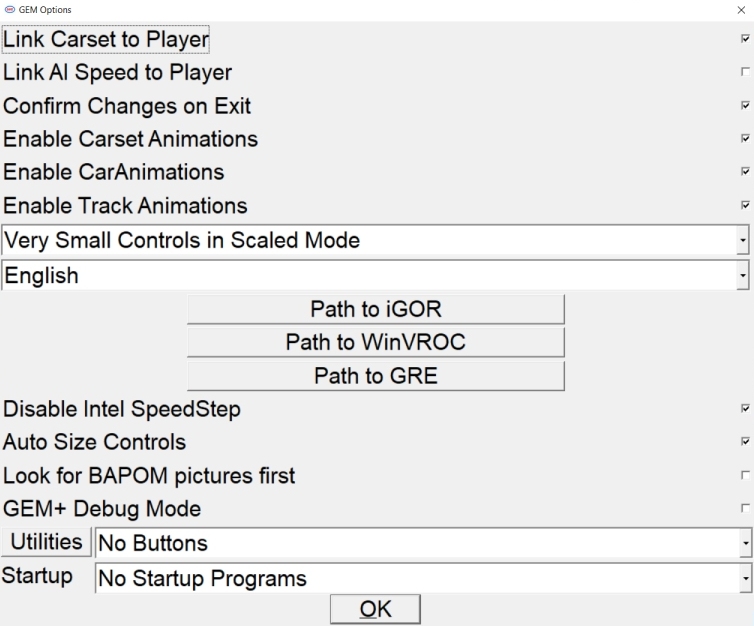
“Link Carset to Player” – ON, so that changing the player changes which mod is active. “Link AI Speed to Player” – OFF, original GPL feature so that AI matched the player. “Confirm Changes on Exit” – ON, so I can discard changes I don’t want to keep if I’ve been tinkering.
12) The top right drop-down list players created through gpl.exe, your GPL 2020 Demo character will not be listed.
Next row down…
13) Click on ‘Carsets’

14) Use the left/right arrows between Inactive/Active Carsets to move your mod to the Active list. It shouldn’t need changing, but ensure the ‘Physics’ are appropriate to the mod; OK when done.
15) The drop-down by Carsets will change which cars are associated with the selected Driver. As we told GEM+ to remember this link, in future changing driver will immediately change the carset.
16) “Installing a mod will add one or more .ini files to the “G:\GPL 2020 Demo\seasons\” folder. The next drop-down shows a list of the tracks that GEM+ believes you have installed AND that are listed in the .ini file indicated alongside the ‘Seasons’ box.”
17) The final drop-down selects the car. NB. These last two just change the first selected tracks/cars. Once you launch a mod, you can still change cars, tracks and race types.
Bottom left…
18) The next drop down is game mode. The settings to try at this stage are Testing or Race. In Testing the further drop-downs are for Car Setup (if one has been created) and Damage Level
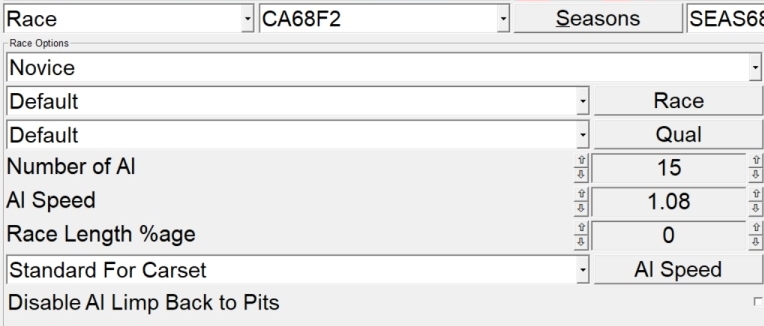
In Race, settings cover race duration/difficulty, car setups to be used for the race and qualifying, and the number of AI opponents. The number next to ‘AI Speed’ affects the AIs’ lap-times: 1 is their natural pace; less than 1 speeds them up; above 1 slows them down. I find 1.08 fun while keeping me vaguely honest.
Bottom right…
19) Immediately below the word ‘Options’ pick the rasterizer that worked for you: OpenGL v2 or Direct3D v2.
20) Now click on the ‘Rasterizer’ box.

21) Recommended settings are:
- LOD Bias “-50”. More objects use models with a higher ‘Level of Detail’
- ’32bit Graphics’ enabled
- “Anisotrophic Filtering 16 (4 levels)”
- ‘Enable VSync’ unchecked
- ‘Direct mirror rendering’ enabled
- ‘Trilinear filtering’ unchecked
22) Set ‘Custom Resolution’ to 1920 x 1080 if you want to be presented with a widescreen view. Leave alone if OK with 4:3. ‘OK’ when done.
23) Next click on the ‘Graphics’ box.

24) It’s recommended to set the ‘Detail Level’ to “99”.
25) Use the drop-down below to select your resolution: 1920 x 1080 if that’s what you set in step 22); a 4:3 resolution of your choice otherwise. ‘OK’ when done.
The large box displays a list of patches installed within GEM+ (see below) and allows them to be enabled/disabled.
Back to the game…
26) At long last, clicking ‘GPL’ in the green flag in the bottom right will have GEM+ amend various .ini files, generate the GPL???.exe and launch it.
27) You should now be at the GPL Main Menu with changed imaging to indicate the mod you are running.
28) I advise going to Player Info to check it’s using the profile you chose. Also, if it’s the first time running this profile, go to Options and configure the controls.
I hope GPL ran for you; but if there was something off in the display…
Not centred?
– a scaling issue. As described in the Fine-tuning Graphics section:
– go to the GPL 2020 Demo folder G:\GPL 2020 Demo\
– change view to Details and sort by Date modified
– relevant GPL???.exe should be the most recent .exe application
– right click -> Compatibility -> Change high dpi settings -> ‘Override high dpi scaling behaviour’ ticked on
Black bars top and bottom?
– GPL 2020 Demo has the NoLetterbox patch built in; not so for gpl.exe, so it needs adding and activating
– close GEM+ if it’s still running
– patch can be downloaded from Lee’s Motorworks http://gplmotorworks.gplworld.de/
– copy both v3 and v4 .xml to G:\GPLSecrets\GEM+\Options
– relaunch GEM+
– tick box in bottom right next to either 77dv3 or 77dv4 No Letterbox (the difference is not in how they display the game, but in the Replay views)
No anti-aliasing?
– display software has no profile for this GPL???.exe so repeat steps outlined in the Fine-tuning Graphics section of this guide:
– launch ‘AMD Software: Adrenalin Edition’
– go to Gaming tab to see panel of installed games
– three dots in the upper right open a drop-down to “Add a game…”
– navigate to G:\GPL 2020 Demo\ and select gpl???.exe
– a new panel called gpl??? will be created; click on this
– make changes in the ‘Advanced’ section as described earlier.
* Many add-ons were hosted on the now closed SMRZ.net forums. If you see a link to “smrz.net”, replace it with “smrz.racesimcentral.net” and, so long as the archive.org webcrawler retained it, you should be able to view the page though probably not download any links. Alternatively, The Fastlane is a good source of GPL additions, but does require registration.
I really like Grand Prix Legends. Bought it 22 years ago, it was a real treat. This racing simulation feels so different from the other games that it is refreshing. It feels like you are going to (virtually) die at each corner, like a soapbox with a huge engine.
Oh boy, I must reinstall this.
Thanks for this nice reminder!
Fantastic work! I never tried it first time round though my dad rated it very highly indeed. Maybe now’s the time 🙂
Great article and great game! Played it a lot in the past, particularly liked the ’65 mod, much easier to drive than the ’67 monsters.
Nice Work. I haven’t touched a racing sim in years but your very thorough introduction has me thinking of seriously giving this demo a try.
Haven’t played this in years so decided to give it another go. Lacking a wheel these days so had to make do with the gamepad but it’s surprisingly not that bad with it. decided to just install the whole thing off the CD and manually install GPLPS etc instead of building off the 2020 ‘demo’. that way I could get all the default tracks in easily and without having to faff about with those ini files. I didn’t have to manually edit any ini files for my resolution either, my native 2k resolution just showed up in game in the options.
Anyway having fun blasting around. Even managed to finish a race around Brands Hatch without crashing and finishing on the podium (I may have slowed the AI down to 1.2 to achieve this. I’m not good at racing games).
Having a lot more fun in this then I did with the new buggy Forza Motorsport!