
If the Bogen bouncers finish this 35-turn scenario in possession of the castle, the village, and the bridges, then they will have ample reason to celebrate. However, if the situation in the woods south-east of the castle doesn’t improve PDQ, those celebrations may be somewhat muted.
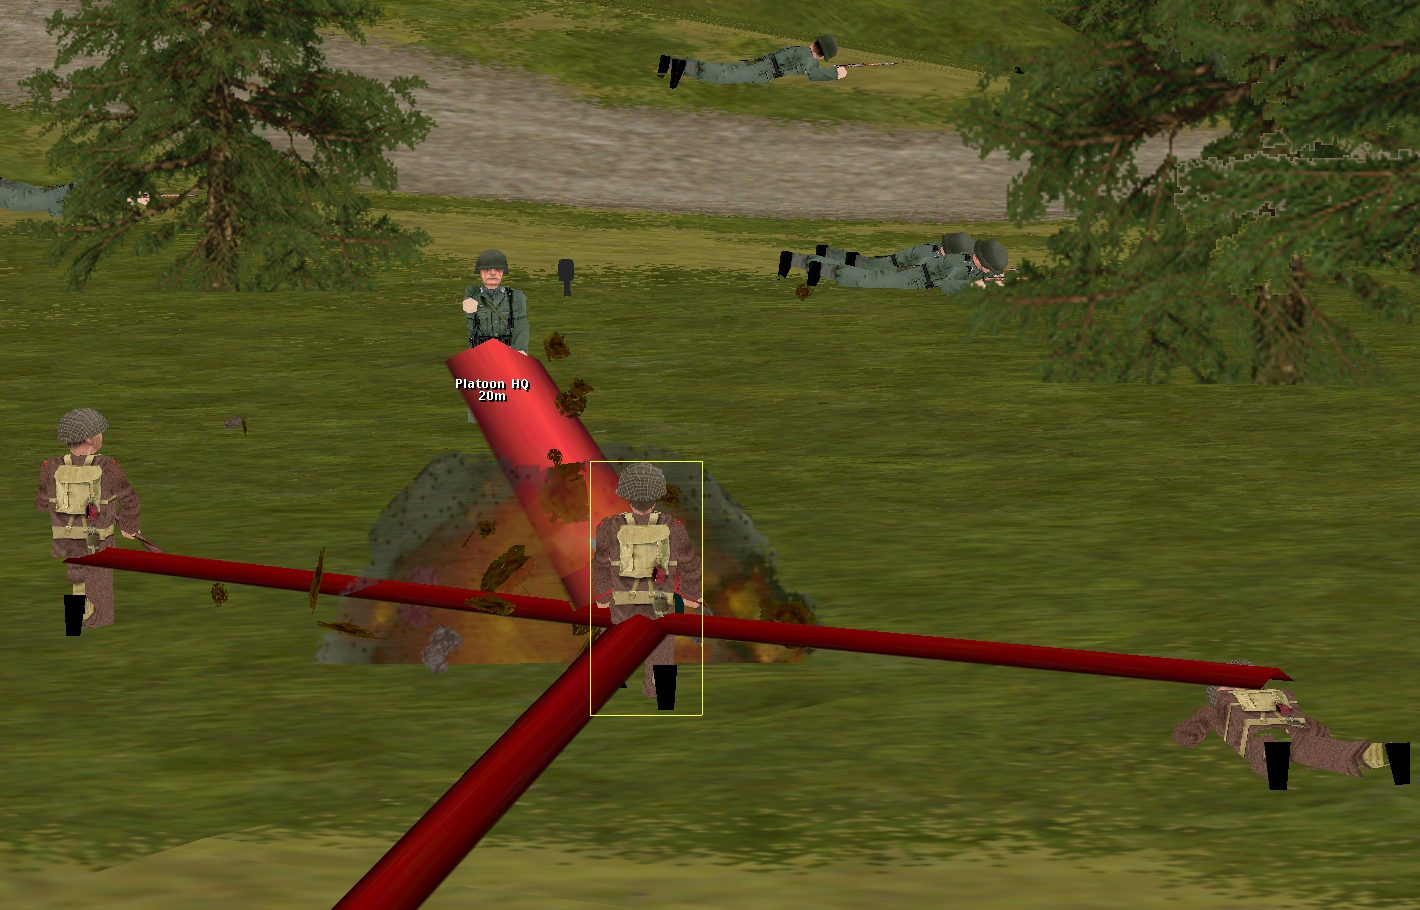
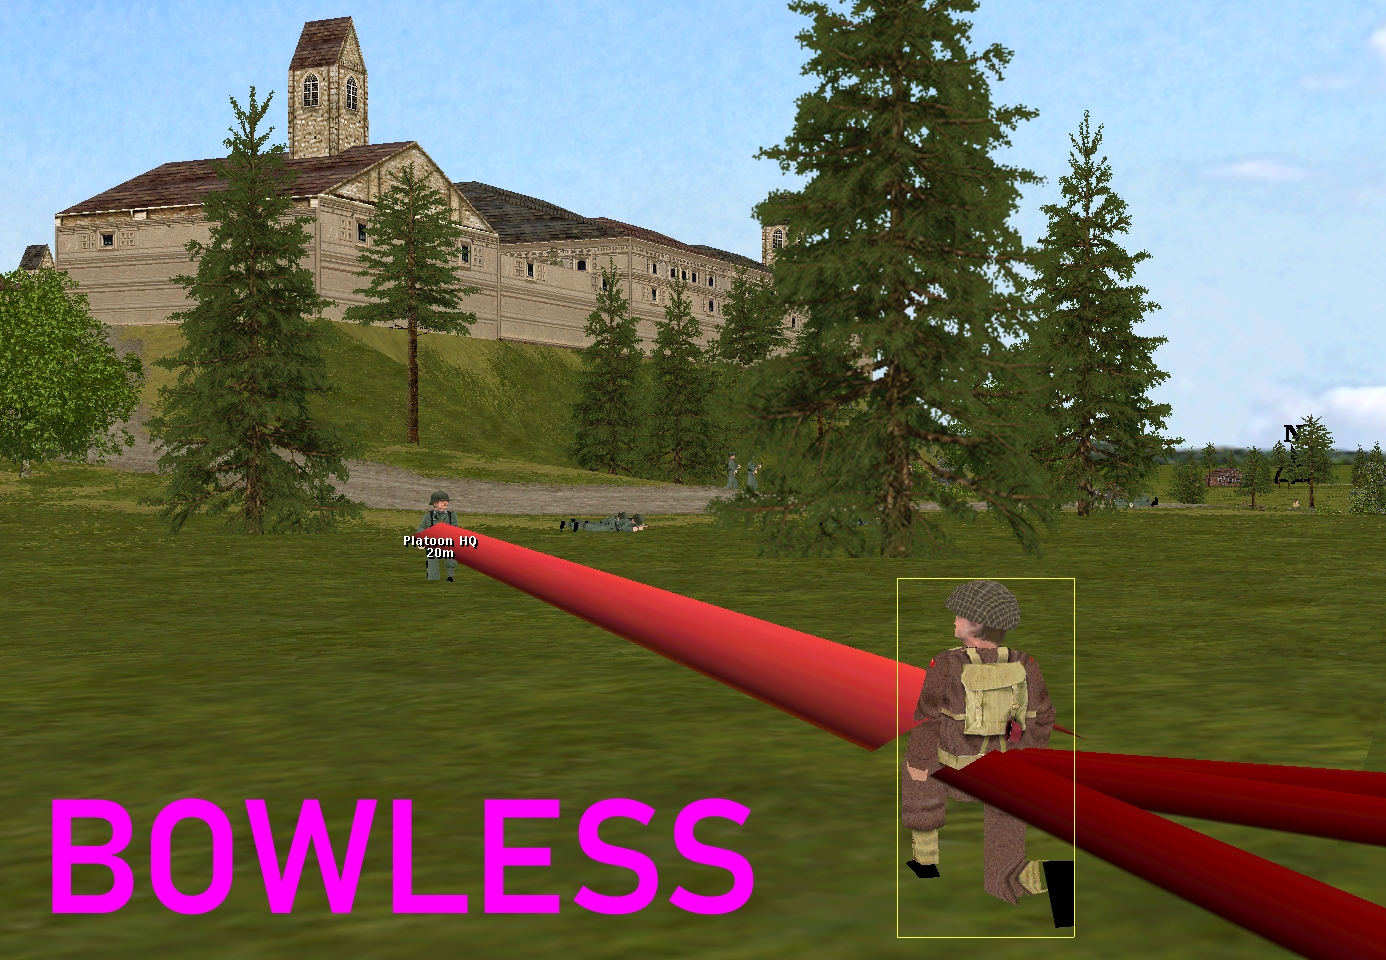
Only one enemy unit has a ‘good’ turn 31. Unfortunately for the Comment Commanders’ charismatic figurehead, the unit in question is the ‘green’ two-man German platoon HQ duelling with the British CO in unlucky-for-some map square 13. During the course of the sixty, this doughty foe’s garrulous MP 40s and expertly hurled potato-mashers settle the hash of two Tommies. By T+60, things look awfully bleak for Captain Hood. Short on ammo and armed with nothing but a 6-round top-break revolver, he’ll be lucky to survive the next turn.
Elsewhere the news is all good. Churchillian ire reduces the light flak gun near the station to a ball of blackened scrap…
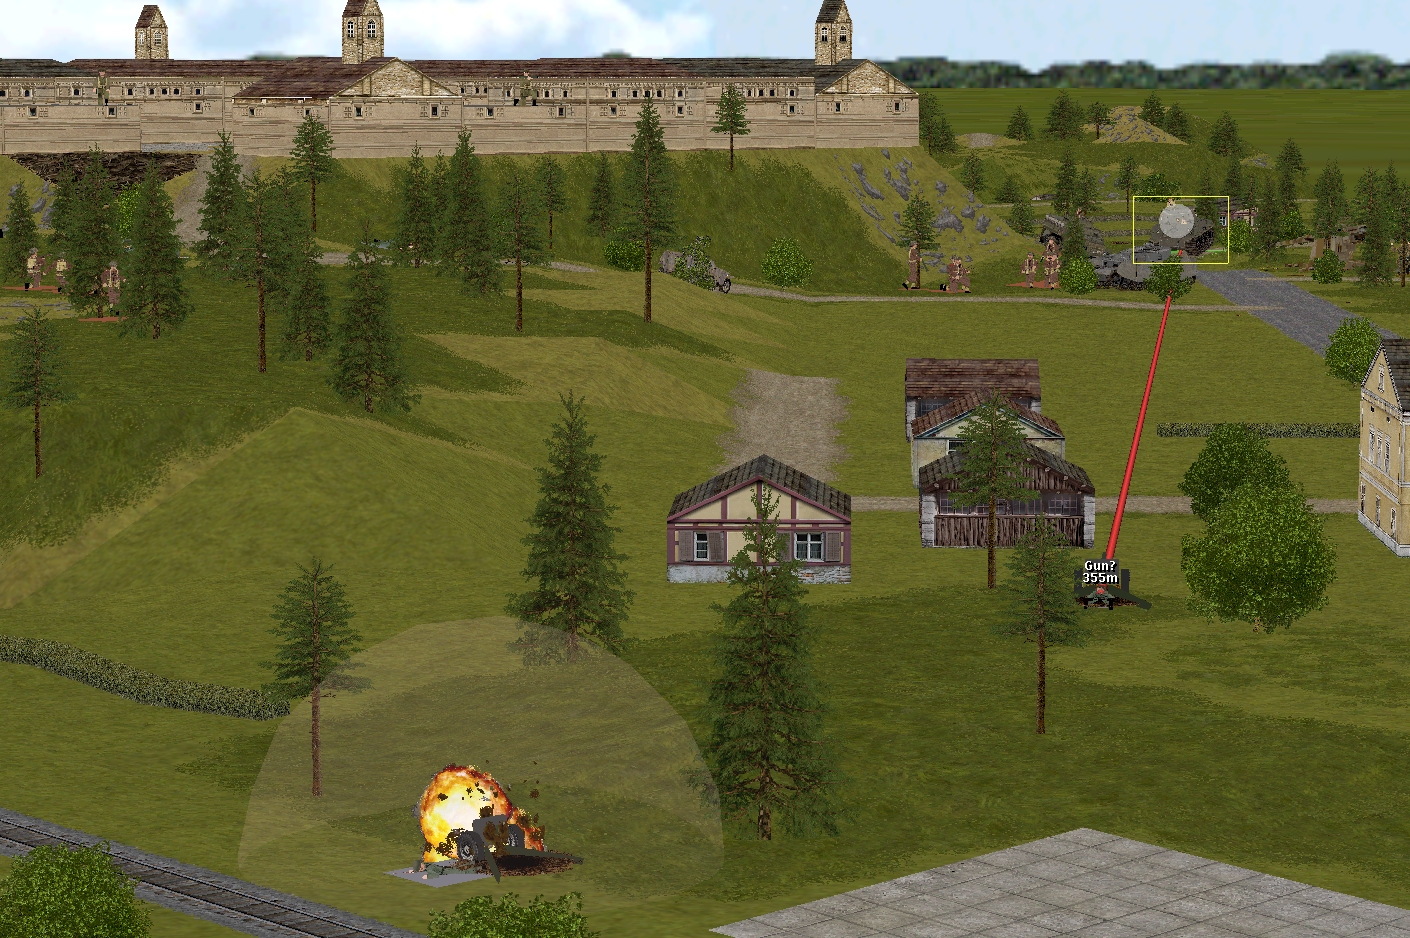
Pyle’s gunner persuades the crew of what turns out to be a 75mm infantry gun to abandon their weapon…

Discombobulated Jerries fleeing from the castle entrance, find themselves under close-range flanking fire from the north…

Allied troops get their first good look at the centre of Nottingheim…
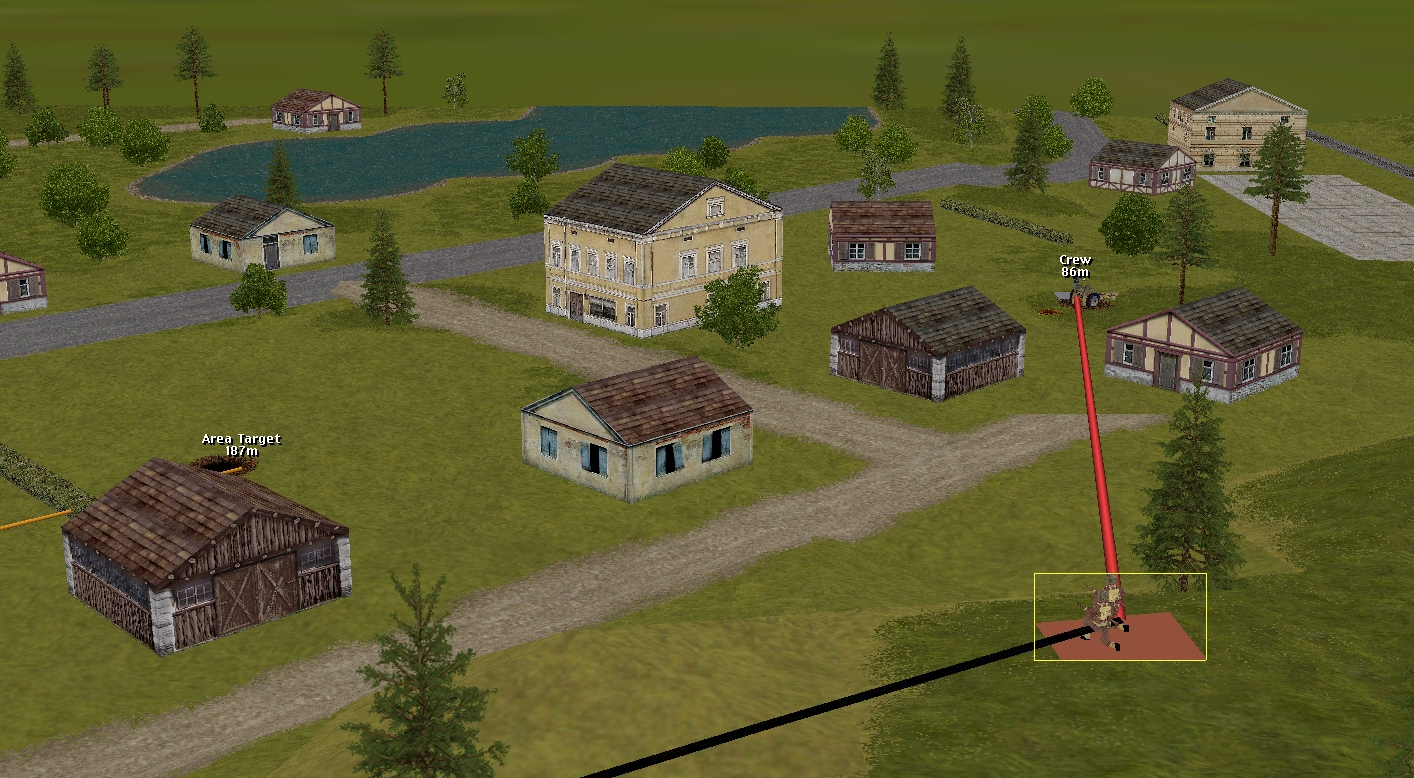
Costner’s lads advance through the woods without loss or scares…
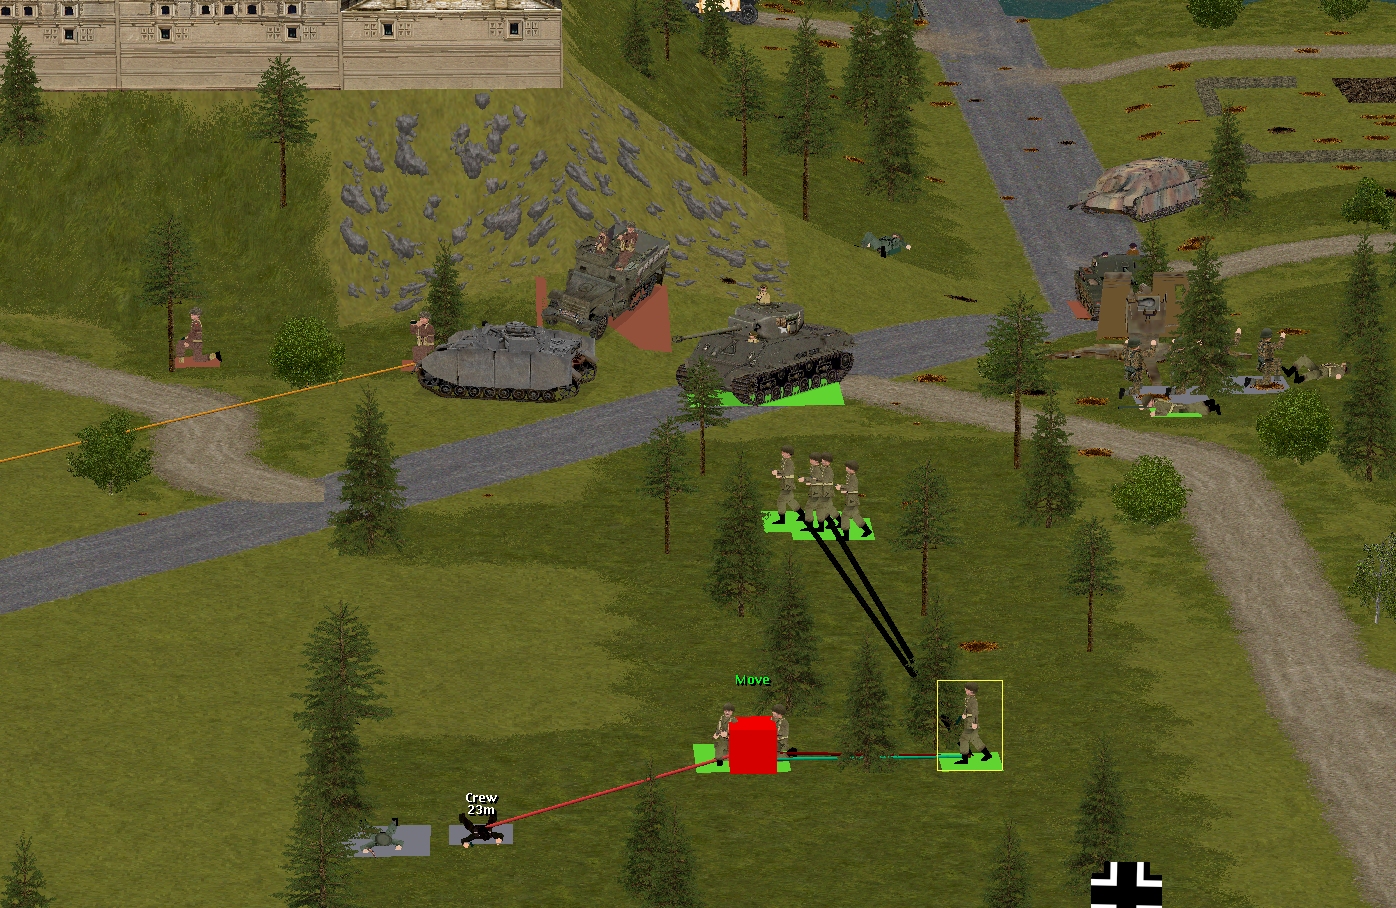
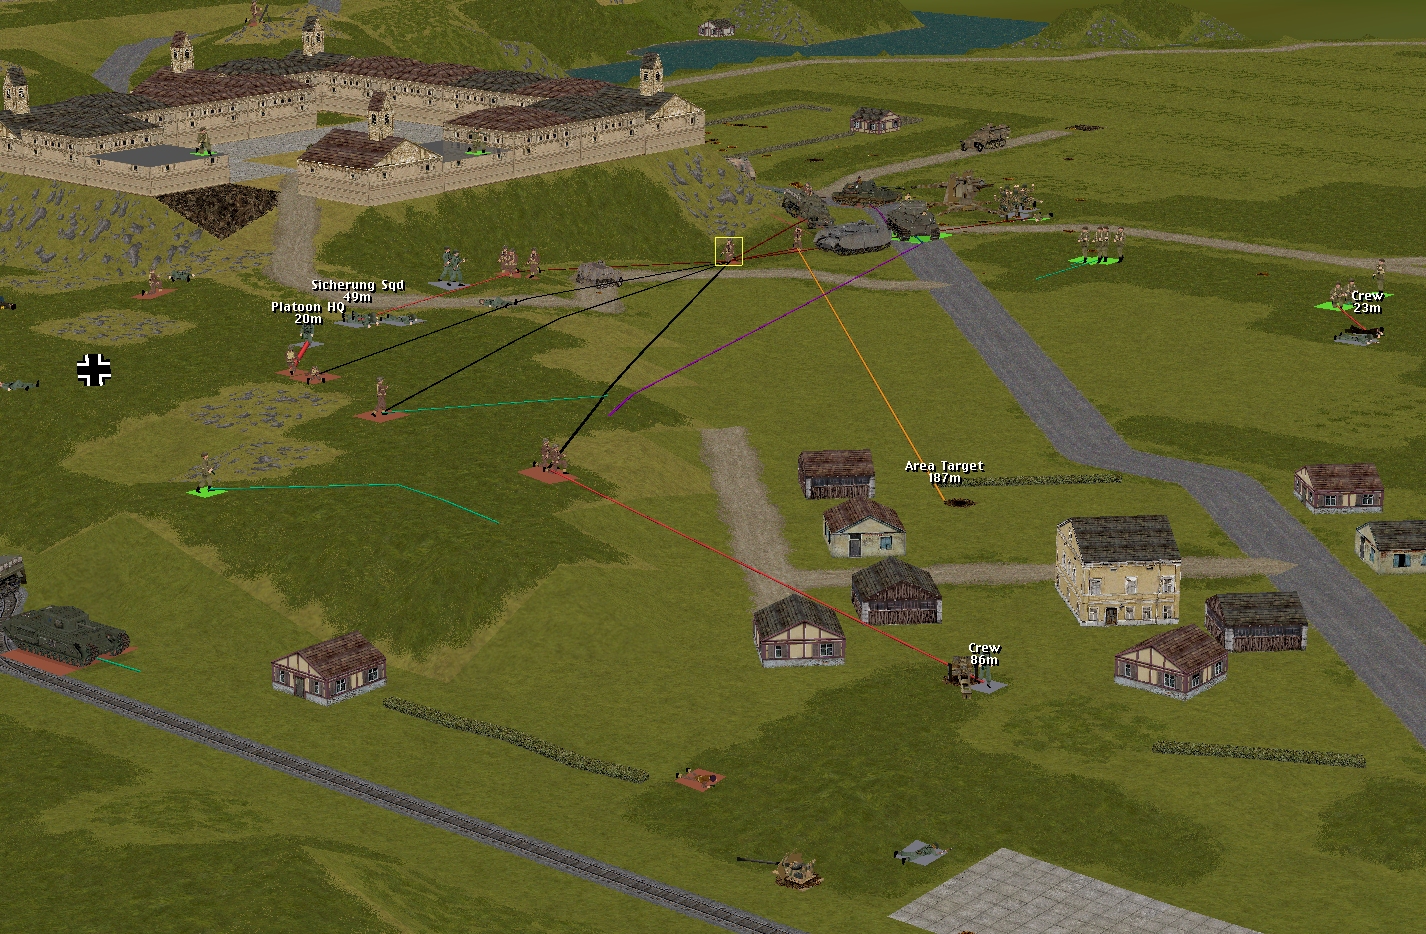
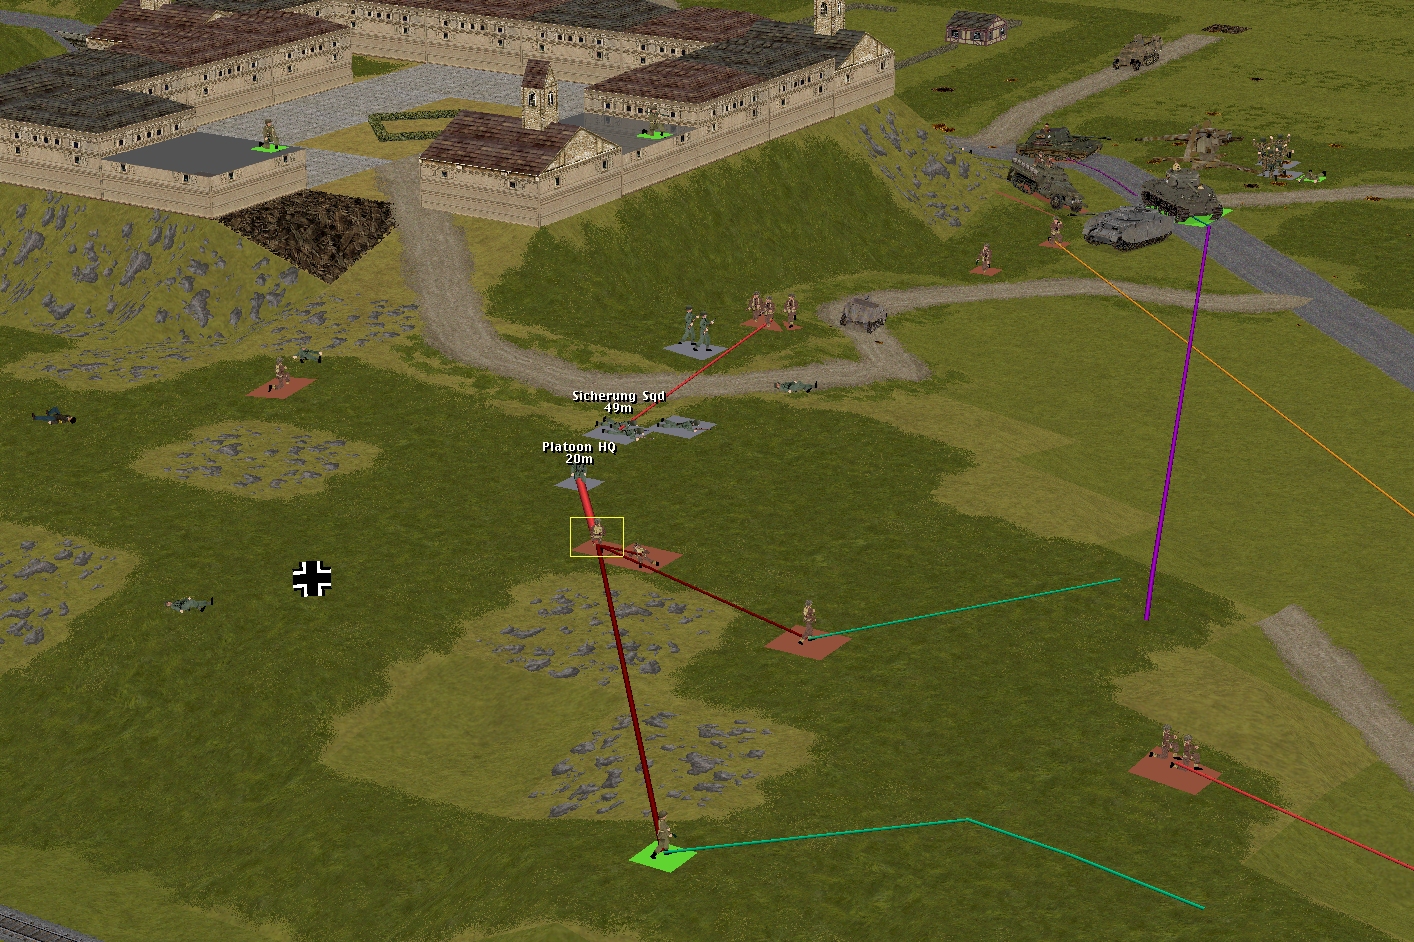
The situation at the start of Turn 32:

Eleven seconds from commencing, Tuck’s bombardment could prove hazardous to Greenwood A & B.
Rifle-armed Sergeant Forester – the unit to the right of Hood – is short of ammo and currently taking cover.
Sherwood is no longer split.

Turn 32 orders here, please. Commenters are cordially invited to suggest moves for the following seven unit groups. First come, first served. Order execution is usually Monday morning at 0700 GMT.
(See screenshots for unit locations)
– Captain Hood’s party (Hood’s HQ (1 man), Sergeant Venison’s rifle squad (2 men, low ammo), Forester’s squad (1 man), Sergeant Greenwood’s squad (6 men, split) + Corporal Fletcher’s M5A1 halftrack)
– Lieutenant Marian’s men (Marian’s HQ (4 men) + Sergeant Sherwood’s rifle squad (10 men) + PIAT team (embarked) + 3 inch mortar team)
– Sergeant Bowman’s Archer TD
– Sergeant Johns’ Churchill VIII
– Sergeant Pyle’s Sherman
– Lieutenant Costner’s platoon (Costner (2) Olander (12), Carlson (4), + bazooka man(1))
– Captain Dale’s party (Six POWs armed with pilfered rifles and pistols) + Corporal Whitehand’s team (Two POWs armed with a pilfered Panzerschreck)
Please start all order comments with ‘ORDER’ and any later revision comments with ‘REVISED ORDER’. This will help me distinguish firm instructions from suggestions and advice.
ORDER: Greenwood ‘B’
MOVE FAST westnorthwestwards to be directly east of the enemy platoon HQ
MOVE FAST west
switch to moving CAUTIOUSLY at a suitable engagement distance (I’ll leave it to Tim’s superior judgement)
ORDER: Sgt. Venison
MOVE FAST directly towards the enemy platoon HQ
switch to ASSAULT for last few metres
ORDER: Sgt. Scarlet’s vehicleless crew
MOVE CAUTIOUSLY east into [7, 4, 5]
ORDER: Sergeant Johns’ Churchill VIII
MOVE FAST east to get south of the pines [7, 3, 4]
MOVE CAUTIOUSLY further east to have view of station buildings [7, 4, 4]
ORDERS: Lt Costner’s Platoon:-
Costner – Complete MOVE to 30, 5, 3. Then MOVE to 30, 5, 2.
Lincoln – No further orders.
Carlson – MOVE to 30, 5, 2.
Olander – RUN/EMBARK onto HT.
Shanley – Complete MOVE to 30, 2, 3. Then MOVE to 30, 2, 2.
ORDER: Pyle’s Sherman – ROTATE towards 14, 3, 5.
ORDERS: Dale’s Party:-
Dale – RUN to 21, 2, 1. Then MOVE to 21, 3, 1. FACE E.
Whitehand – No further orders.
ORDER: Bowman’s Archer – Complete previous turn.
ORDER: Tuck 25pdr – Continue to TARGET Foxholes 15, 1, 5.
ORDER: Fletcher’s HT – FAST MOVE to 30, 1, 2. FACE SE.
ORDERS: Marian’s Platoon:-
Marian – RUN to 21, 4, 2.
Sherwood – SPLIT. BOTH MOVE to 21, 4, 2.
Team ‘A’ RUN to 21, 5, 1. Face SW.
‘B’ Team MOVE to South edge of 21, 4, 2.
PIAT team – Remain on HT.
REVISED ORDER: Pyle’s Sherman – TARGET Foxholes 14, 3, 5.
Bleedin’ Nora (now there’s a nickname I definitely don’t want).
Can I play my joker and transform Hood into ‘Mad Jack’ Churchill?
https://en.wikipedia.org/wiki/Jack_Churchill
I’ll leave Greenwood ‘A’ looking for movement in the village, but the foxhole at [14, 3, 5] will need dealing with next turn.
I am at a bit of a loss with what to do with the Churchill during and after the bombardment. Hold box [8] and pin down anything that might be in box [16]?
A (risky) alternative for Greenwood ‘A’ – is to scout out the foxhole to see if anyone is home.
Say MOVE to 14, 3, 4 via 14, 3, 3, followed by immediate RUN or withdraw order back to 14,3,3. Not quite a reconnaissance in force but hopefully not a reconnaissance in farce either. If you draw fire the Sherman should intervene.
Churchill – for now I would be tempted to stay around 7,1,4, That way it still has a view of the SW of the village whilst keeping an eye on the stn area, and keeping a safeish distance from the as yet unexplored woods.
I’m ordering Captn Dale out of the Castle this turn, you can change his orders as you see fit or just take command?
I can’t think of much to occupy Capt Dale beyond supervising the (soon-to-be) hors de combat units along the castle trackway:
– Forester, down to 1 man
– Venison, 2
– plus at least 3 Sicherung squads
I am tempted to showboat our way to victory by seizing the village with just the disembarked crews of Scarlet and Spencer. Last one to finish their roast squirrel-on-a-skewer is a rotten egg!