

A couple of turns ago, the Allied bid to take the castle gates looked to be in real trouble. The unexpected appearance of enemy reinforcements had left Hood’s vanguard bloodied and backpedaling. In Turn 27, bolstered by halftrack-delivered replacements, and fire support from within the castle, the determined Brits regain the upper hand.
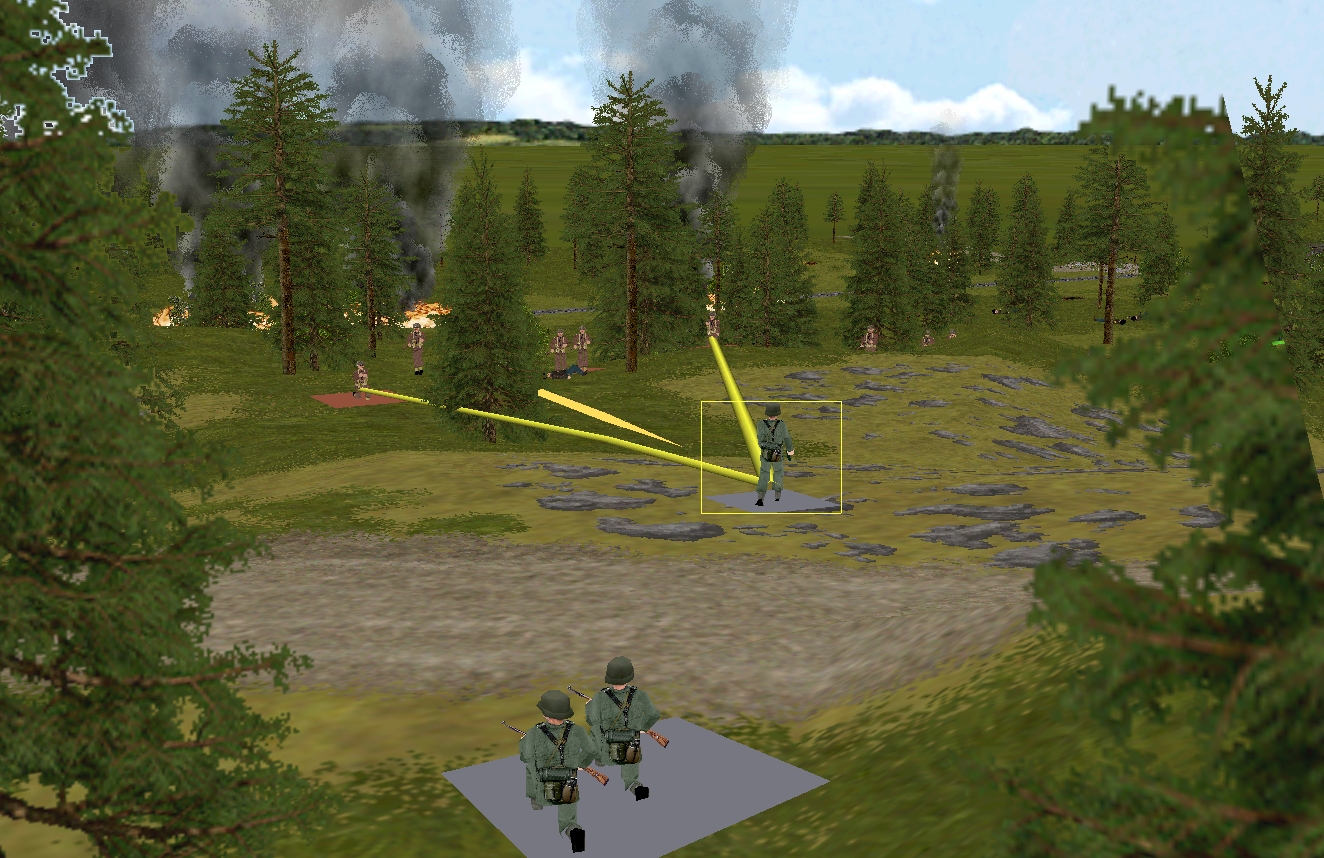
The four-man German platoon HQ that vigorously counterattacks in the first half of the sixty, clearly doesn’t realise the Tommies to the south of the castle have grown in number, and recovered from their alarming Turn 25 wobble. Advancing through a jumble of lichen-furred boulders, the HQ soon finds itself under pressure from multiple directions. Expertly hurled Mills bombs prove the final straw.
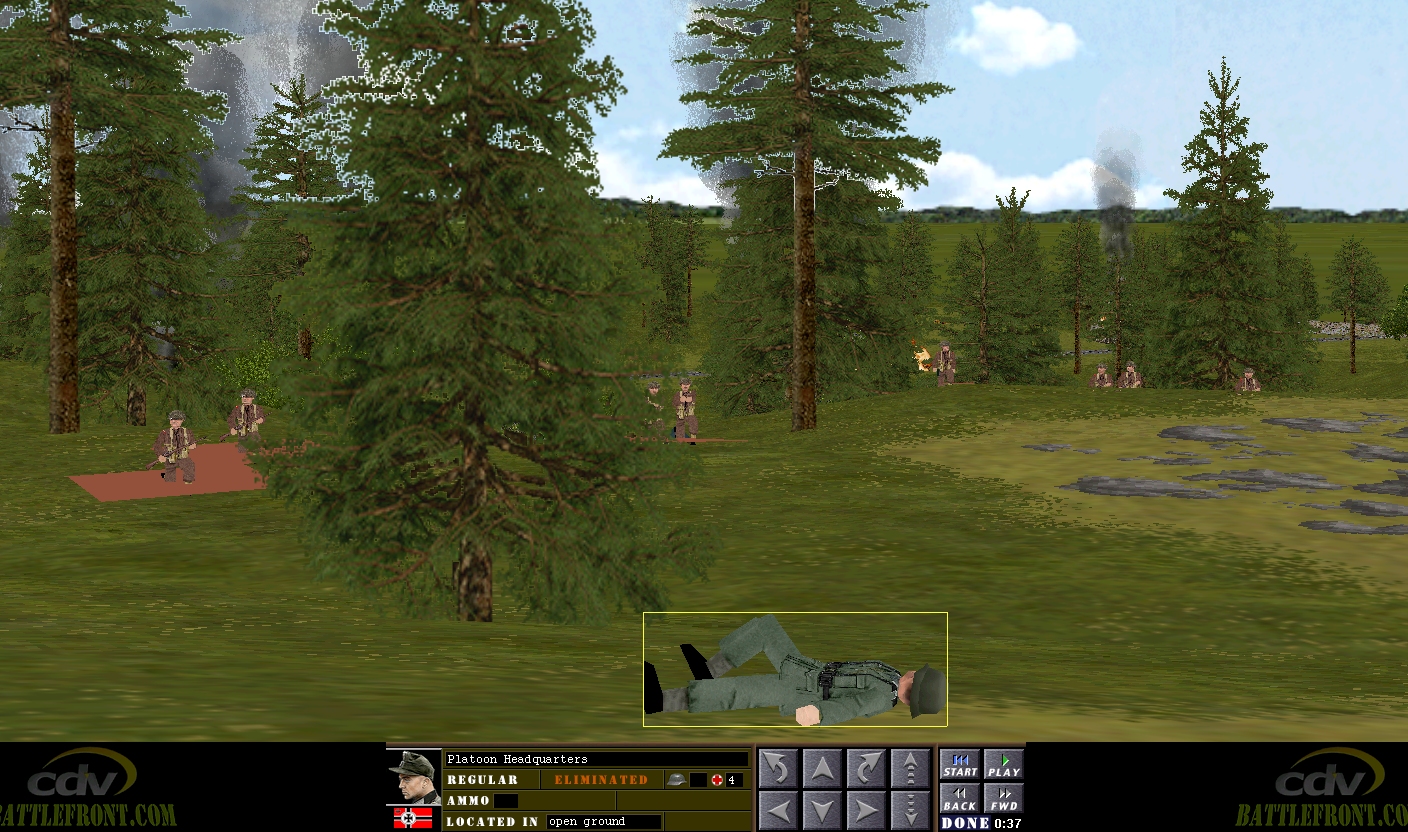
By T+37 the counterattack is over.
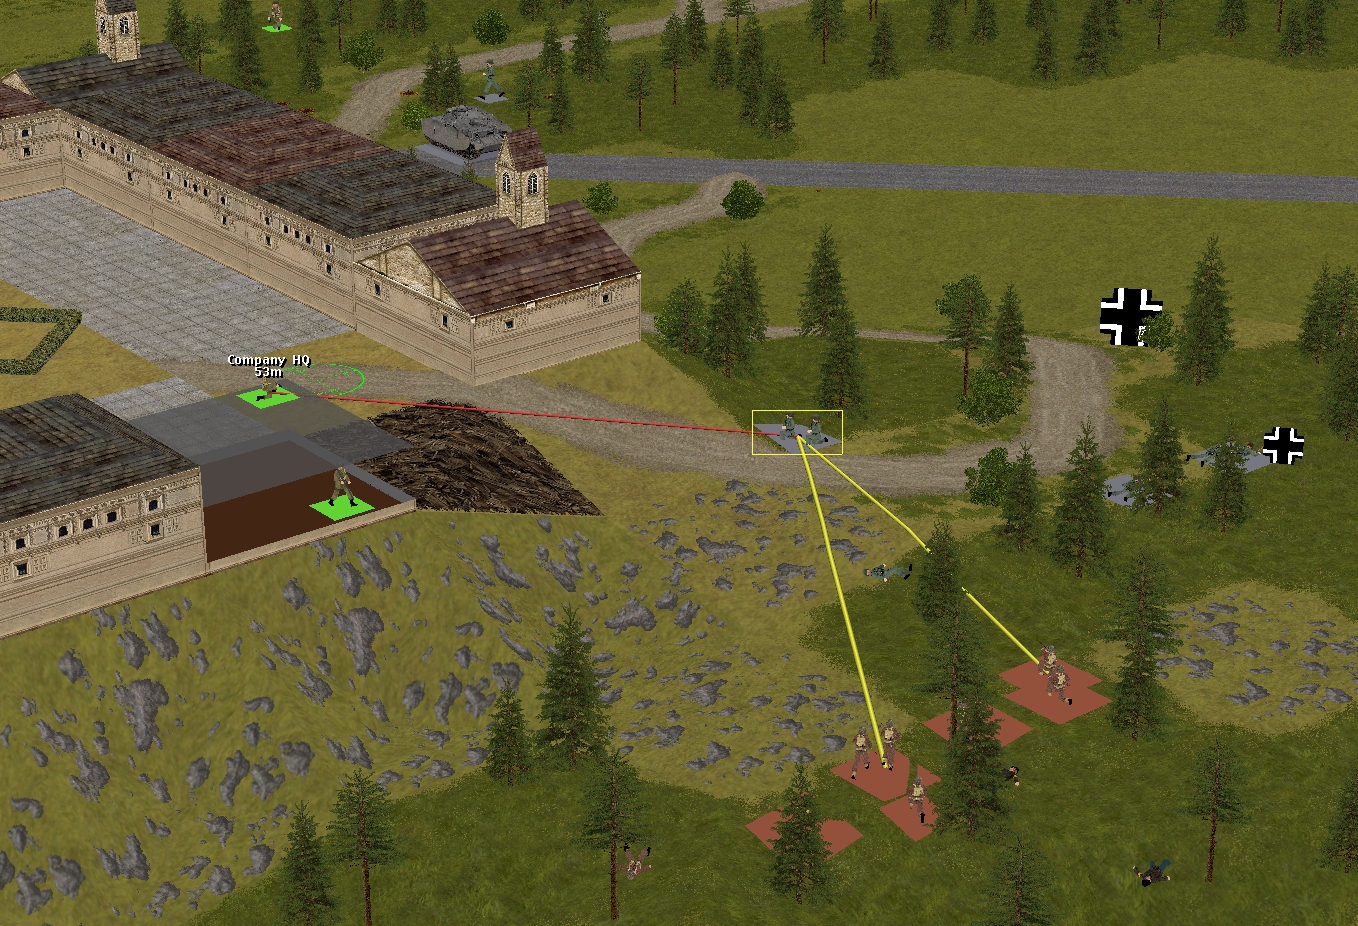
Having dealt with one progress preventer, Hood’s force proceed to tackle another – the German infantry unit firing from the woods on the far side of the approach road. Aided by flanking fire from Captain Dale (who, together with Corporal Whitehand, dashes across the castle courtyard this turn) the Brits eventually persuade their target to cease fire and take cover. There’s still the little matter of a nearby Sonderkraftfahrzeug to deal with, but the omens seem propitious, especially with the staircase-ascending Whitehand possibly on the verge of establishing LoS to said AFV.
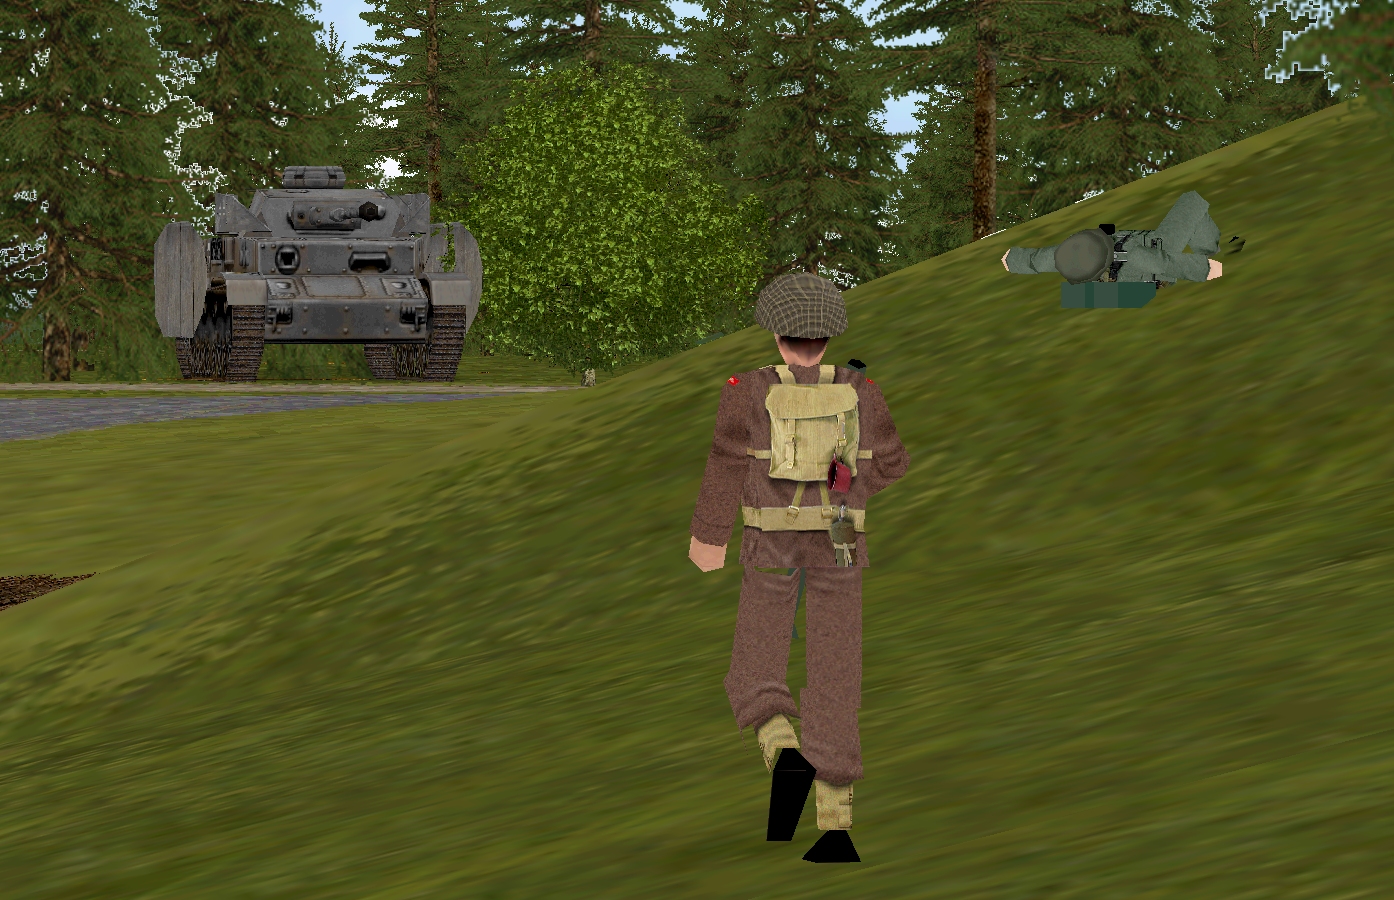
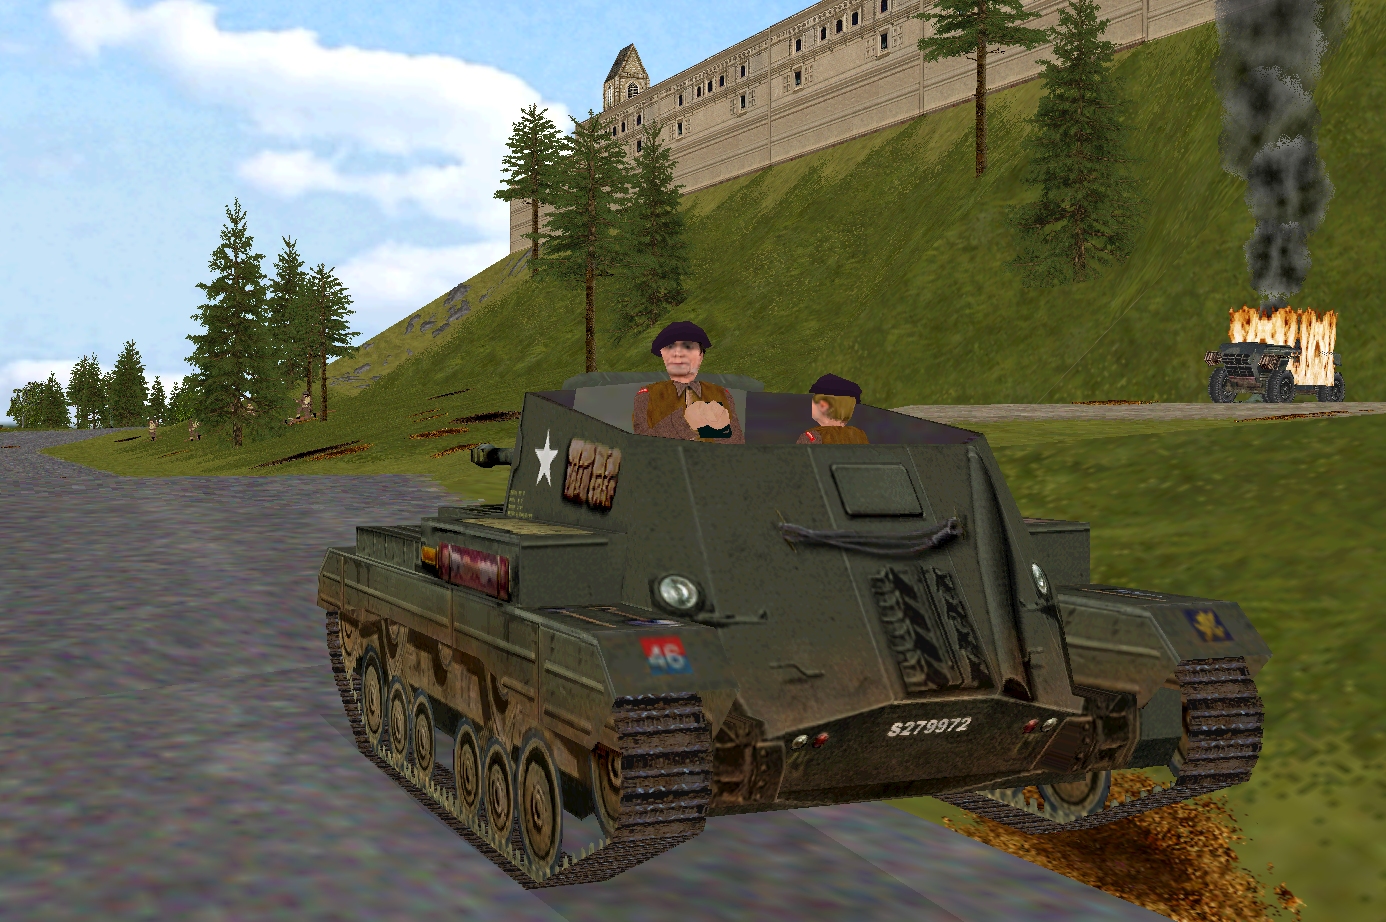
Turn 27’s other riveting duel involves a nervy Panzer and a cream-crackered PIAT team.
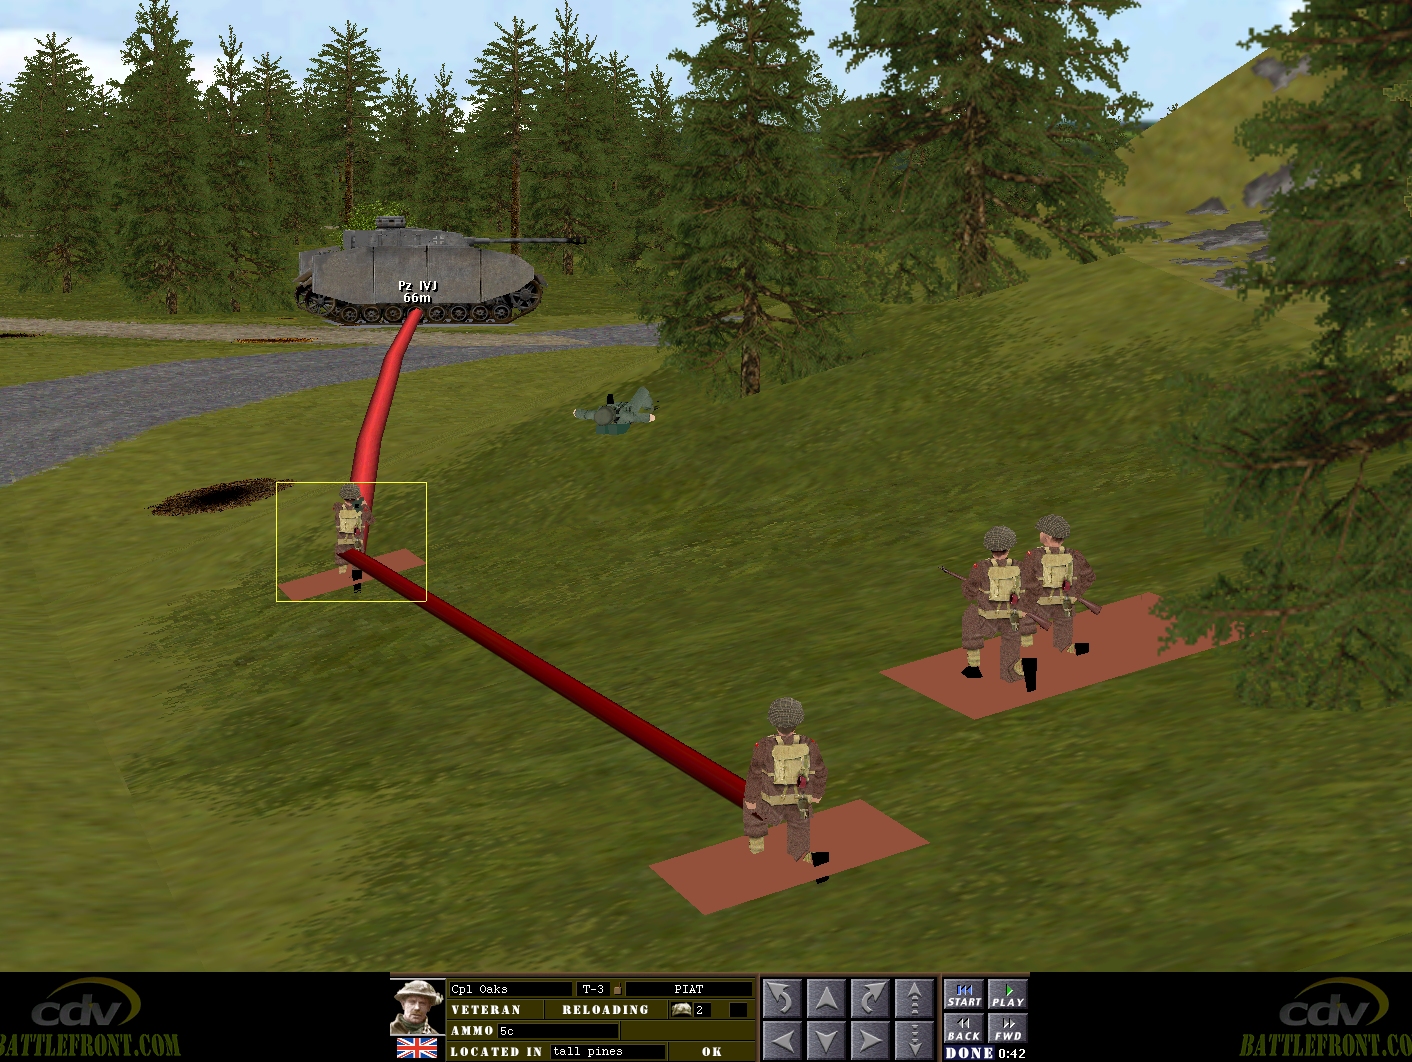
By the time tired Oaks sets eyes on the Pz IVJ, it is heading south, possibly spooked by glimpses or sounds of the approaching American threats to its right. Oaks has time to project one HEAT round before the tank disappears from view. The bomb misses its mark, exploding harmlessly against a tree trunk.
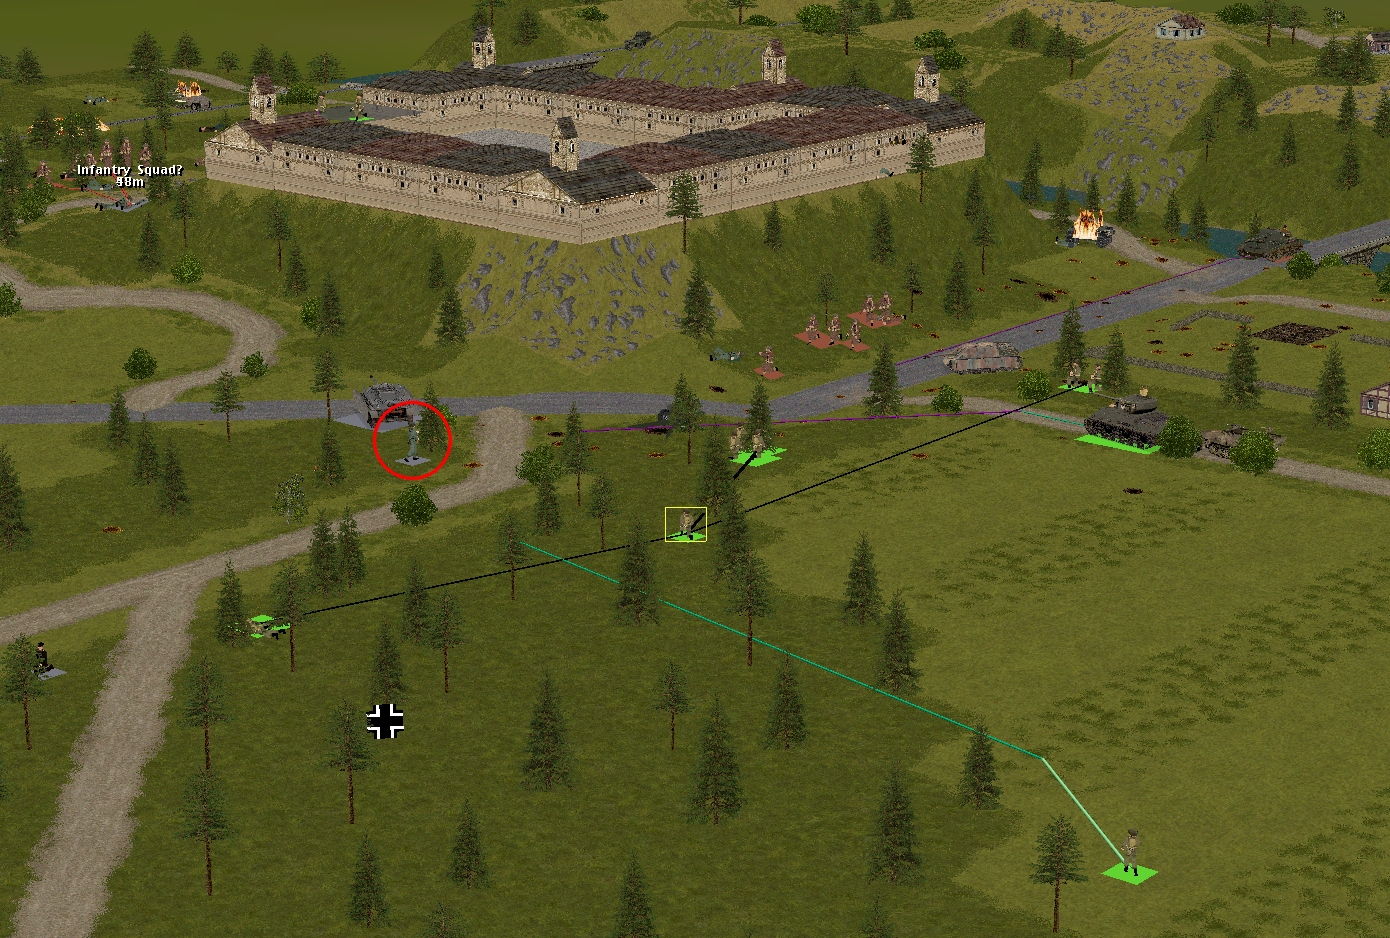
The situation at the start of Turn 28:
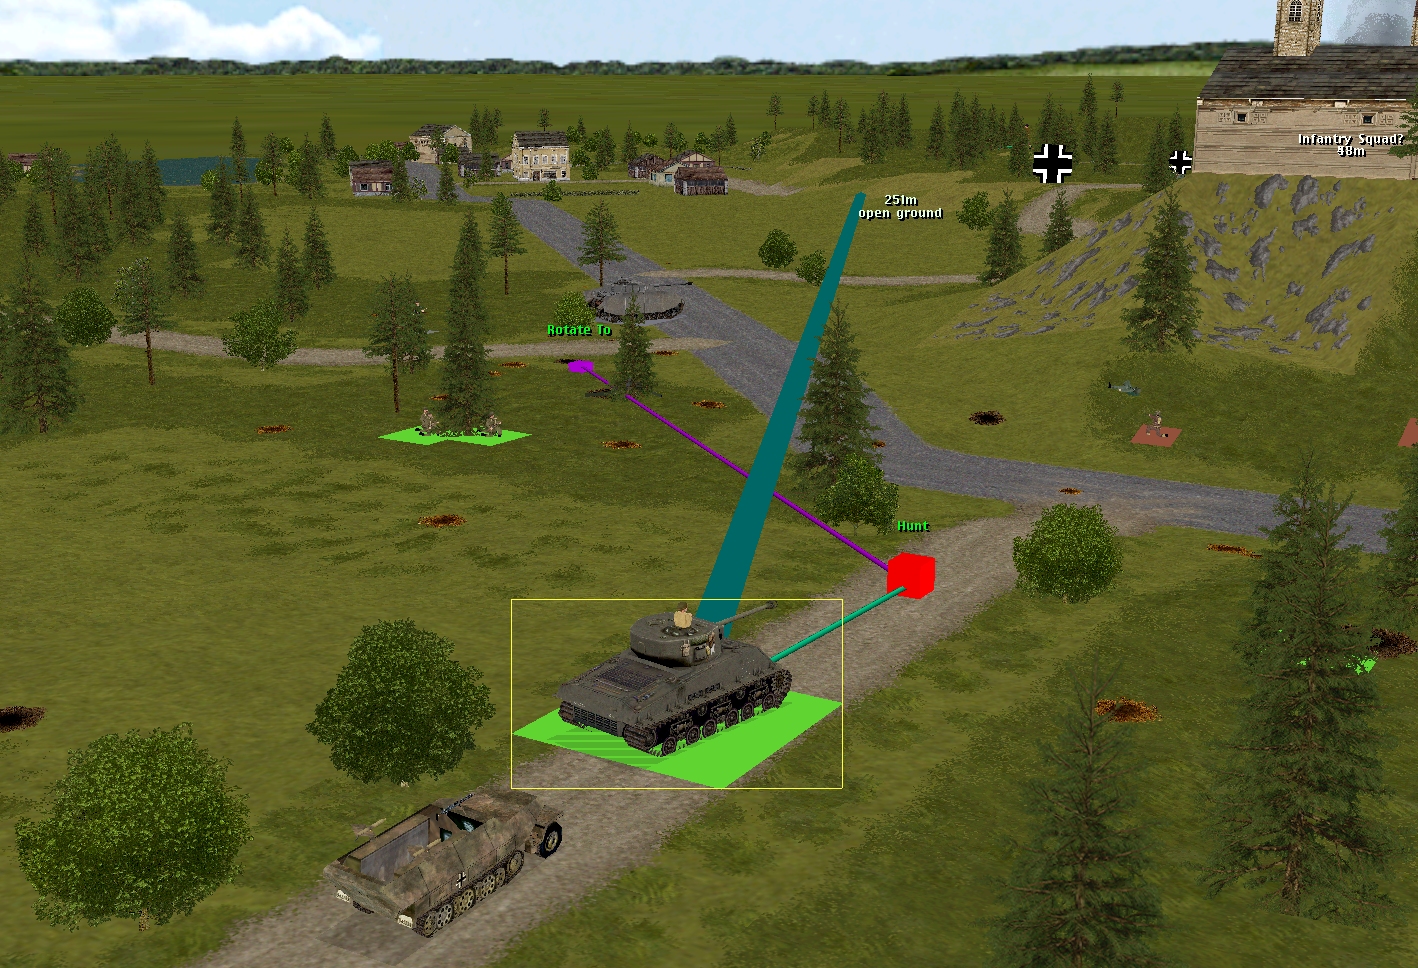
The Panzer IV has halted just out of view of Oaks and is in the process of turning clockwise. Pyle’s Sherman has a narrow LoS window at eleven o’clock, but the window doesn’t extend to the Ausf J’s position.
An unidentified enemy infantry unit appears to be moving northwestward circa 30,1,4. With the exception of Corporal Lincoln, all of Costner’s lads are now stationary.
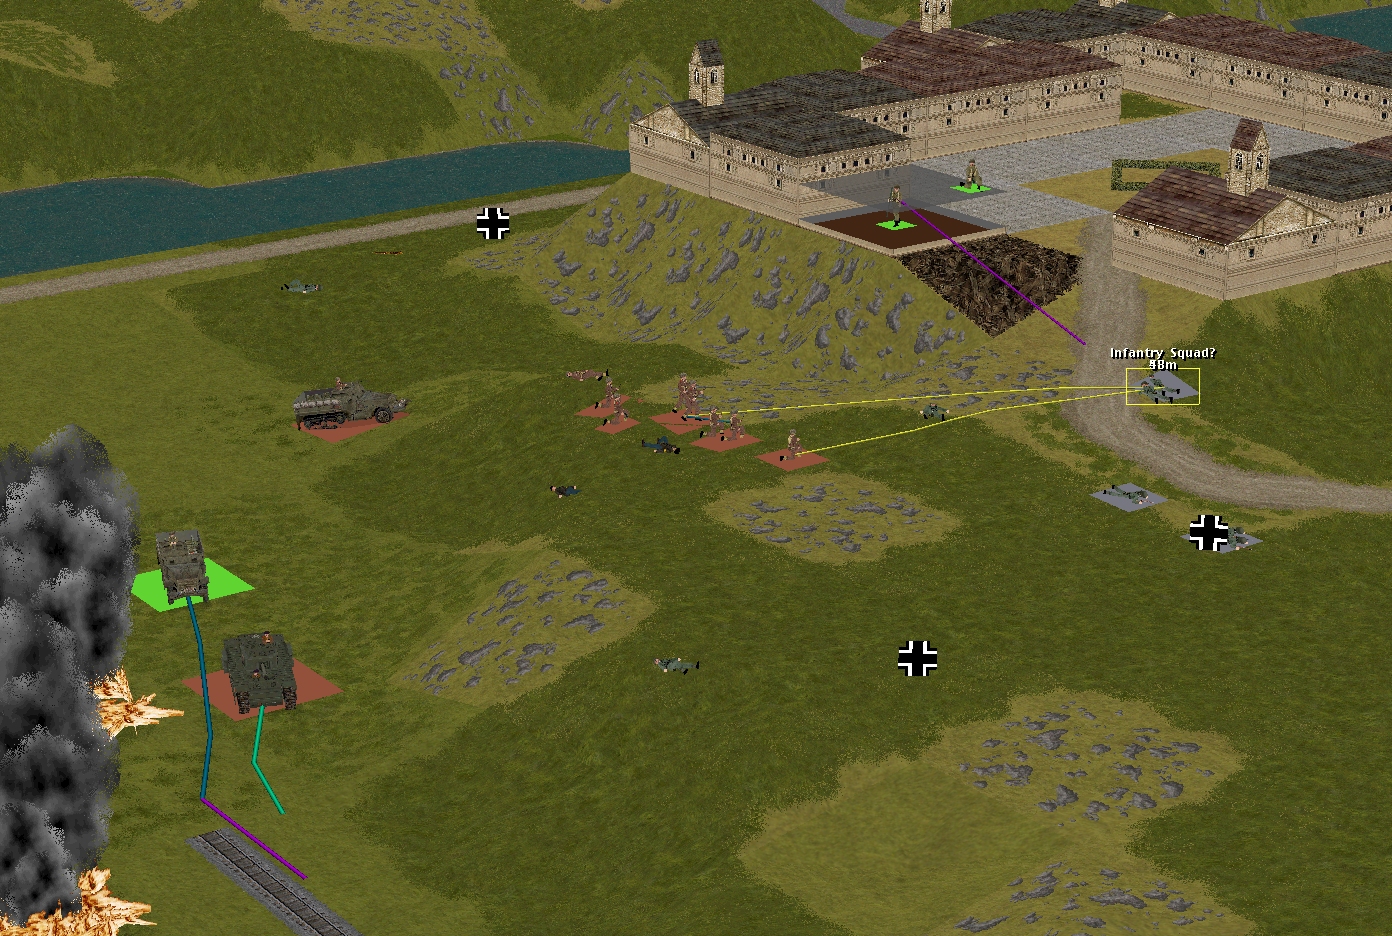
The Churchill VIII remains bogged. Maybe a short reversing manoeuvre is worth a try? As Fletcher’s HT proved incapable of multitasking, I was forced to abandon its move order to ensure its passengers disembarked. There are around seven green Sicherung troops cowering near the out-of-LoS German halftrack.
The reversing Archer is about 120 metres from its destination (29,1,5).

Turn 28 orders here, please. Commenters are cordially invited to suggest moves for the following seven unit groups. First come, first served. Order execution is usually Monday morning at 0700 GMT.
(See screenshots for unit locations)
– Captain Hood’s party (Hood’s HQ (6 men), Sergeant Venison’s rifle squad (2 men, low ammo), Forester’s squad (3 men, split), Sergeant Greenwood’s squad (9 men, split) + Corporal Fletcher’s M5A1 halftrack)
– Lieutenant Marian’s men (Marian’s HQ (4 men) + Sergeant Sherwood’s rifle squad (10 men, split) + PIAT team + 3 inch mortar team)
– Sergeant Bowman’s Archer TD
– Sergeant Johns’ Churchill VIII (bogged)
– Sergeant Pyle’s Sherman
– Lieutenant Costner’s platoon (2 split inf squads + bazooka team + 1 HT)
– Captain Dale’s party (Six POWs armed with pilfered rifles and pistols) + Corporal Whitehand’s team (Two POWs armed with a pilfered Panzerschreck)
Please start all order comments with ‘ORDER’ and any later revision comments with ‘REVISED ORDER’. This will help me distinguish firm instructions from suggestions and advice.
ORDER: Sergeant Johns’ Churchill VIII (bogged)
Cancel all movements
REVERSE straight backwards 10 metres
MOVE into middle if [5, 3, 5]
TURN to face just south of east
HUNT forwards 10 metres to be south and ahead of the halftrack
(No idea what Corporal Spencer will make of this manouevre, particularly if they trade paint)
ORDER: Greenwood ‘A’ {immediately left of Forester}
MOVE between rocky clearings [13, 3, 3]
MOVE CAUTIOUSLY 5 metres east
ORDER: Capt. Hood
MOVE CAUTIOUSLY to replace Greenwood ‘A’ in the line
TURN to face enemy infantry on far side of the trackway
ORDER: Sgt. Scarlet
Continue sneaking to [14, 5, 1]
After that, SNEAK into hut at [6, 5, 5]
Assuming it has a suitable window, look out north-eastwards.
– – – – – – – – – – – –
Cpl. Fletcher’s halftrack should have a move order from last turn (FAST to [28, 2, 4])
Forester, if he hasn’t already, ought to REFORM as a single unit.
ORDERS: Lt Costner’s Platoon:-
Costner – MOVE to 38, 1, 1.
Lincoln – Continue move.
Sgt Alvarez – MOVE to SE cnr of current cell.
Carlson – RUN to 30, 2, 4 then MOVE to 30, 1, 4.
Shanley – RUN to 37, 3, 1 via 37, 2, 2. Then MOVE to 37, 5, 1.
Olander – MOVE 37, 3, 1 then MOVE back to 37, 4, 1. FACE SE.
ORDER: Sgt Pyle’s Sherman – Continue last order.
ORDERS: Dale’s Party:-
Dale – No further orders.
Whitehand – Complete last order, but HIDE on arrival.
ORDER: Bowman’s Archer – Continue move.
ORDER: Tuck – MOVE to 29, 1, 4.
ORDERS: Marian’s Platoon:-
Marian – Hold position.
Hawthorn’s Mortar – No further orders.
Sherwood – A’ and ‘B’ Team. RUN to 29, 2, 4.
PIAT team – HIDE.
I’ve looked into it and unbogging tanks in CM is supposed to be a post hoc ergo propter hoc fallacy – people feel the need to intervene even if something would sort itself out, then assume whatever they did brought about the outcome. At least in patched versions of the game.
But, just in case Tim as GM is failing to look after the juju at his end (ie. failing to wear lucky underpants, stirring his tea an incorrect number of times, has offended a tree deity by winter trimming branches and bringing the brooms indoors, etc), I’ll play along…
Softly softly, catchee Sd.Kfz 251
Are we trying to coax it nearer? (Although I doubt firing at an even more downwards angle makes it easier)
Or do we assume it’s stationary, and try to avoid spooking it?
They’ll definitely be some spooking involved if it becomes visible to the bazooka team.