
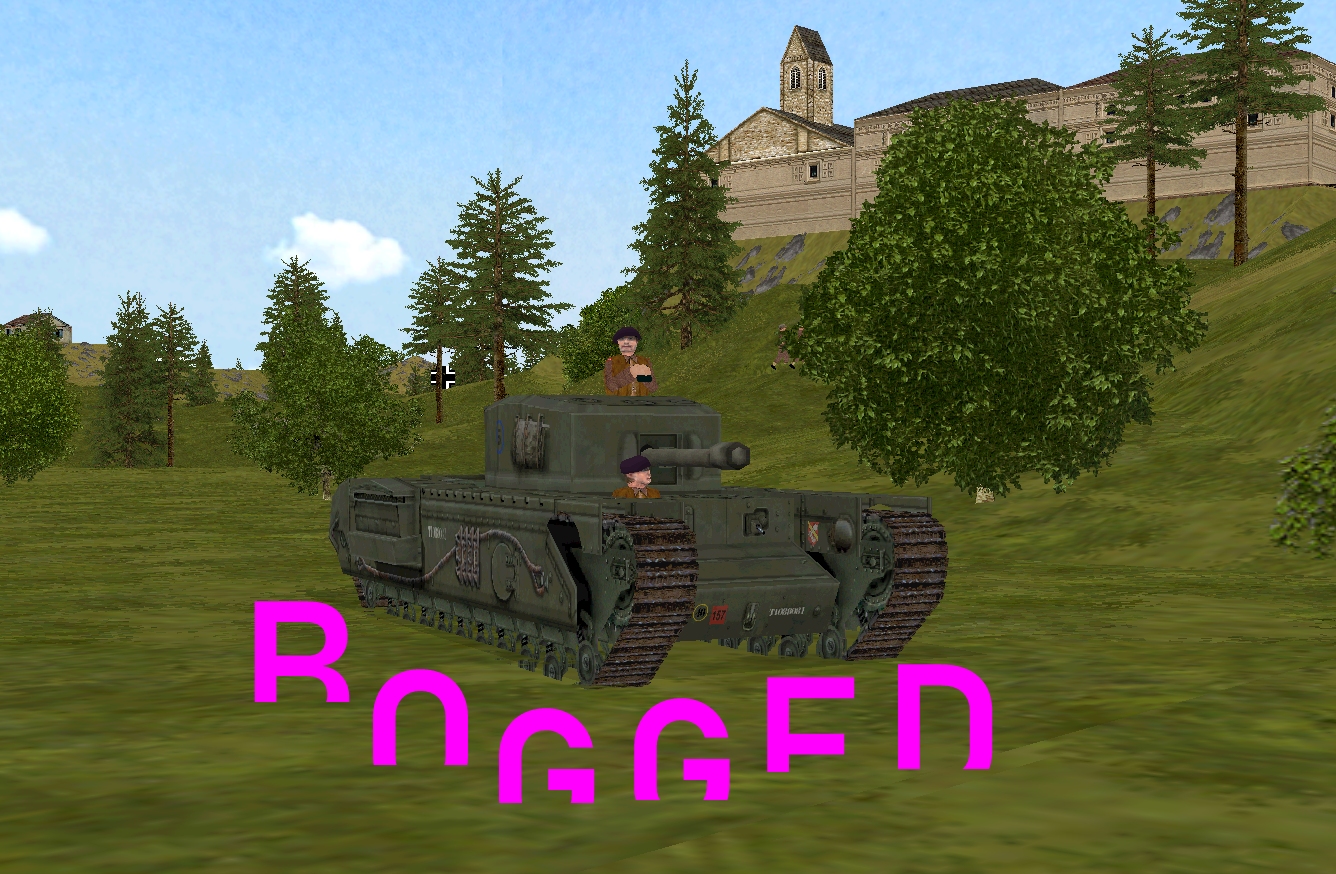
The closest Allied Armoured Recovery Vehicle to Nottingheim is over twenty miles away. If the churning caterpillars of the Churchill VIII don’t grip something solid in the next turn or two, Sergeant Johns and his crew have a long, frustrating wait ahead of them.
Happily, apart from the bogging of the British slow-coach south of the castle, this turn goes extremely well for the Comment Commanders.
^ This T+60 screenshot shows what happens when a cavalier King Tiger exposes its left flank at close range to an on-the-hunt M4A3(76)W.
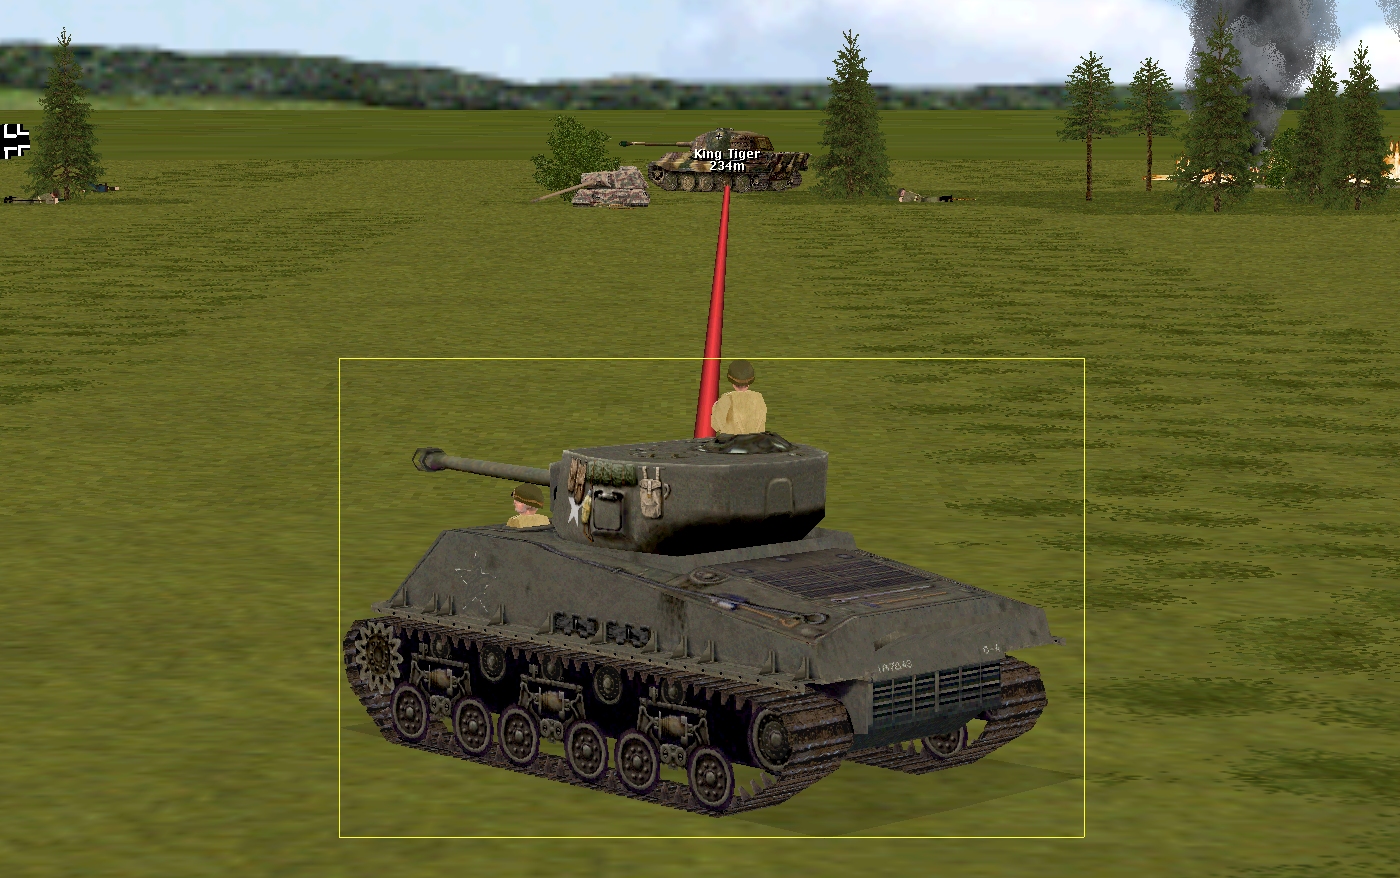
Having established LOS to the German heavyweight via a short north-easterly move, Pyle’s tank basically had one chance.
If the Sherman’s gunner had missed with his first shot, the Panzer VIB – which was in the process of rotating its hulking Henschel turret when slain – would almost certainly have prevented a second.
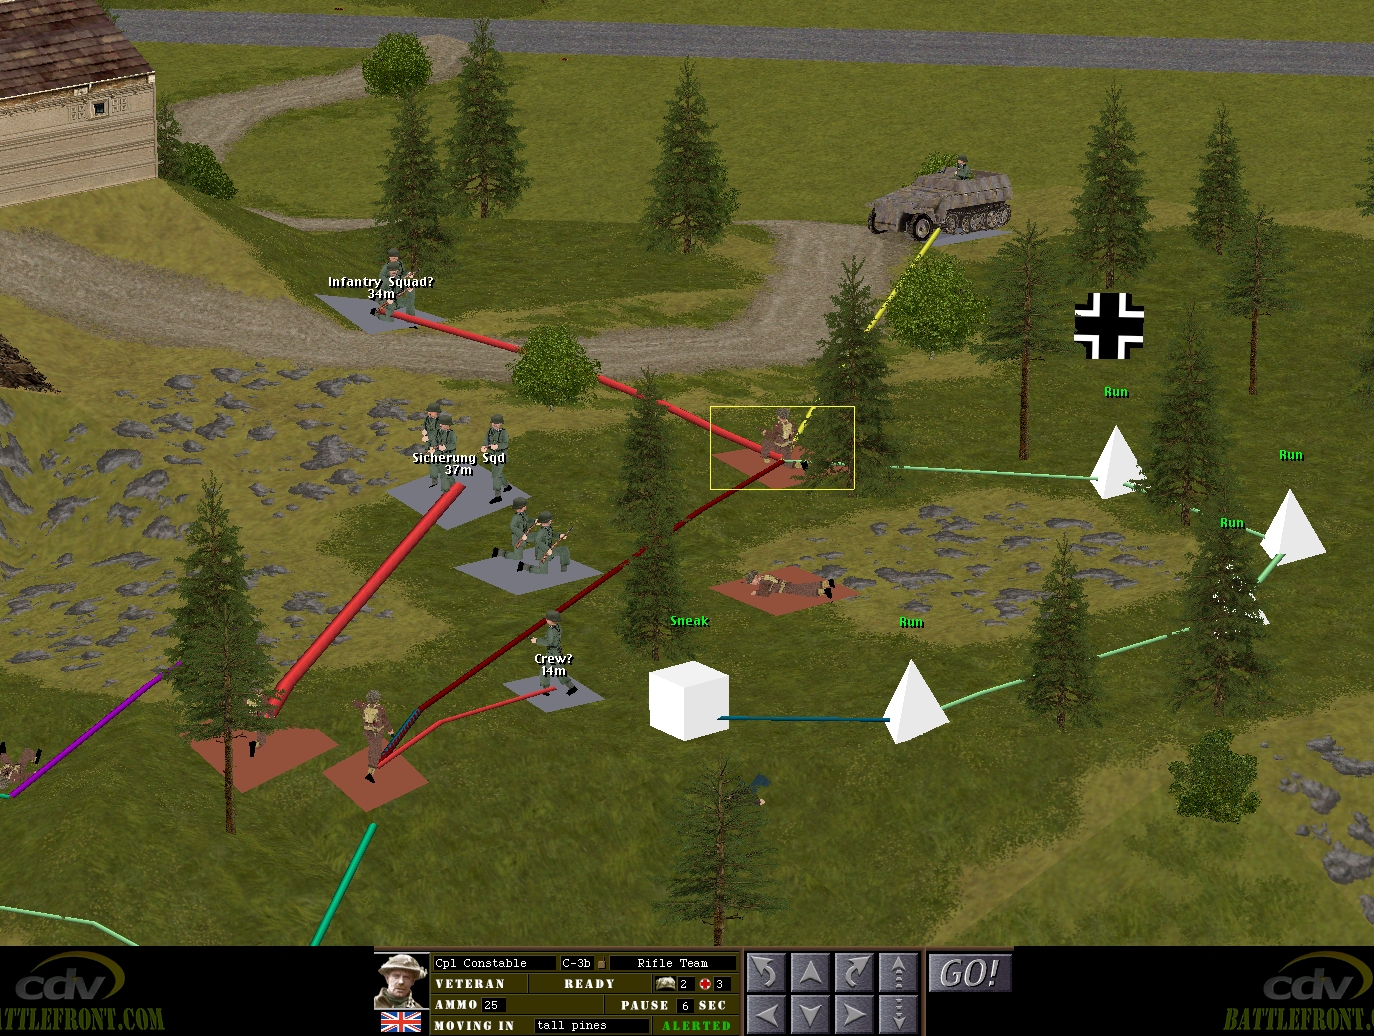
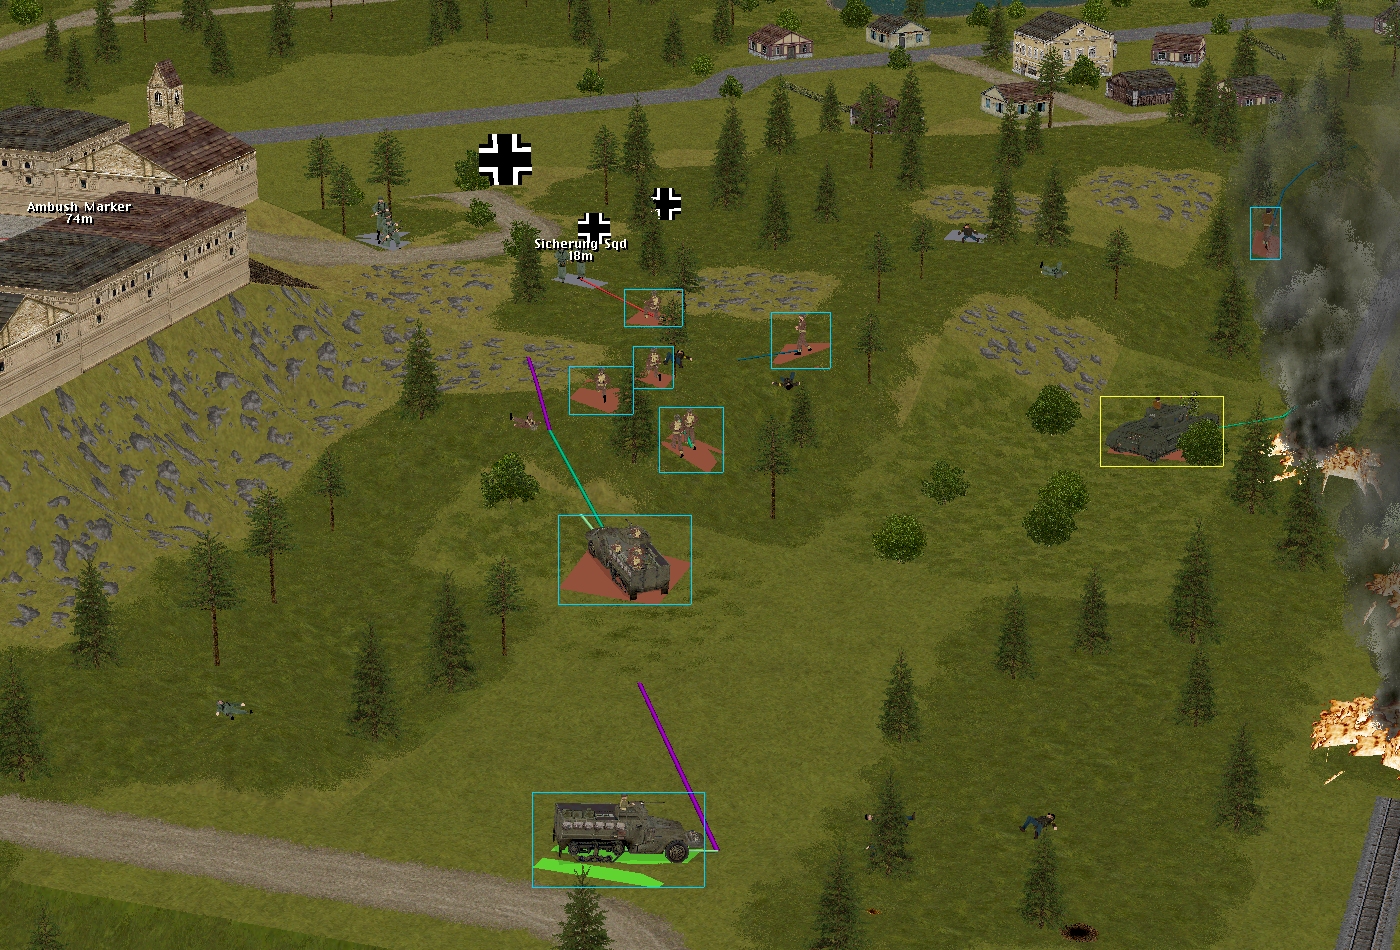
Just as cheering as the KT’s demise was the table-turning close to the castle entrance. Amazingly, only one of the Tommy infantrymen involved in this desperate woodland ding-dong fell during the turn. The sole casualty – one of Forester’s ‘B’ team – was cut down while attempting to distance himself from the enemy halftrack and the security squad beyond the castle approach road.
That nine-man Sicherung squad that stormed across said road last turn, and appeared to be on the verge of decimating the depleted British force south of the Schloss? Like the four-man unit it attempted to bolster, it was comprehensively dismantled by Limey grit, bullets, bayonets, and Mills bombs.
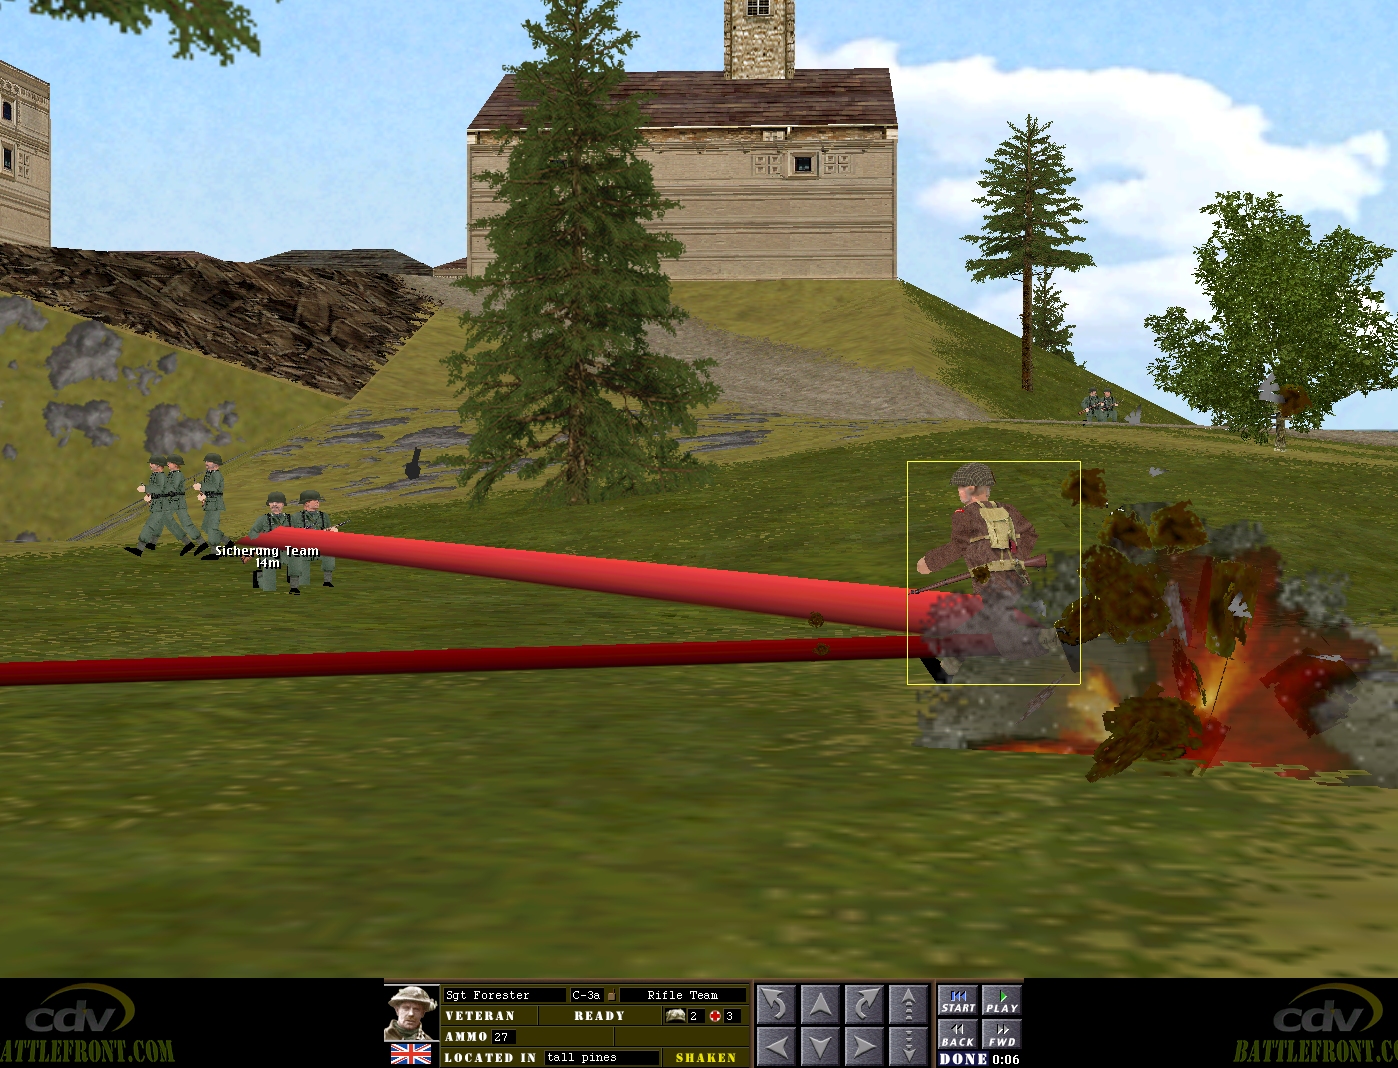
First ‘Fighting’ Forester dislodged the smaller threat (note the incoming stick grenade).
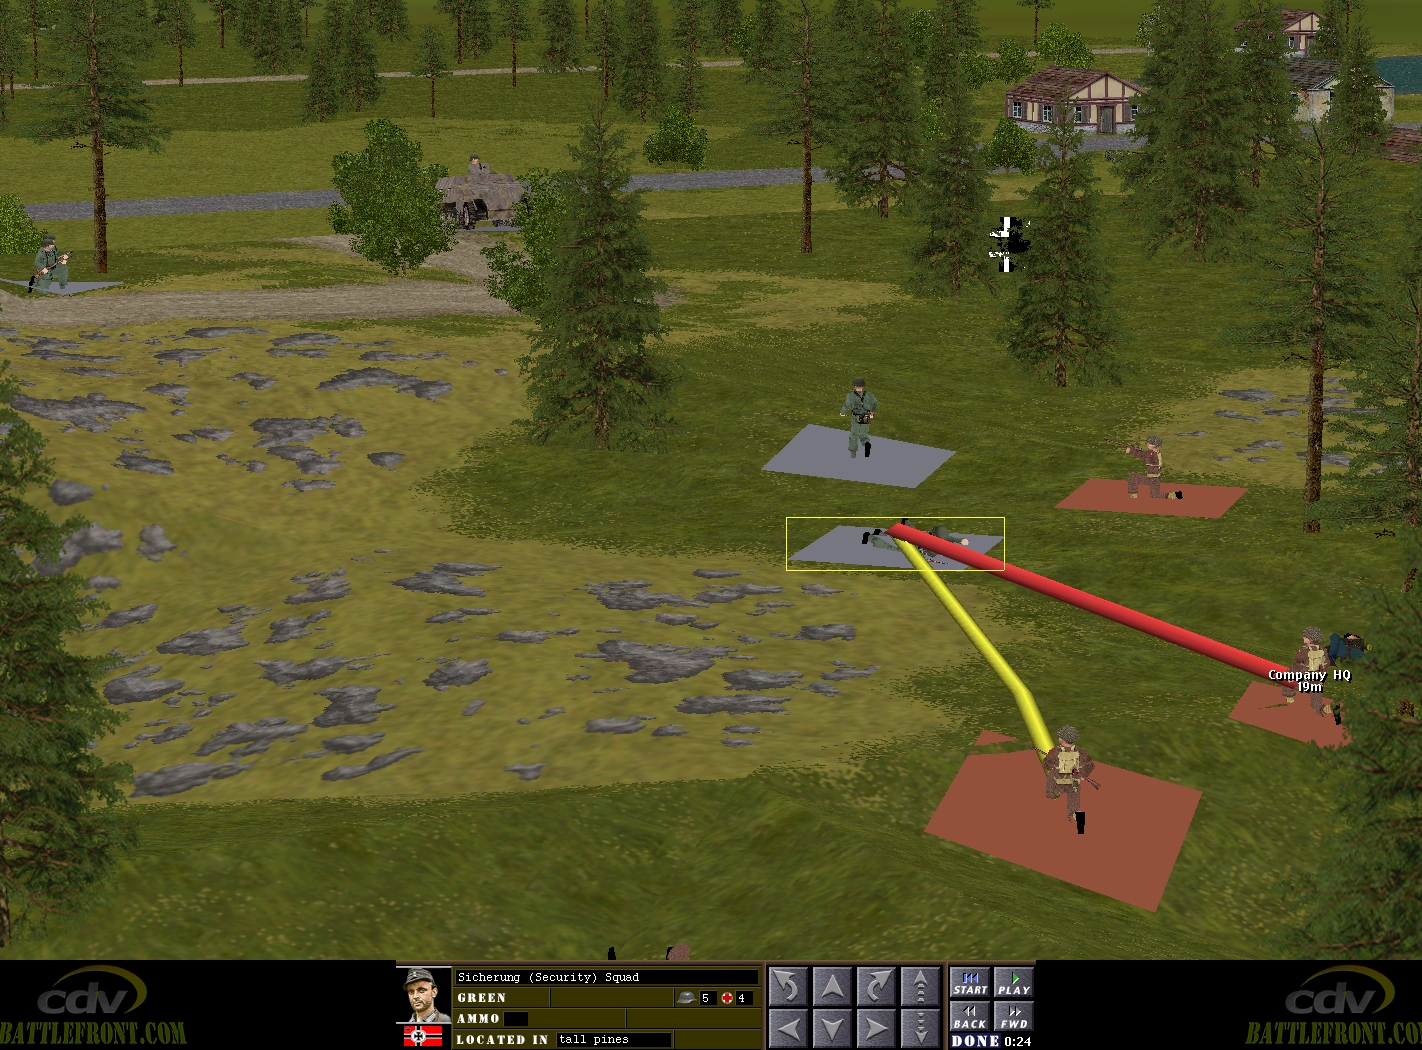
Then, working together, Hood, Venison, and Forester reduced the larger one to five fleeing irrelevances.
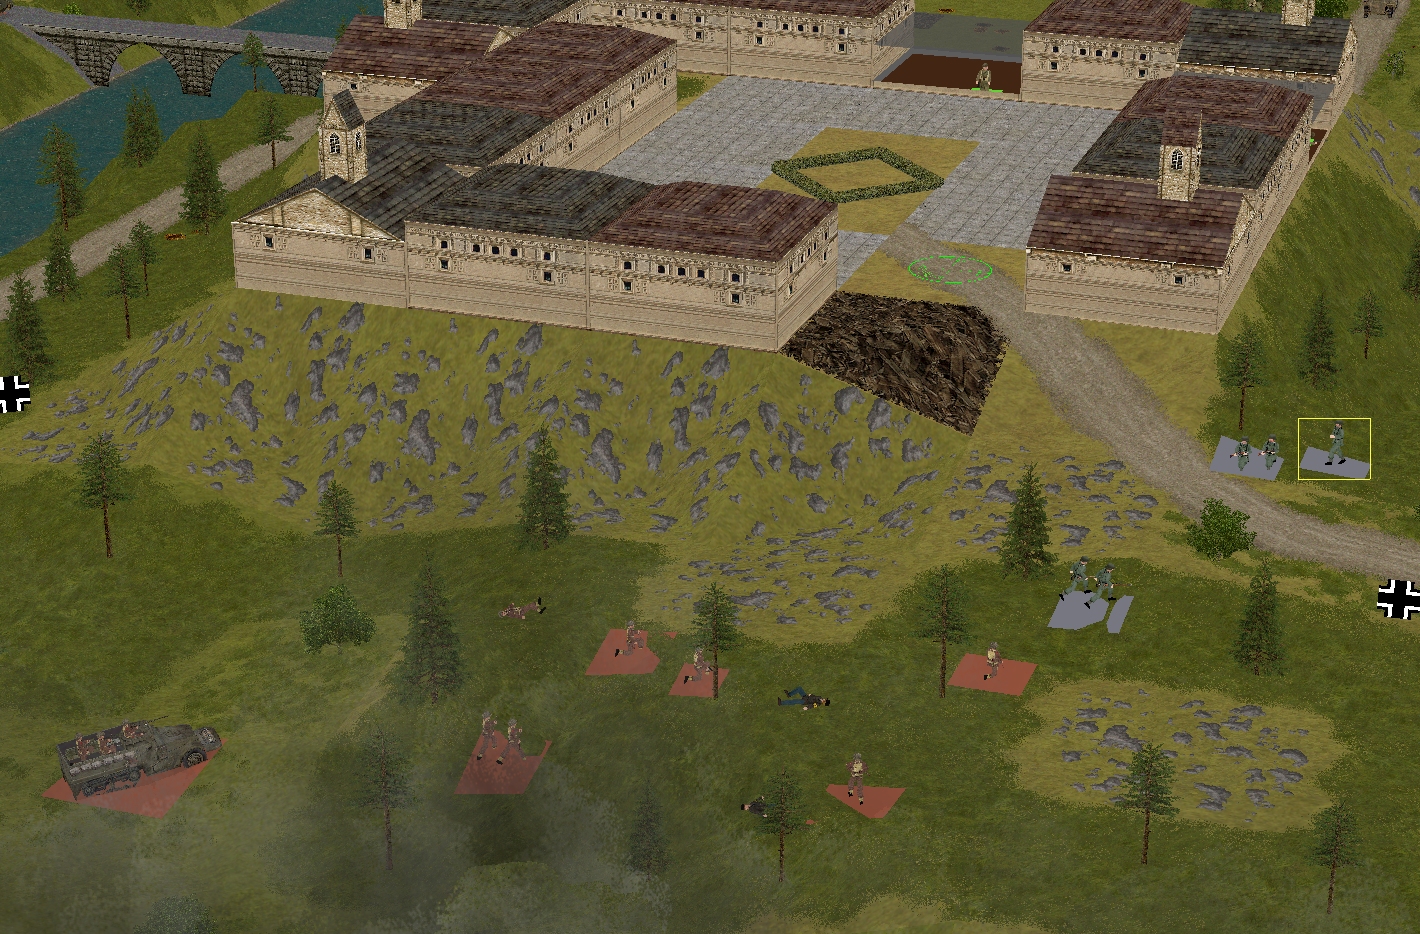
Yes, the battle for what’s left of the castle gates is far from over (in the closing seconds of the turn another unidentified ‘Infantry Squad?’ pops out of the feathery pine re-gen in 21,3,2) but, with the help of recently arrived reinforcements (Fletcher’s HT delivers half of its passengers – Greenwood ‘A’ – before the clock stops) – things look much brighter for the Allies in this region of the battlefield.
Turn 26’s other notable incidents and developments include…
(all of the following images were snapped at T+60)
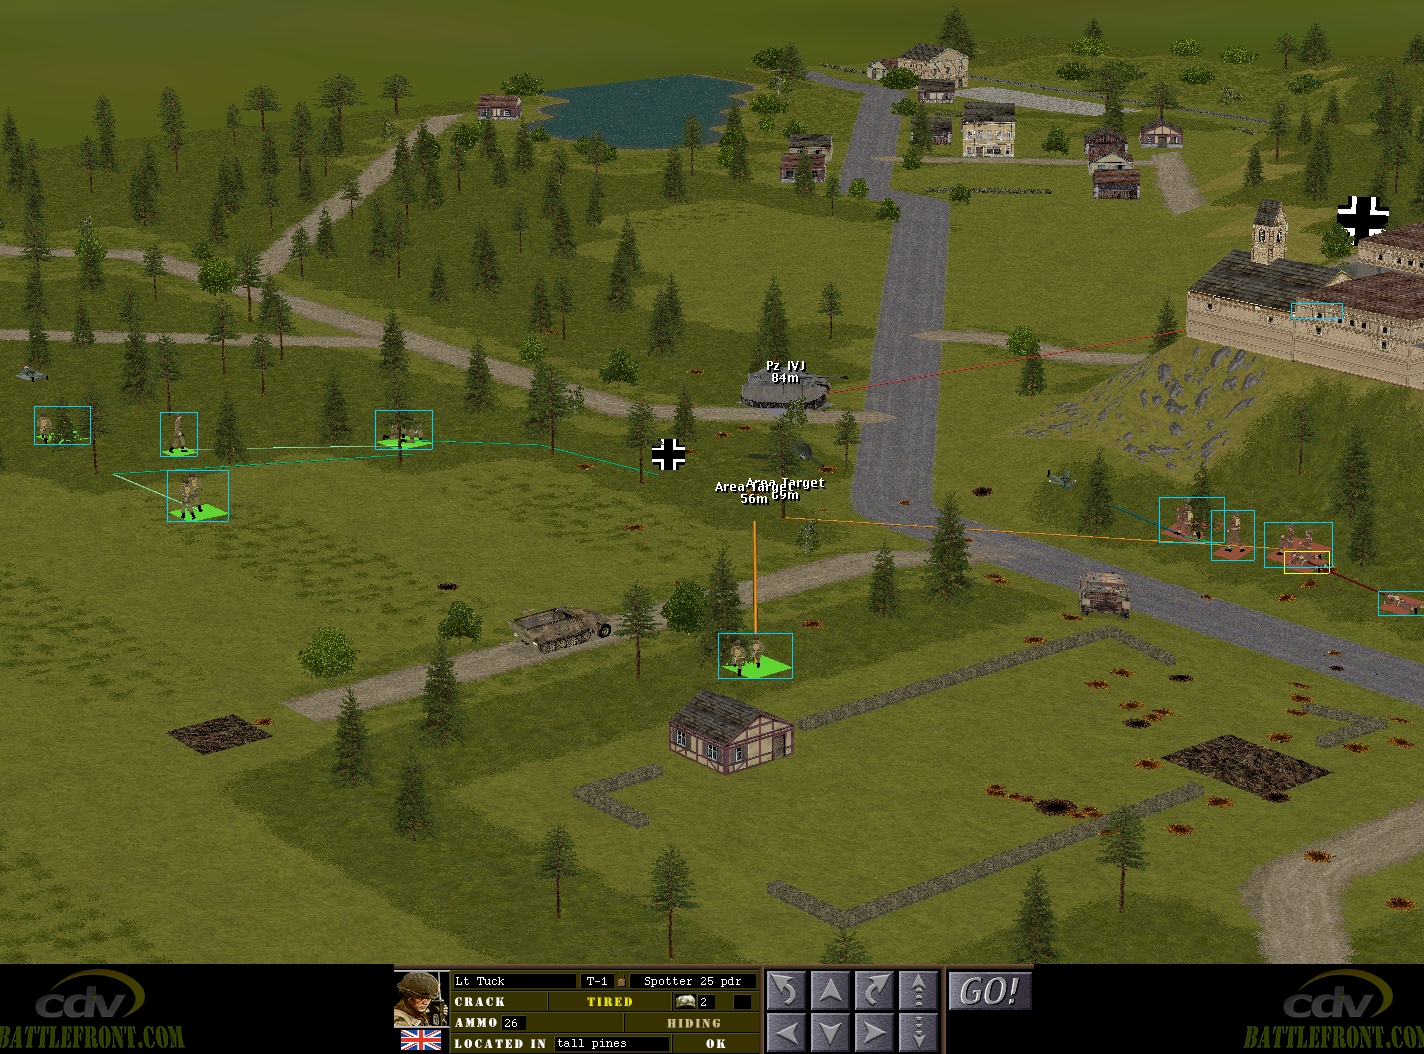
…Corporal Whitehand, perhaps fearful of 75 mm reprisals, failing to have another go at the Panzer IVJ, and a ‘tired’ Tuck scratching his latest barrage and moving up.
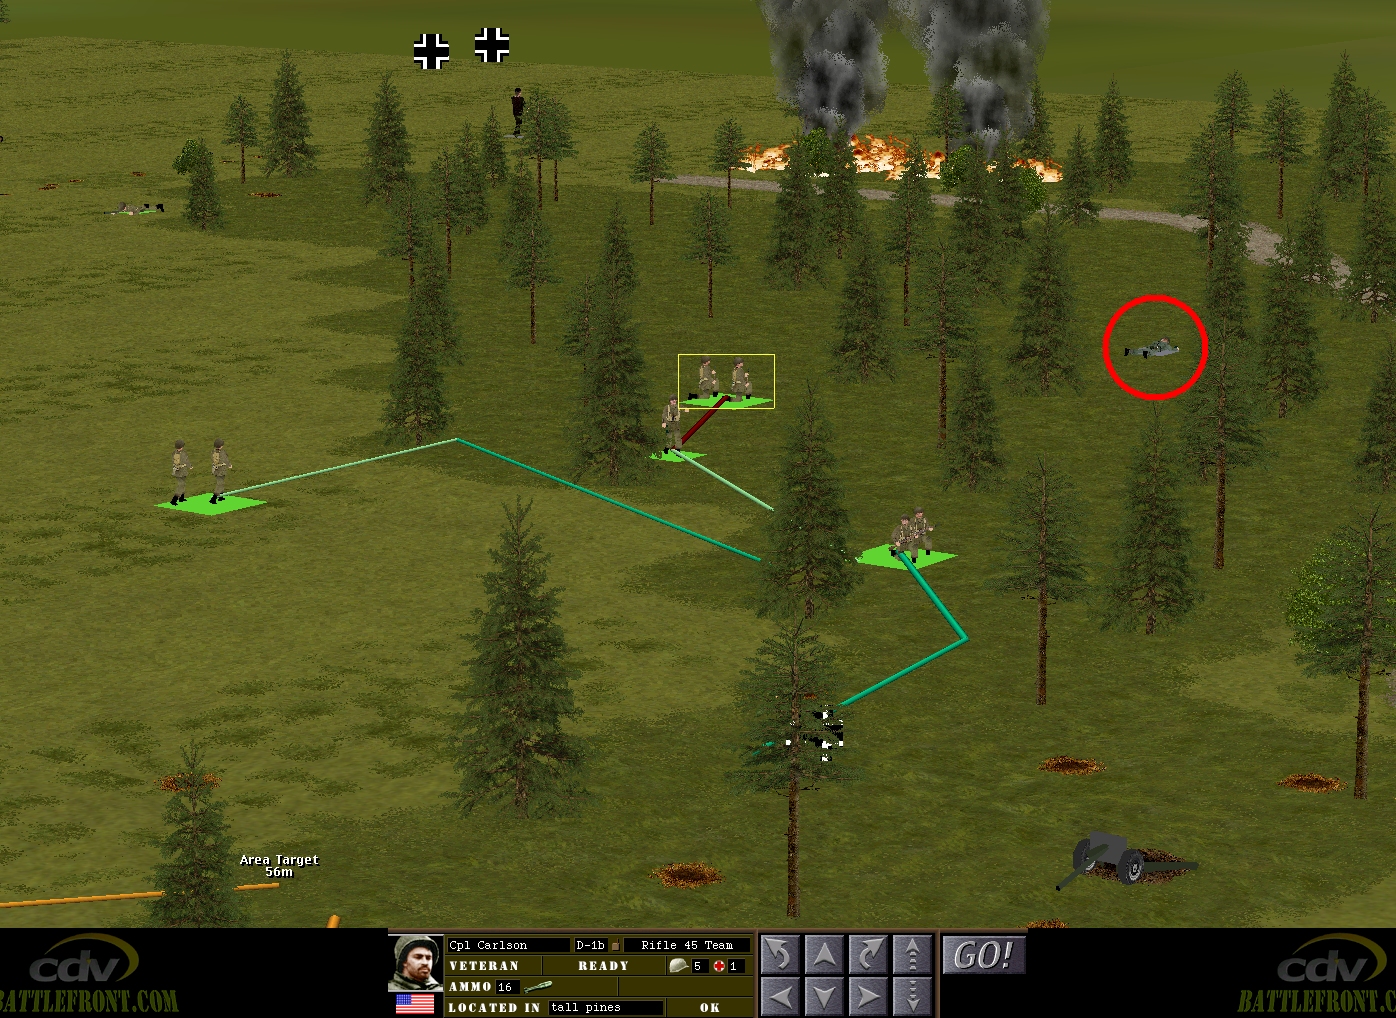
…Corporal Carlson getting distracted by innocuous German stragglers.
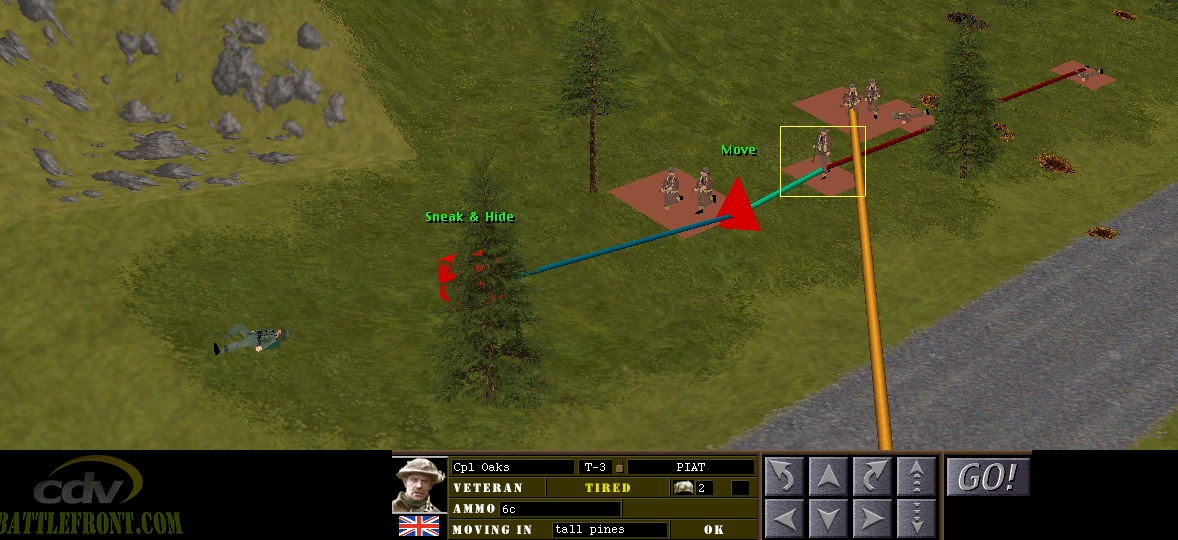
…Marian’s ‘tired’ PIAT team puffing and panting.
…Corporal Spencer’s driver putting pedal to metal.
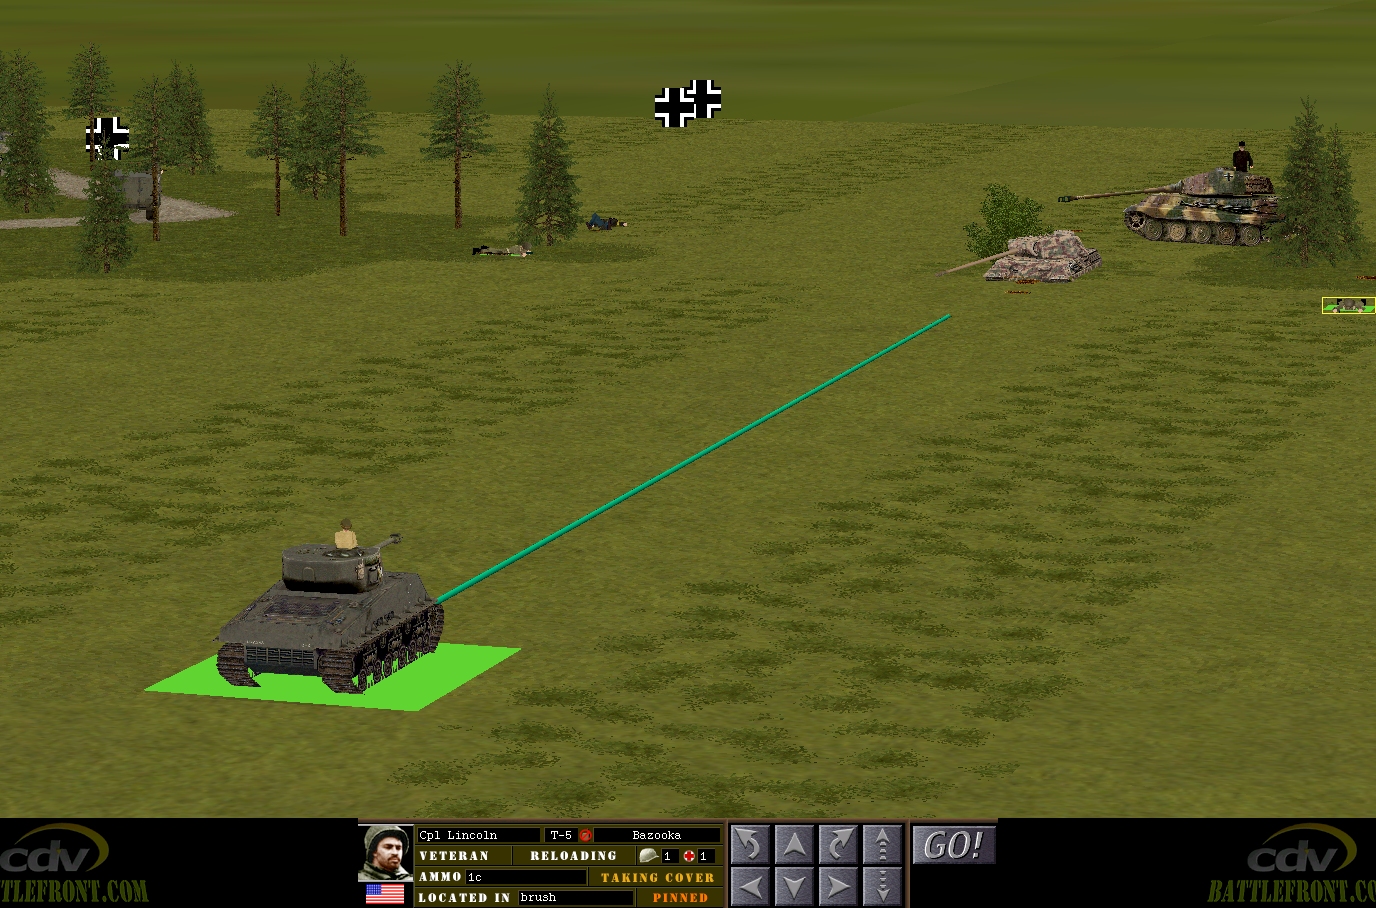
…and Corporal Lincoln (now commandable again) counting his lucky stars.

Turn 27 orders here, please. Commenters are cordially invited to suggest moves for the following seven unit groups. First come, first served. Order execution is usually Monday morning at 0700 GMT.
(See screenshots for unit locations)
– Captain Hood’s party (Hood’s HQ (6 men), Sergeant Venison’s rifle squad (2 men, low ammo), Forester’s squad (3 men, split), Sergeant Greenwood’s squad (9 men, split) + Corporal Fletcher’s M5A1 halftrack)
– Lieutenant Marian’s men (Marian’s HQ (4 men) + Sergeant Sherwood’s rifle squad (10 men, split) + PIAT team + 3 inch mortar team)
– Sergeant Bowman’s Archer TD
– Sergeant Johns’ Churchill VIII (bogged)
– Sergeant Pyle’s Sherman
– Lieutenant Costner’s platoon (2 split inf squads + bazooka team + 1 HT)
– Captain Dale’s party (Six POWs armed with pilfered rifles and pistols) + Corporal Whitehand’s team (Two POWs armed with a pilfered Panzerschreck)
Please start all order comments with ‘ORDER’ and any later revision comments with ‘REVISED ORDER’. This will help me distinguish firm instructions from suggestions and advice.
(The aim is to have units south of the castle able to shoot out onto the castle path but not get macerated if the hun half-track comes by again)
ORDER: Sergeant Forester One Man unit
Cancel current move.
MOVE FAST behind Two Man unit
MOVE CAUTIOUSLY north and REJOIN Two Man unit
ORDER: Greenwood unit in tall pines (Greenwood ‘A’ ?)
Cancel any remaining move.
MOVE FAST to northern blue-trousered corpse
MOVE CAUTIOUSLY to take position on Forester’s Two Man unit’s left
ORDER: Greenwood unit in half-track (Greenwood ‘B’ ?)
Disembark
MOVE FAST between Venison and Hood
MOVE CAUTIOUSLY further left of Forester’s Two Man unit [13, 1-2, 4-5]
ORDER: Cpl. Fletcher’s halftrack
Eject Greenwood’s rump
MOVE through scattered trees to [13, 3, 1] to be east of the Churchill
MOVE CAUTIOUSLY to peak out at [5, 3-4, 5]
FACE east
ORDER: Sgt. Scarlet
(Pick up the pace a bit)
MOVE NORMALLY east 10m to get on the downward slope
SNEAK to the same destination [14, 5, 1]
ORDERS: Lt Costner’s Platoon:-
Costner – Complete move.
Lincoln – RUN to 46, 3, 1. MOVE to 38, 2, 1.
Sgt Alvarez – Complete move.
Carlson – RUN to 38, 4, 1 HIDE.
Shanley – CANCEL area target. MOVE to 37,1, 2. Face SE.
Olander – RUN to 37, 5, 1. MOVE to 37, 4, 1.
Spencer HT – Await developments.
ORDER: Sgt Pyle’s Sherman – FASTMOVE to 37, 3, 4. Then
HUNT to 37, 2, 2 via 37, 2, 3 to. FACE S.
ORDERS: Dale’s Party:-
Dale – CANCEL Ambush target. RUN to 20, 5, 2. Avoid the
Ornamental gardens (admission costs extra) proceed to
TOP floor NE cnr window. FACE E.
Whitehand – RUN to 20, 5, 2. TOP floor SE cnr Face E.
ORDER: Bowman’s Archer – REVERSE to 29, 1, 5. Keep to
Southern edge of road.
ORDER: Tuck – Take a breather.
ORDERS: Marian’s Platoon:-
Marian – MOVE to 29, 1, 4. Wave his Webley, ask the PIAT team if
they would mind awfully picking up the pace a smidgeon.
Hawthorn’s Mortar – Continue to enjoy the view.
Sherwood – A’ and ‘B’ Team Cease area fire.
PIAT team – Move to NE cnr of 29, 2, 4. FACE SE.
REVISED ORDER: Cpl. Fletcher’s halftrack
Eject Greenwood’s rump
MOVE FAST to [28, 2, 4]
REVISED ORDER: Cpl. Spencer’s HT
MOVE FAST to [12, 4, 2]
MOVE through scattered trees to [13, 3, 1] to be east of the Churchill
MOVE CAUTIOUSLY to peak out at [5, 3-4, 5]
FACE east
I guess Sgt. Venison DCM’s wounding words somehow crossed the language barrier. Either that or…
https://youtu.be/YeMnPyusuBE?si=cU4Fkz2Nn_wiOLvr&t=337
Now he can get on with his second favourite dream for life after the war: launching Leonidas brand Fluid Beef to fortify refined palates throughout the British Empire.
(His most favourite dream was riding in the rear tandem seat of a Tamplin as Lt. Merry’s “companion” while they traversed the country as a couple of raggers, solving crimes.)
((Only Venison knows the Leonidas the meat extract commemorates is Merry, not himself. And that the logo contains hidden symbolism to the Sacred Band of Thebes))
– – – – – – – – – – – – –
Tim, are there meant to be a couple of pictures at the end that aren’t showing up? Regarding Cpl Carlson, ‘tired’ PIAT and ‘tired’ Tuck.
In your above comment you’ve got “Sherwood” under Hood. Should be Greenwood, I reckon.
Woods typo fixed and a couple of extra pics added.
And here’s Scarlet’s current destination viewed from the station at ground level (The SE corner of the map isn’t as flat as it first appears):
https://tallyhocorner.com/wp-content/uploads/2026/01/bogen26n.jpg
Who’s taking charge of the Yank HT?
Is Whitehand up for having a pop at the hun HT? What level of pacification at the castle gates would he require?
I’d intended to have Whitehand and the Captn move up to the gates this turn, hence placing both on the ground floor previously, its just a shame the good corporal didn’t recall one his founding fathers wise words first.
https://www.youtube.com/watch?v=lZ4UmlFNdSI&list=RDlZ4UmlFNdSI&start_radio=1.
I’m sending the HT back north to take part in a future ‘thunder run’ into the village, Panzer IV notwithstanding.
Just had another thought. Fletcher’s HT will be short of ammo – not much point moving into the village if it cant shoot up anything. How about a swap? Send Fletcher up north say 27, 2, 4 and take over the Yank, its low mileage and had one careful owner.
“Send Fletcher up north say 27, 2, 4” should be 28, 2, 4.