
Turn 23 ended on a cliff edge. The Comment Commanders’ most valuable (?) armoured asset – a late-war Sherman – seemed seconds away from an unpleasant encounter with an unidentified German heavyweight. In this sixty-second instalment of intricate WEGO wargaming, the mysterious tank reveals itself and expectorates a couple of 88mm rounds.
For the first half of the turn, Pyle’s Sherman looks the likeliest recipient of any emissions from the Grey Eminence.
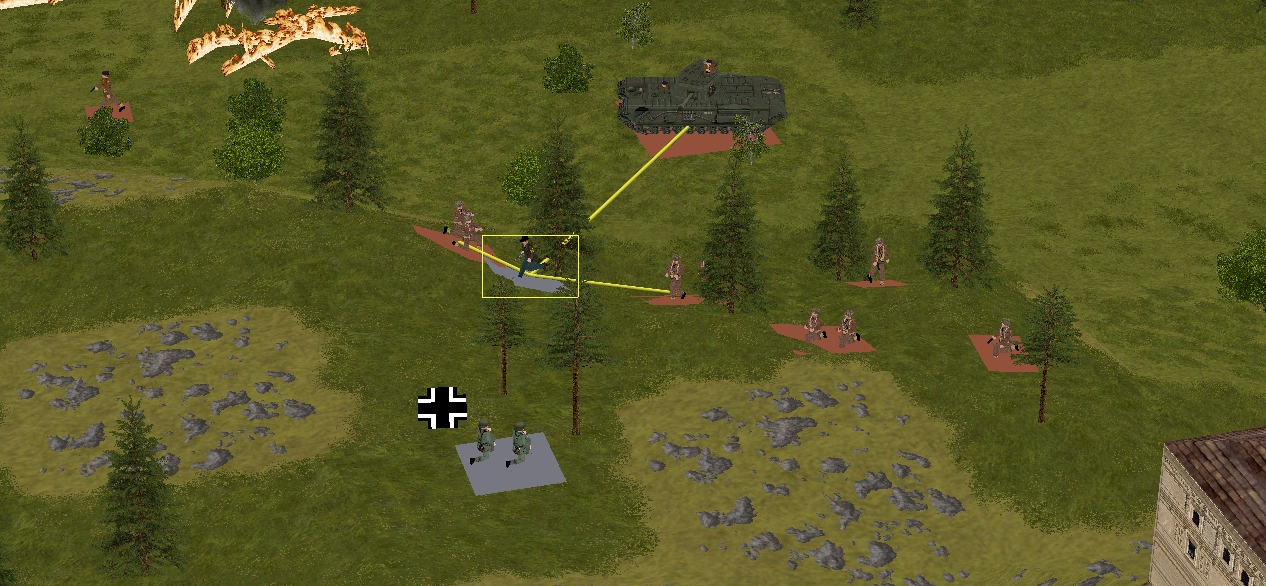
In fact it’s Lieutenant Costner (the US infantry HQ team) and Corporal Lincoln (Costner’s bazooka team), both of whom backtrack this turn, who end up IDing the groundshaker and grappling with it first.
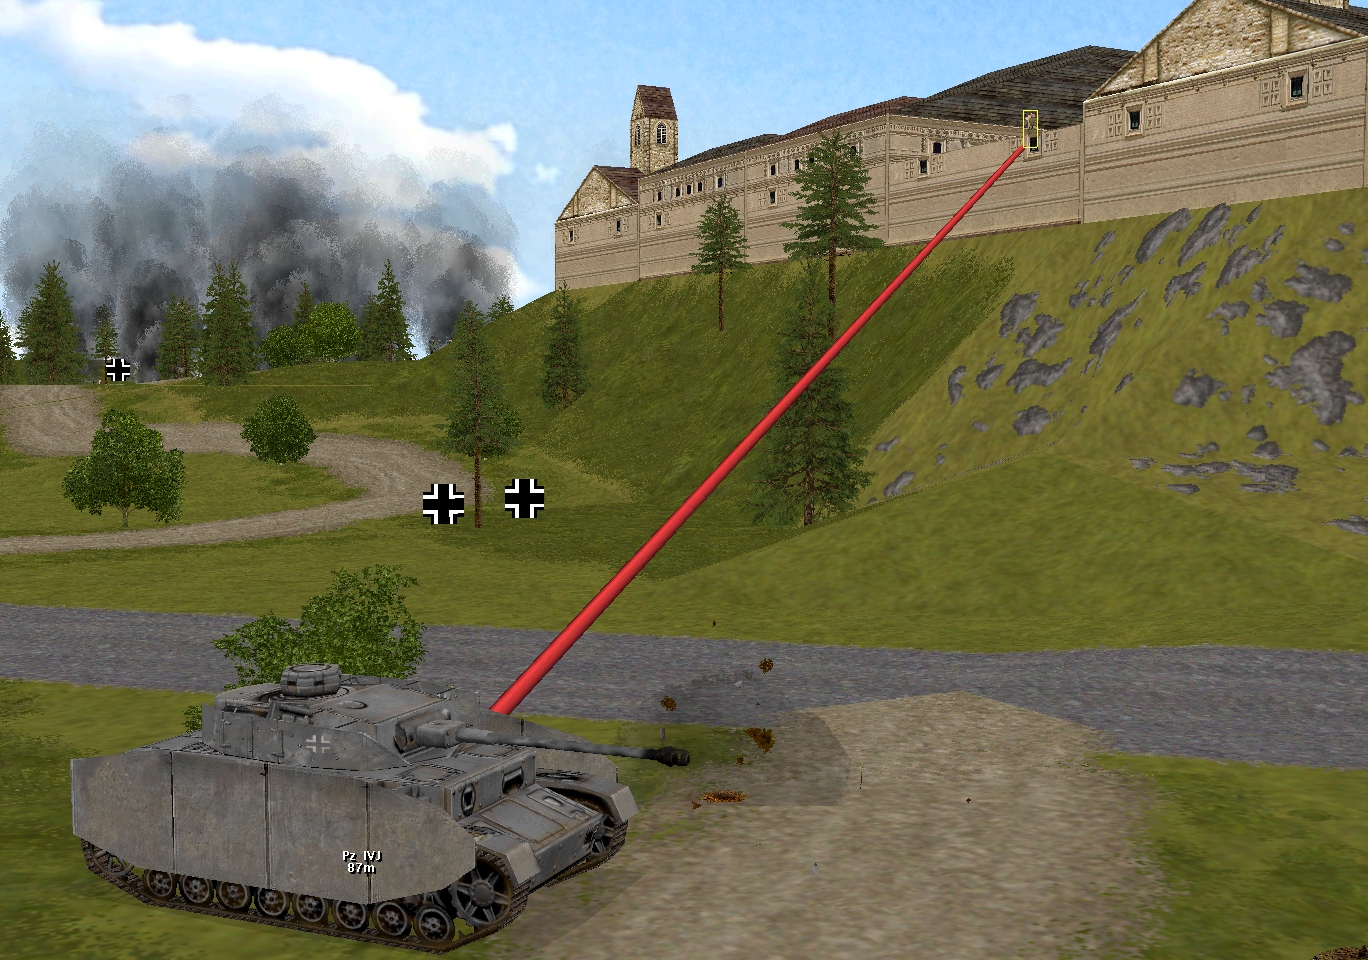
Circa T+40, Lincoln kneels, loads and levels his drainpipe, and launches a 60mm AT rocket into the upper hull of the frond-framed Panzer Something.

The detonation sends Zimmerit fragments flying…
…and prompts the attacked AFV to employ its Nahverteidigungswaffe, but achieves little else.
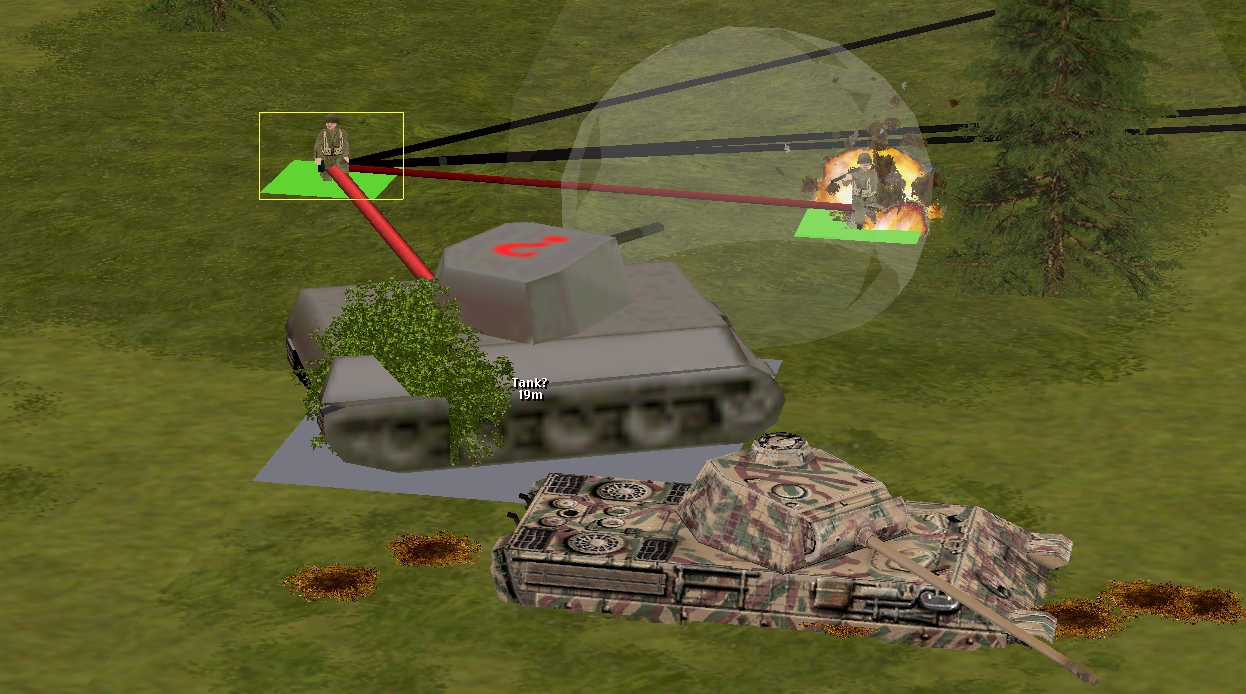
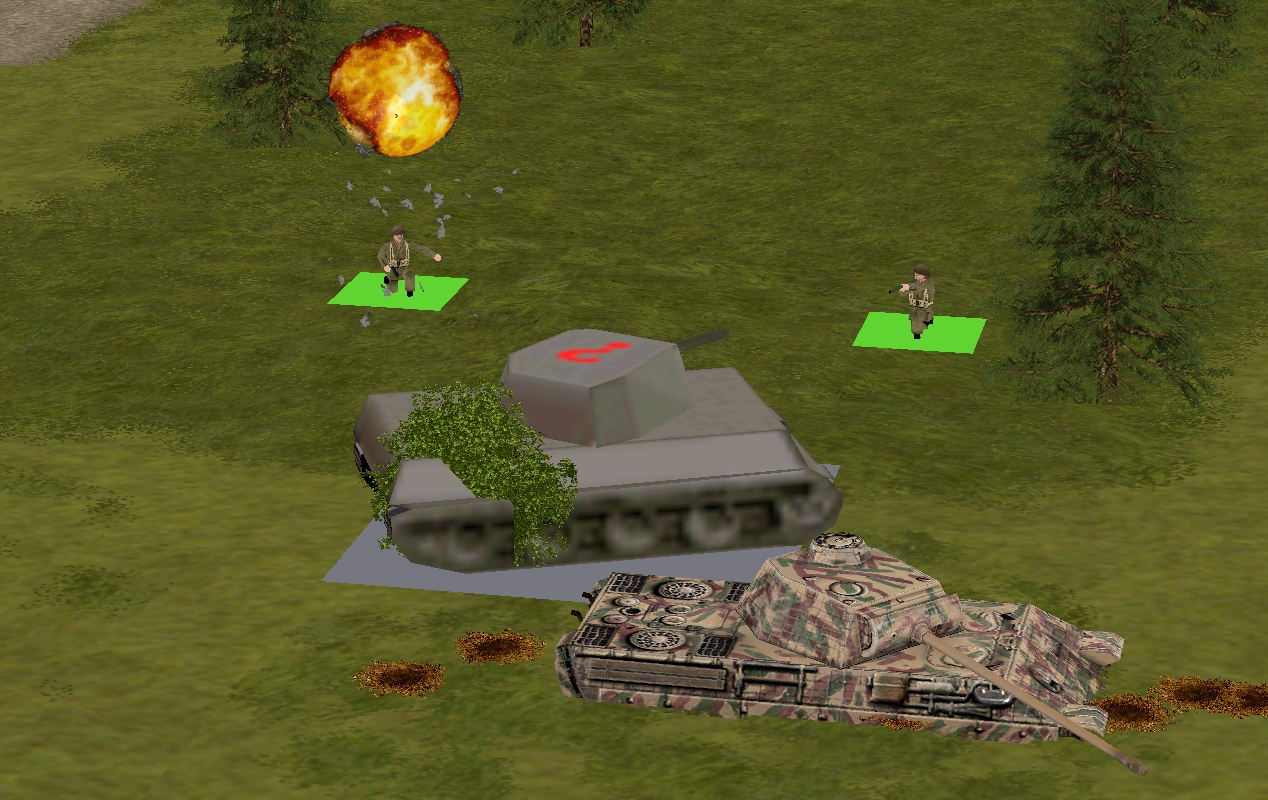
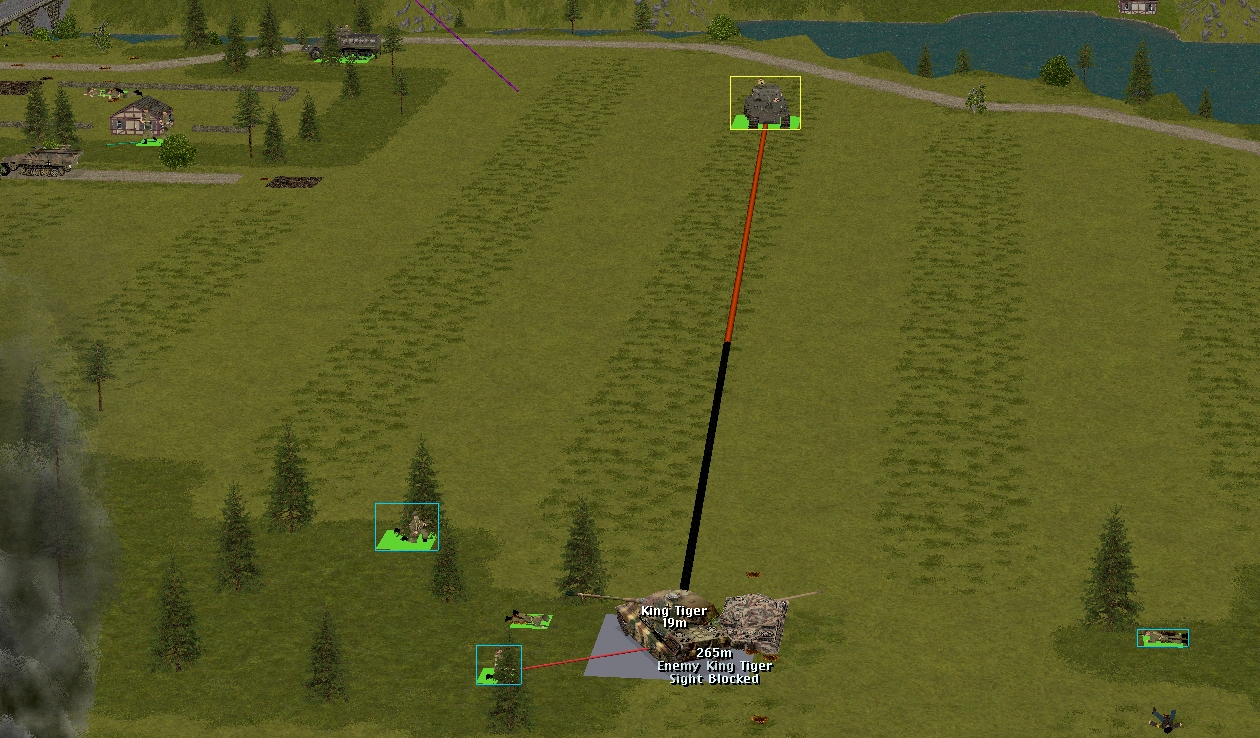
Two seconds after the (thankfully) ineffective grenade blast, Lincoln has his fillings loosened by an 88mm crater maker.
The near miss doesn’t prevent the dirt-spattered zookist from firing one of his two remaining rockets at what he now knows to be a (gulp) King Tiger.

Damn, another inconsequential hit!
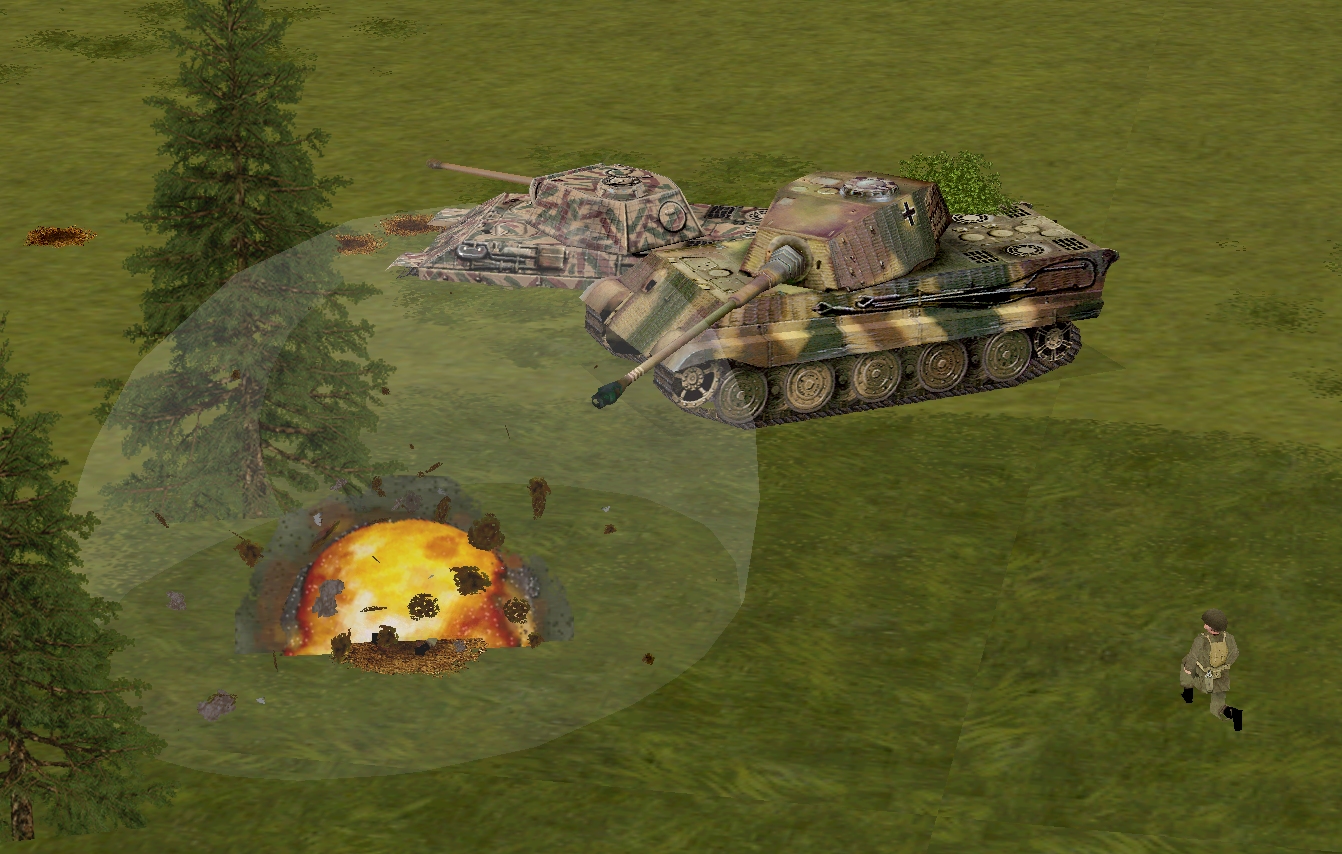
A moment before the clock stops, the plucky tank hunter is mauled again This time the deafening near miss sows understandable panic.
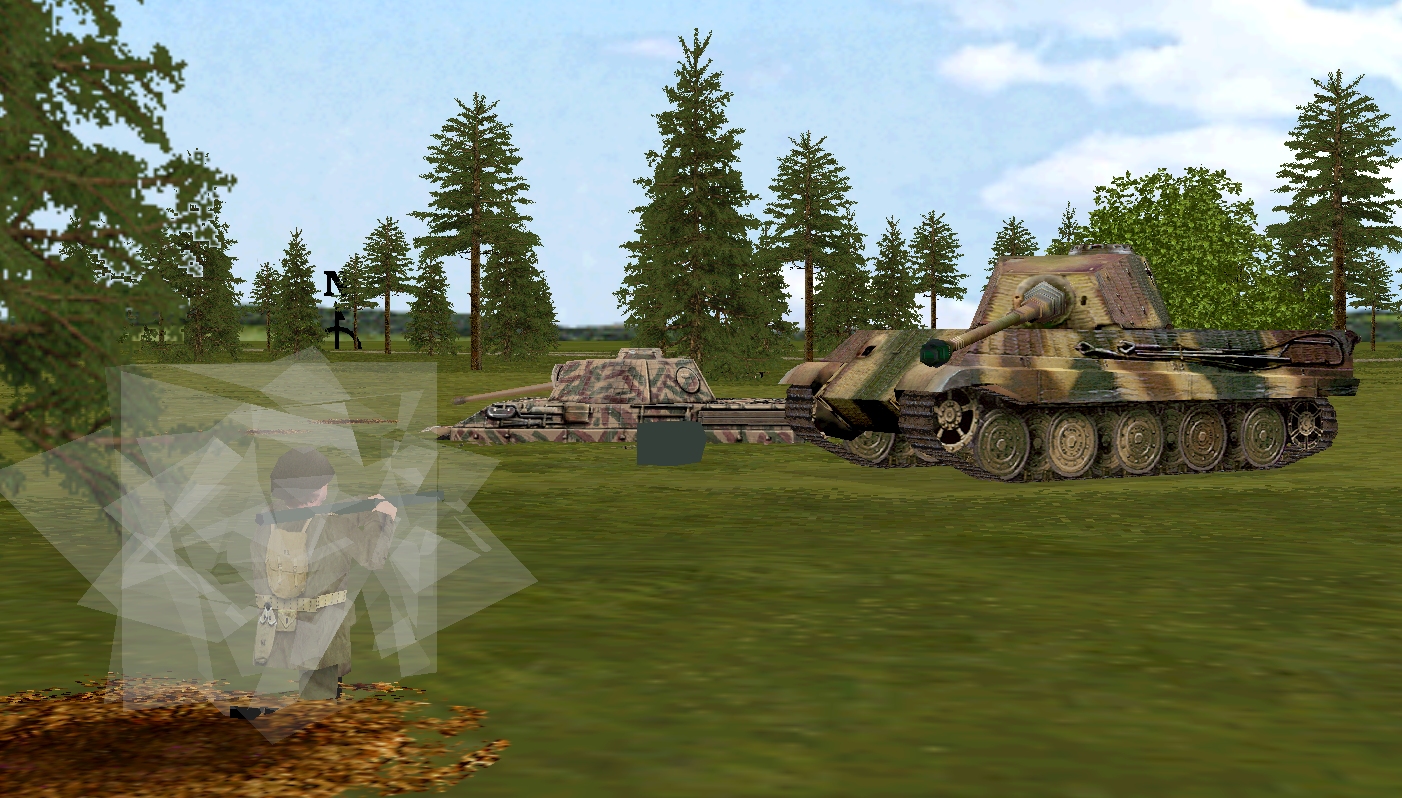
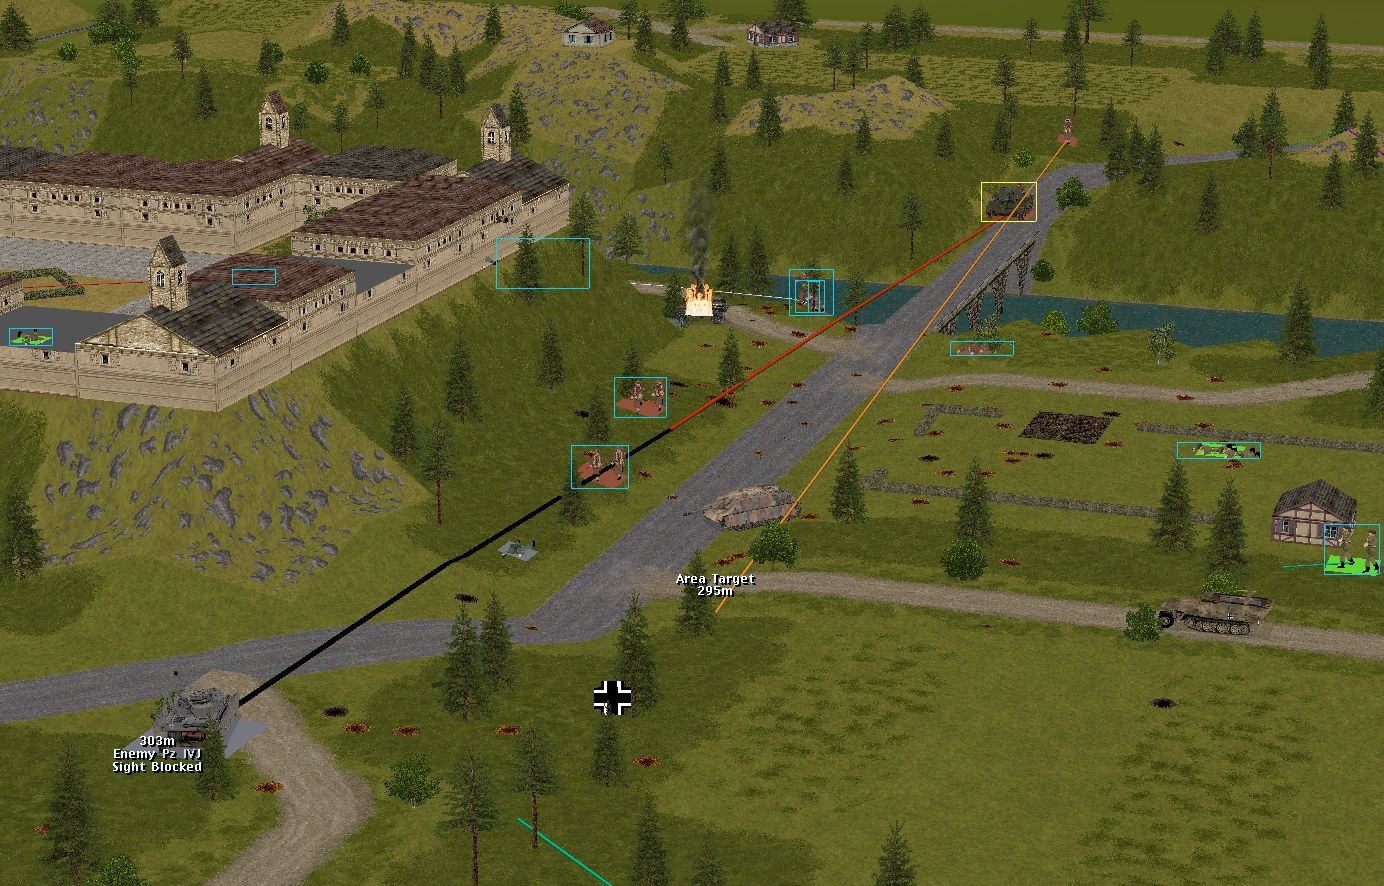
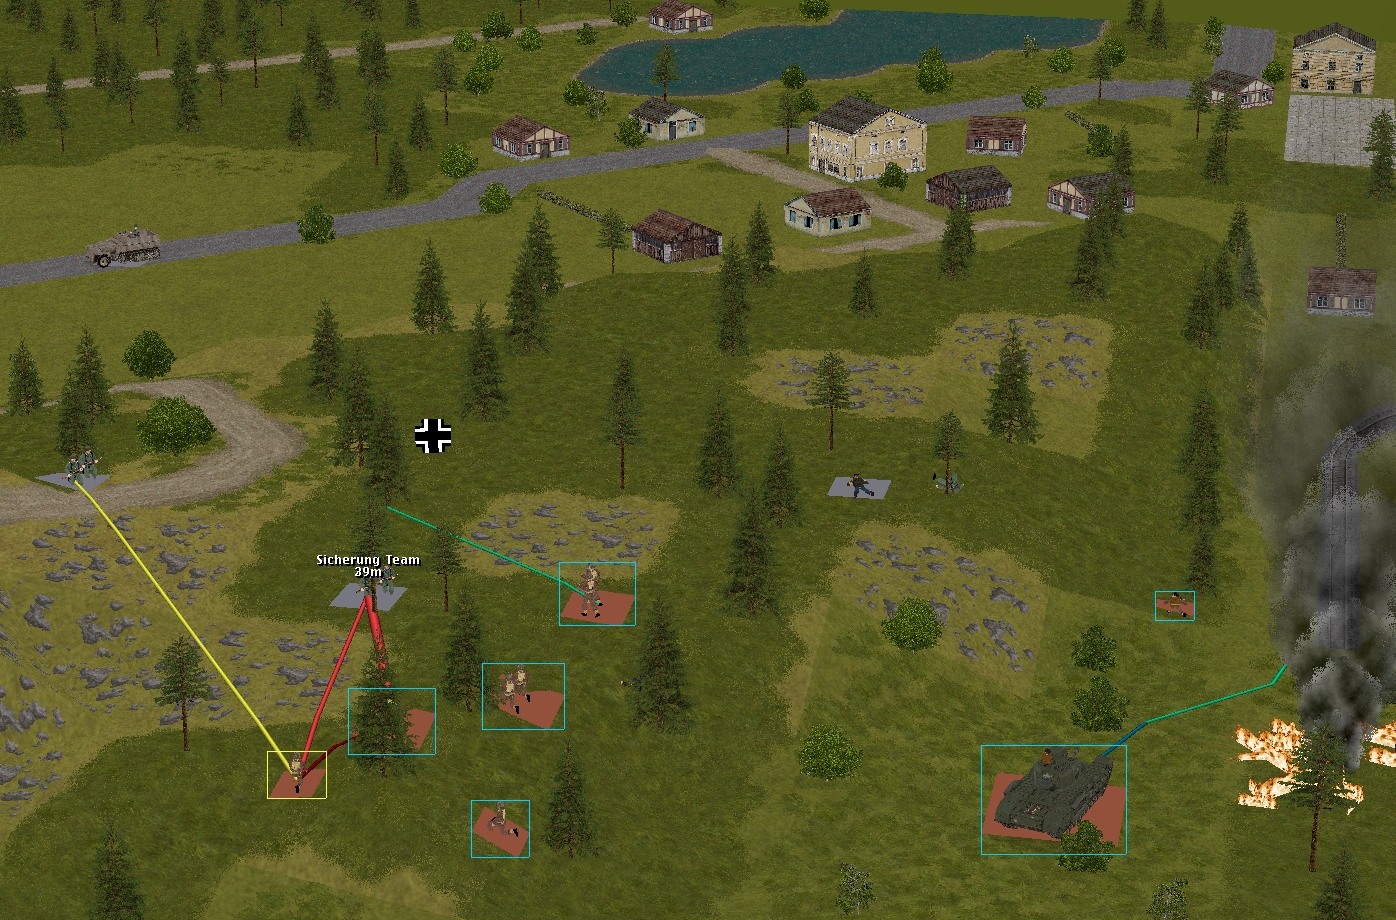
The encastled Corporal Whitehand also looses two AT rockets this sixty. Arriving at a familiar lofty vantage point not long after the Panzer IV has veered off the main road between bridge and village and buttoned up after a nearby spotting round explosion (Tuck is in the process of retasking the off-map 25-pounder battery), he begins taking MG fire from the SE almost immediately.
The incoming probably plays a role in this (^) miss.
However, it doesn’t stop him hitting his mark with his second try.
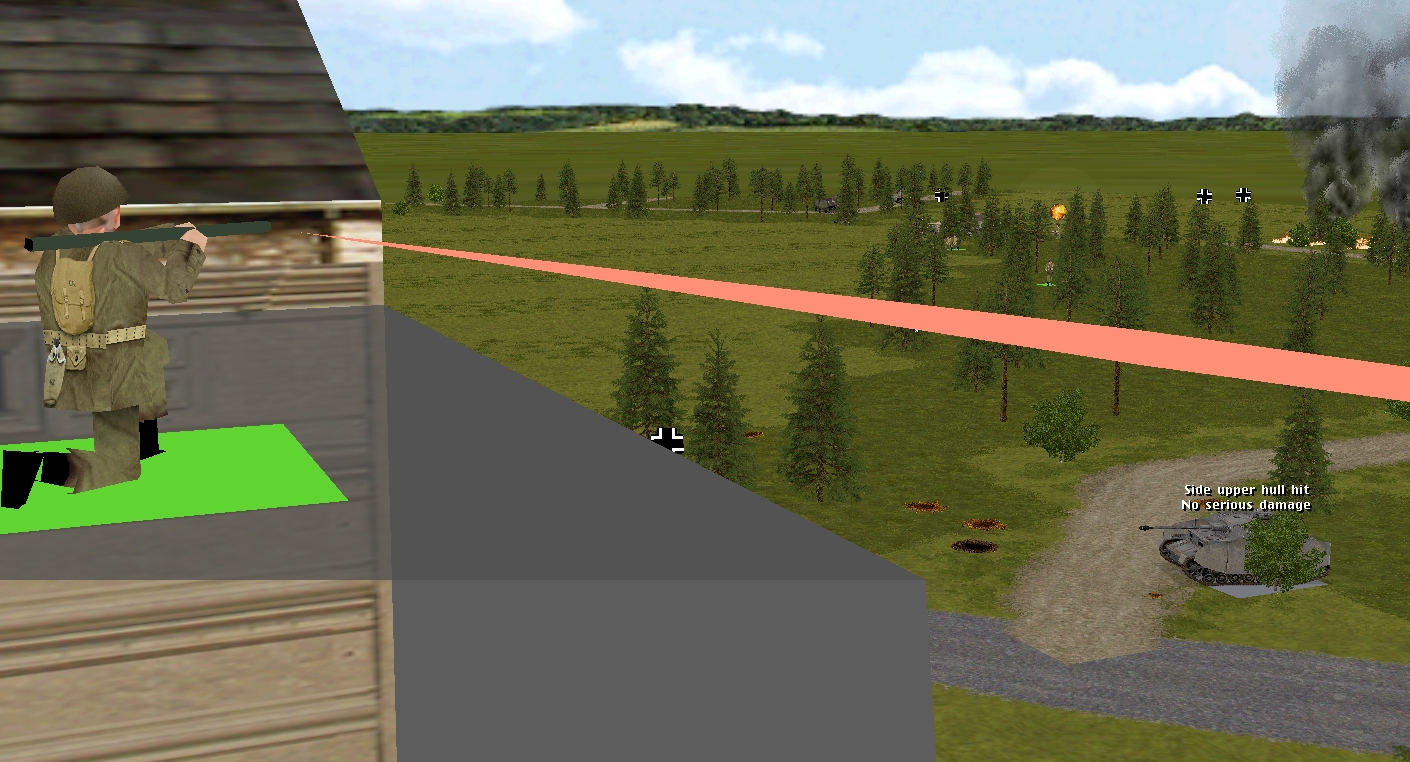
‘Side upper hull hit. No serious damage.’ Seriously!?
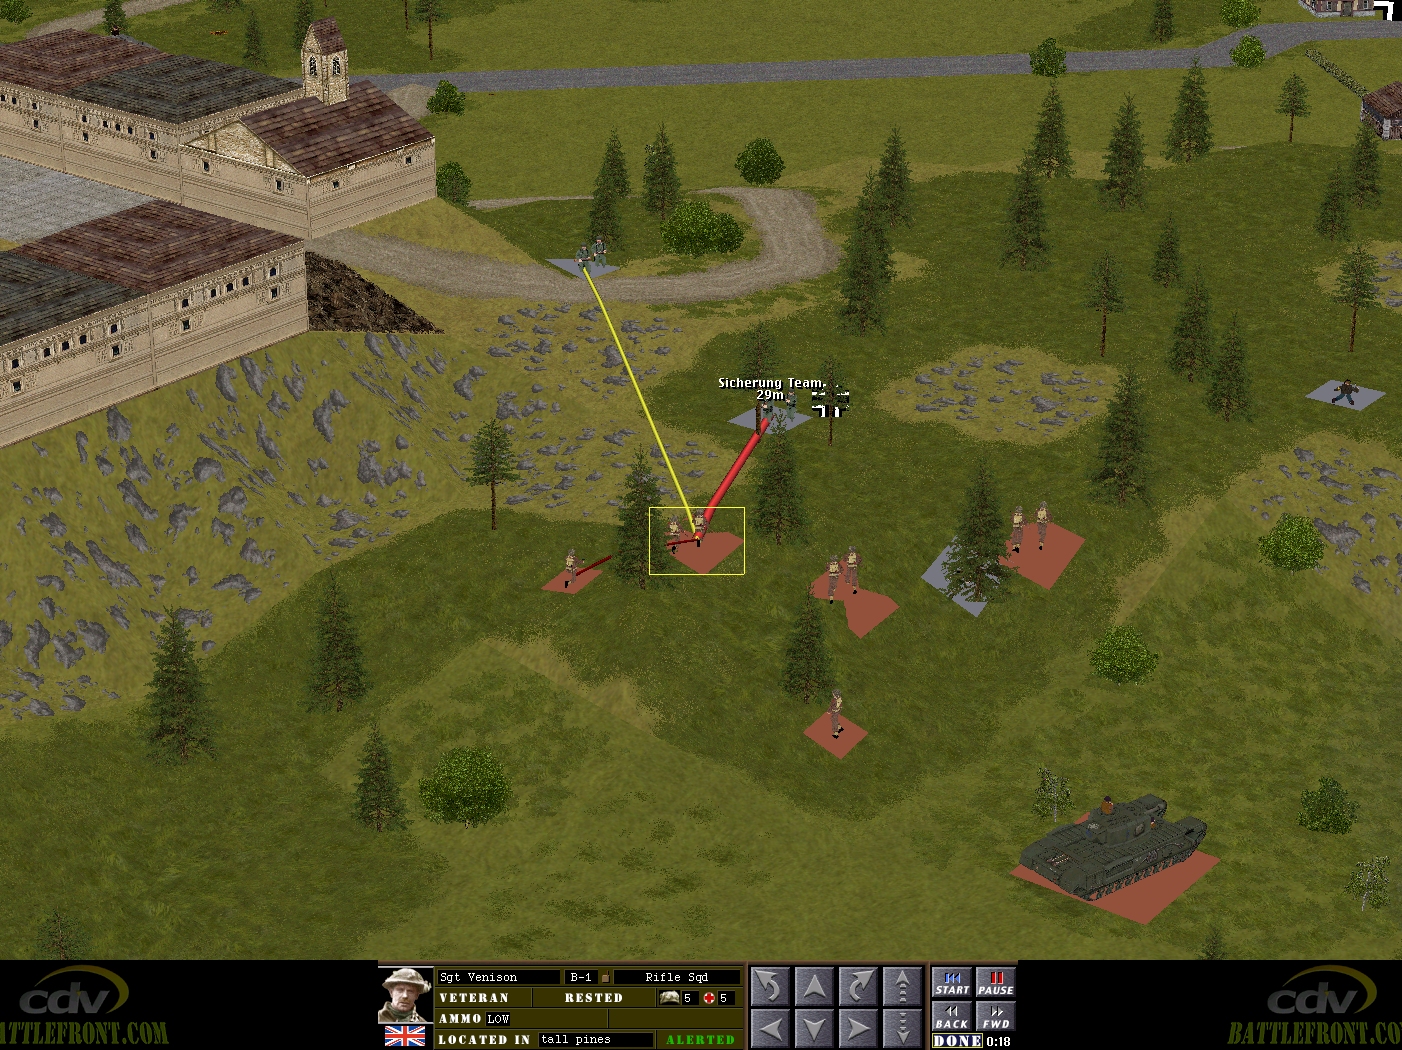
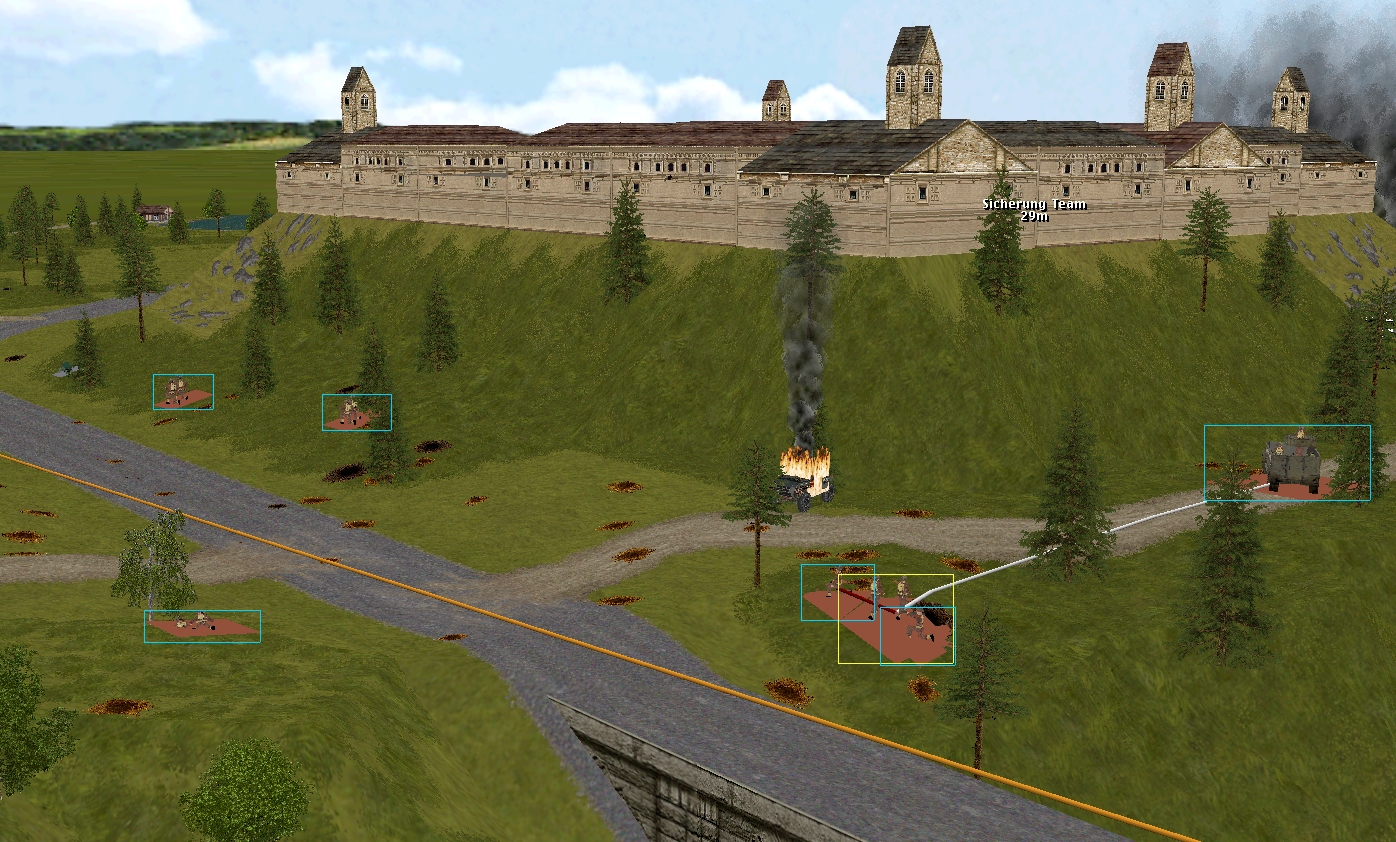
The Brits beyond the rail bridge might not have any tanks to deal with, but denuded by earlier scraps, running short on ammo, and facing two, four-man Sicherung squads (?) in the woods close to the castle entrance, their eastward advance is in serious danger of stalling. There’s eighteen seconds on the clock when one of Venison’s lads groans and hugs a tree trunk for support.
Twenty seconds later, taking SMG fire from two directions, the same Tommy unit loses another man. Lieutenant Merry’s HQ unit also suffers a casualty this turn. The Lieutenant is on his tod from here-on.
Happily, it’s not all bad news south of the Schloss. Between them, Forester’s teams and the Churchill neutralise a three-man Volkssturm unit that fails to withdraw with sufficient haste, and send another battered remnant (indicated by a Balkenkreuz in the above image) haring towards the eastern map edge.
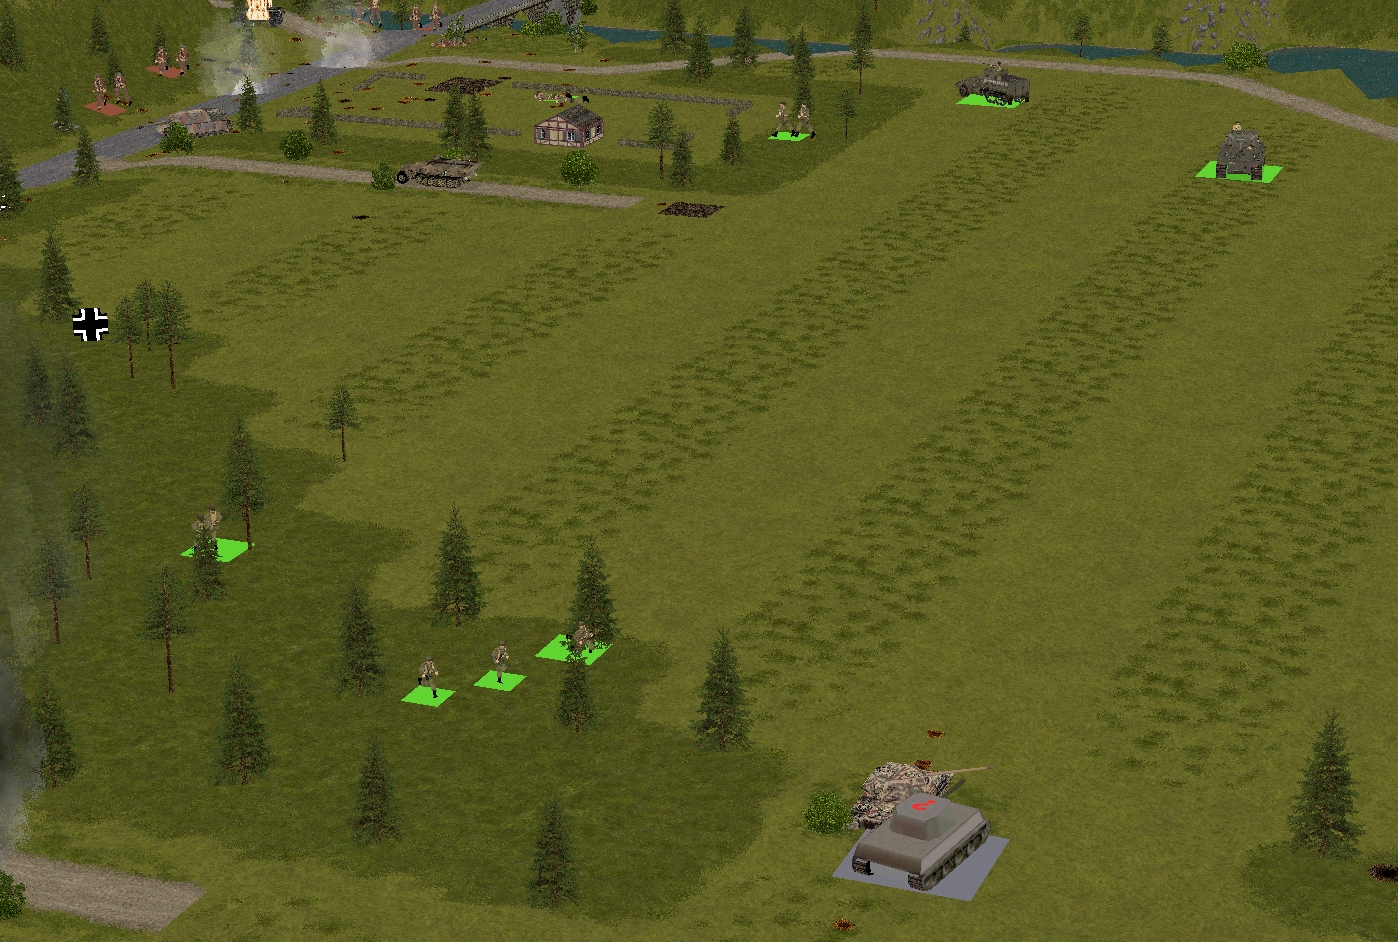
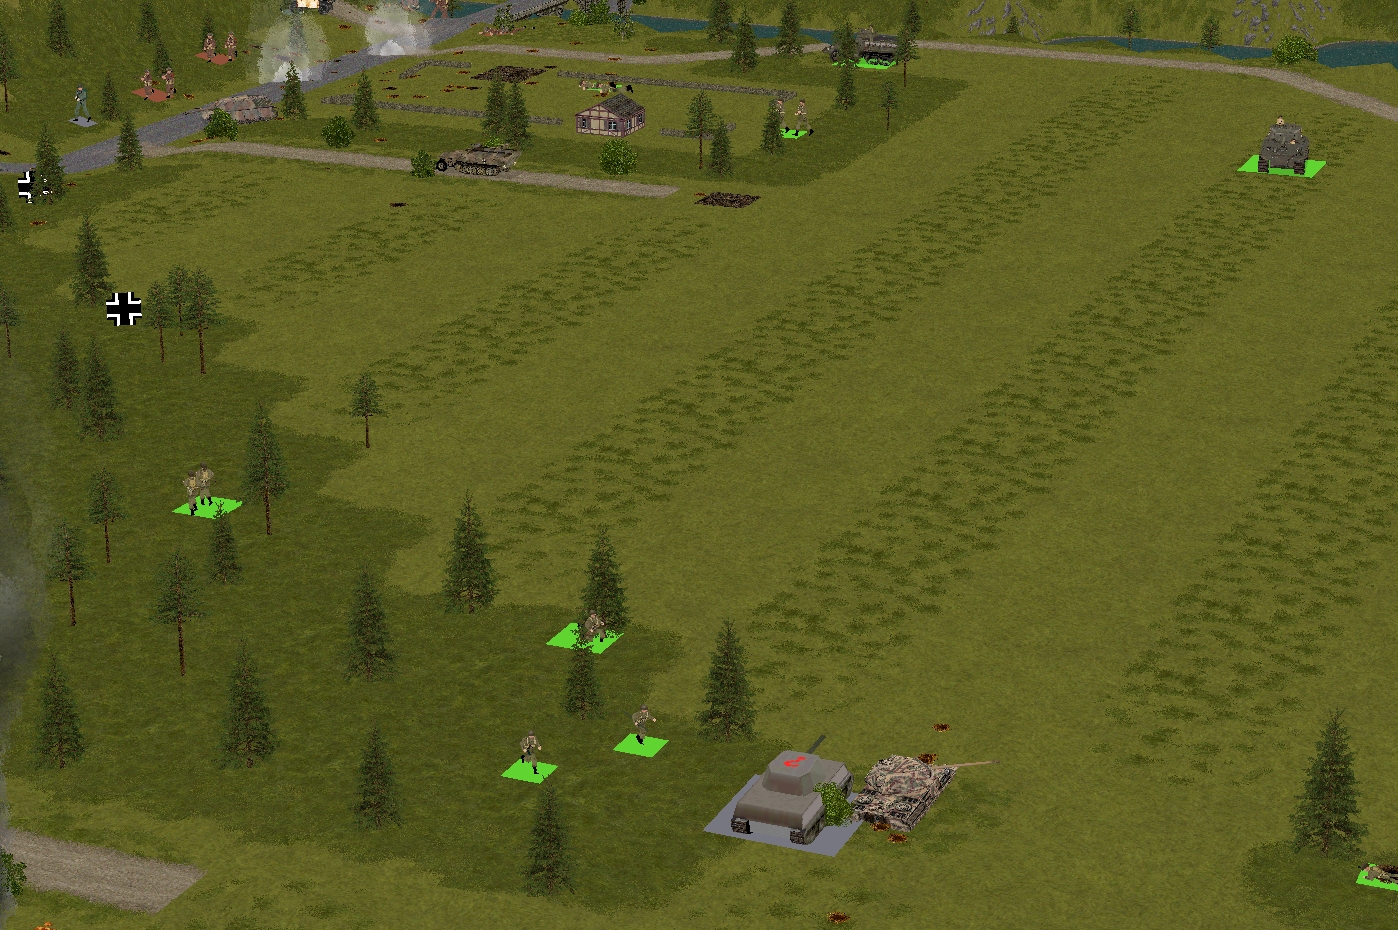
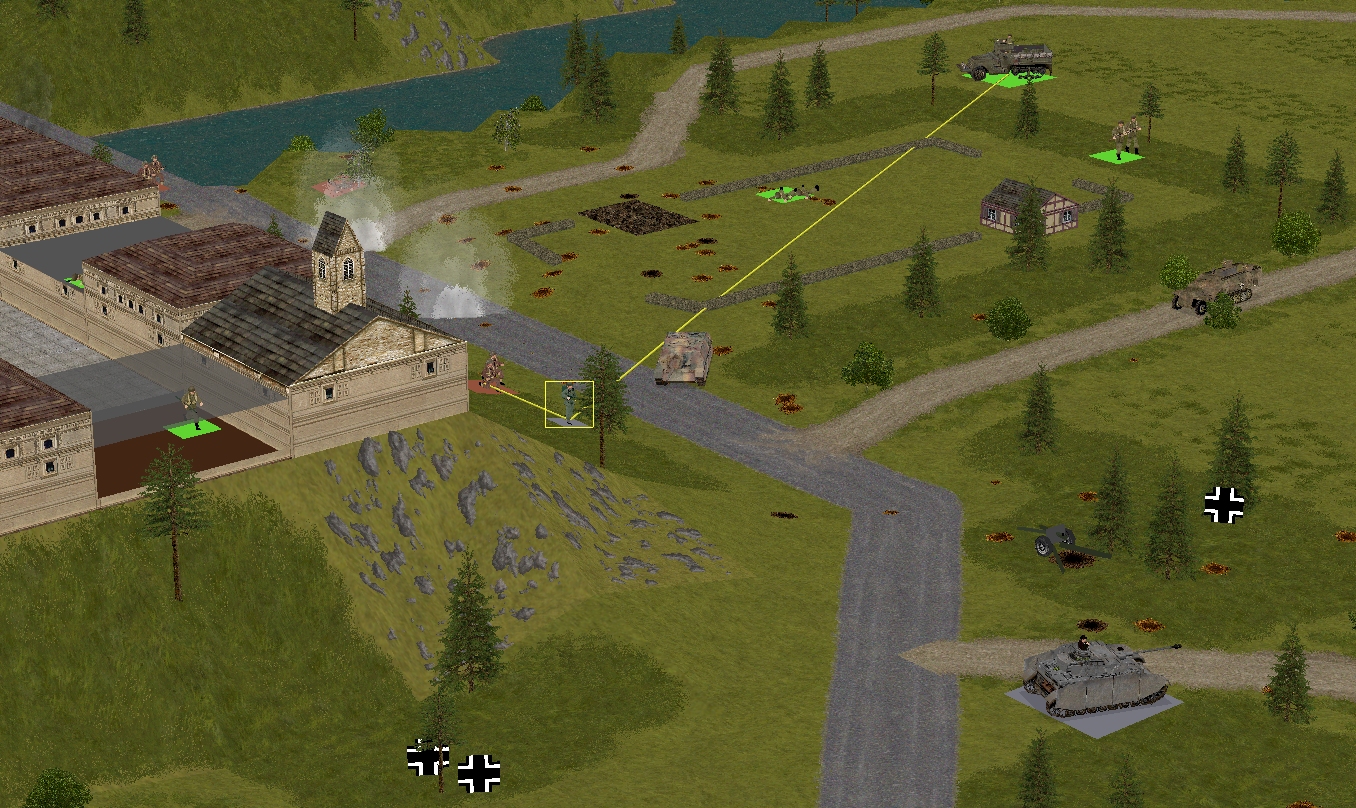
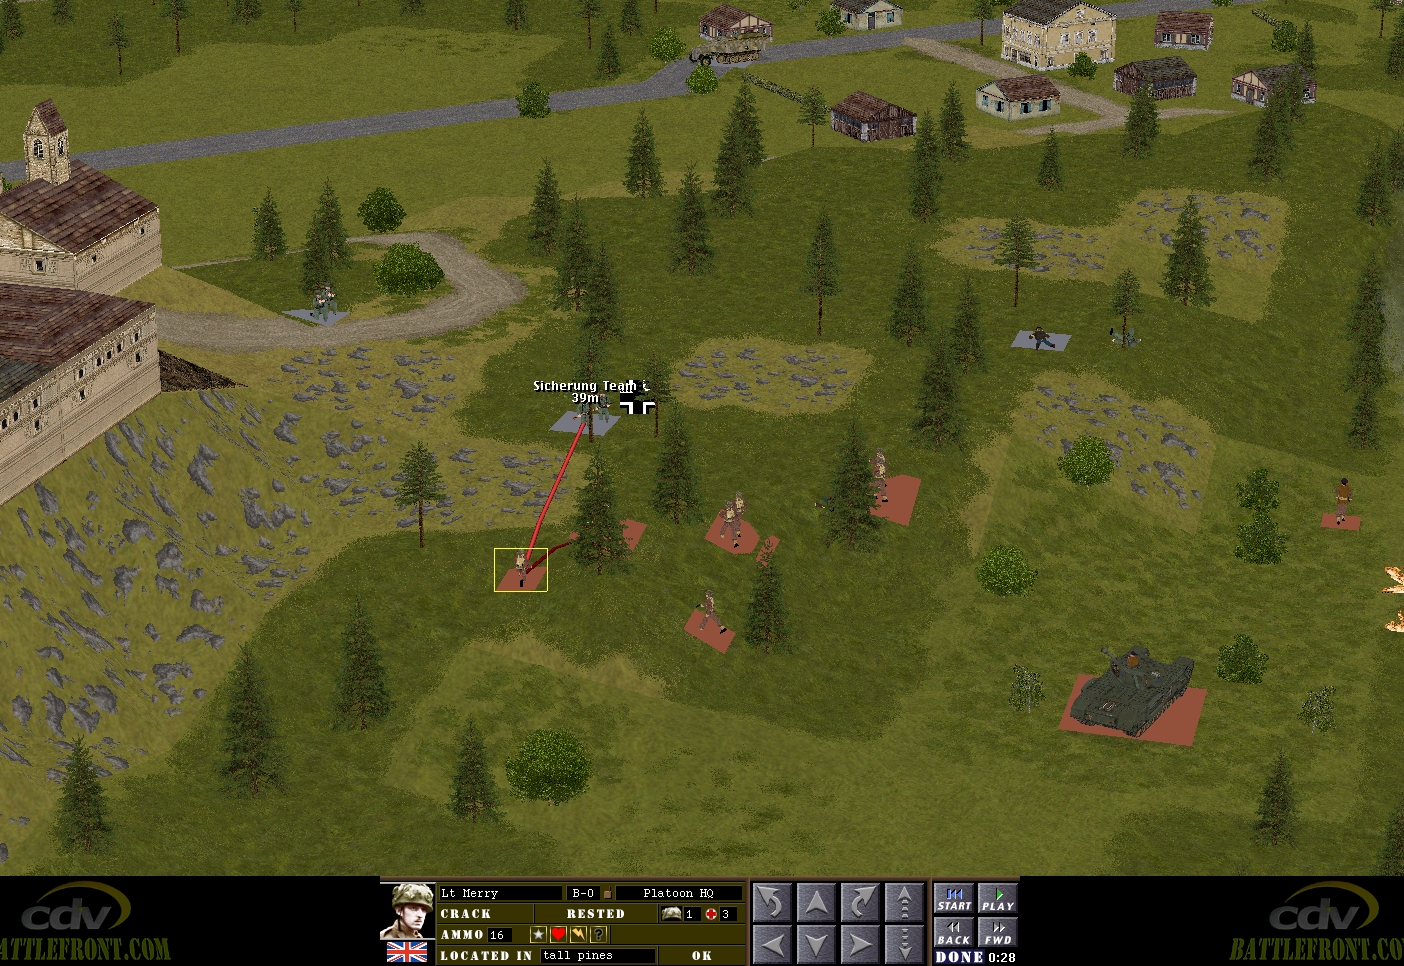
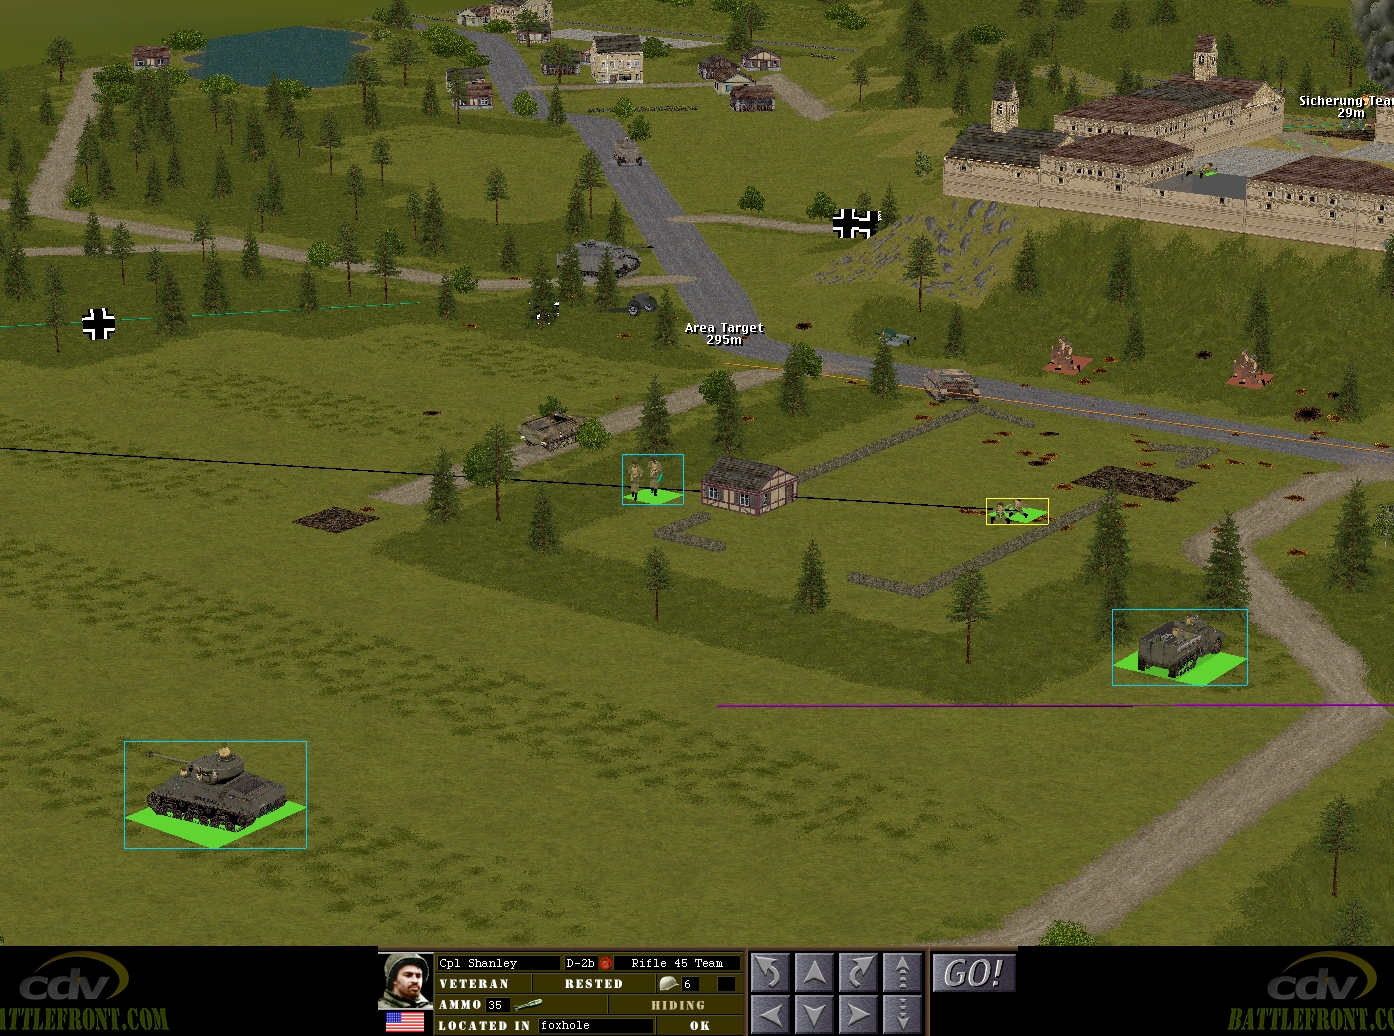
The situation at the start of Turn 25:
Although Sherwood’s men failed to eliminate the German flamethrower this turn, their assault, supported by Spencer’s halftrack, did dislodge it and reduce it to a single arsonist. Shanley and Olander remain at full strength. Tuck’s bombardment is thirty seconds away.
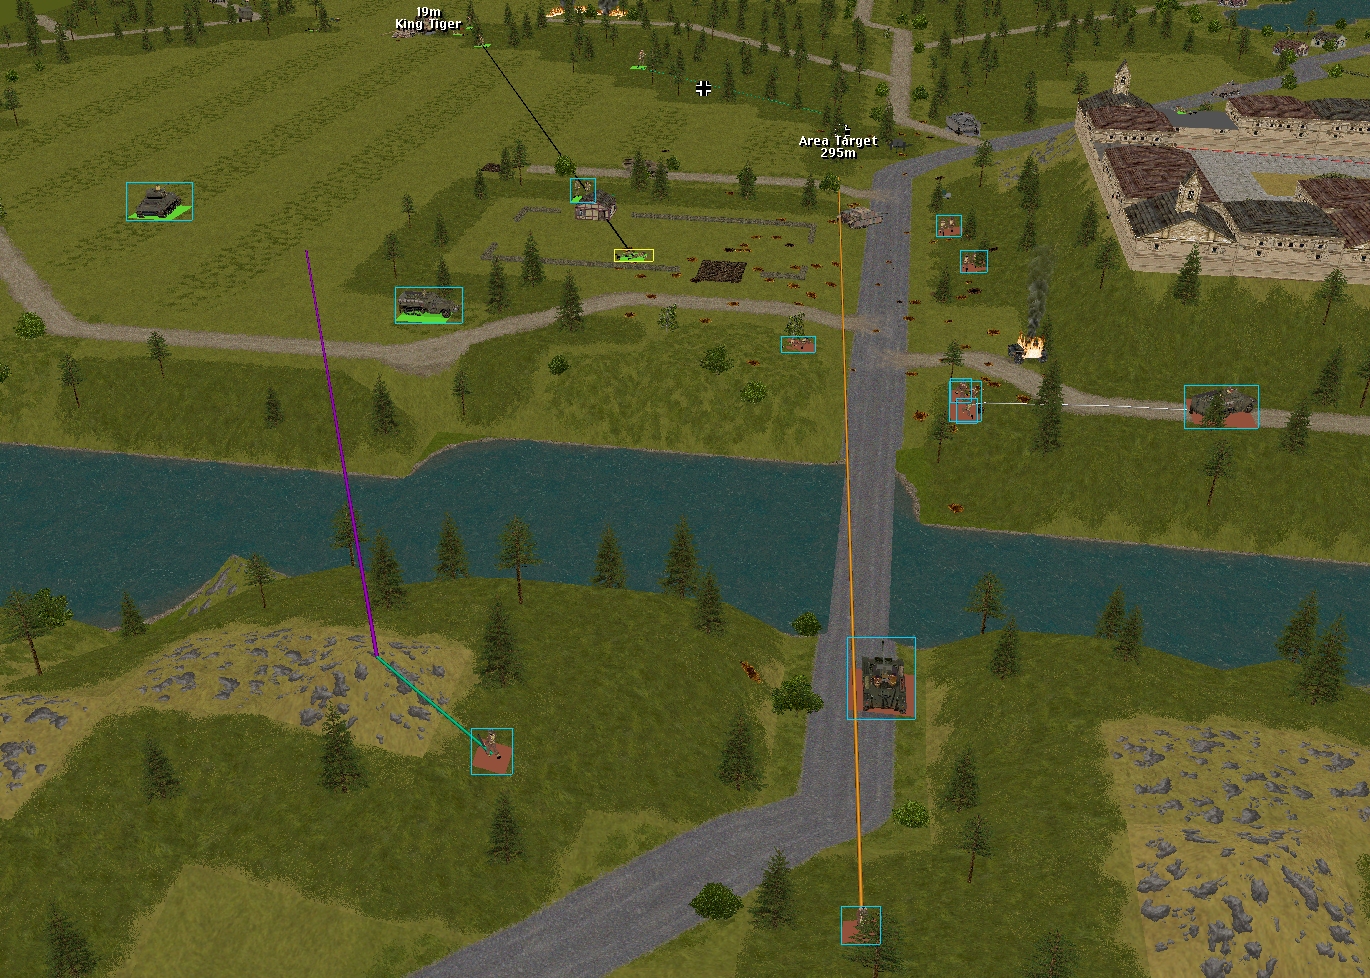

He might be ‘taking cover’ and ‘shaken’, but Whitehand remains biddable.

Turn 25 orders here, please. Commenters are cordially invited to suggest moves for the following eight unit groups. First come, first served. A maximum of one unit group per commenter (Ignore this limit if order execution – usually Monday morning at 0700 GMT – is less than 24 hours away).
(See screenshots for unit locations)
– Merry’s men (Lieutenant Merry + Sergeant Venison’s rifle squad + Corporal Fletcher’s M5A1 halftrack)
– Marian’s men (Lieutenant Marian + 3 x rifle squads + PIAT team + 3 inch mortar team)
– Captain Hood (Six-man company HQ + arty spotter Lieutenant Tuck)
– Sergeant Bowman’s Archer TD
– Sergeant Johns’ Churchill VIII
– Sergeant Pyle’s Sherman
– Lieutenant Costner’s platoon (2 split inf squads + bazooka team + 1 HT)
– Captain Dale’s party (Six POWs armed with pilfered rifles and pistols) + Corporal Whitehand’s team (Two POWs armed with a pilfered Panzerschreck)
Please start all order comments with ‘ORDER’ and any later revision comments with ‘REVISED ORDER’. This will help me distinguish firm instructions from suggestions and advice.
ORDER: Sergeant Forester (western squad)
MOVE CAUTIOUSLY beyond the nearer Sicherung squad ie. [13, 2, 5].
ORDER: Capt. Hood
MOVE CAUTIOUSLY directly towards the nearer Sicherung squad.
ORDER: Cpl. Fletcher’s halftrack
ORDER: Greenwood ‘B’
ORDER: Greenwood ‘A’
“All Aboard!” within 45 seconds if possible. Then…
MOVE FAST to [12, 4, 2]
MOVE normally to [13, 2, 2]
ORDER: Sgt. Scarlet
MOVE CAUTIOUSLY eastwards through tall pines to [14, 2, 1]
HIDE.
(I forgot that there’s an option to Sneak, which I presume is the same as Moving Cautiously except comedy music plays timed to your tip-toed footsteps)
REVISED ORDER: Sgt. Scarlet
SNEAK eastwards through tall pines to [14, 2, 1]
HIDE.
ORDERS: Lt Costner’s Platoon:-
Costner – TARGET Tiger then RUN to 47, 1, 3. MOVE 38, 2, 4.
Lincoln – If still commandable (he is certainly very commendable) WITHDRAW to 47, 1, 4. HIDE.
Sgt Alvarez – RUN to 46, 4, 1. MOVE 38, 2, 3.
Carlson – HALT. SNEAK to 38, 3, 4.
Shanley – RUN to 37, 1, 3.
Olander – Continue MOVE to 37, 1, 4. HIDE.
Spencer HT – Hold.
ORDER: Sgt Pyle’s Sherman – HUNT 45, 1, 5.
ORDERS: Dale’s Party:-
Dale – RUN to Bottom floor South windows. Continue AMBUSH at castle entrance 21, 1, 3.
Whitehand – WITHDRAW to Bottom floor, West wall. Then SNEAK to East window of Bottom floor. Face NE. HIDE.
ORDER: Bowman’s Archer – Remain alert.
ORDER: Tuck – RUN to 27, 5, 4. HIDE FACE E.
ORDERS: Marian’s Platoon:-
Marian – RUN to 28, 4, 4. HIDE.
Hawthorn’s Mortar – Continue MOVE to 34, 4, 3. FACE NE.
Sherwood – ‘B’ Team MOVE to 29, 1, 4. Extinguish the firelighter.
‘A’ Team MOVE to 28, 5, 4.
PIAT team – RUN to 28, 4, 4. HIDE.
That’s as far as Greenwood ‘B’ moved in sixty seconds?!
I blame SunderLad for failing to ginger up his men with fluid beef.
(Possible, though unlikely, I was trying to be too clever by half).
Yes its on me, I’m afraid I drank it all when I saw the King. Its the second successive Monday morning I’ve coughed up my cornflakes.
Whitehand summed it up perfectly for me….. “Seriously!?”
Mea culpa. Thinking it would save time in the long run, I issued their order as a straight ’embark’. I’d forgotten that CMBO only starts moving embarking troops when the relevant taxi is stationary. This turn, a 45 second pause applied to the HT will give the Greenwood Bs time to board.
I’m going to struggle to make much headway while the two tanks are on the loose up north, so it makes more sense that Greenwood ‘A’ should also be employed alongside ‘B’ pushing into the village from the south. I’ll ginger up the ‘A’ team to embark onto the (45 sec paused) HT this turn.
Just when things were looking good up pops a King Tiger.
Total respect though to its crew. That’s some serious camo to keep it hidden for that long to people less than a tank’s length way.