
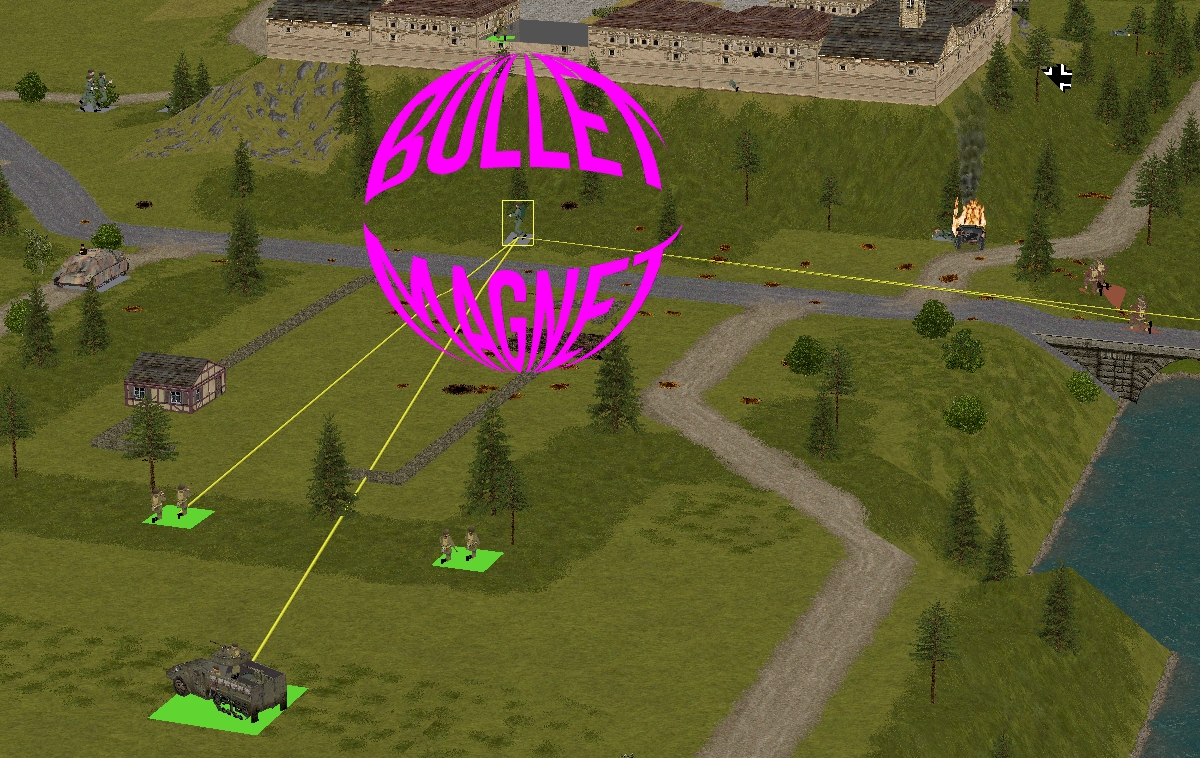
During the course of Turn 21, the German arsonist in the woods north of the castle, is fired on by five different Allied units. Miraculously, not one of the incoming rounds hits flesh or Flammöl 19.
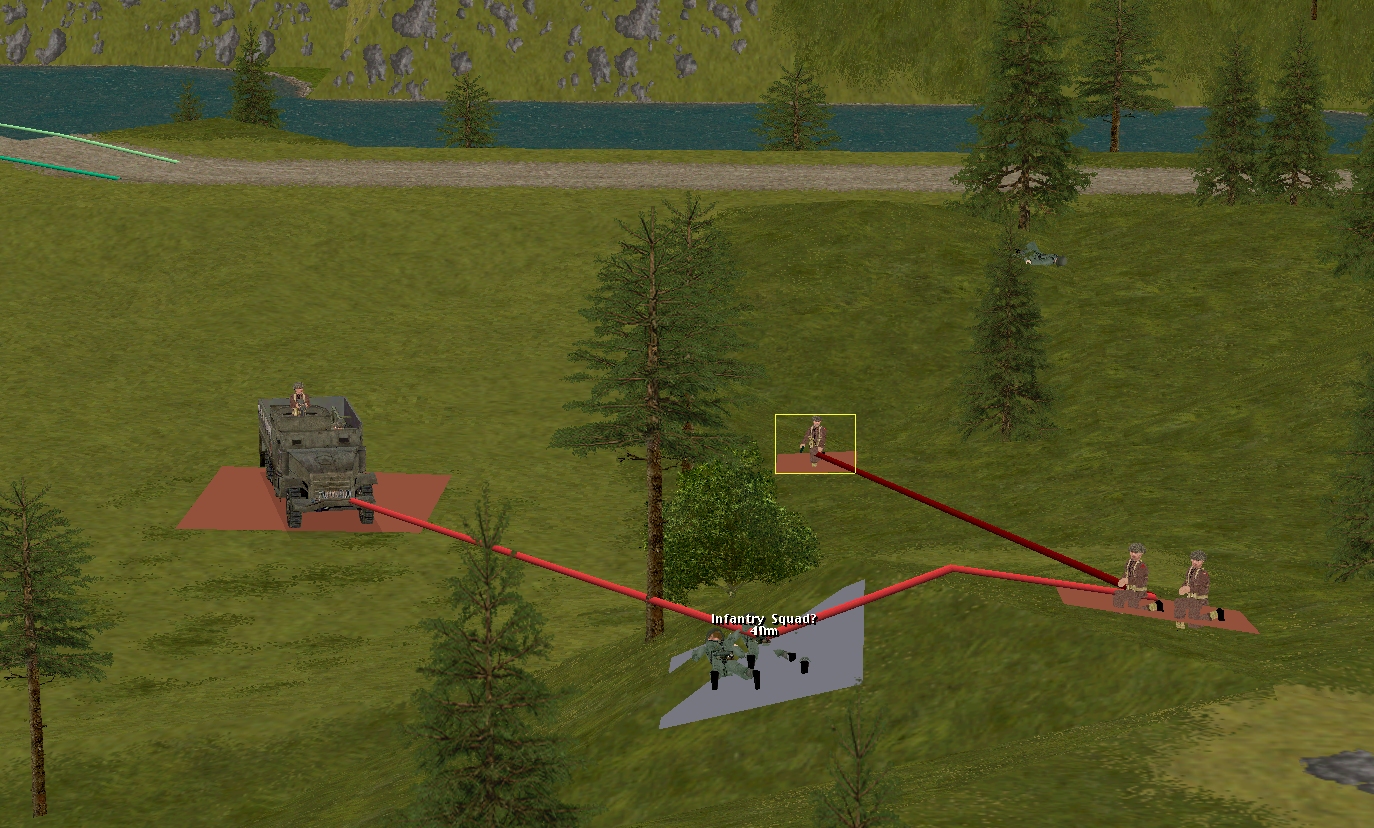
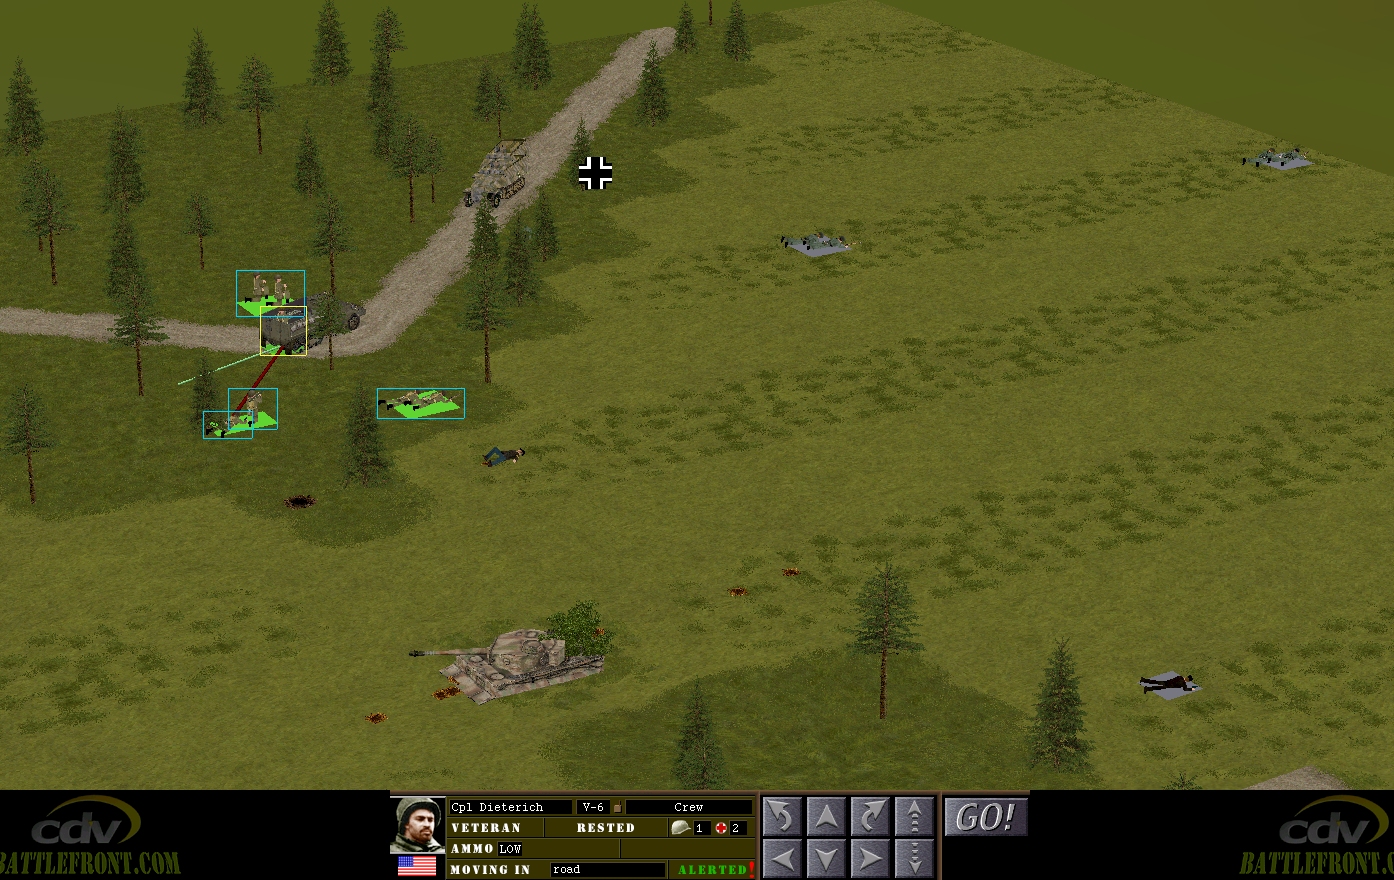
Less fortunate this sixty is Corporal Dietrich, the commander of the northernmost US halftrack. Edging forward in an attempt to assist Carlson’s rifle team*, the M3A1 ends up embroiled in a close-range firefight with a previously undetected SPW 251/1 instead.
* It turns out Carlson’s lads don’t need any help. They win their duel before support arrives.
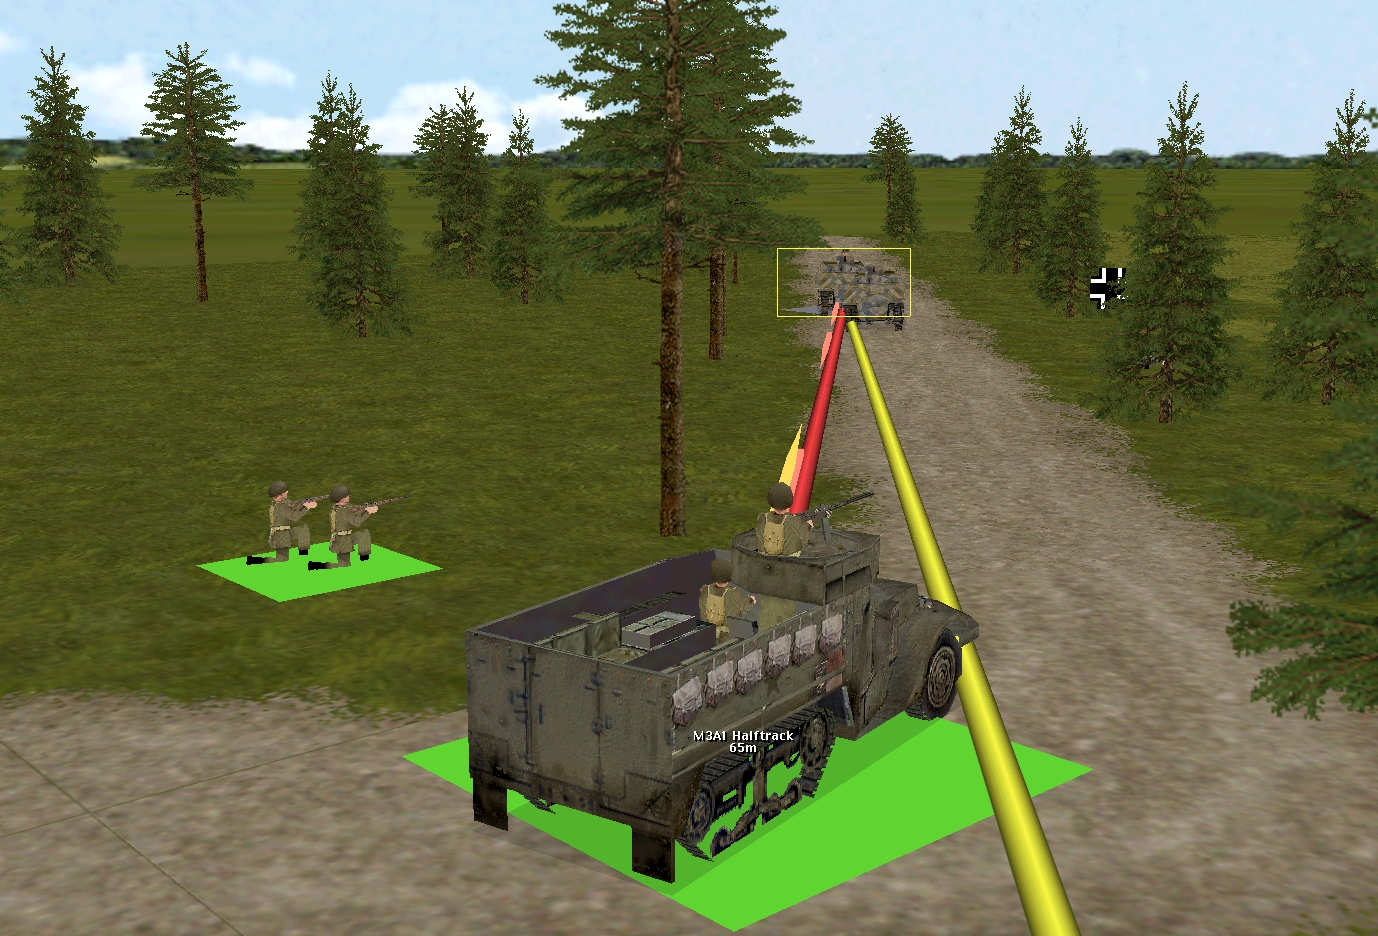
Bazooka palooka Corporal Lincoln spots the enemy HT at roughly the same time as Dietrich and gets off a fairly prompt shot. However, the rocket falls short, allowing the SPW’s ‘green’ but keen gunner to rake both the M3A1 and the Corporal’s position.
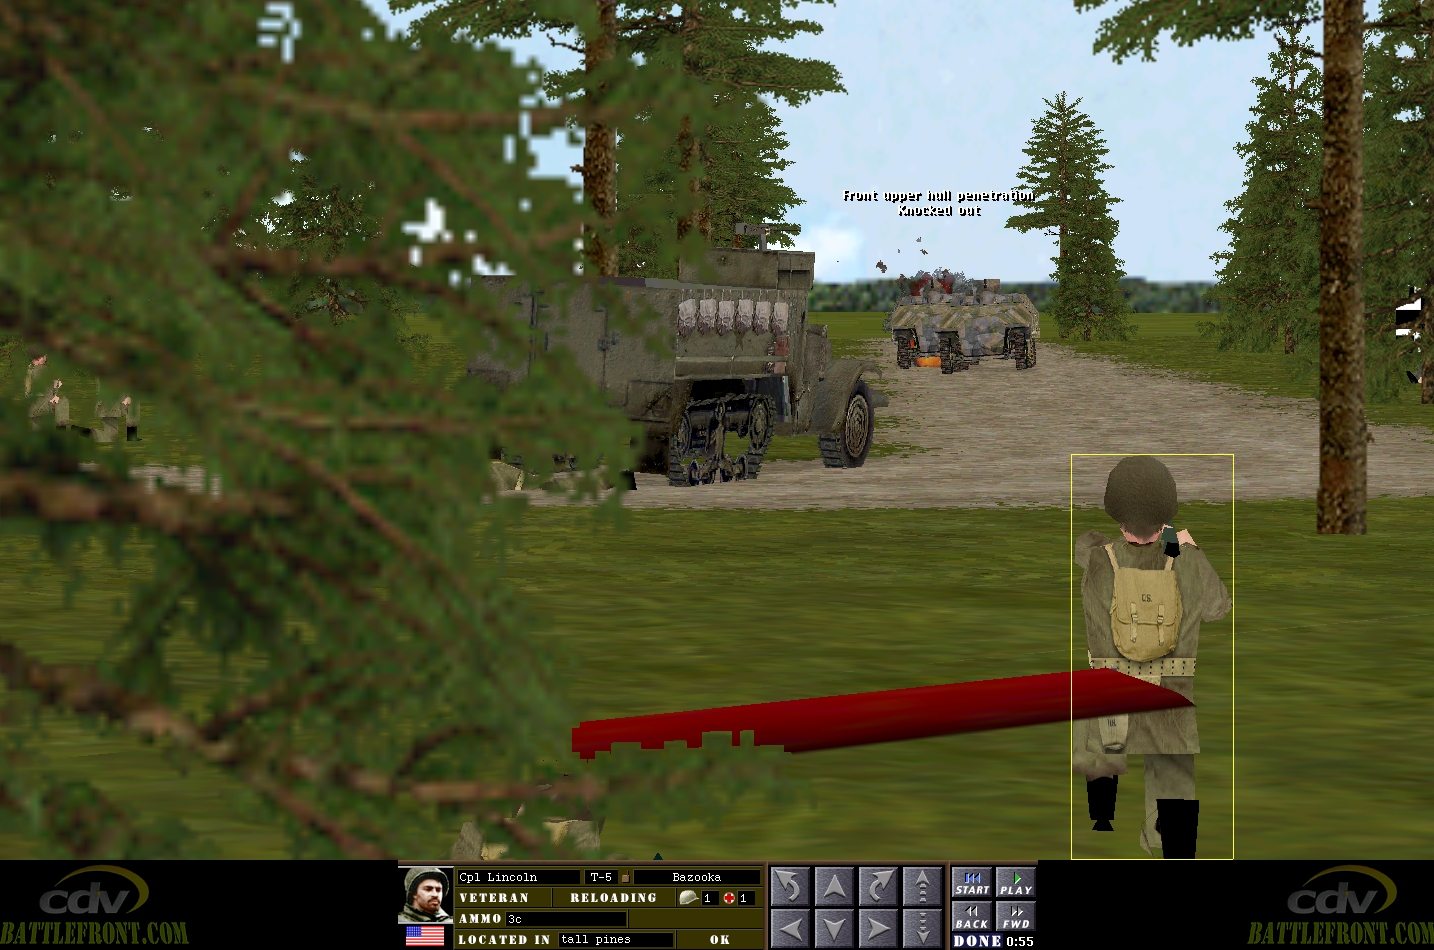
Lincoln’s ammo bearer crumples and Dietrich bails out alone before a second fin-stabilised armour harmer restores American hegemony in the plantation.
If the Panzer IV hadn’t volte-faced and beetled back towards the Black Squirrel inn, Lincoln probably wouldn’t have been the only Allied AT unit to see action this turn.
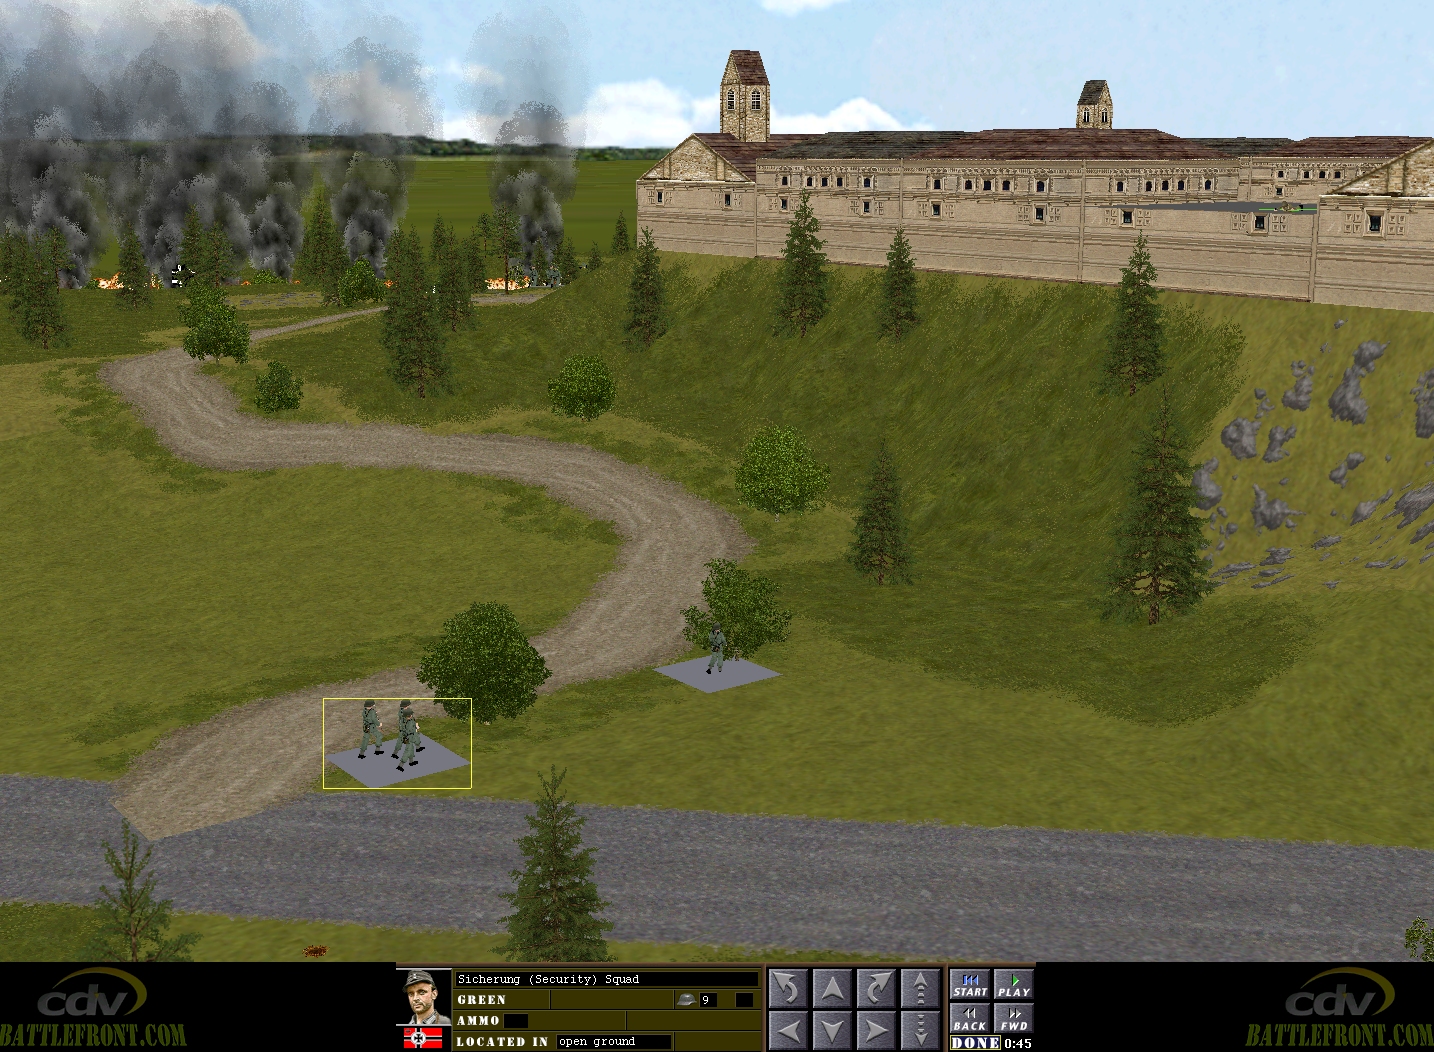
The exasperated mutterings of Panzerchreck-toting ex-POW Corporal Whitehand are cut short by the alarming spectacle of two German infantry units emerging from the woods NE of the Schloss, Both of the new threats sprint in his direction. By the time the clock stops, one is sufficiently close and conspicuous to be identifiable (see above).
Anticipating an attack from the Jagdpanzer IV – an attack that fails to materialise – Pyle’s Sherman spends roughly half of the sixty in reverse gear.
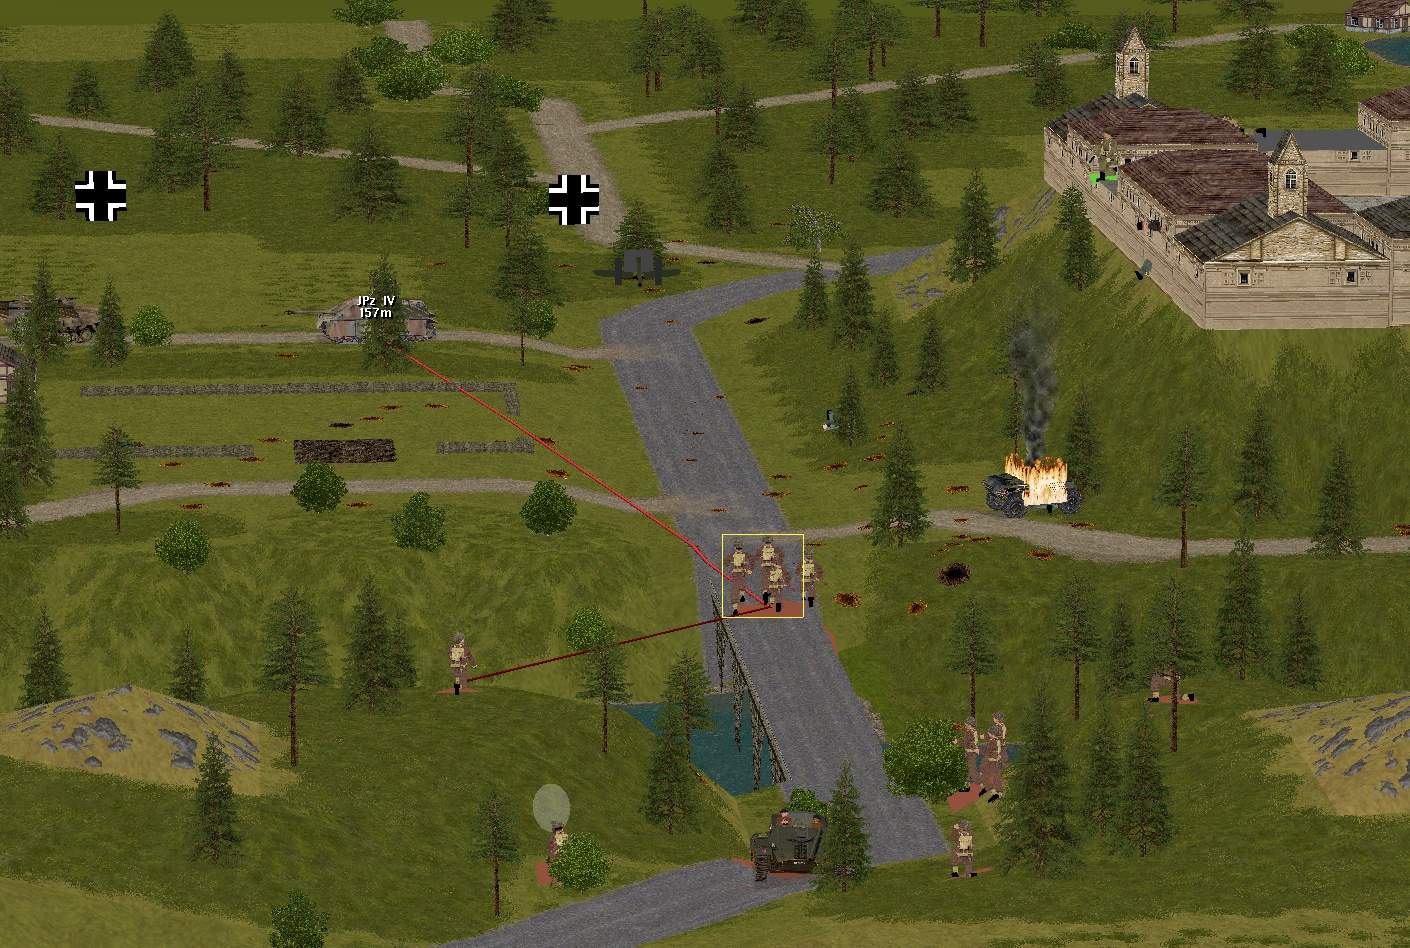
Stationary for the entire minute, the squat Axis TD draws inconsequential* fire from both halves of Sherwood’s squad as the British infantry hoof it across the road bridge and head for the foxholes at 27, 5, 4.
* The vehicle’s phlegmatic führer refuses to button up.
Thanks to patient/pleasing teamwork east of the rail bridge, the Brits in that neck-of-the-woods will begin Turn 22 in a pretty commanding position. Shortly before the clock freezes, the advancing enemy infantry unit at 12, 5, 4 goes to ground after taking withering fire from front and flank. If Sergeant Venison decides to hurl his demo charge and Fletcher’s gunner keeps pouring it on, my money is on the Tommies in this particular exchange.
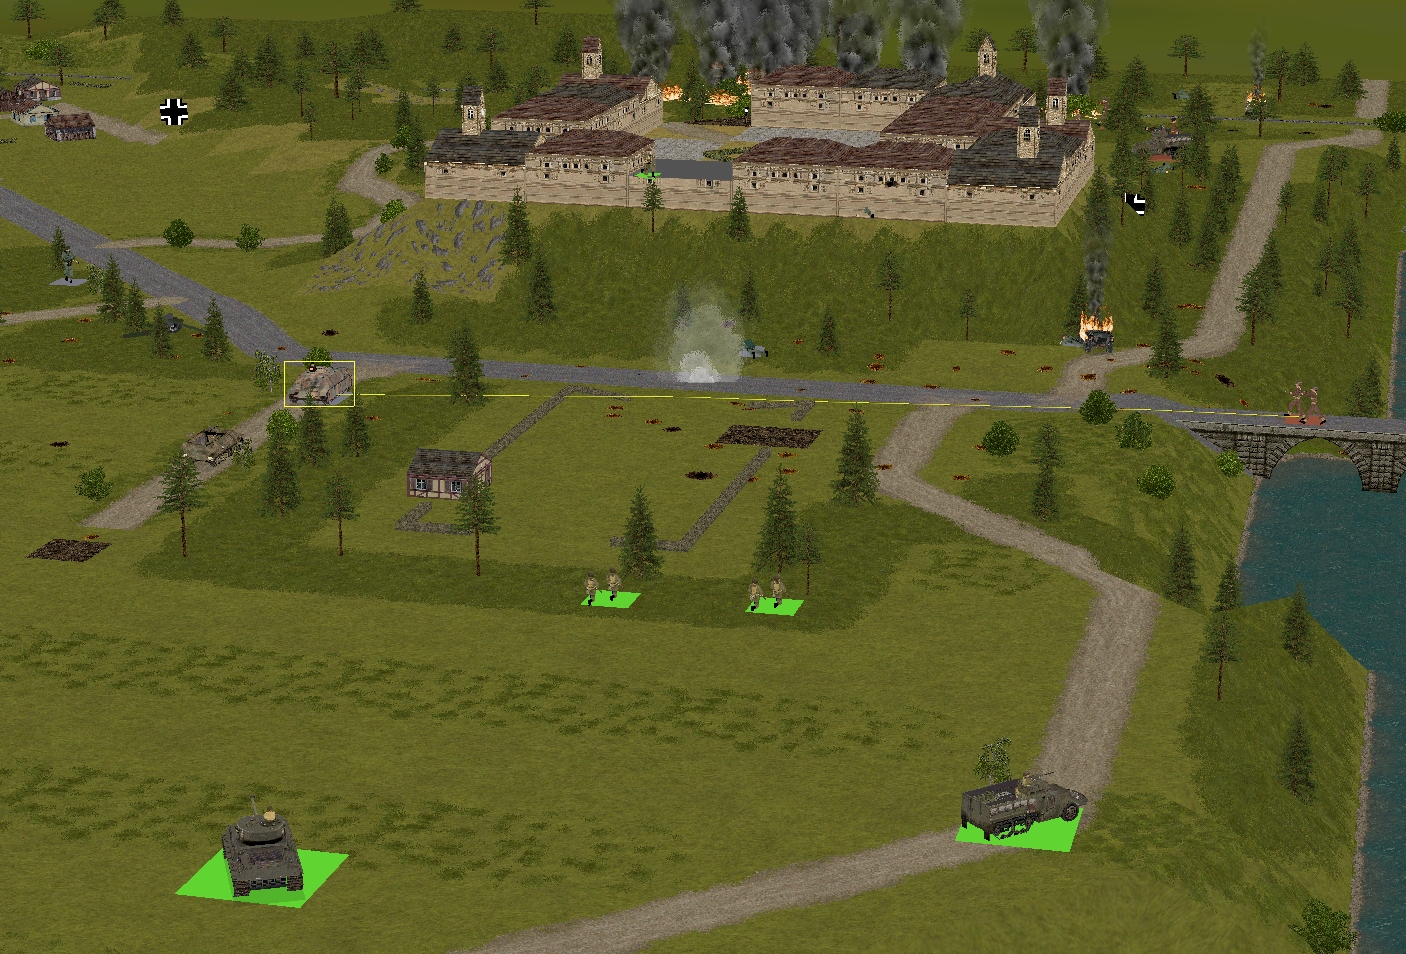
The situation at T+60:
The Churchill should finally deliver its passengers next turn. Because pause commands can’t be added to waypoints in CMBO, Johns will need to wait until Turn 23 before continuing north.
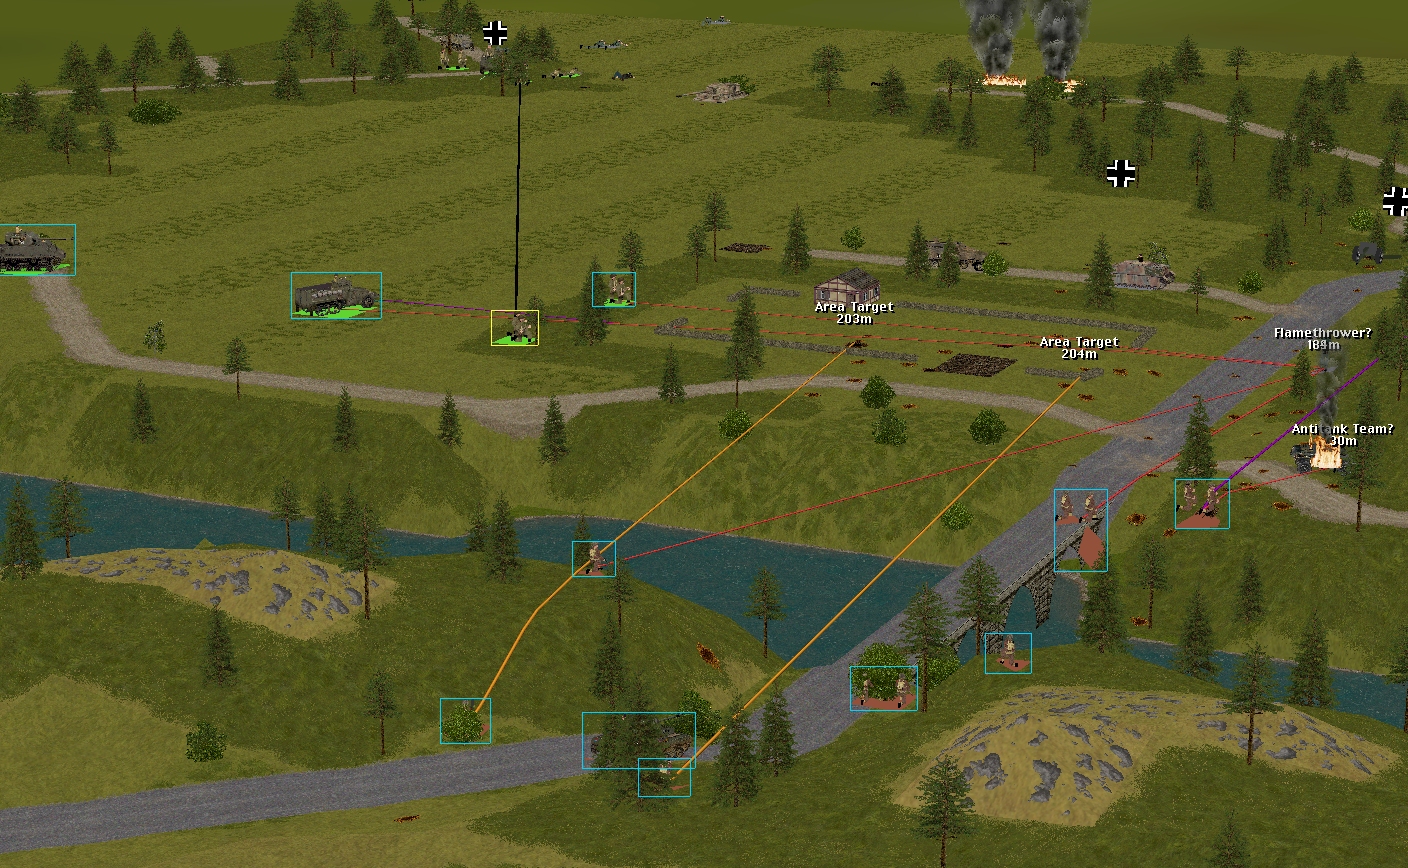
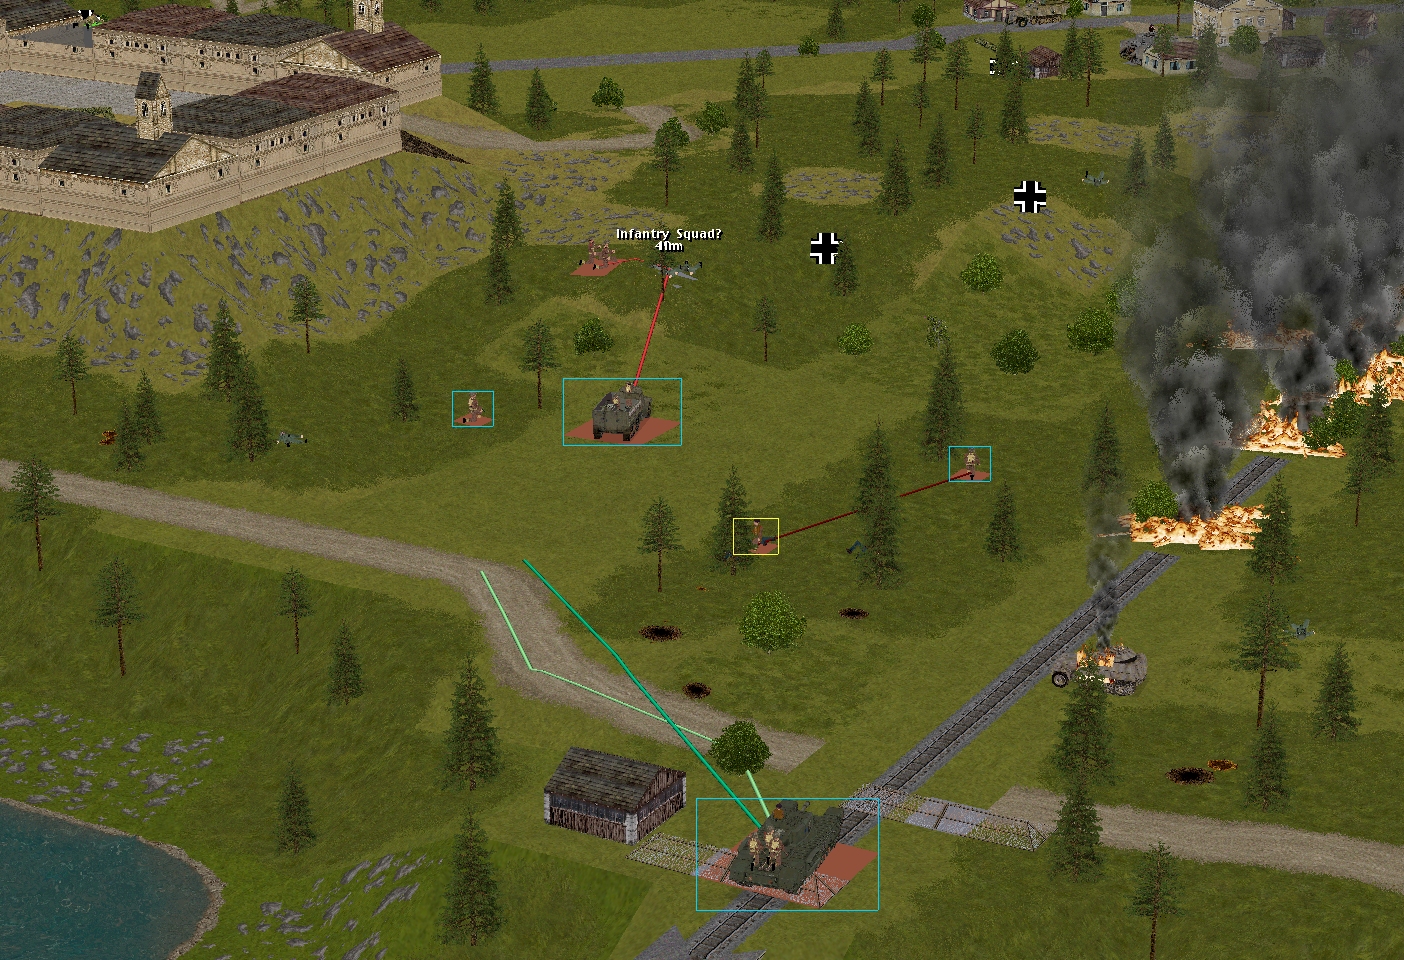
Sergeant Sherwood’s ‘A’ team is firing on the retreating flamethrower while his ‘B’ team is tackling some tank hunters (?) close to the KOed Humber. Tuck has 44 rounds remaining. Hawthorn has 12h and 2s left. From its new position, the Archer has a good view of the road east of the road bridge.
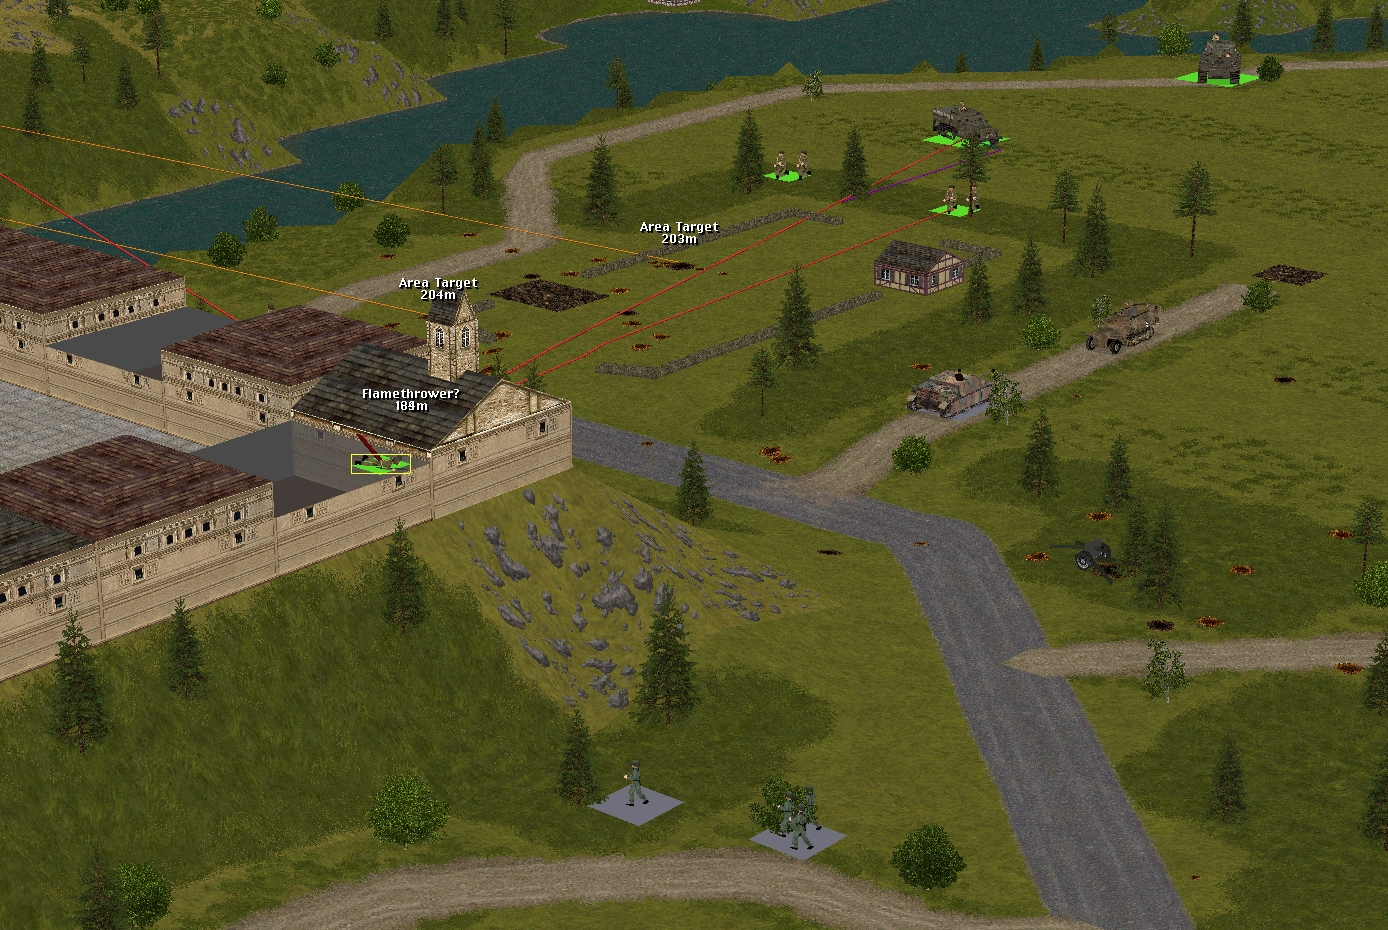
If the nine-man Sicherung squad and its unidentified companion are headed for the castle interior, things could get hot for the US airmen.
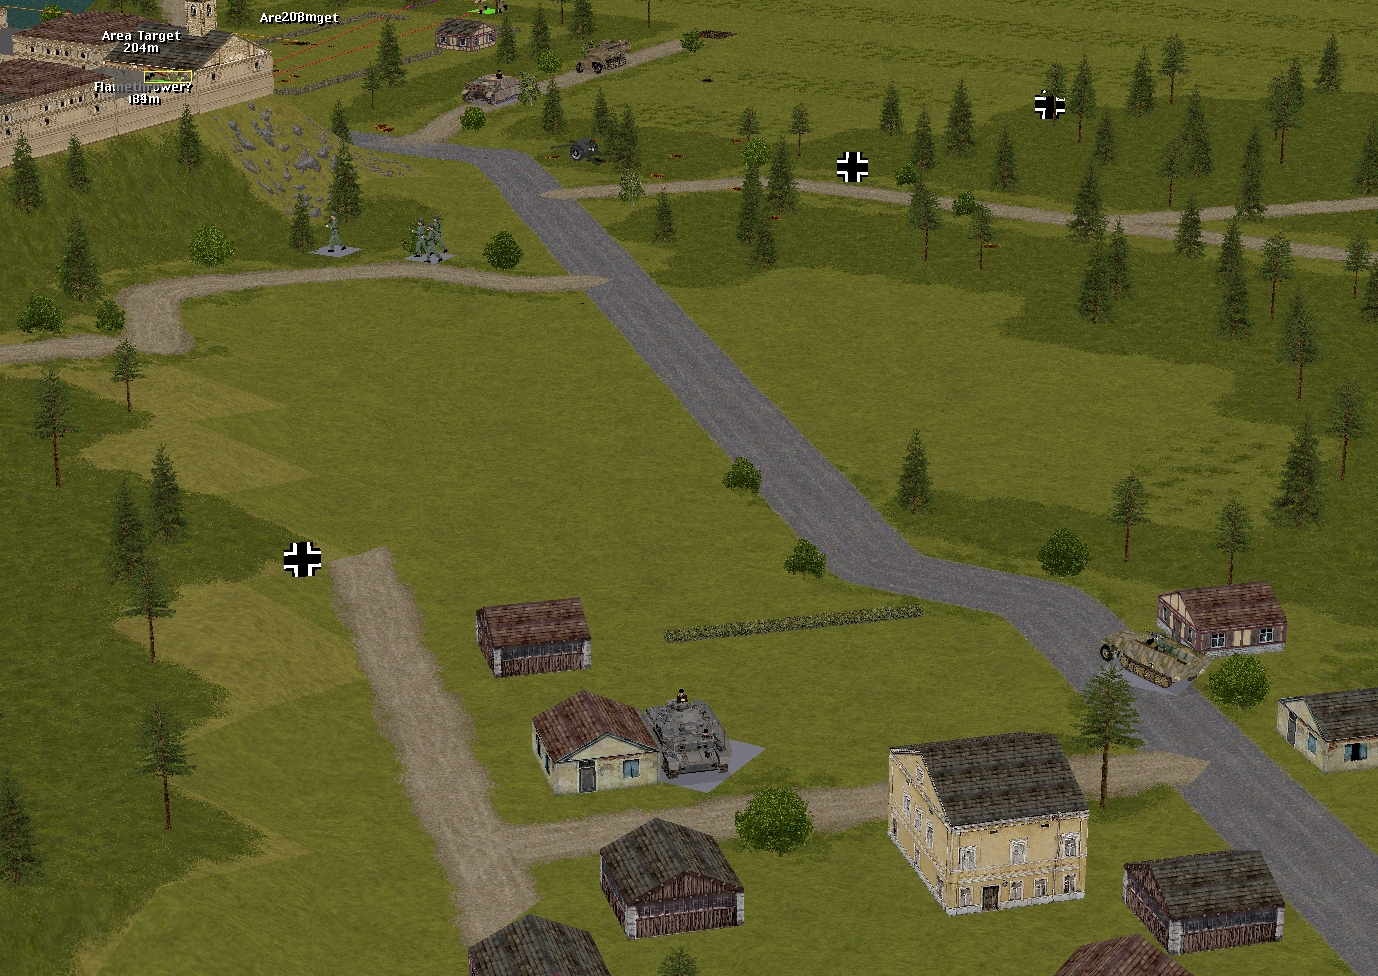
Does the Panzer IV have a train to catch?
Costner seems to be in control in the NE.

Turn 22 orders here, please. Commenters are cordially invited to suggest moves for the following eight unit groups. First come, first served. A maximum of one unit group per commenter (Ignore this limit if order execution – usually Monday morning at 0700 GMT – is less than 24 hours away).
(See screenshots for unit locations)
– Merry’s men (Lieutenant Merry + Sergeant Venison’s rifle squad + Corporal Fletcher’s M5A1 halftrack)
– Marian’s men (Lieutenant Marian + 3 x rifle squads + PIAT team + 3 inch mortar team)
– Captain Hood (Six-man company HQ + arty spotter Lieutenant Tuck)
– Sergeant Bowman’s Archer TD
– Sergeant Johns’ Churchill VIII
– Sergeant Pyle’s Sherman
– Lieutenant Costner’s platoon (2 split inf squads + bazooka team + 1 HT)
– Captain Dale’s party (Six POWs armed with pilfered rifles and pistols) + Corporal Whitehand’s team (Two POWs armed with a pilfered Panzerschreck)
Please start all order comments with ‘ORDER’ and any later revision comments with ‘REVISED ORDER’. This will help me distinguish firm instructions from suggestions and advice.