
Thanks to the considered/conscientious comment commanding of SunderLad and Colonel_K, the Allied push towards Nottingheim shows no sign of stalling. In this sixty-second chunk of WEGO action the understaffed Allies strengthen their hold on the rail bridge and make life extremely miserable for any Hermans* still in the vicinity of the road bridge. In response, the computer finally commits its dizygotic IVs.
* Typo so splendid, I can’t bring myself to correct it.
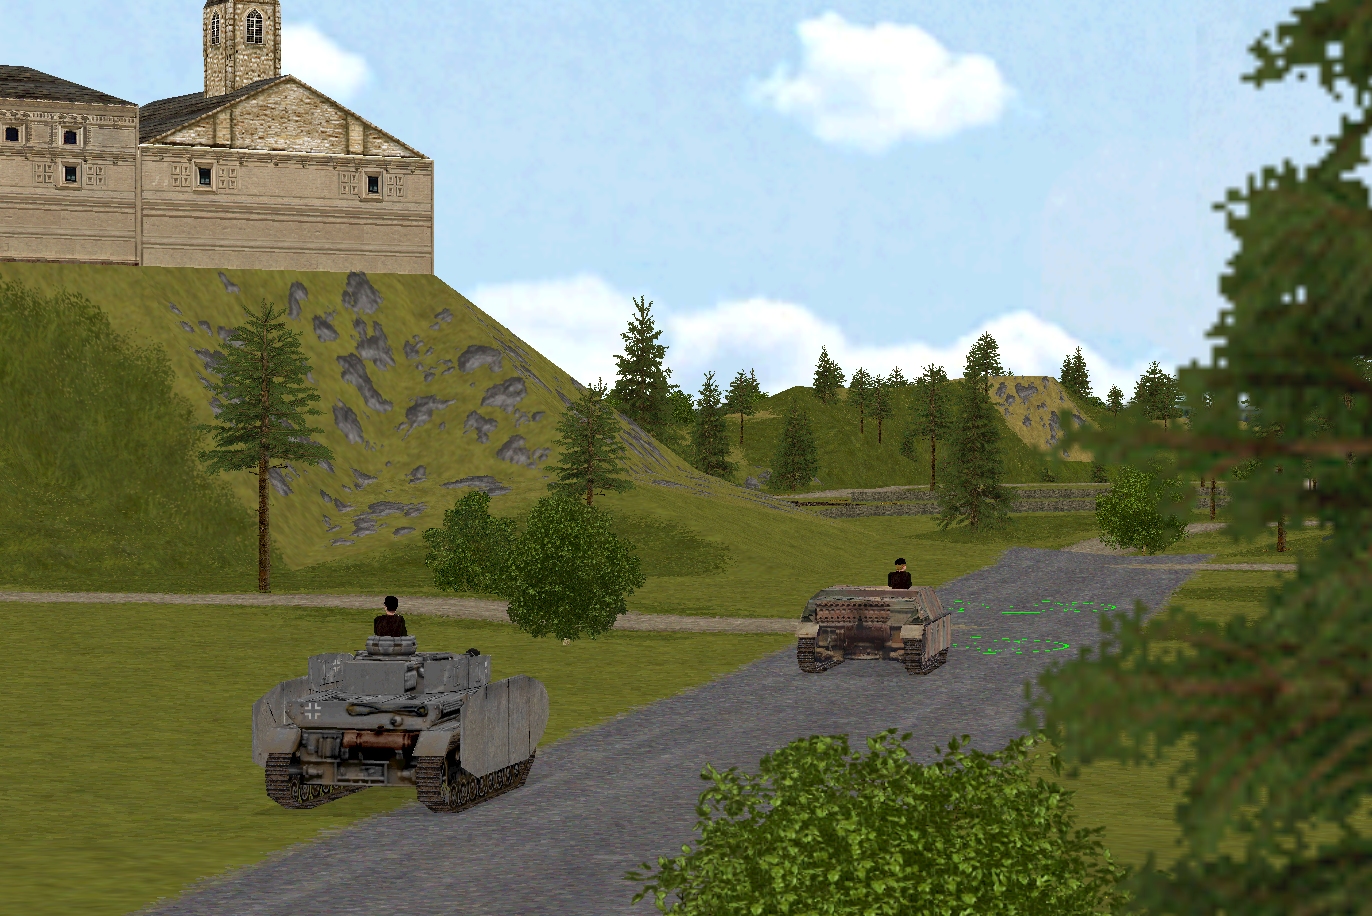
Both the Panzer IV and Jagdpanzer IV move purposefully northwestward this turn. If the pair keep heading up the road that leads to the road bridge, patient Corporal Whitehand, the US POW with the pilfered Panzerschreck, should get a shot at one or both of them early next turn.
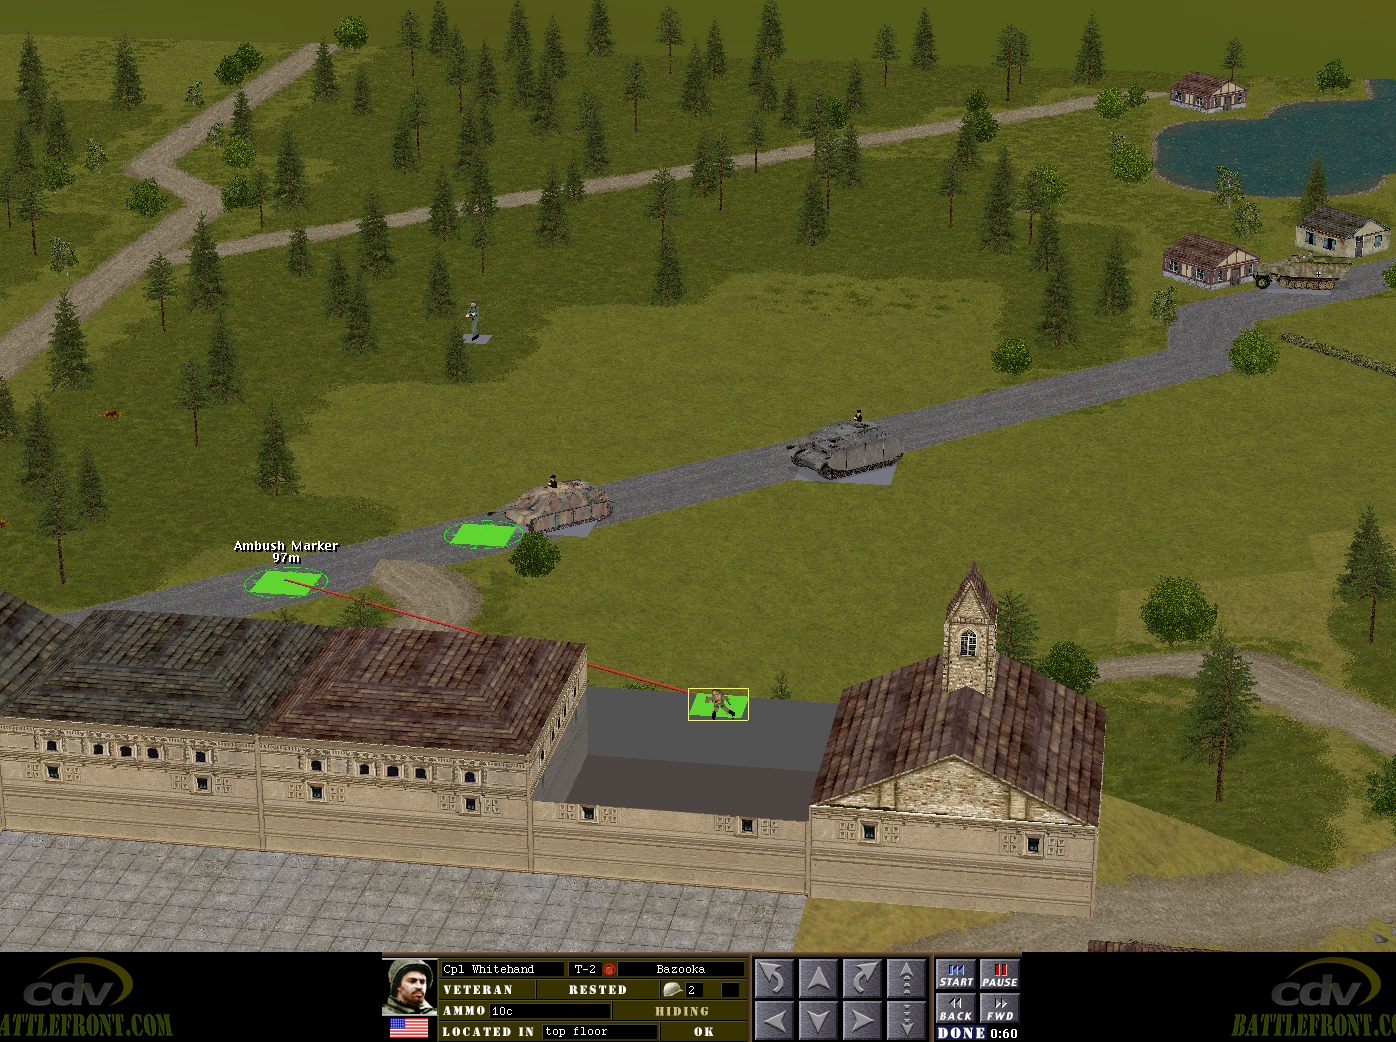
Of course, the moment he reveals himself, he’s likely to draw fire from the two trundlers, the sedentary halftrack near the inn, and any enemy infantry on the castle side of the village.
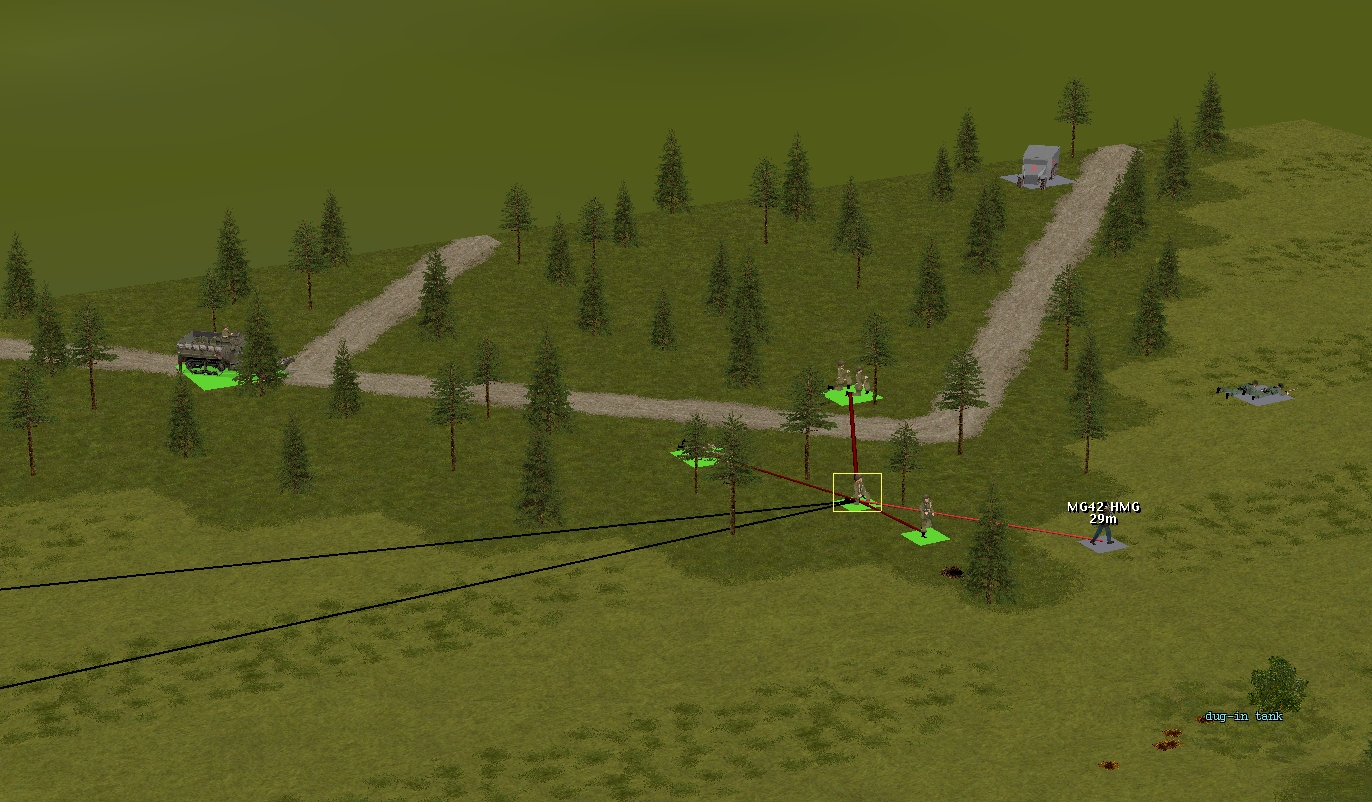
It’s possible Lt Costner’s plantation probers may also have a run-in with a Sonderkraftfahrzeug during turn 18. As the Americans head towards the superbly camouflaged (?) dug-in tank at 55, 2, 1, they whittle a retreating ‘Rifle 44 Squad’ down to five men, catch a six-man MG 42 team in the open, and hear the squeaky rumble of a halftrack possibly approaching from the left.
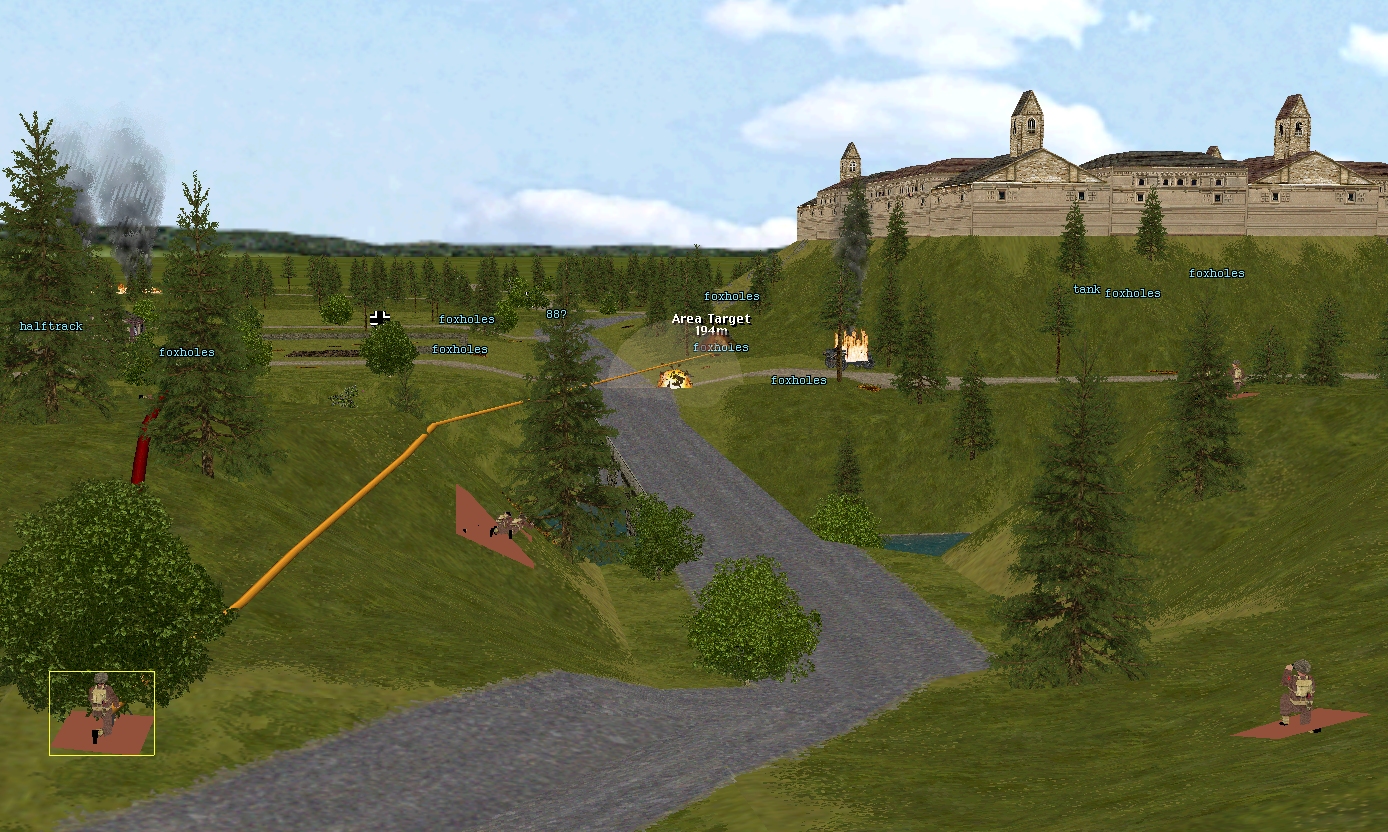
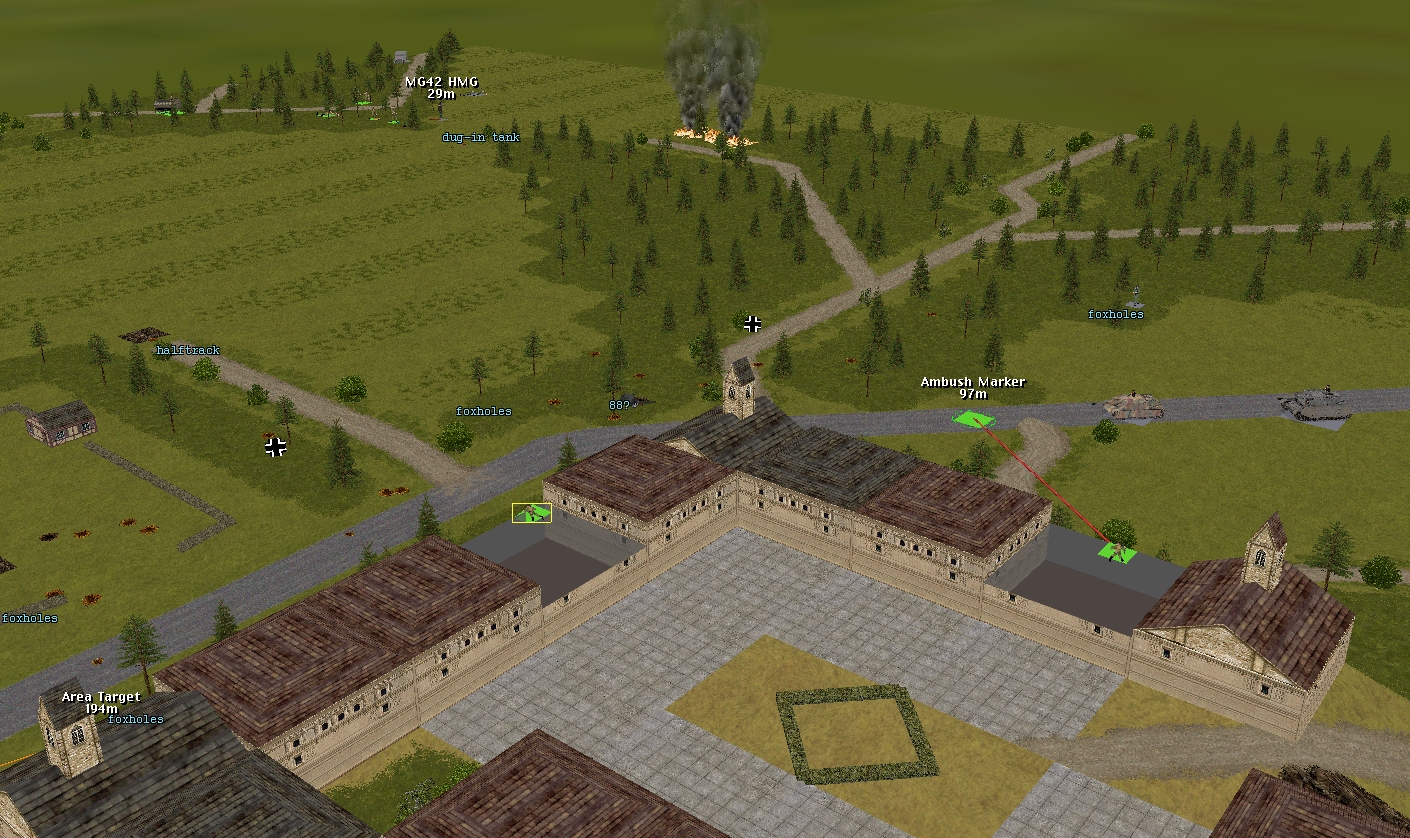
Down by the road bridge, fast work by Hawthorn (Marian’s 3-inch mortar team) and Lt Tuck (the spotter for the off-map 25-pounder battery) leads to the foxholes close to the NW corner of the castles getting a thorough pasting. When the clock stops, Hawthorn has 33h and 10s remaining, and Tuck is down to 68 rounds.

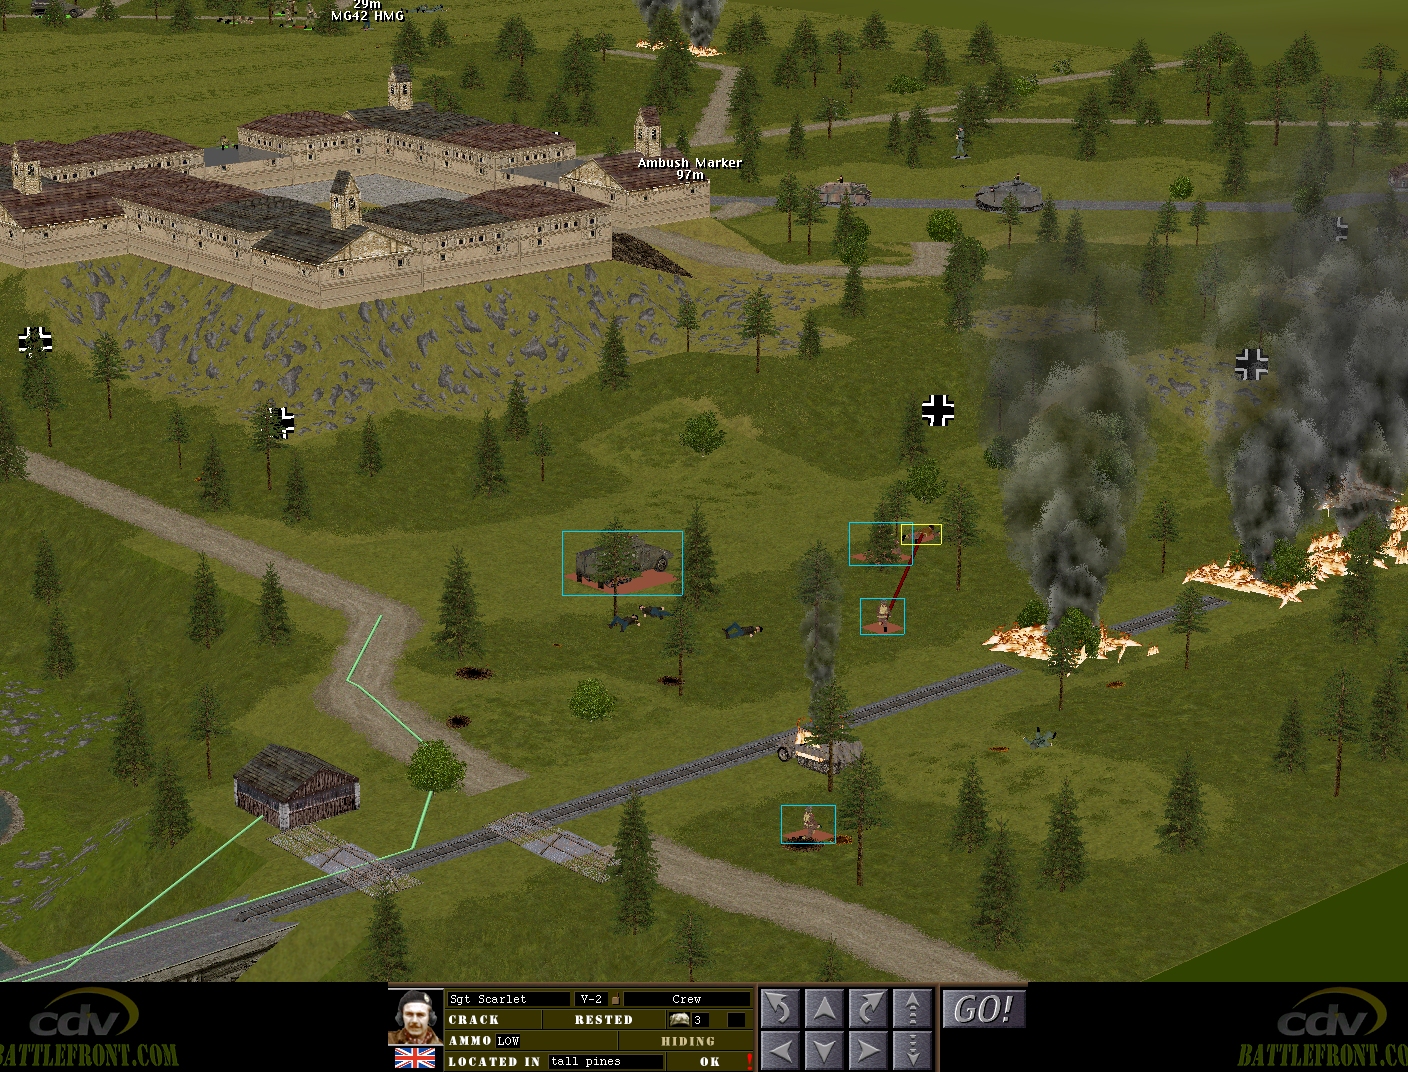
East of the the rail bridge, desultory German small arms fire is quickly silenced by the pleasing teamwork of Fletcher’s M5A1 and Venison’s half-dozen. The latter amalgamate at T+60 under the watchful gaze of their platoon leader, Lieutenant Merry.
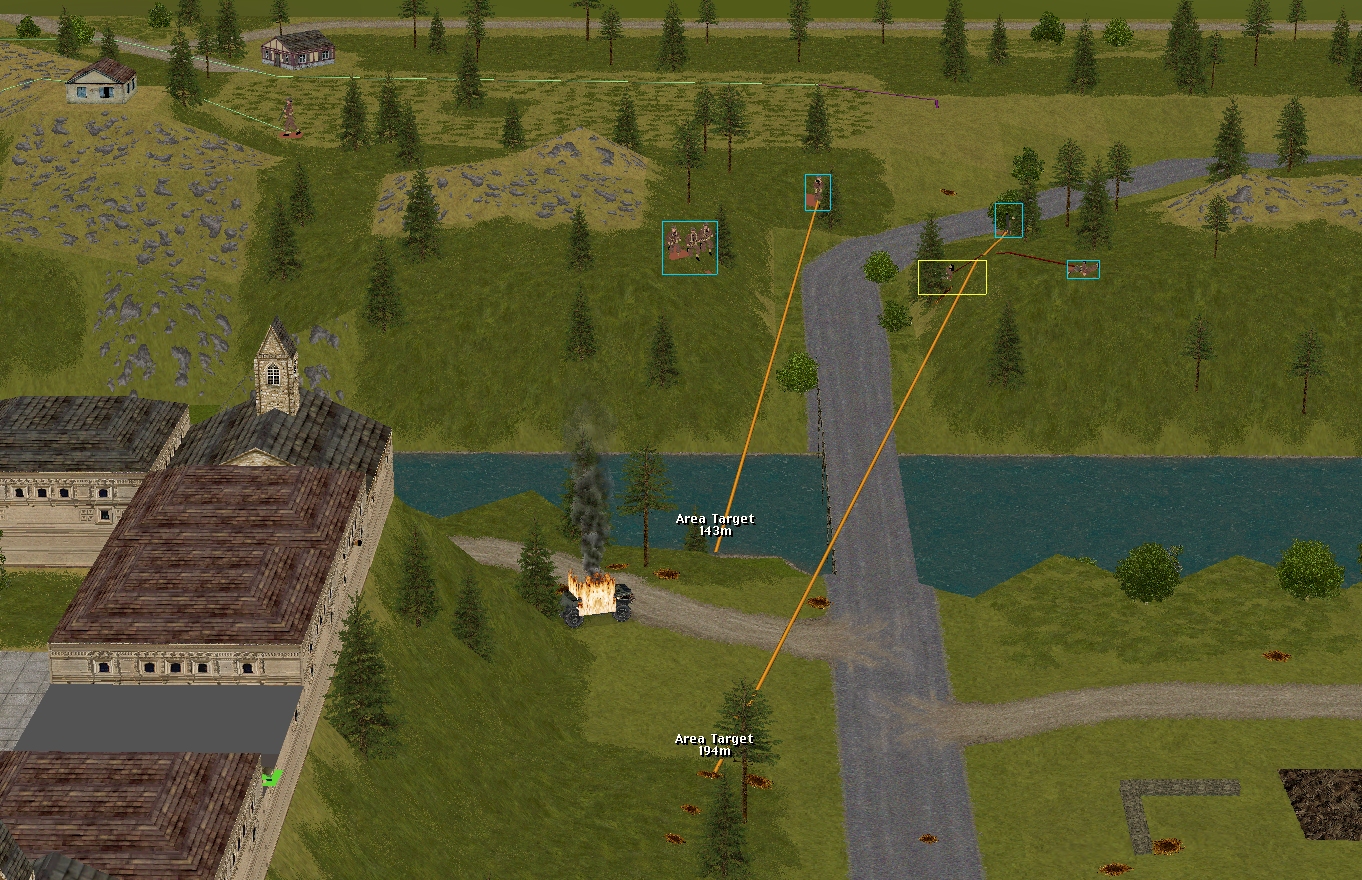
The situation at the start of turn 18:

Making for the rail bridge, Corporal Oaks (PIAT) and Sergeant Forester (infantry squad) are both knackered, and the Churchill VIII is being annoyingly ponderous. I suspect the Archer will have reached its assigned destination (33, 5, 1) by the start of turn 19.
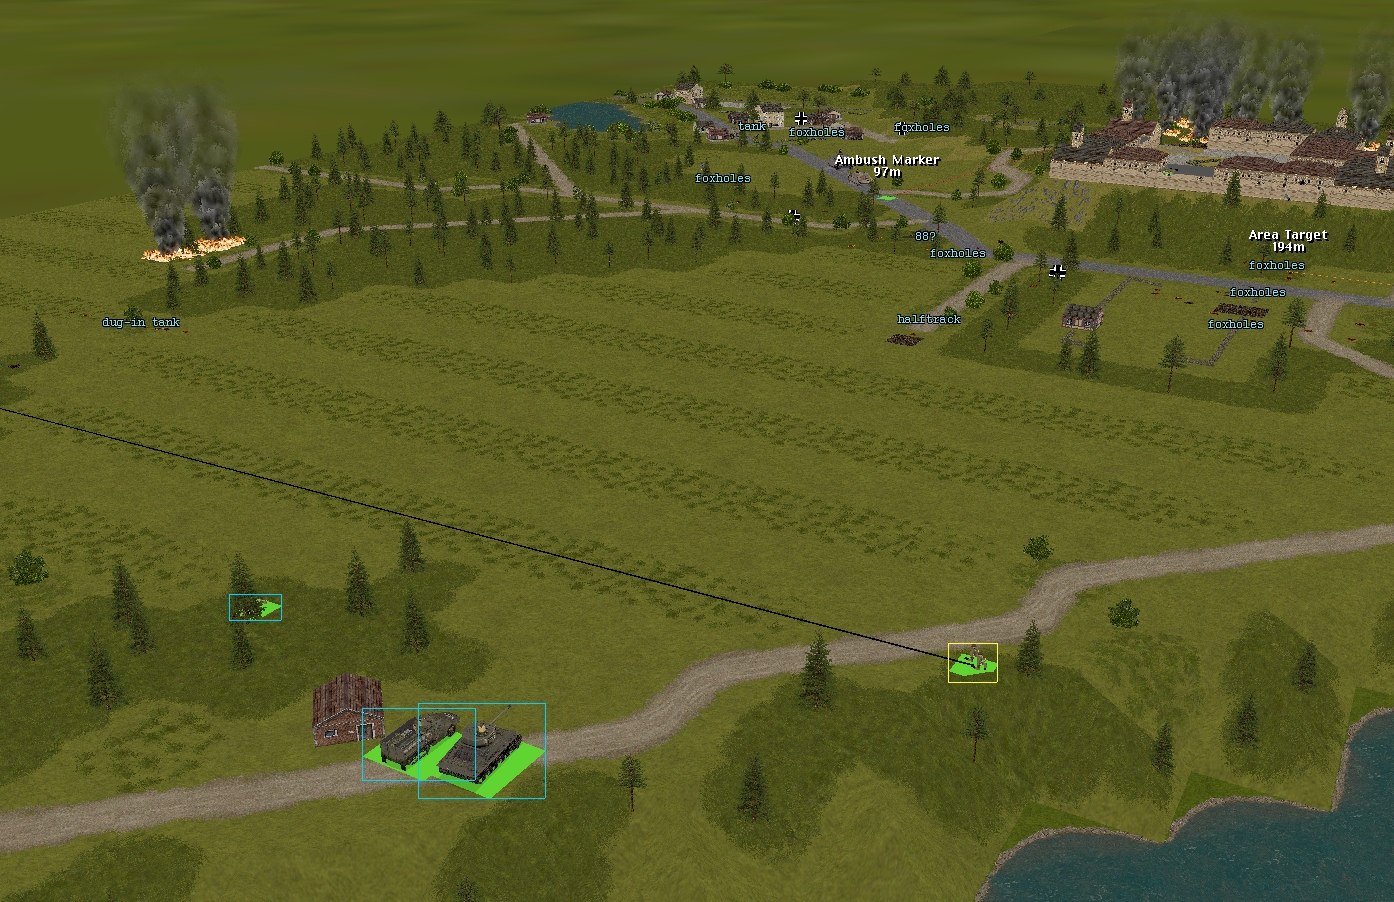
Steep slopes slightly complicated Shanley’s advance, but the six-man US rifle team has made it to 52, 3, 4.
Captain Dale has shifted position. Due to CMBO limitations (it’s impossible to add an ambush marker to the end of a movement order) he’s currently hiding.

Also hiding at present, is Sergeant Alvarez’s team (selected in the above shot) and…
…Scarlet’s Daimler crew…
…and Sergeant Sherwood’s squad.

Turn 18 orders here, please. Commenters are cordially invited to suggest moves for the following eight unit groups (First come, first served. A maximum of one unit group per commenter. I’ll try to execute the turn as quickly as possible after all orders are in.)
(See screenshots for unit locations)
****anyone****
– Merry’s men (Lieutenant Merry + Sergeant Venison’s rifle squad + Corporal Fletcher’s M5A1 halftrack)
– Marian’s men (Lieutenant Marian + 3 x rifle squads + PIAT team + 3 inch mortar team)
– Sergeant Bowman’s Archer TD
– Sergeant Pyle’s Sherman
****subscribers only****
– Captain Hood (Six-man company HQ + arty spotter Lieutenant Tuck)
– Sergeant Johns’ Churchill VIII
– Captain Dale’s party (Six POWs armed with pilfered rifles and pistols) + Corporal Whitehand’s team (Two POWs armed with a pilfered Panzerschreck)
– Lieutenant Costner’s platoon (2 inf squads + bazooka team + 2 HTs)
Please start all order comments with ‘ORDER’ and any later revision comments with ‘REVISED ORDER’. This will help me distinguish firm instructions from suggestions and advice.
Follow-up question: can the rail bridge cope with two-way tracked vehicle traffic?