

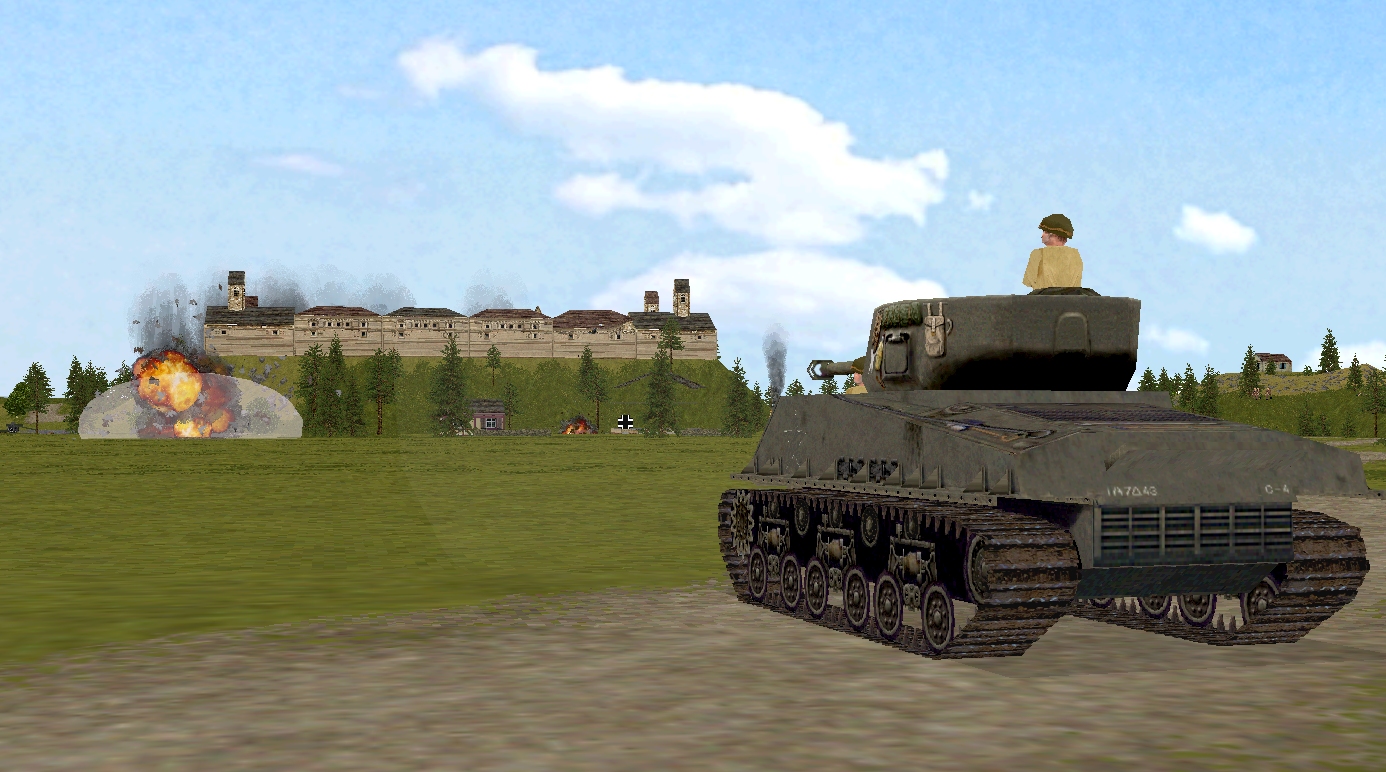
Two of the five buildings on the northern half of the map collapse into heaps of blackened brick and burning timber during turn 16. That sort of thing tends to happen when you use 25-pounders and Sherman tanks for home improvement.
This turn’s notable developments in chronological order:
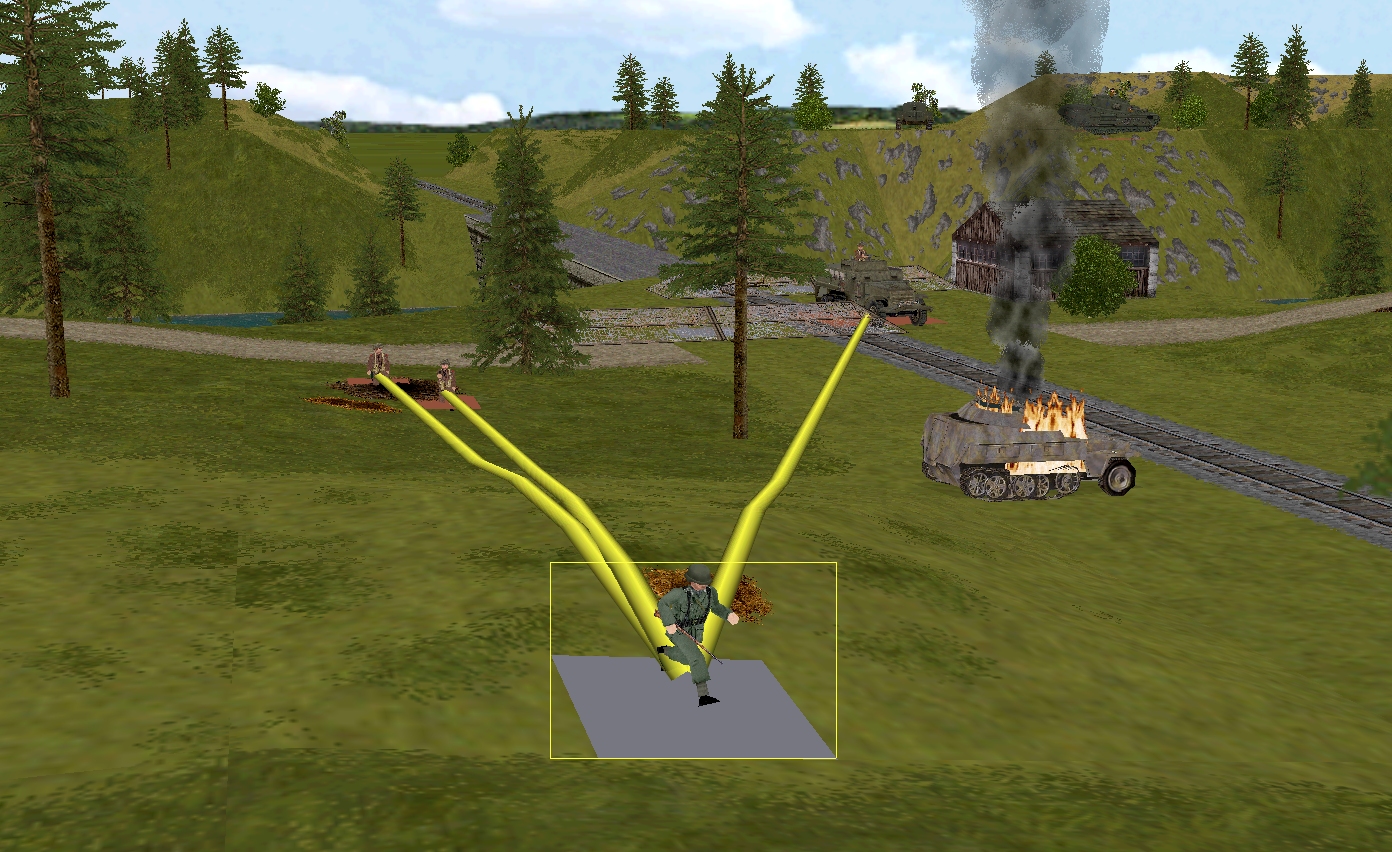
T+17. The sole survivor of the Volksgrenadier squad that attempted to counterattack the rail bridge last turn, is a few strides from relative safety when his luck runs outs. Was it Merry, Hood, or Fletcher’s gunner who delivered the coup de grâce? It’s impossible to tell.
T+18. Seeing the writing on the cracked and quivering walls, the occupants of the two-storey building near the road bridge, make a hasty exit. From across the river, Sgt Greenwood’s squad harasses them with rifles and Bren gun as they retreat.
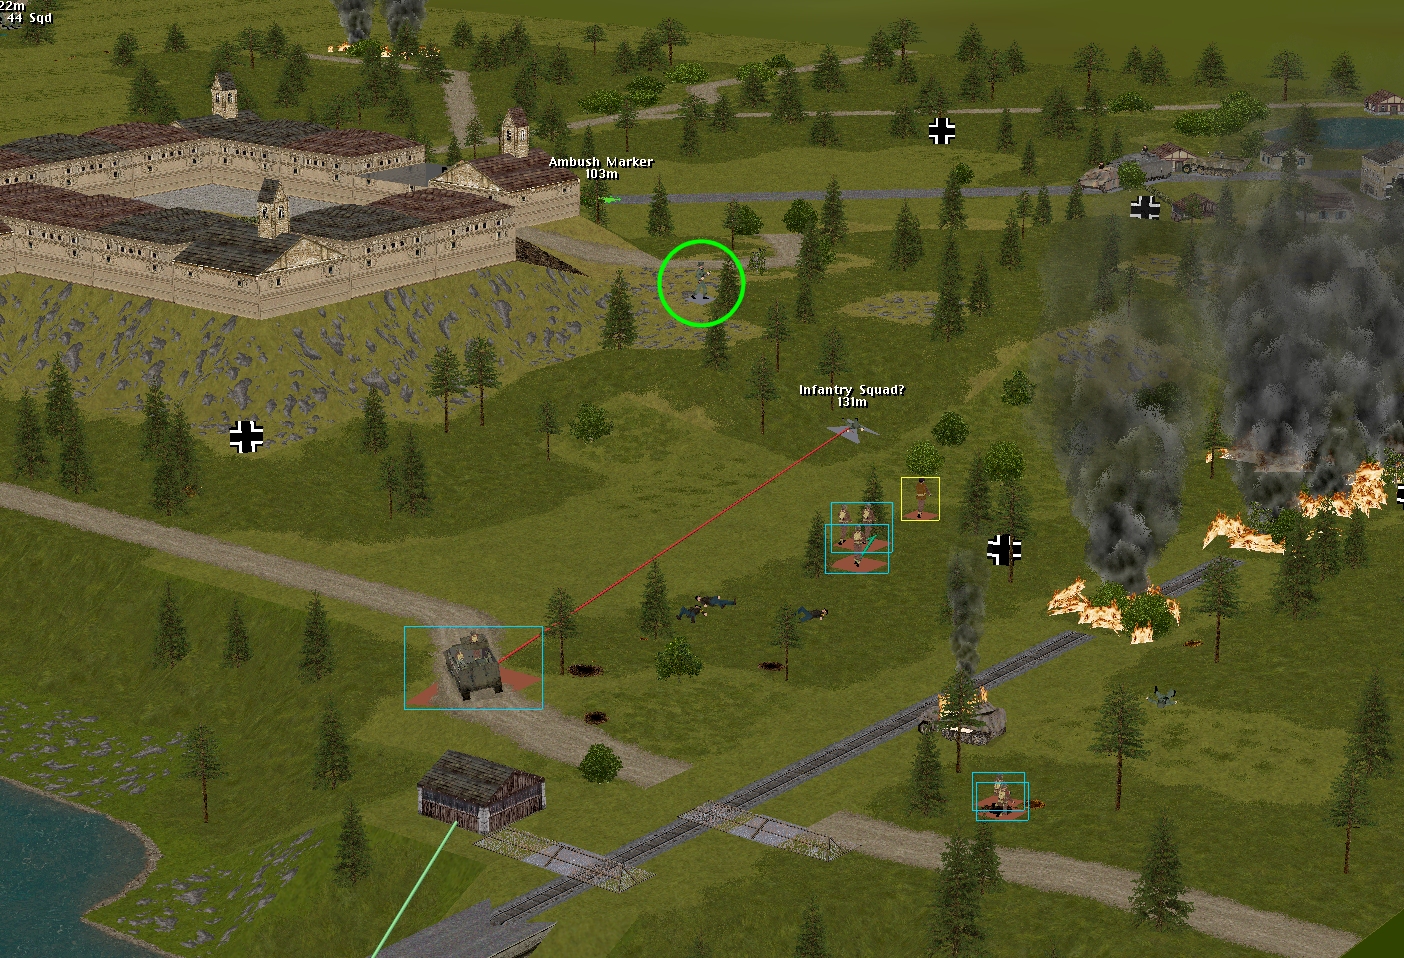
T+33. Corporal Whitehand spots a Panzer IV coming up the road from the station. The medium tank is still moving – still heading NW – when the clock stops.
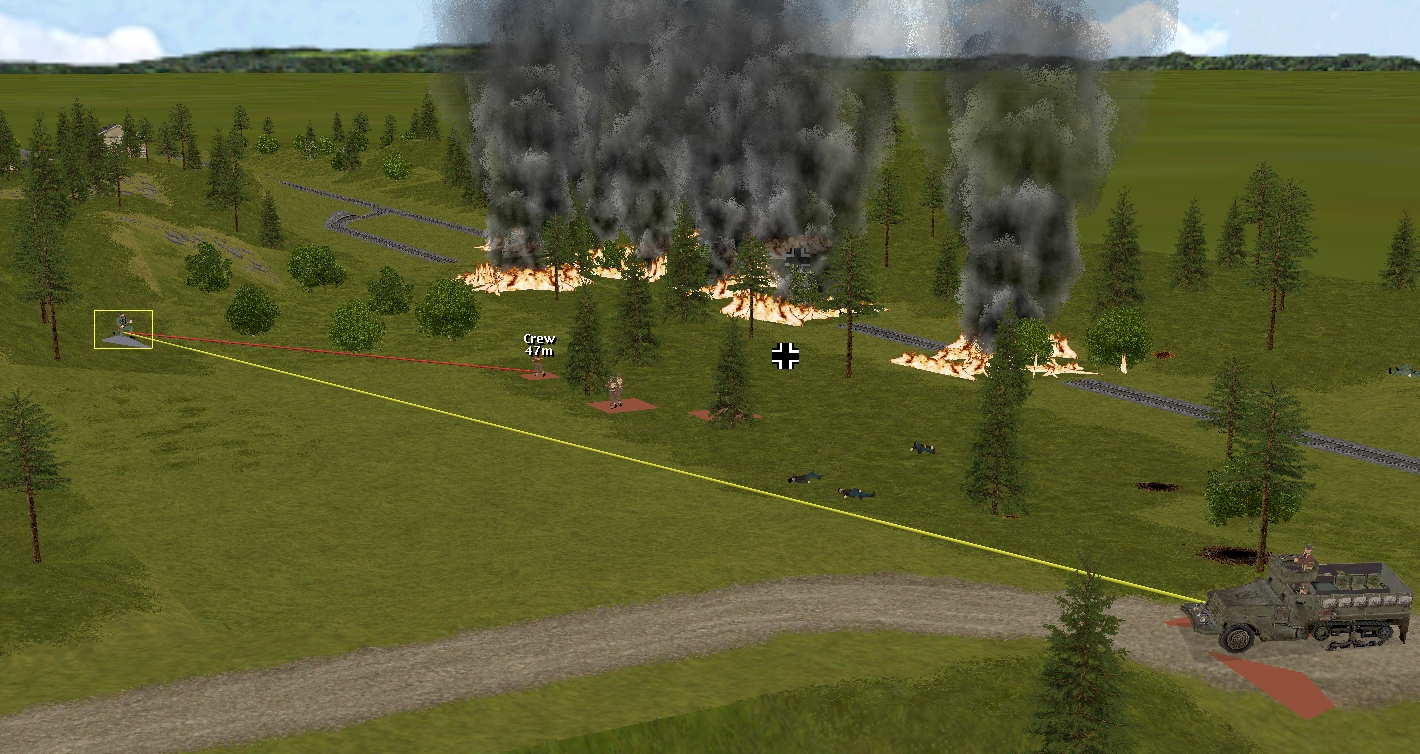
T+43. HE rounds projected by Pyle’s Sherman reduce the house at 45, 2, 1 to rubble. If, as Captain Dale indicated, there’s a halftrack lurking behind it, it won’t be visible until the dust and smoke from the explosion clears.
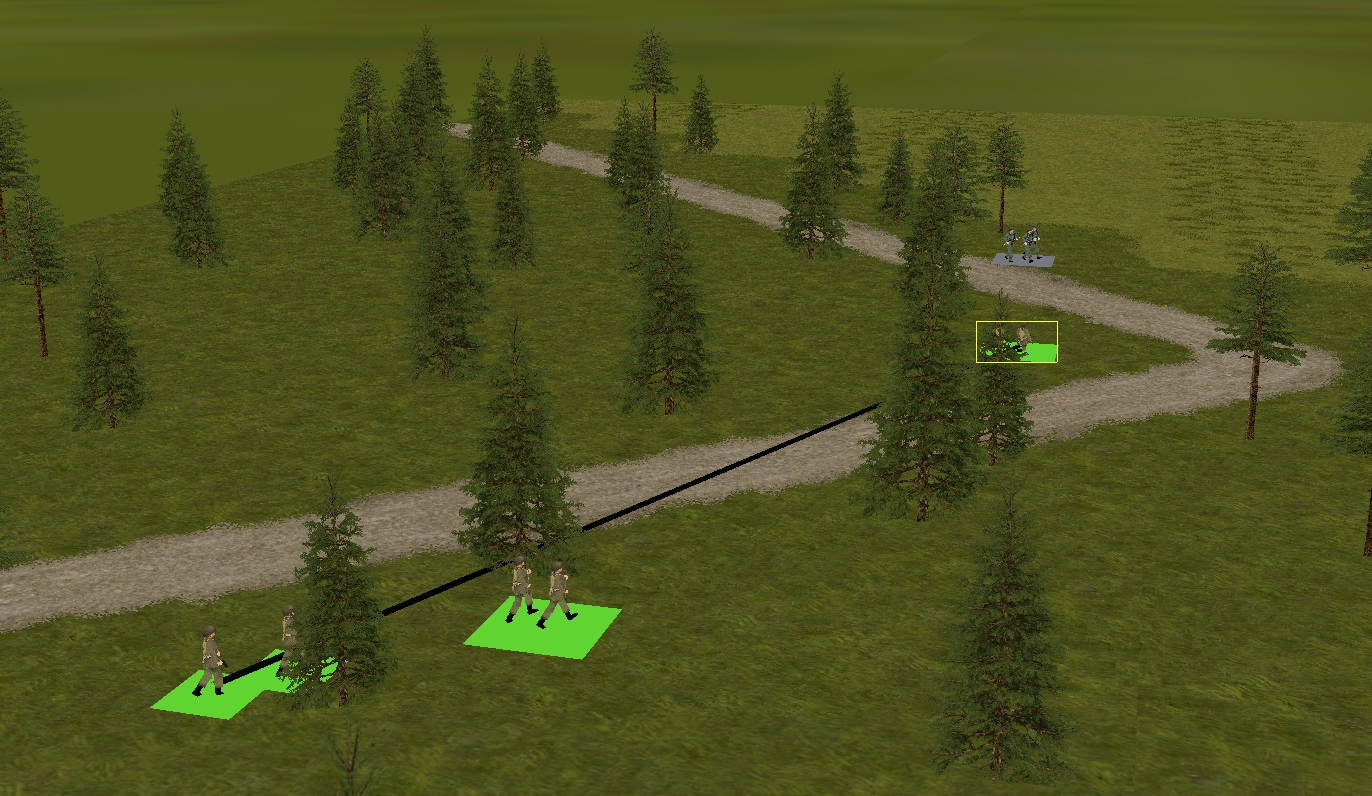
T+47. In the plantation on the northern map edge, one of Costner’s rifle teams opens fire on an approaching German rifle squad. The surprised krauts suffer a casualty and quicken their pace.
Incoming from another direction fells a second soldier, and persuades the Germans to veer left.
T+56. The Daimler crew (Scarlet & Co) come under fire as they push eastward. Happily, support in the form of a gabbling Ma Deuce isn’t slow to arrive
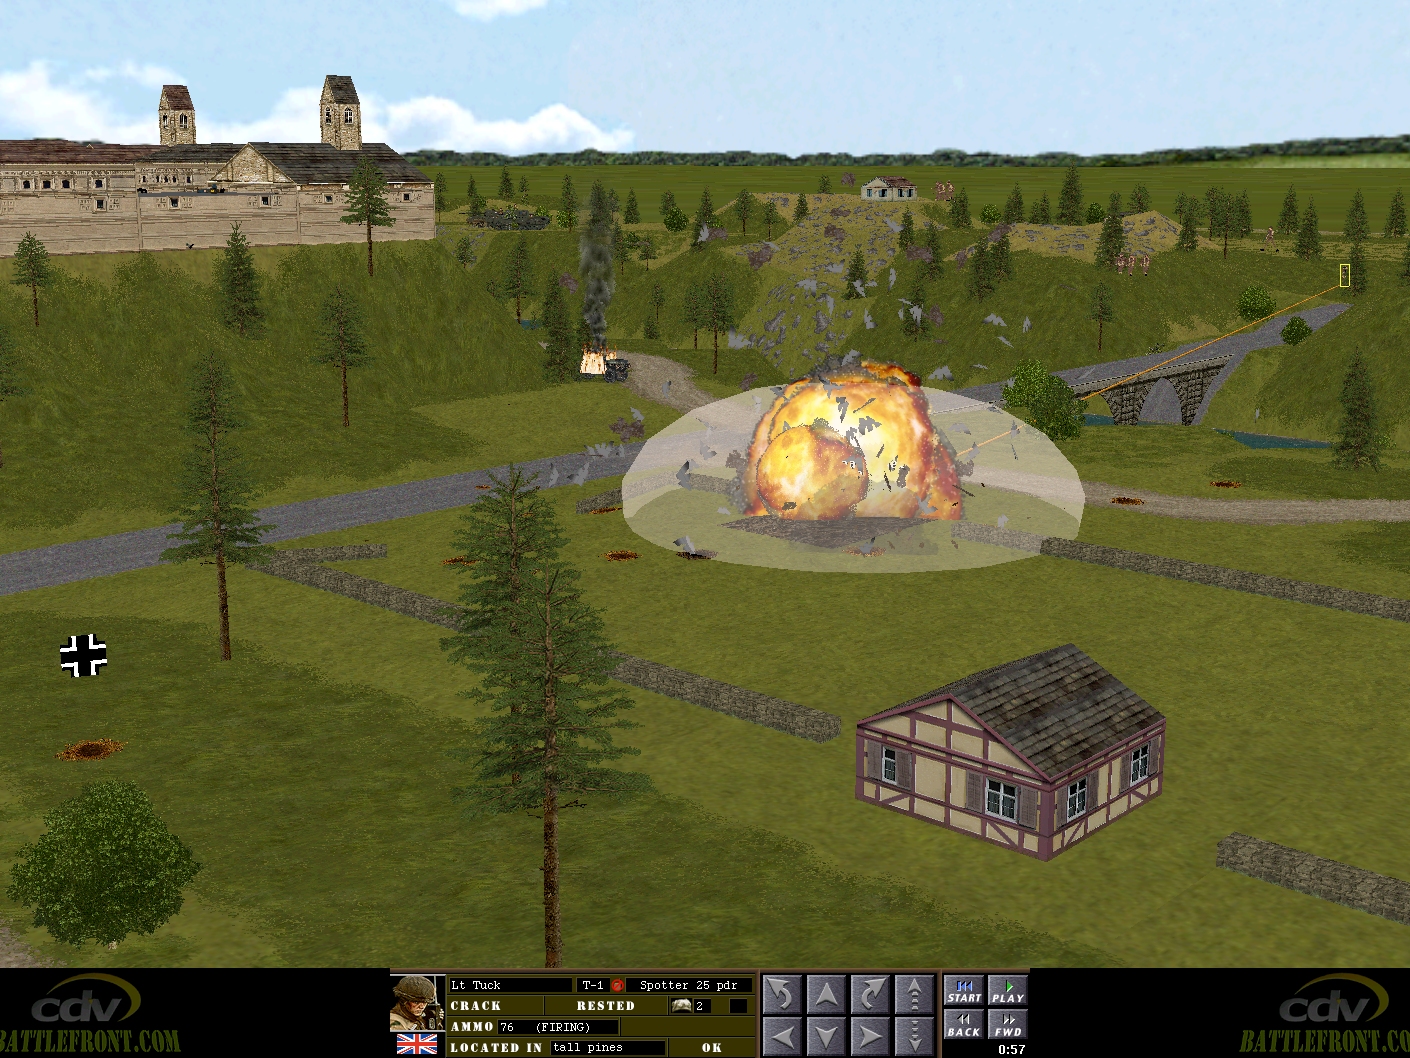
T+57. Tuck grins as an 87.66mm thunderbolt brings the abode at 36, 3, 2 crashing down.
The situation at T+60:
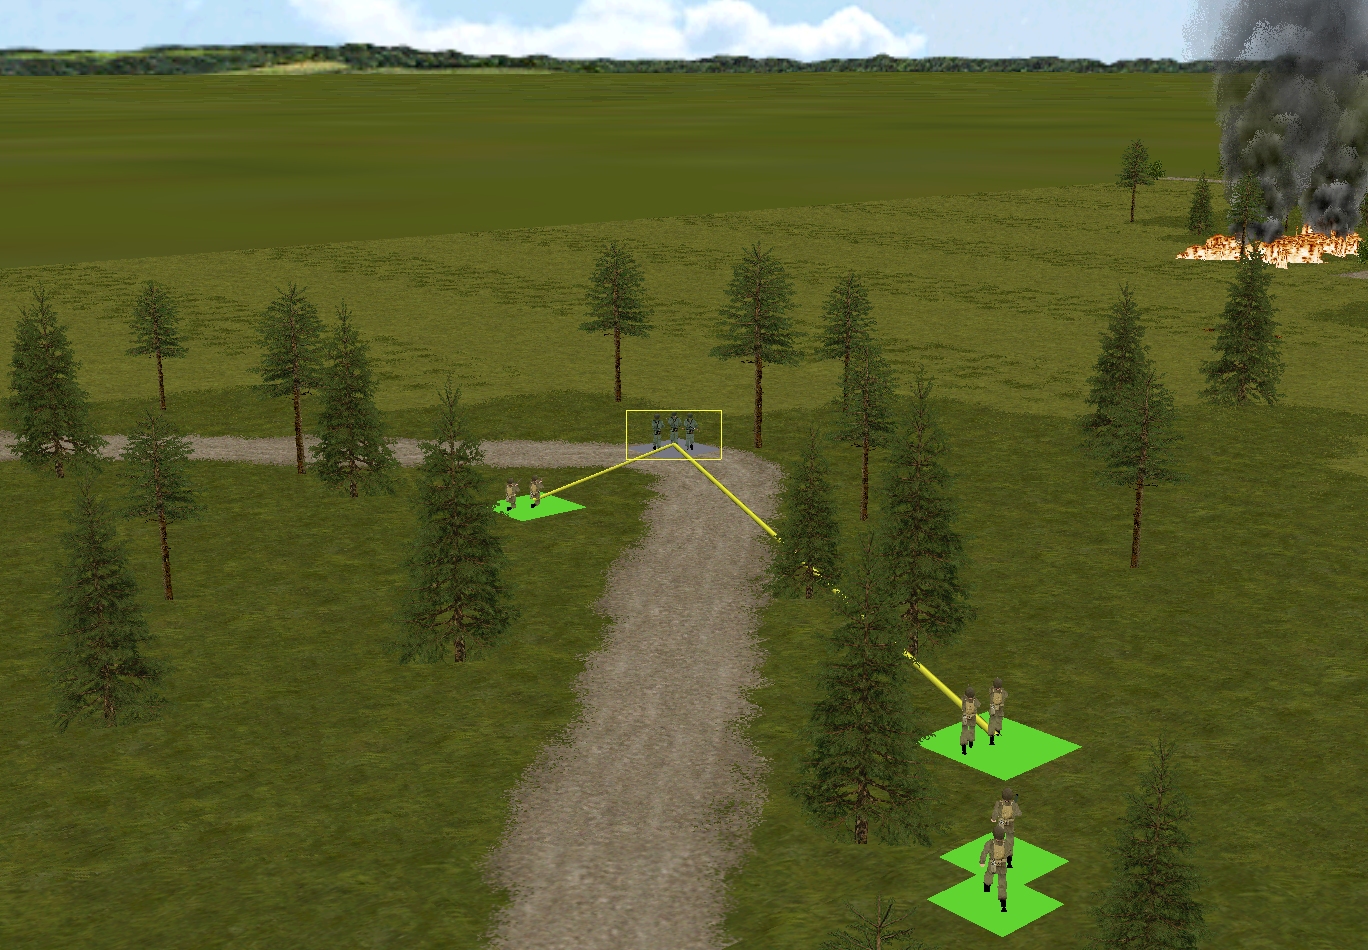
As the two halves of Venison’s split squad are still on the move when the clock stops, they won’t be amalgamated at the start of the next turn. The ringed German is a sound contact.
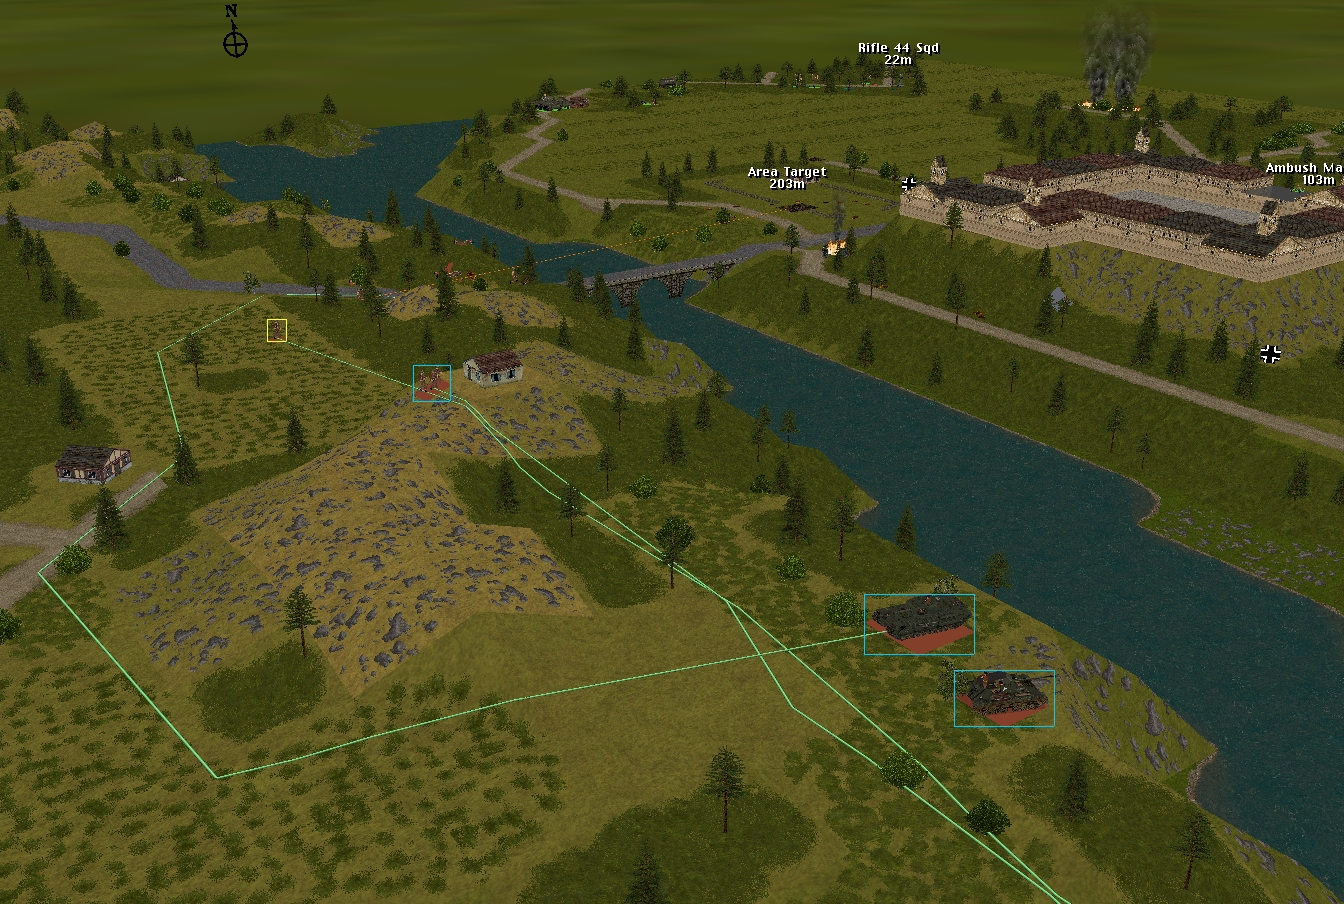
It looks like it will take a few turns for Forester (rifle squad) and Oaks (PIAT) to reach the rail bridge, and for Johns’ Churchill VIII to arrive at the road bridge.
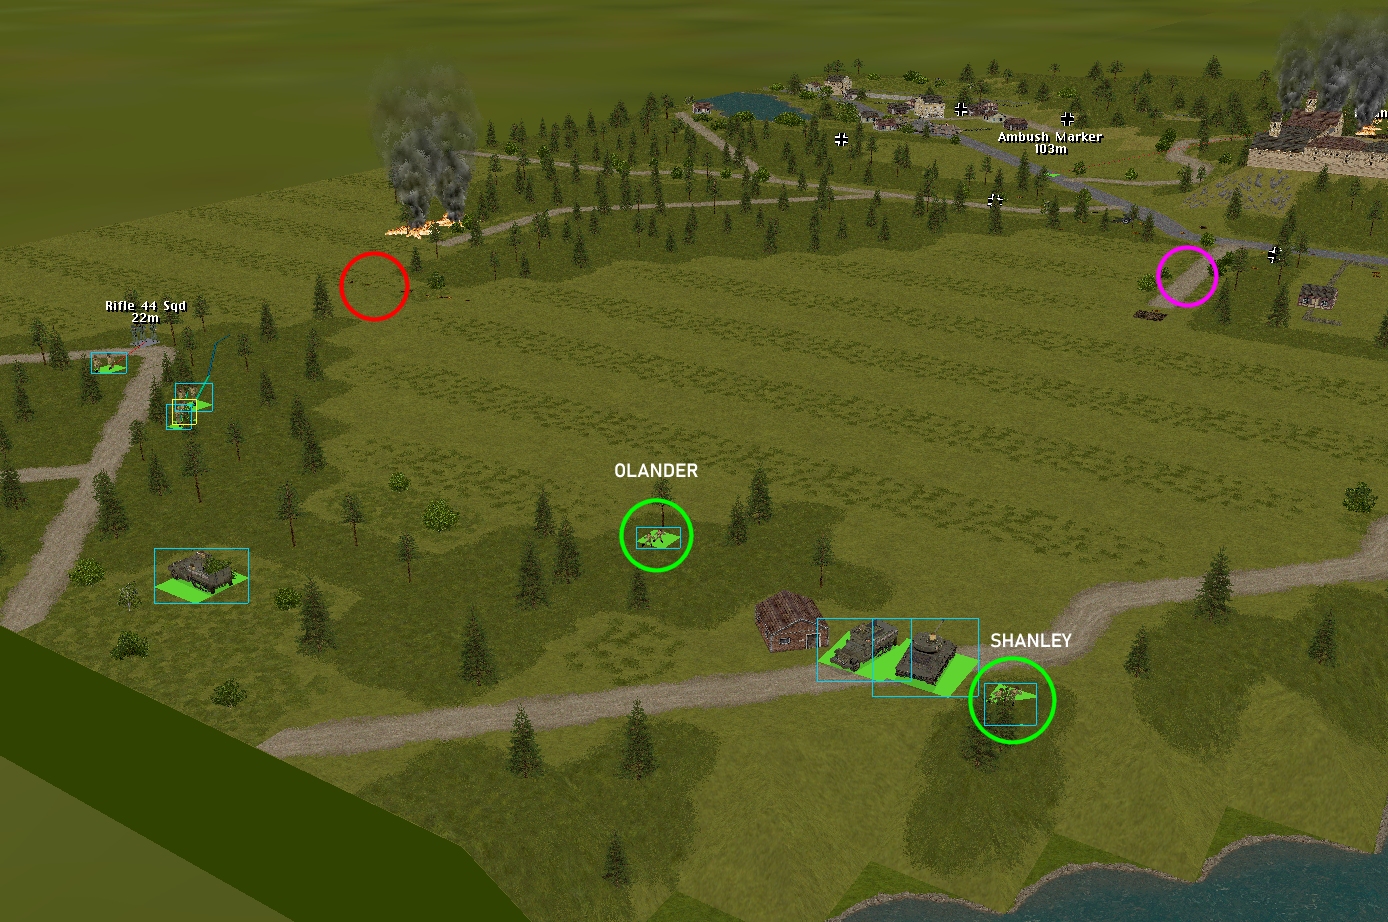
For some reason (GM gaffe?) Spencer’s halftrack decided to reverse to its new location. Fortunately, the eccentric manoeuvre went unpunished. The two ringed US rifle teams are currently hiding. The red circle shows the rough location of the dug-in tank, the pink one the elusive halftrack.
The on-the-move Panzer IV is ringed in the above screenshot.

Turn 17 orders here, please. Commenters are cordially invited to suggest moves for the following eight unit groups (First come, first served. A maximum of one unit group per commenter. I’ll try to execute the turn as quickly as possible after all orders are in.)
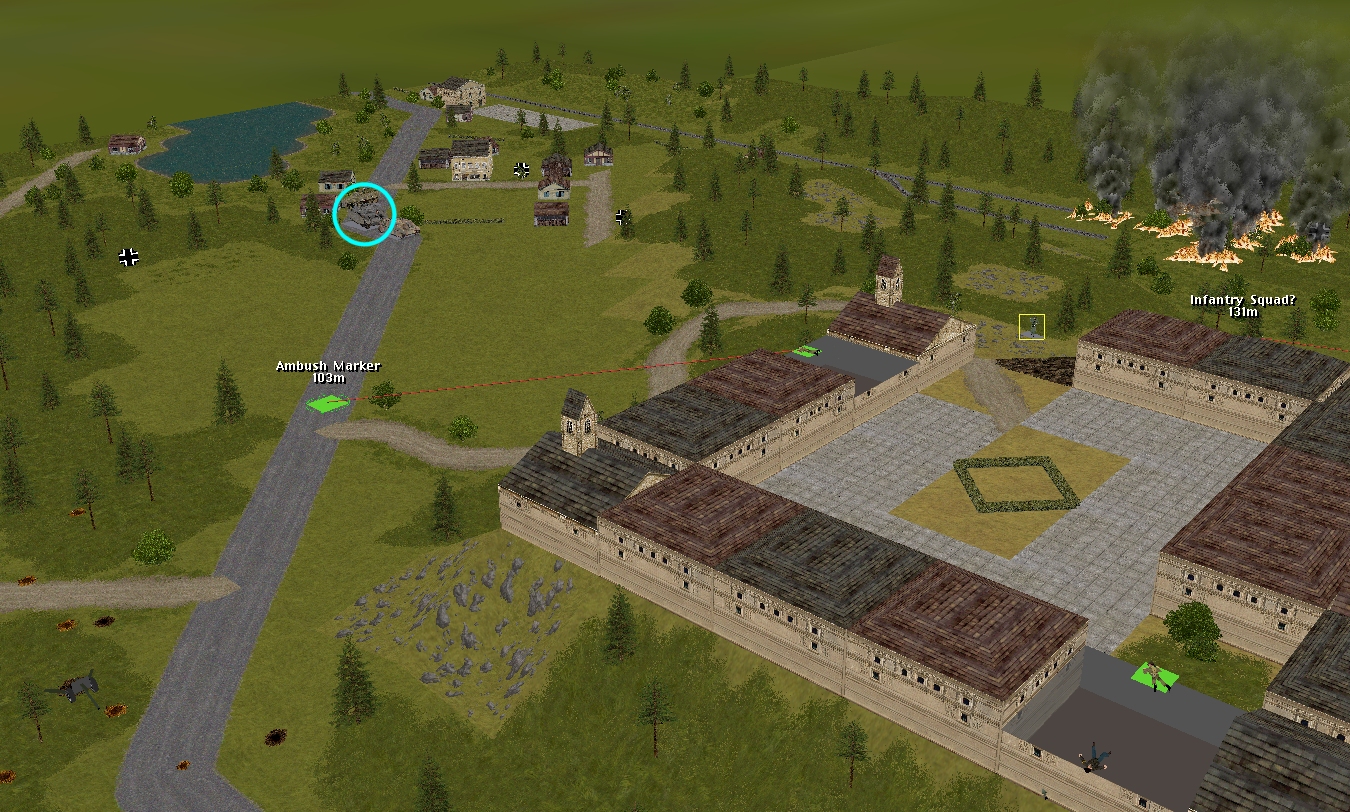
(See screenshots for unit locations)
****anyone****
– Merry’s men (Lieutenant Merry + Sergeant Venison’s rifle squad + Corporal Fletcher’s M5A1 halftrack)
– Marian’s men (Lieutenant Marian + 3 x rifle squads + PIAT team + 3 inch mortar team)
– Sergeant Bowman’s Archer TD
– Sergeant Pyle’s Sherman
****subscribers only****
– Captain Hood (Six-man company HQ + arty spotter Lieutenant Tuck)
– Sergeant Johns’ Churchill VIII
– Captain Dale’s party (Six POWs armed with pilfered rifles and pistols) + Corporal Whitehand’s team (Two POWs armed with a pilfered Panzerschreck)
– Lieutenant Costner’s platoon (2 inf squads + bazooka team + 2 HTs)
Please start all order comments with ‘ORDER’ and any later revision comments with ‘REVISED ORDER’. This will help me distinguish firm instructions from suggestions and advice.
ORDER: Sgt. Venison’s squad (Two halves)
Two objectives: TARGET enemy infantry squad at [13, 1, 3]
Attempt to re-form as a single unit
ORDER: Lt. Merry
MOVE FAST NNE to provide moral support to Venison and Scarlet, approx [4, 2, 5]
ORDER: Cpl. Fletcher’s halftrack
ADVANCE on the enemy [12, 2, 2]
ORDERS: Lt Costner’s Platoon:-
HQ unit and bazooka team – RUN to 55, 2, 4. Bazooka team only SNEAK to 55, 2, 3.
HT – FAST move from 62,2,4 to 62,3,5 then MOVE down the track to 62,5,3.
Shanley – RUN to 60, 4, 1. Then SNEAK to 52, 3, 4, keeping inside the tree line.
Spencer’s HT – Empty his driver’s canteen of moonshine, then Rotate facing SOUTH.
ORDER: Whitehand – Change ambush location to 30, 1, 2. Don’t forget all your deflection shot training!
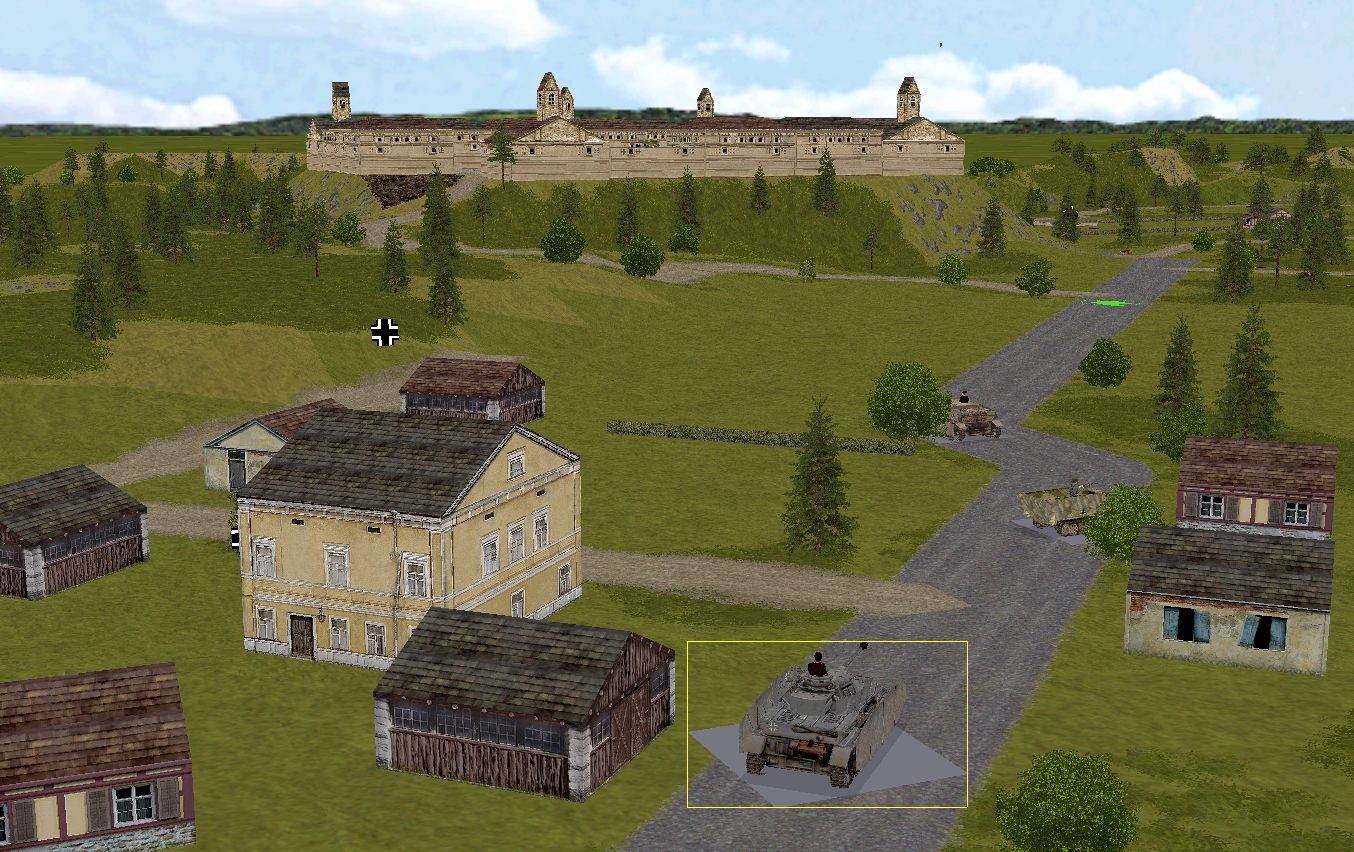
ORDER: Capt. Dale – RUN to part of the castle 28, 5, 2. MOVE upstairs to NORTH wall and look for foxholes, halftracks etc but hold fire.
ORDER: The Churchill – CHANGE to FAST Move via RAIL Bridge to 11, 5, 2. Now the Pz IV is heading north, the Churchill can join Merry heading for the village.
ORDER: The Archer – FAST MOVE to 25, 4, 5 then REVERSE to 33,5,1. all via quickest possible route to help defend against the likely AFV counter attack on the road bridge. Its likely Whitehead will be unsuccessful at the castle.
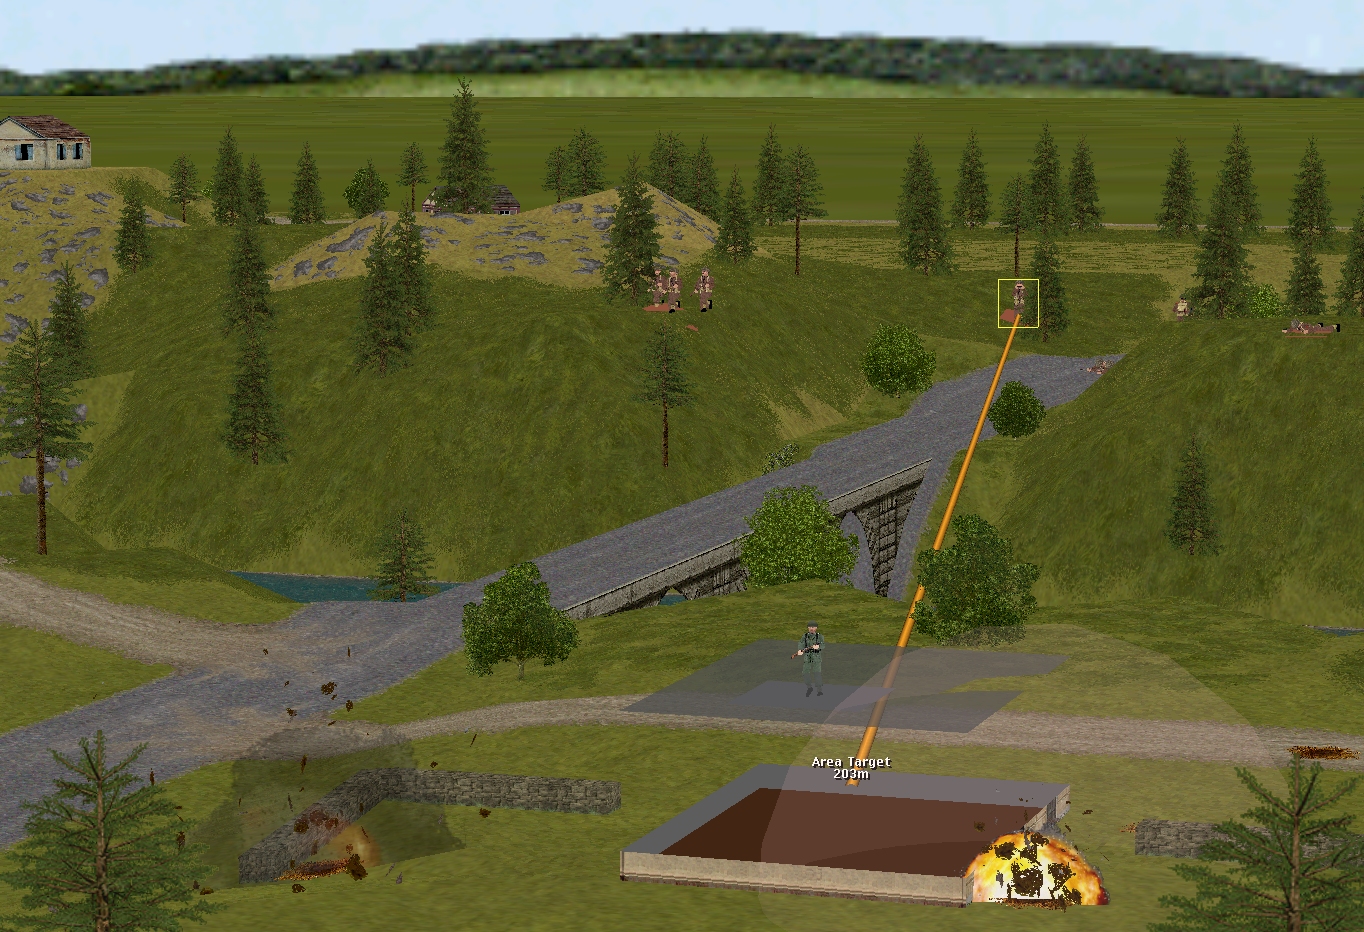
ORDER: Lt Tuck – Now that he’s (hopefully) got the hang of it – ADJUST barrage to alleged foxhole location circa 27, 5, 4. Danger Close.
ORDER: Marian’s Mortar Team – TARGET possible foxhole circa 28, 3, 4.
Ghosts of Comment Commanders Past, Present and those Yet to Come!
Any thoughts?
Castle bazooka team – Should it stay or should it go… north to get a better shot at the Pz IV?
25pdr – Next target? Btw we’re getting a lot of noise complaints.
Churchill – Change destination to the rail bridge battlegroup then onwards to liberate the squirrels?
Archer – Dart to the road bridge to counter a likely AFV counter attack?
Afraid I ain’t got nuthin’ beyond threatening Comment Commanders who have gone A.W.O.L. with Sheriff Rickman
https://www.youtube.com/watch?v=MhfuuKiTcYQ
Question: is Cpl. Fletcher’s halftrack capable of transporting both Forester (rifle squad) and Oaks (PIAT)?
Would defer to Tim for definitive, but I believe it can, just don’t come at me with a dull spoon if I’m wrong.
Yes, that should be possible.