
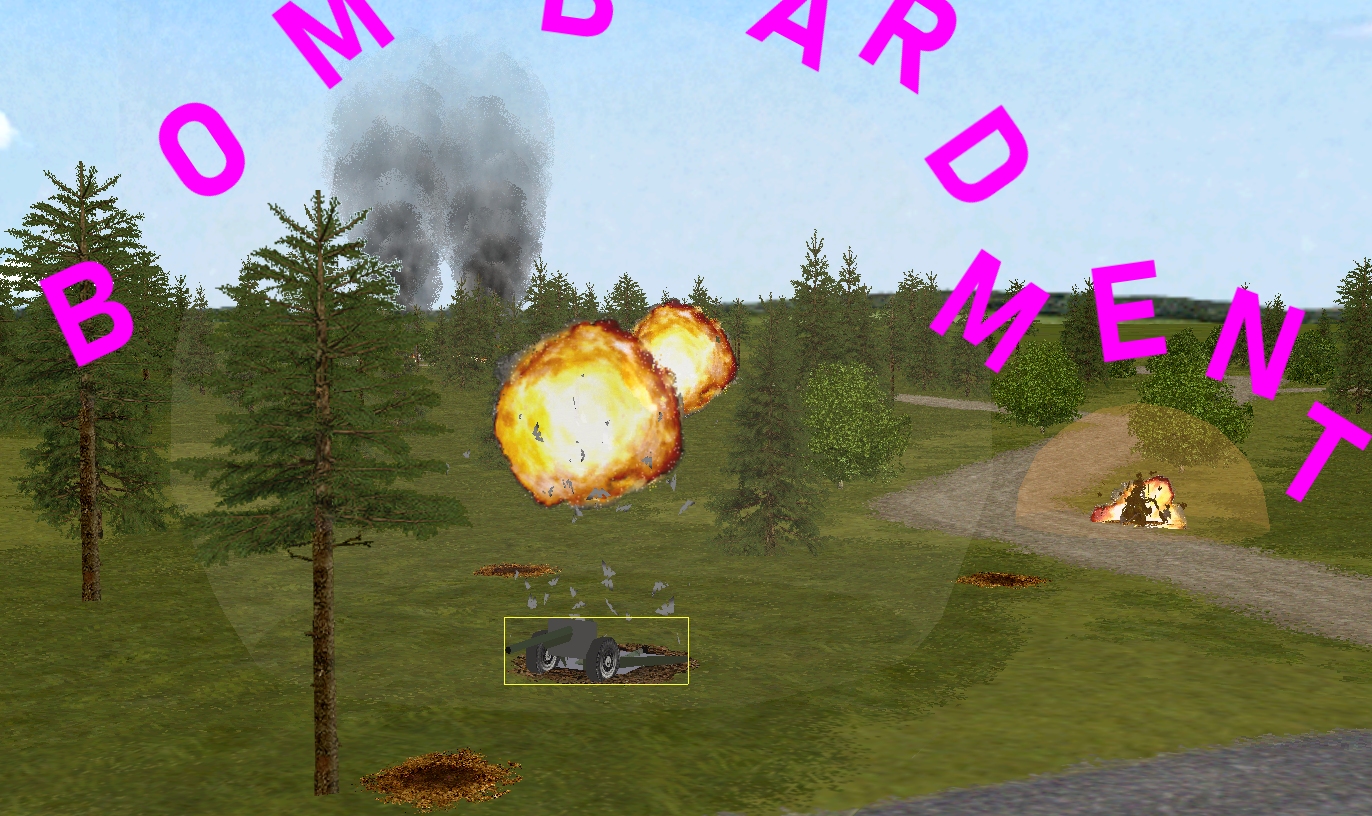
This sixty-second burst of WW2 WeGo action leaves map square 29, 4, 5 and its environs reeking of cordite, limonene, and pinene. The citrusy terpenes waft from conifers violently pollarded and pruned by 25-pounder rounds.
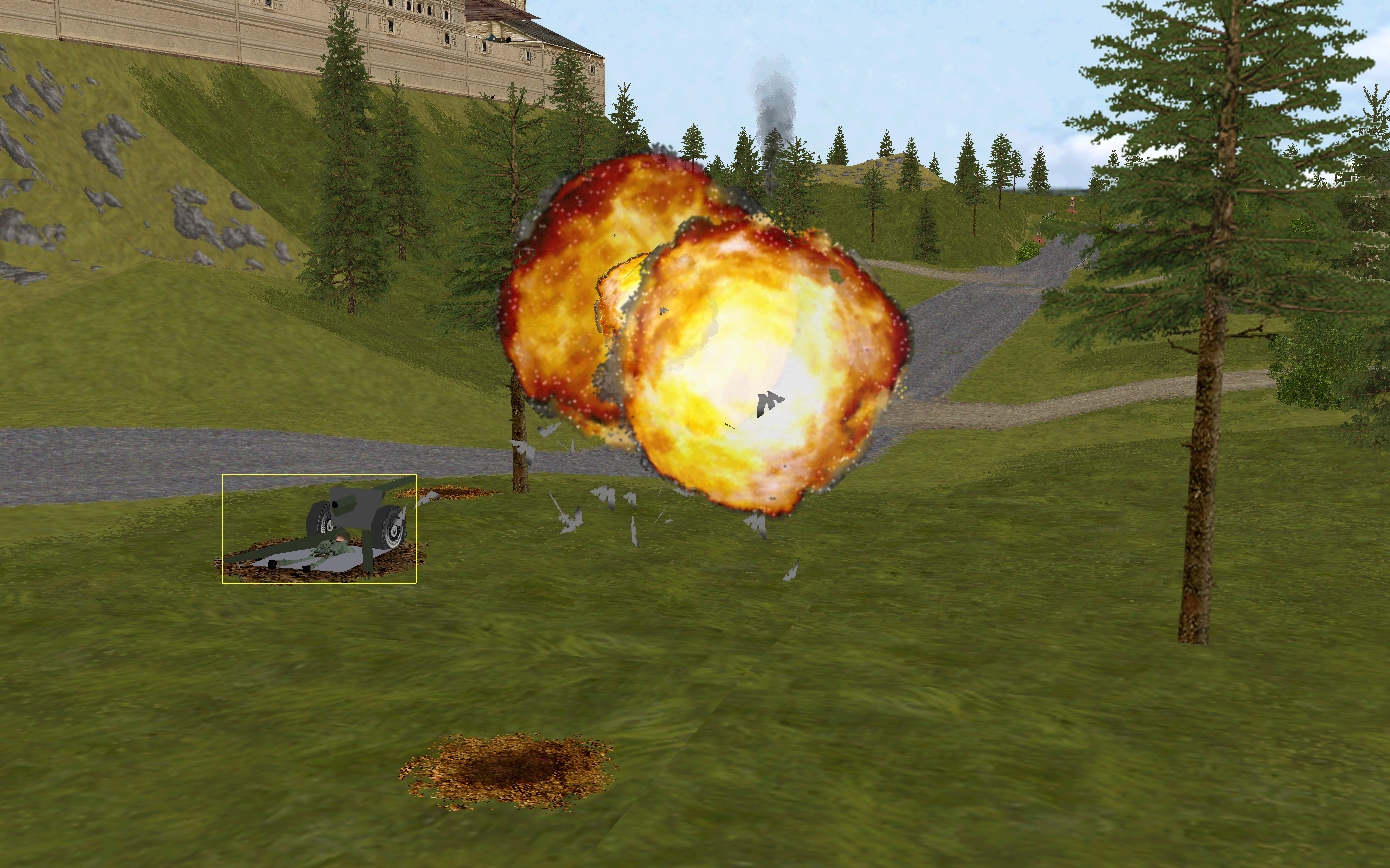
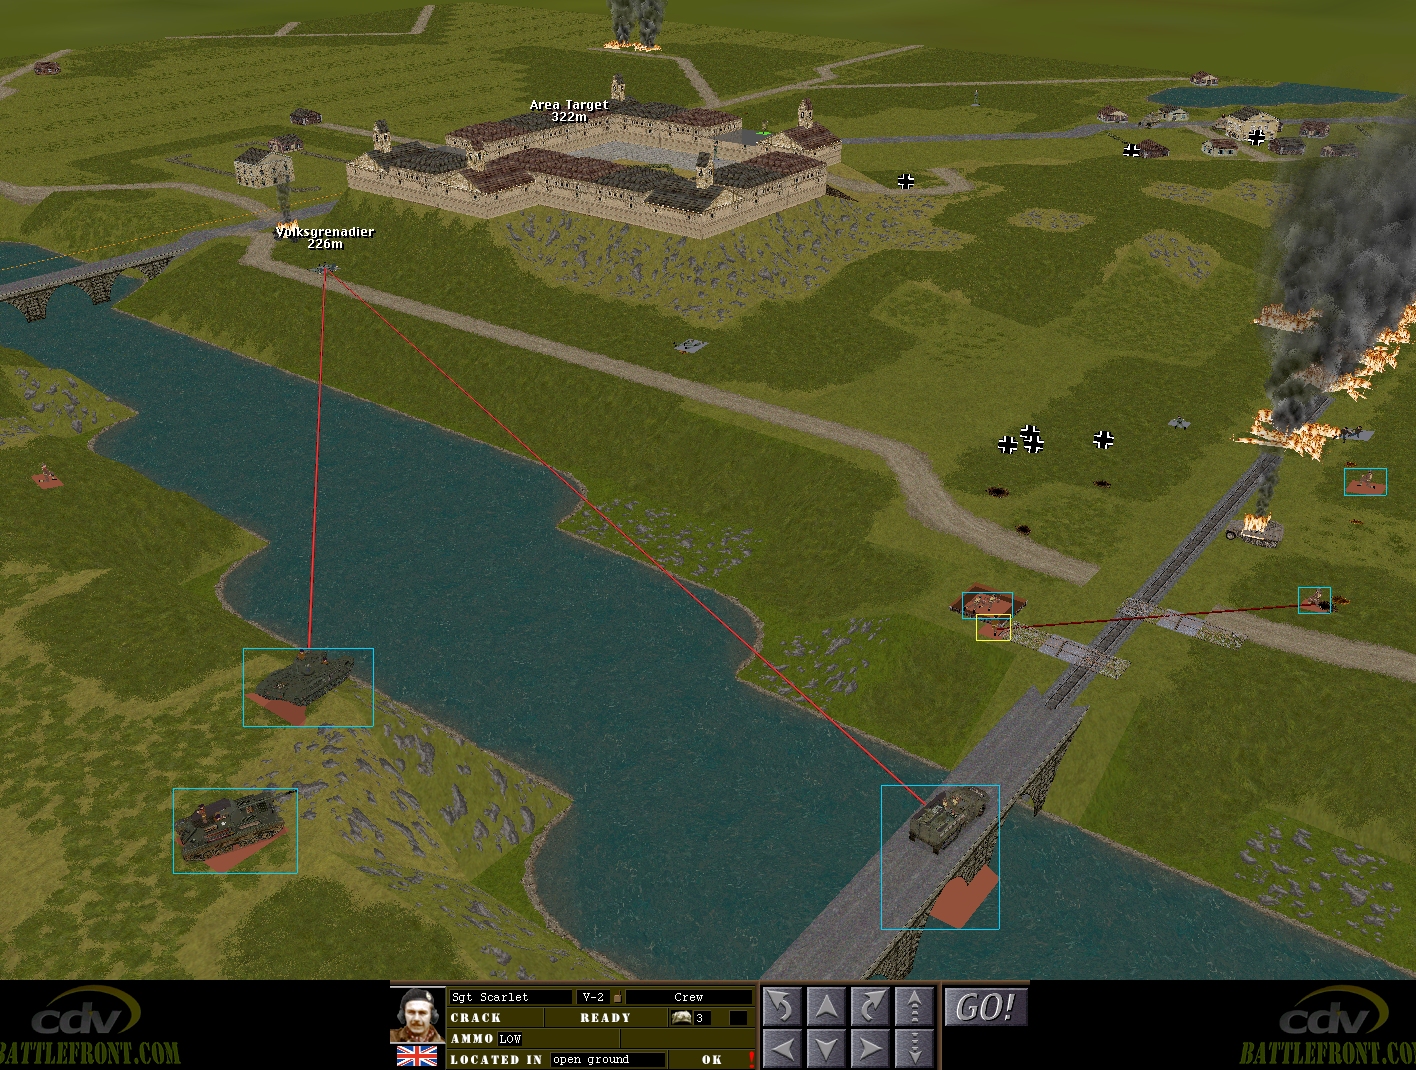
It’s quite possible that the flurry of explosions that rock 29, 4, 5 in the latter half of the turn, neutralised the ‘88’ said to be lurking there. Although the unidentified German gun watching over the road bridge isn’t shown as KOed at the end of the sixty, several of the 25-pounder shells either impacted very close to its apparent position or treeburst almost directly above it. Watching the pandemonium from across the Bogen, Allied artillery spotter Lieutenant Tuck has reason to feel optimistic.
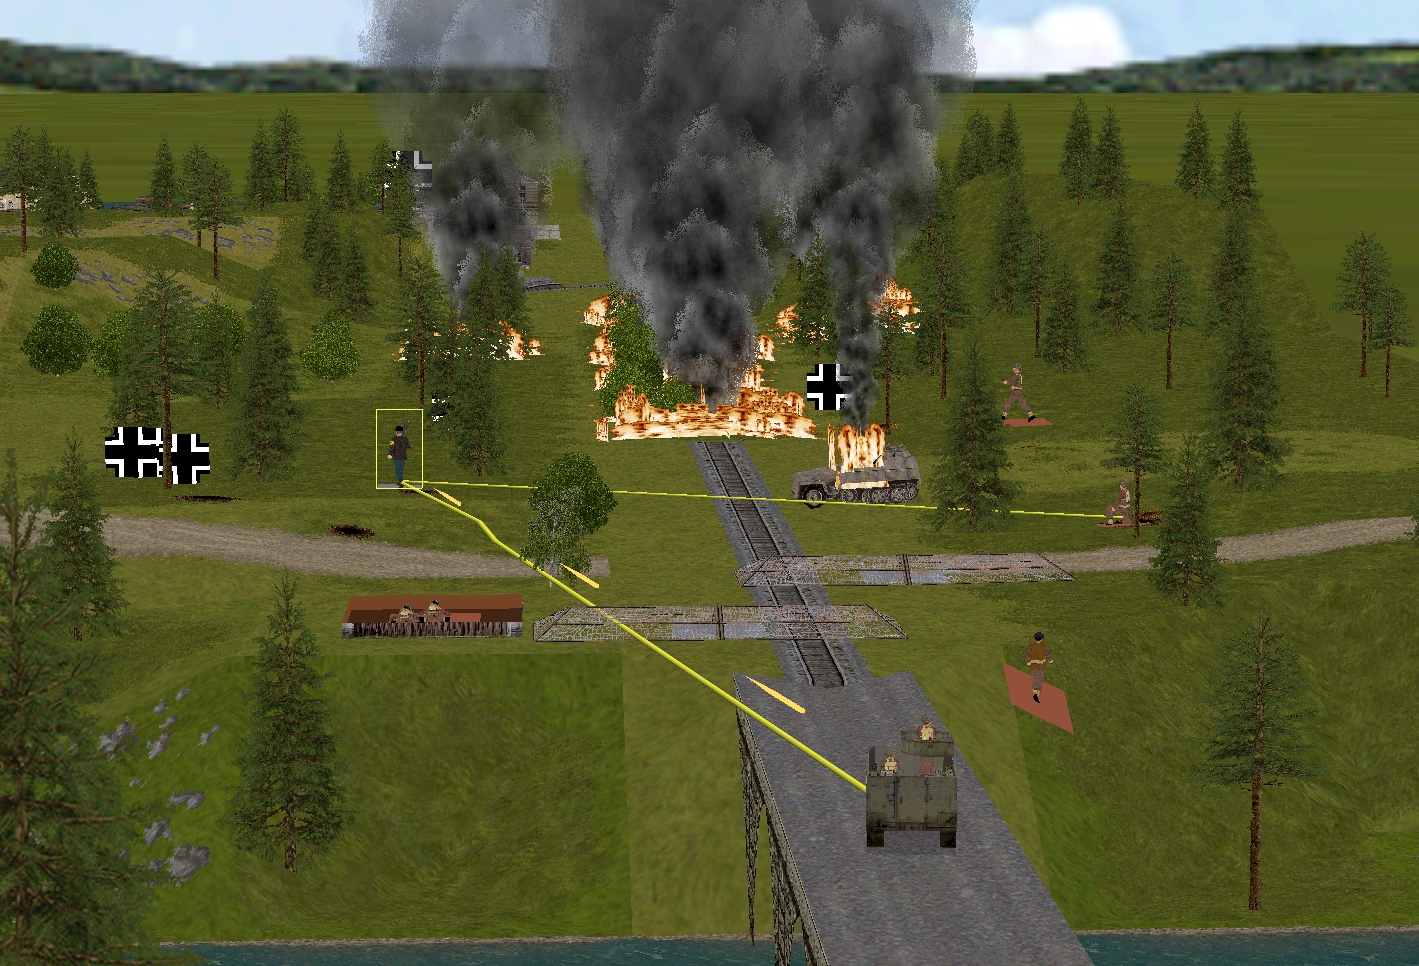
Further south, things also go pretty well for the Comment Commanders. Halfway through the turn resistance at the rail bridge ceases when the Volkssturm machine gunner east of the signal box decides to take to his heels.
If the two Volksgrenadier squads close to the riverbank road wish to reinforce the rail bridge defences or retake the crossing, they’ll need to figure out a way to deal with the tracked howitzer currently menacing them from the clifftop opposite.
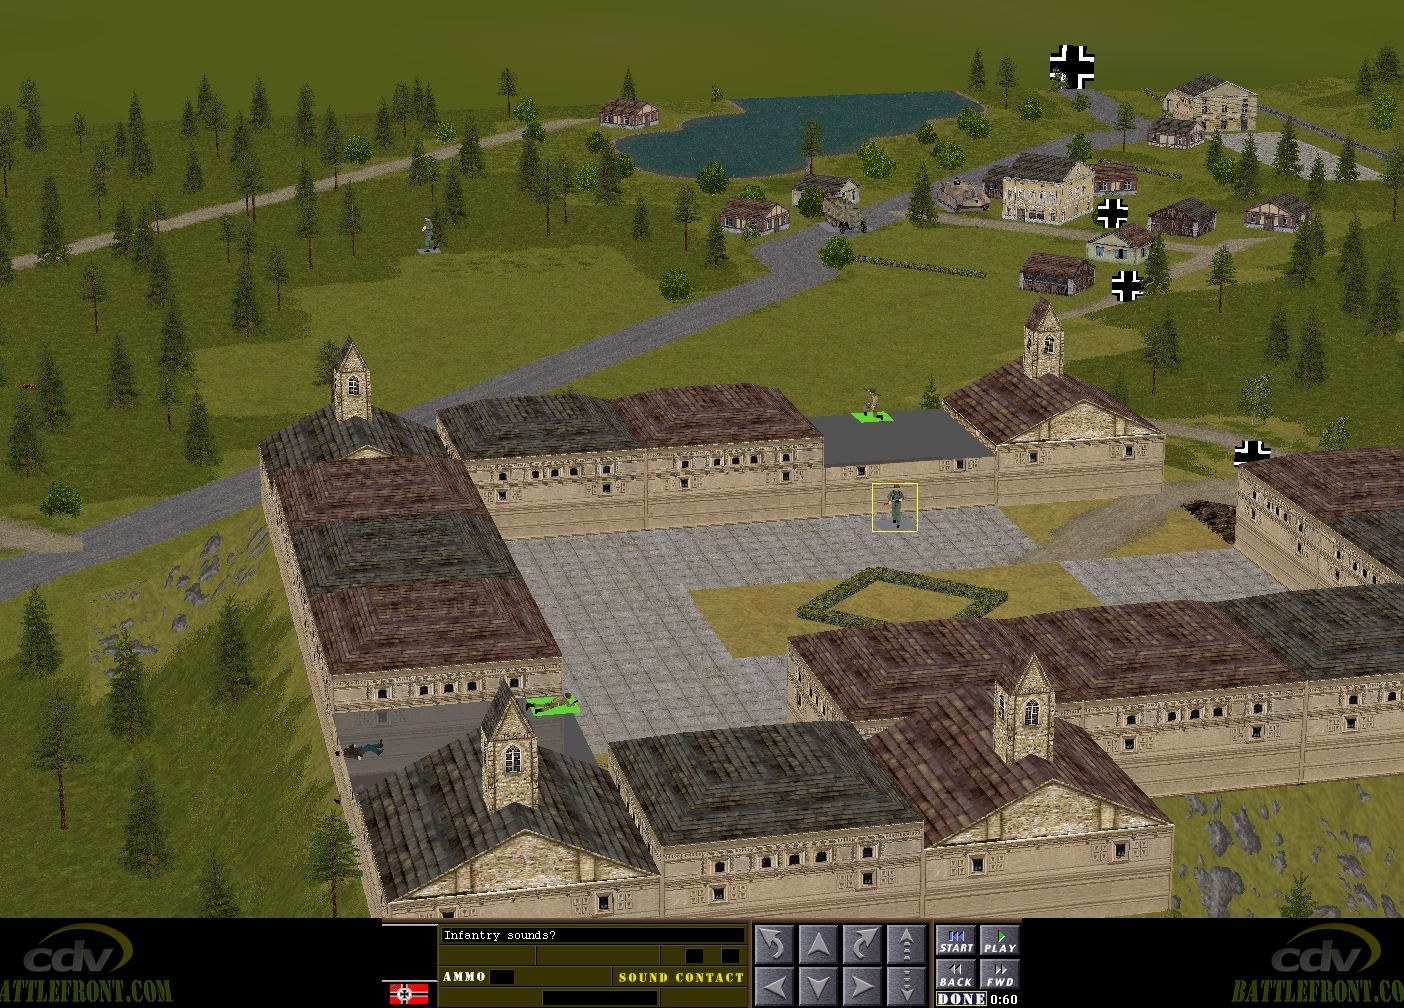
If it wasn’t for a disquieting development in the final seconds of the turn, this report would be wall-to-wall good news. Circa T+55 an ‘Infantry sounds?’ contact icon appears in the castle courtyard close to Corporal Whitehand. Are the USAAF squatters about to get a visit from a gang of belligerent bailiffs?
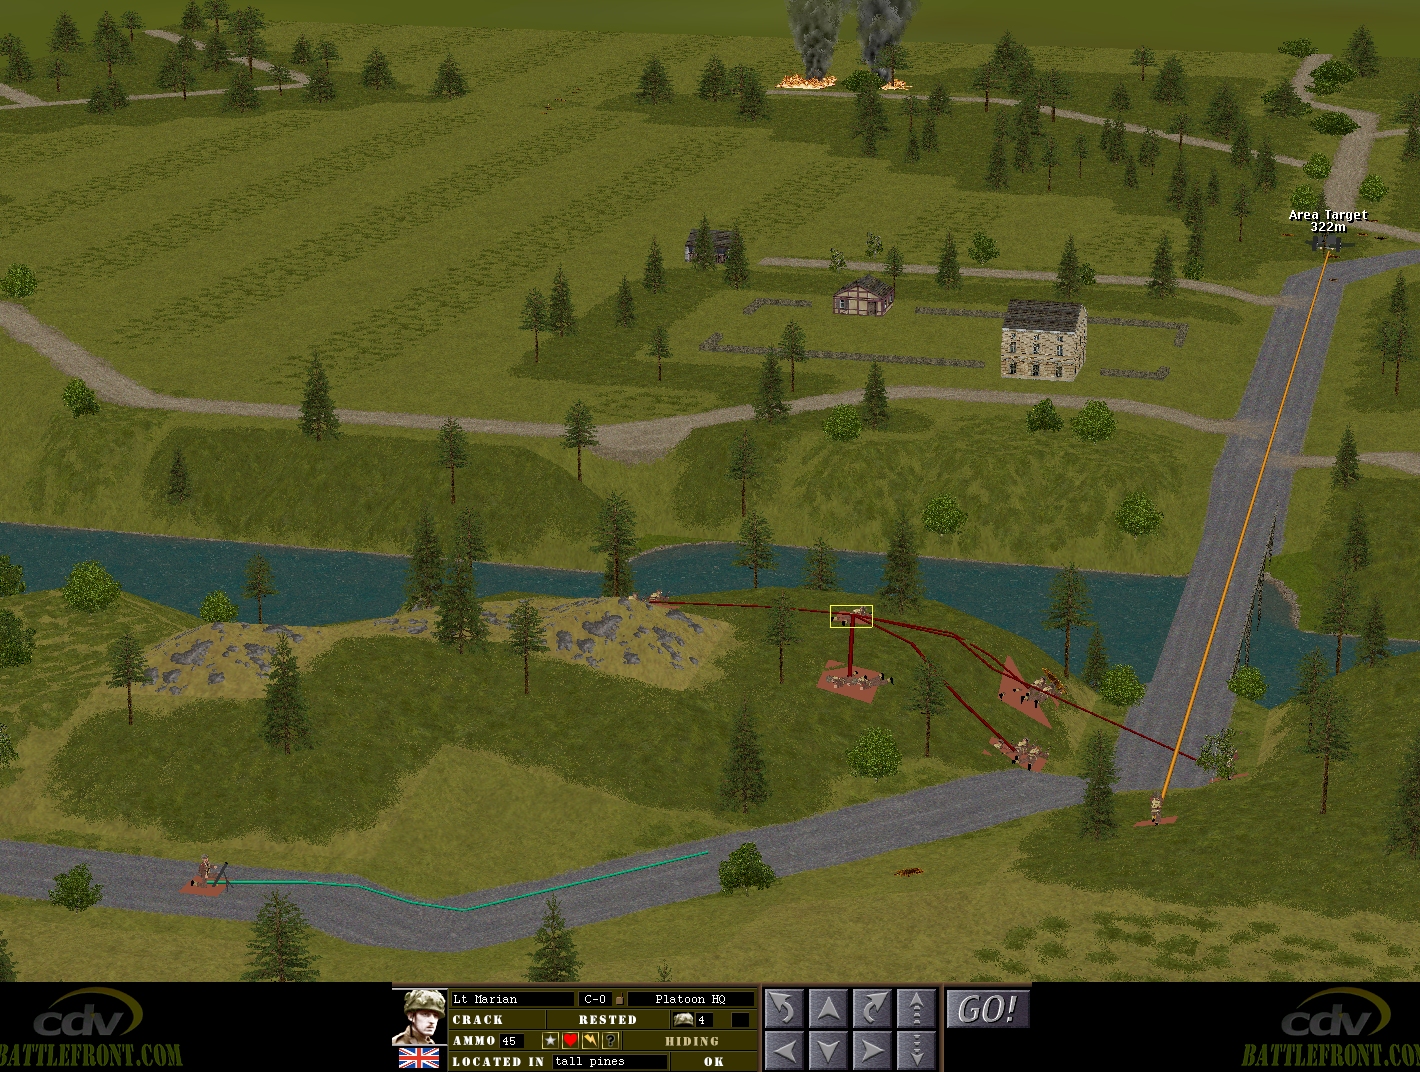
The situation at the start of Turn 13:
^ Tuck has 106 25-pounder rounds remaining.
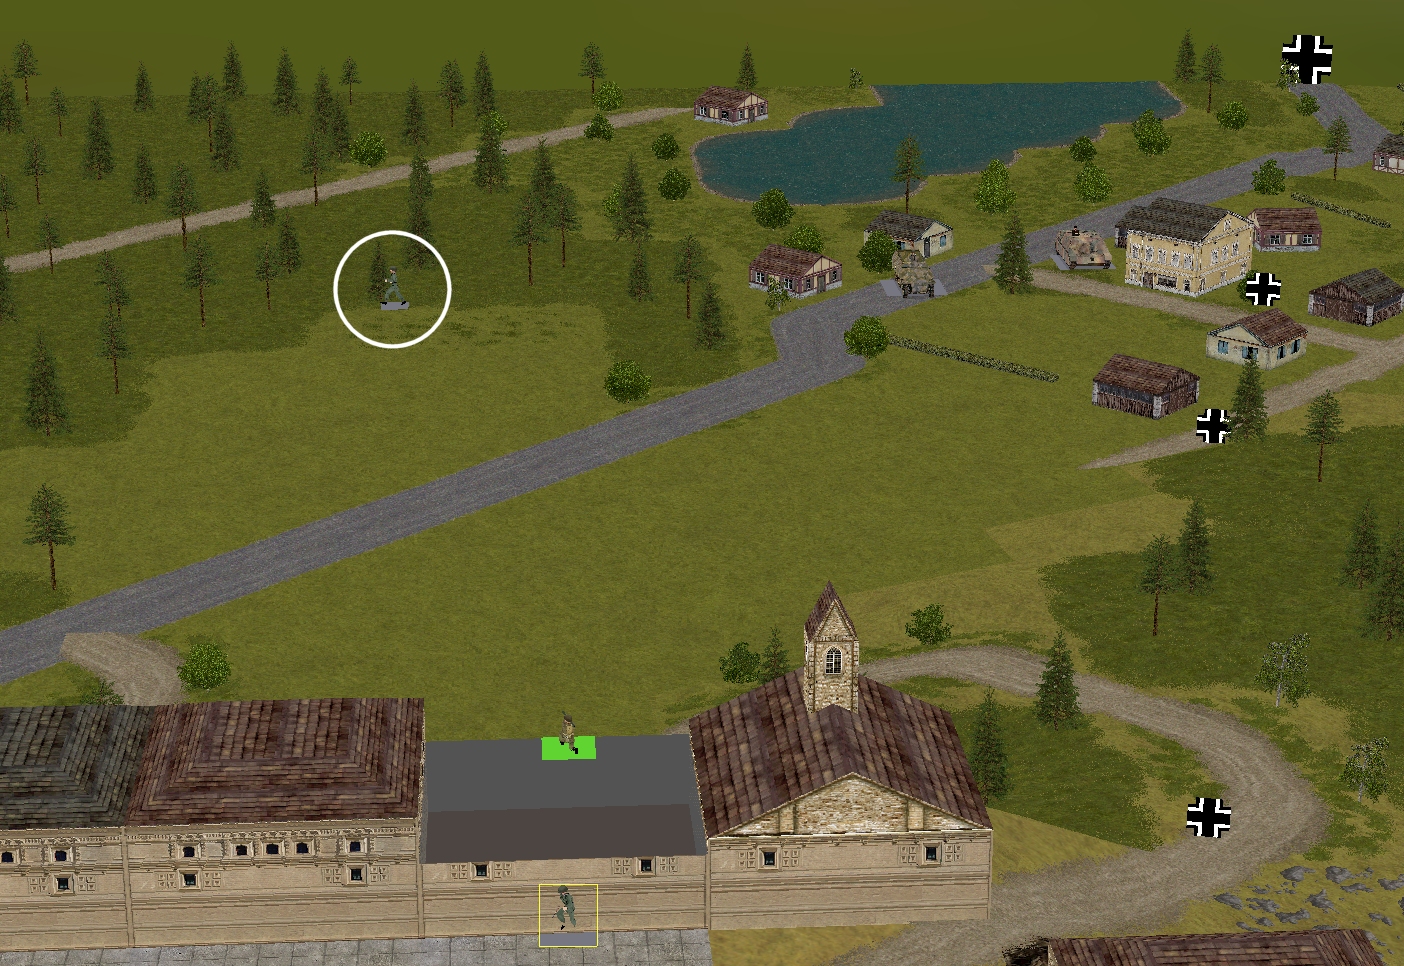
^ Whitehand can see a German infantry squad moving northward through the woods east of his vantage point.

Turn 13 orders here, please. Commenters are cordially invited to suggest moves for the following six unit groups (First come, first served. A maximum of one unit group per commenter. I’ll try to execute the turn as quickly as possible after all orders are in.)
(See screenshots for unit locations)
****anyone****
– Merry’s men (Lieutenant Merry + Sergeant Venison’s rifle squad + Corporal Fletcher’s M5A1 halftrack)
– Marian’s men (Lieutenant Marian + 3 x rifle squads + PIAT team + 3 inch mortar team)
– Sergeant Bowman’s Archer TD
****subscribers only****
– Captain Hood (Six-man company HQ + arty spotter Lieutenant Tuck)
– Sergeant Johns’ Churchill VIII
– Captain Dale’s party (Six POWs armed with pilfered rifles and pistols) + Corporal Whitehand’s team (Two POWs armed with a pilfered Panzerschreck)
Please start all order comments with ‘ORDER’ and any later revision comments with ‘REVISED ORDER’. This will help me distinguish firm instructions from suggestions and advice.
(Let’s see if they’re capable of meat- and bone-sack based scouting)
ORDER: Sgt Scarlet’s disembarked crew
MOVE FAST into the MG42 foxholes at [3,5,5], facing ENE.
ORDER: Cpl. Fletcher’s halftrack
MOVE CAUTIOUSLY east to where the railway texture overlaps the bridge.
ORDER: Sgt. Venison’s (A) 2-man fireteam
WAIT 30 seconds then MOVE FAST north to the woods at [4,2,5]
GO PRONE.
ORDER: Lt. Merry
SNEAK north by east a couple of metres to remain in the woods, but have a good viewing arc covering the Wehrmacht crosses around [12,1,1]
ORDER: Dale’s crew to move FAST to the bottom floor and then HUNT out to the adjacent courtyard.
Whitehand: If it’s possible to move directly between parts of the castle, (IIRC only the corner “cloclktowers” are unenterable), FAST two squares north (which I think should be [29,1,2]). If that would force them into the courtyard, then the alternative order is to HIDE
ORDER
Hood to start making his way to 3,3,5 to give some extra encouragement to Merry’s men.
No new orders for Tuck – let’s see what another 60 seconds of bombardment does…
ORDER:
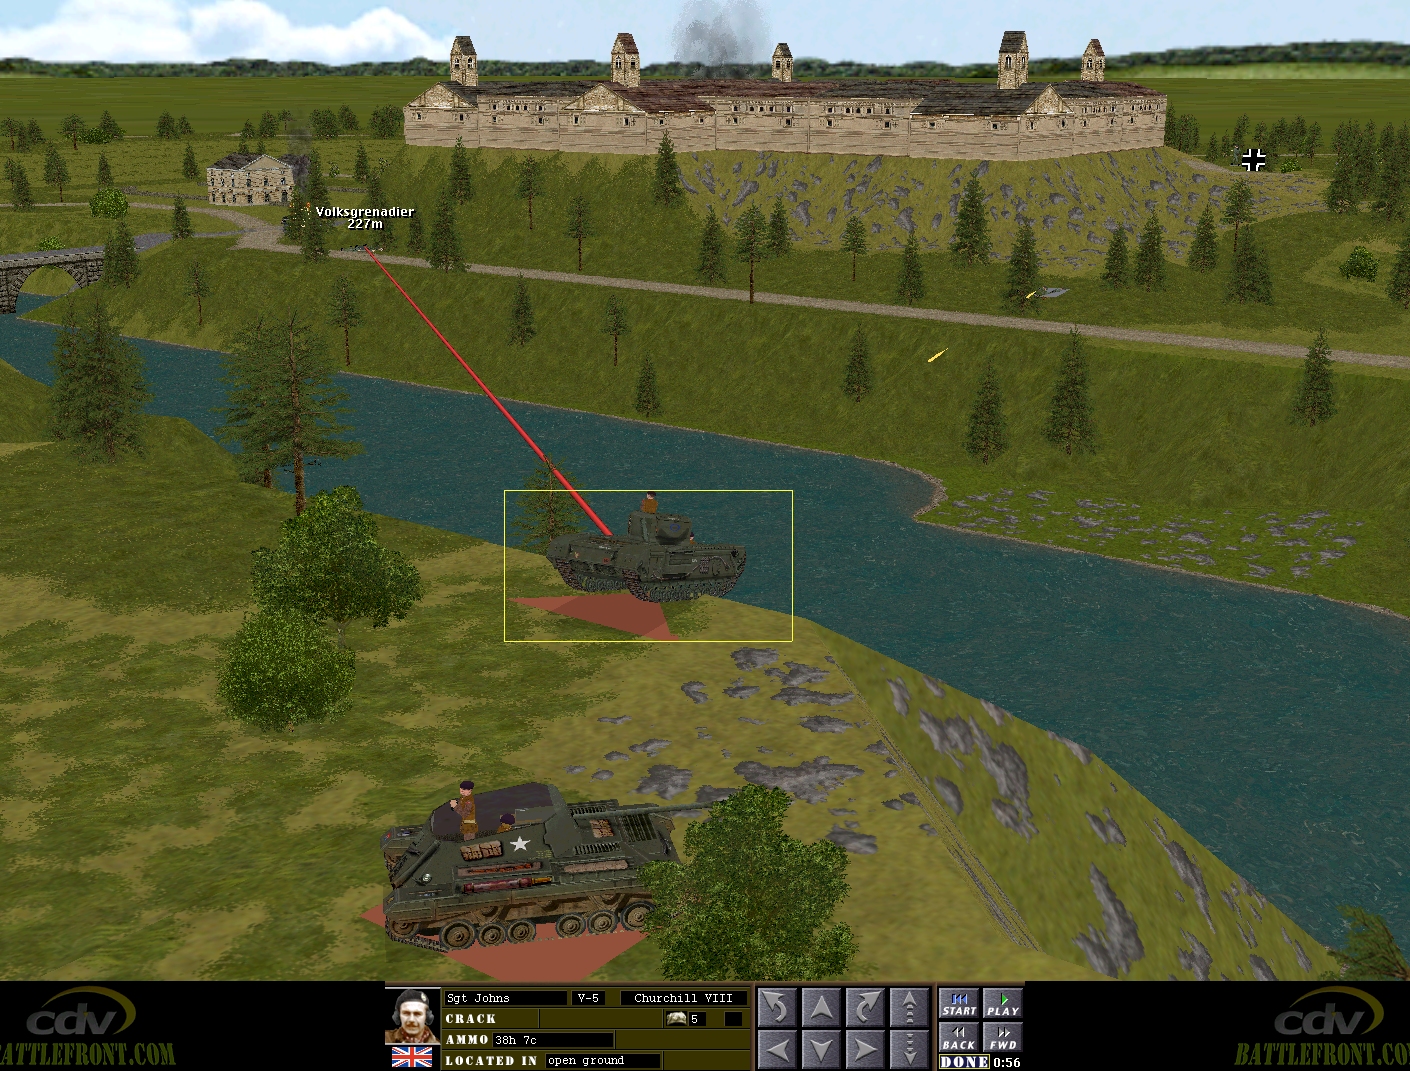
Sergeant Johns’ Churchill VIII – TARGET Volksgren in Block 27 with main gun.
ORDER: In the absence of a Commander for Marian’s men.
Foresters A and B. – MOVE to 34,5,2 (S.E cnr) and HIDE.
Mortar team continue along road to 34,3,1. Hopefully into command range of Lt Marian.
Greenwood – RUN to 26,4,4. then SNEAK to 26,5,4. HIDE.
Tim, what’s the status of the three prostrate enemy figurines (one unit of 2, the other of 1) that can been seen by Sgt Venison either side of the burning oil tank?
https://tallyhocorner.com/wp-content/uploads/2025/10/bogen12h.jpg
The unit north of the railway is the sole survivor of the halftrack. The unit to the south is the ‘green’ four-man militia team that caused Venison problems earlier. Morale-wise, both look to be struggling.
What are the prospects for Sgt. Venison and his plus one taking the militia team (presumably Jönnes, Vrëjser, Gottfrei and Wälker) prisoner?
What are the prospects for the militia team staying prisoner once Sgt. Venison moves away?
If approached, the militia team will probably run rather than surrender. If there was a Brit unit between them and the village, things might be different.
IIRC surrendered units never ‘un-surrender’ in CMx1.
Sorry for being MIA these past few weeks! I was in Budapest with a friend, her first visit to her motherland (fun fact: her great-grandfather designed the first ever Hungarian glider (https://en.wikipedia.org/wiki/Gy%C3%B6ngy%C3%B6s_33). Then a week-long stroll from Switzerland to France. It’s a tough life, etc.
Seems that my dereliction of duty is about to turn Whitehand into chum for these great white brutes. Best do something about that.