
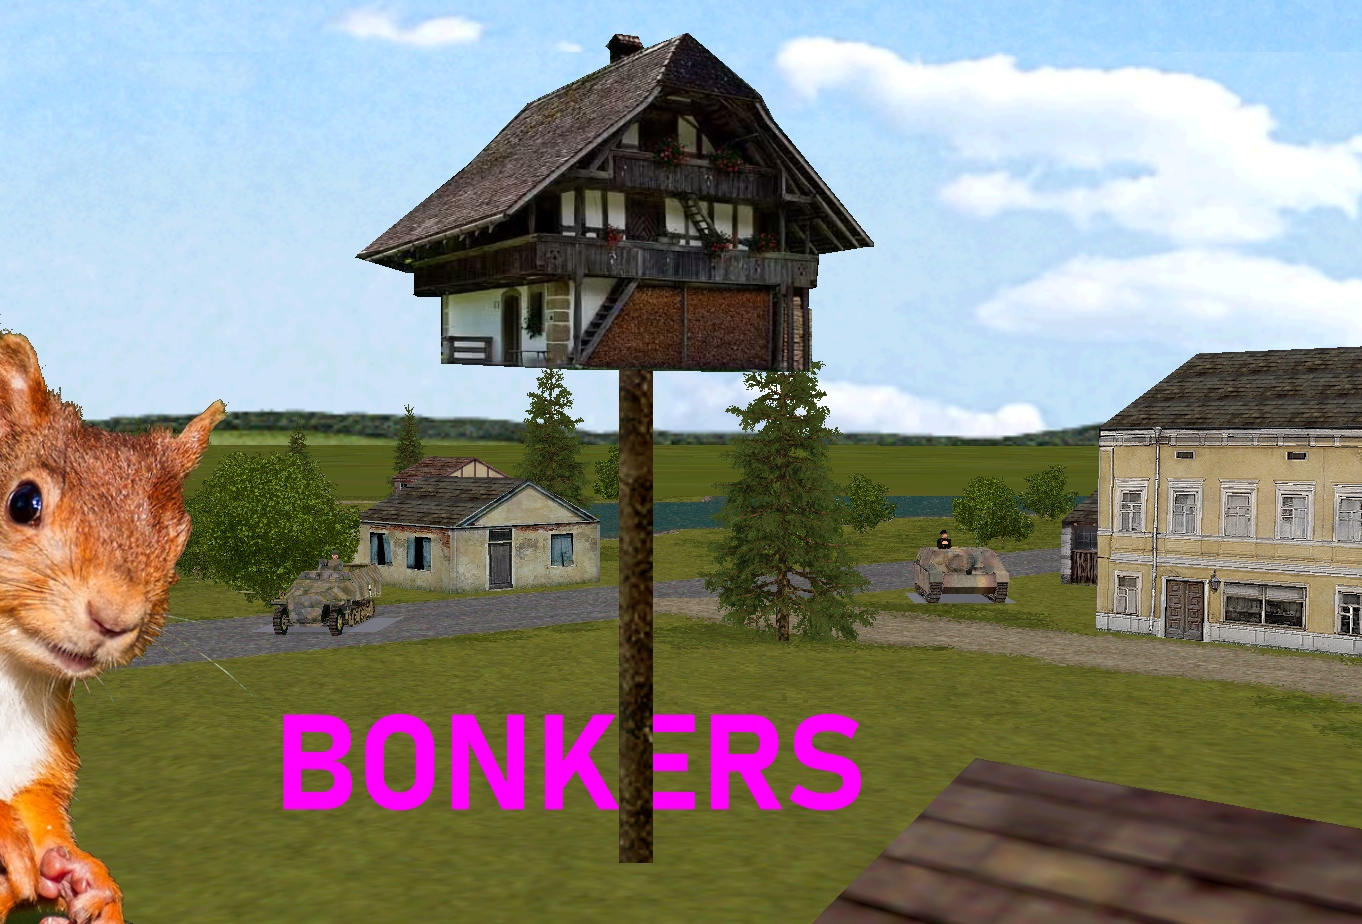
Before the war the village of Nottingheim was something of a tourist magnet. The big draw wasn’t the castle, it was the famous Eichhörnchenhaus and its unusually tame residents. As CMBO doesn’t include an ornate squirrel tenement among its building selection, you’ll just have to imagine there’s a cross between a traditional Swiss chalet and a pole-mounted dovecot in the pasture NE of the Black Squirrel inn.
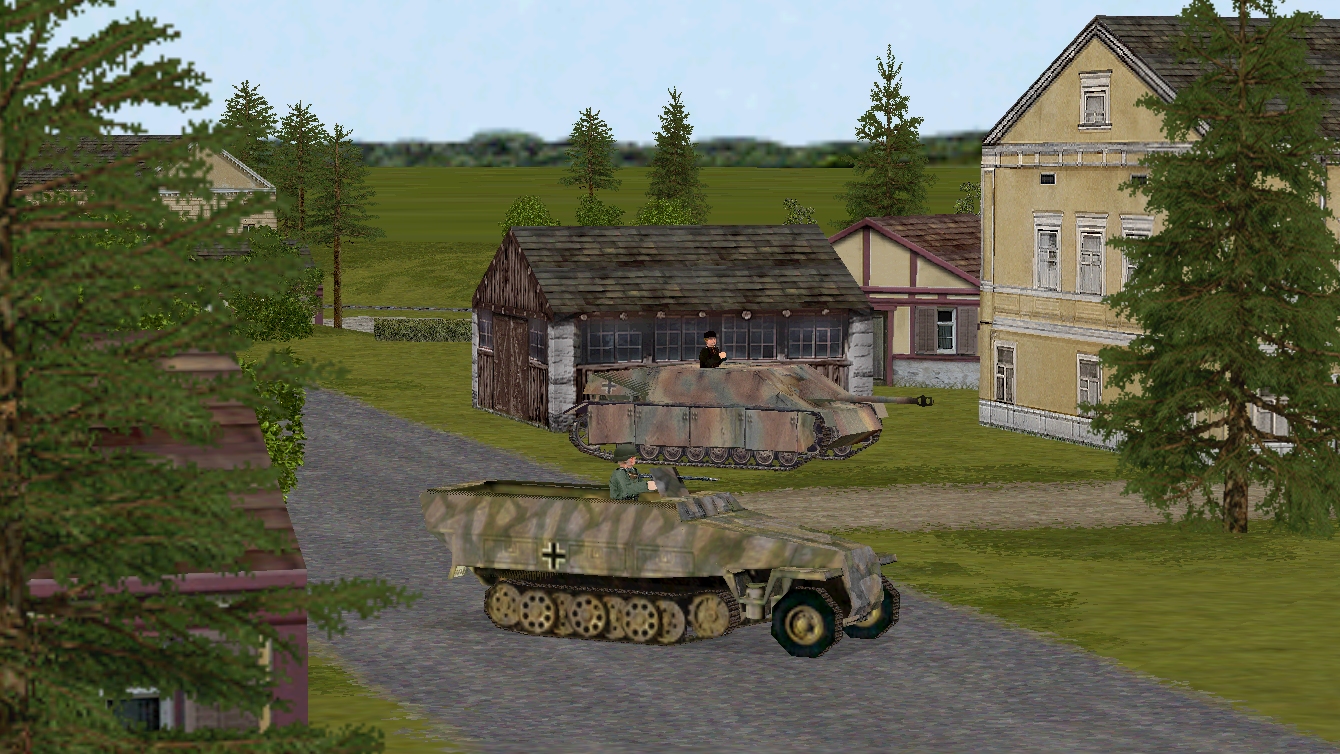
I mention the Eichhörnchenhaus because it could be the reason the Jagdpanzer IV and halftrack spotted by Corporal Whitehand back in Turn 2 have yet to move. Who wants to die for the Führer when there are cute furry acrobats to feed, pet, and observe.
Three Deutschlanders begin Turn 11 full of beans and end it full of lead and/or shrapnel.
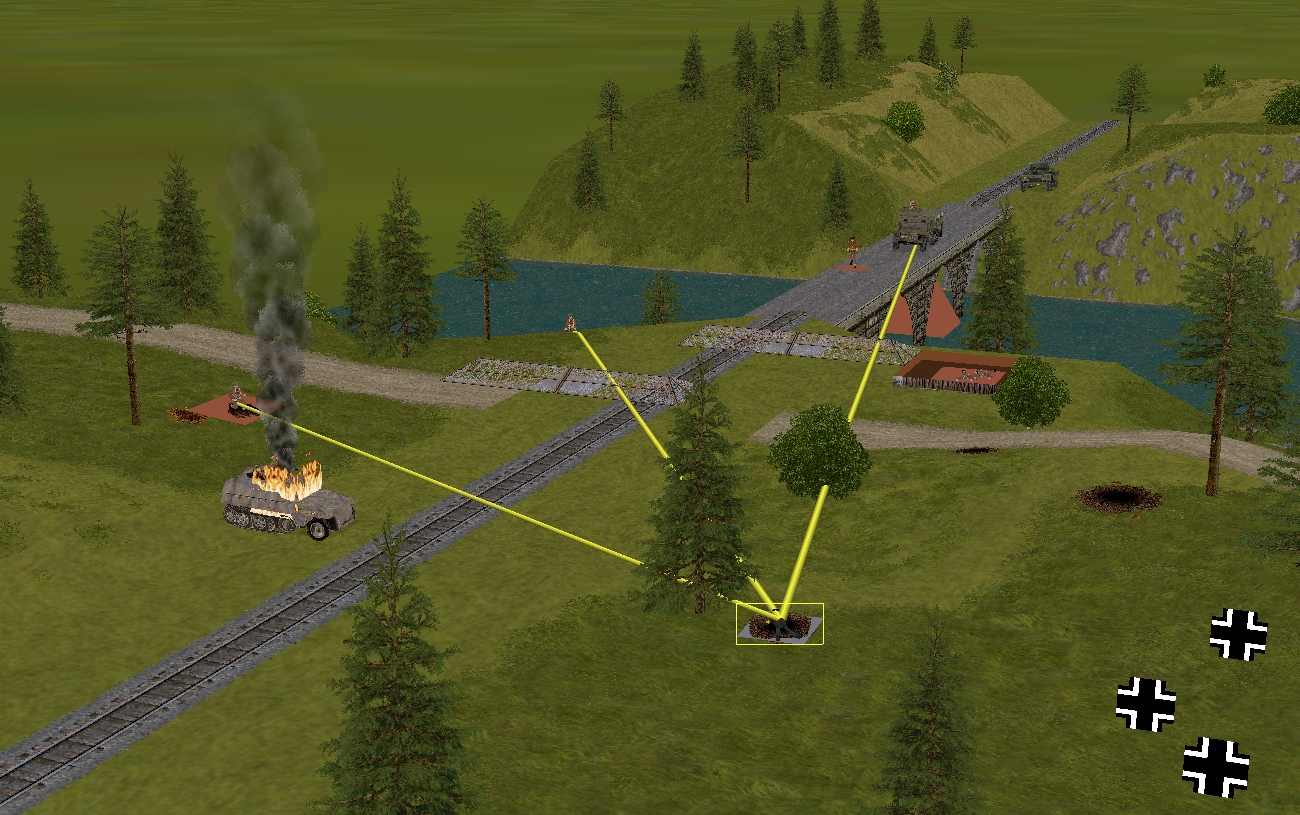
One of the enemy casualties is manning an MG 42 when the end comes.
The other two are Volksgrenadiers trying and failing to merge with their sprucey surroundings.
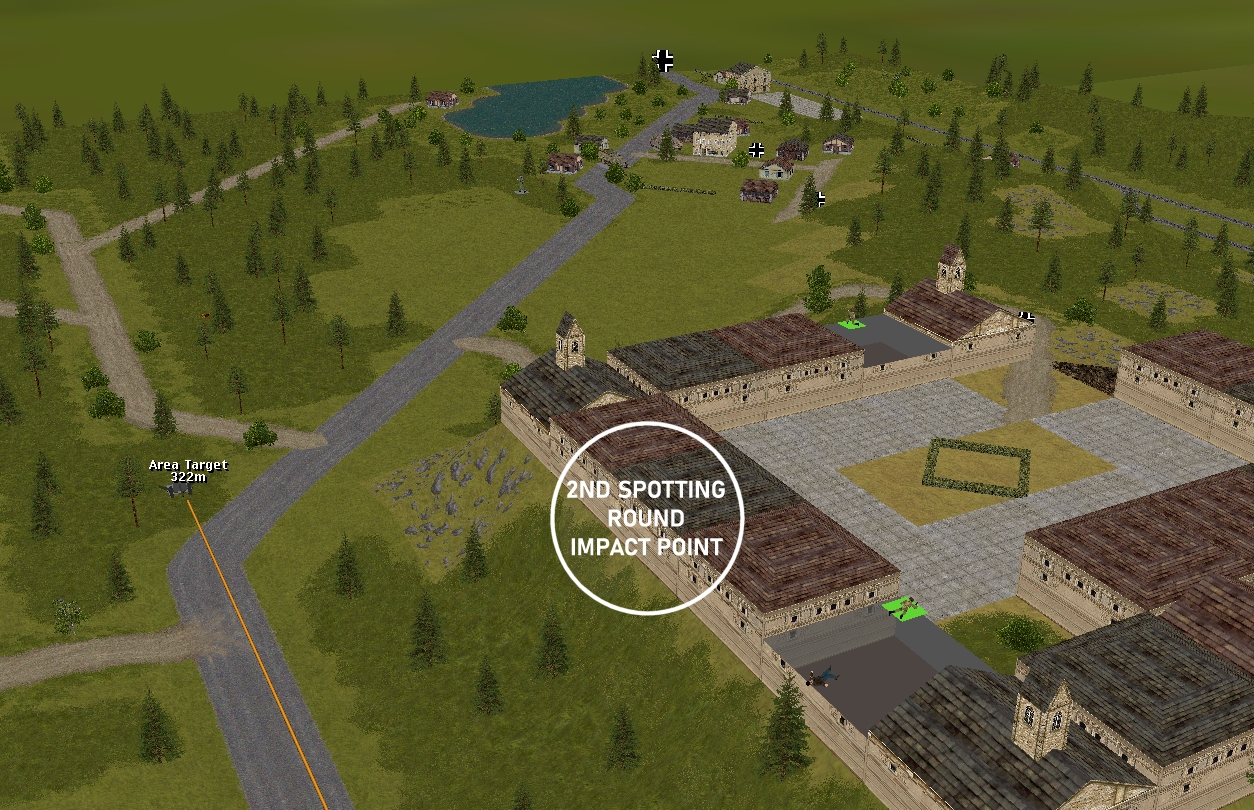
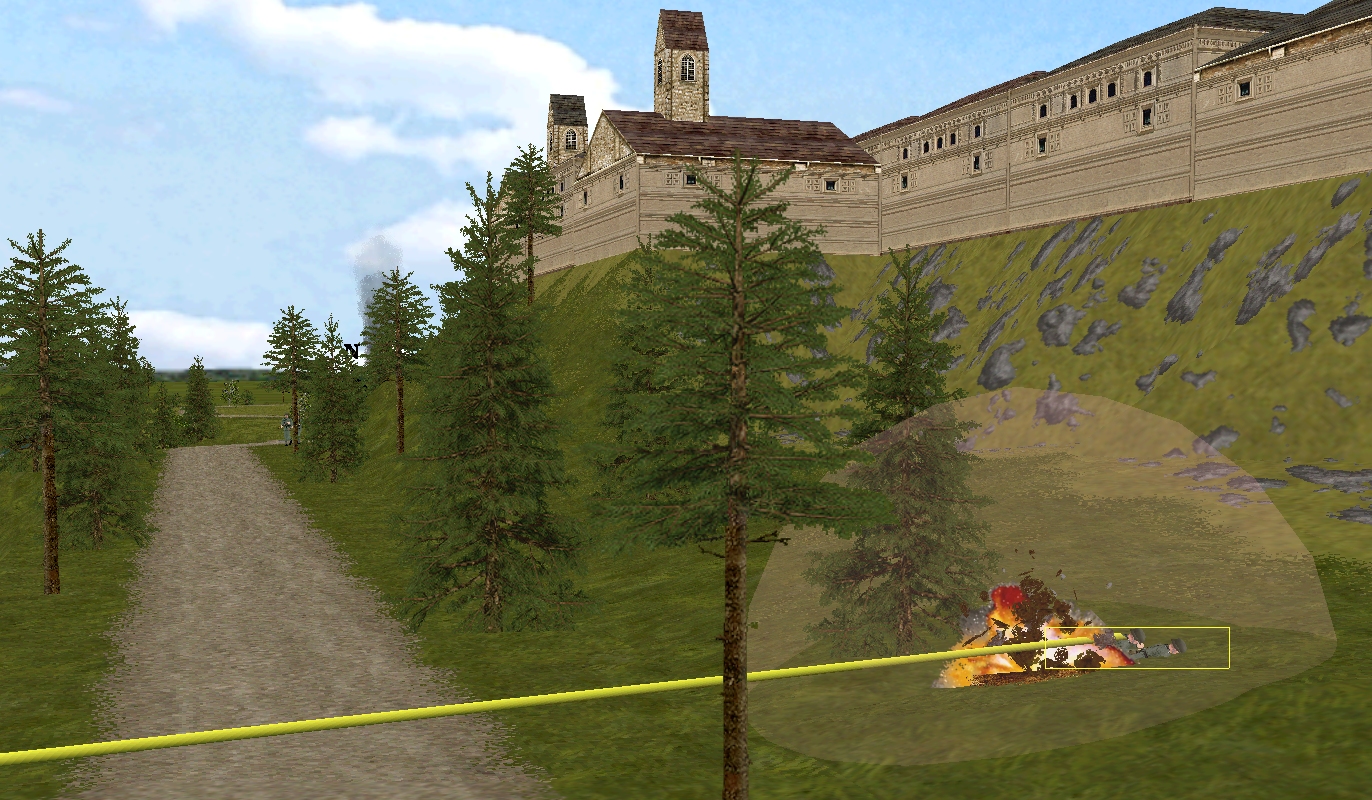
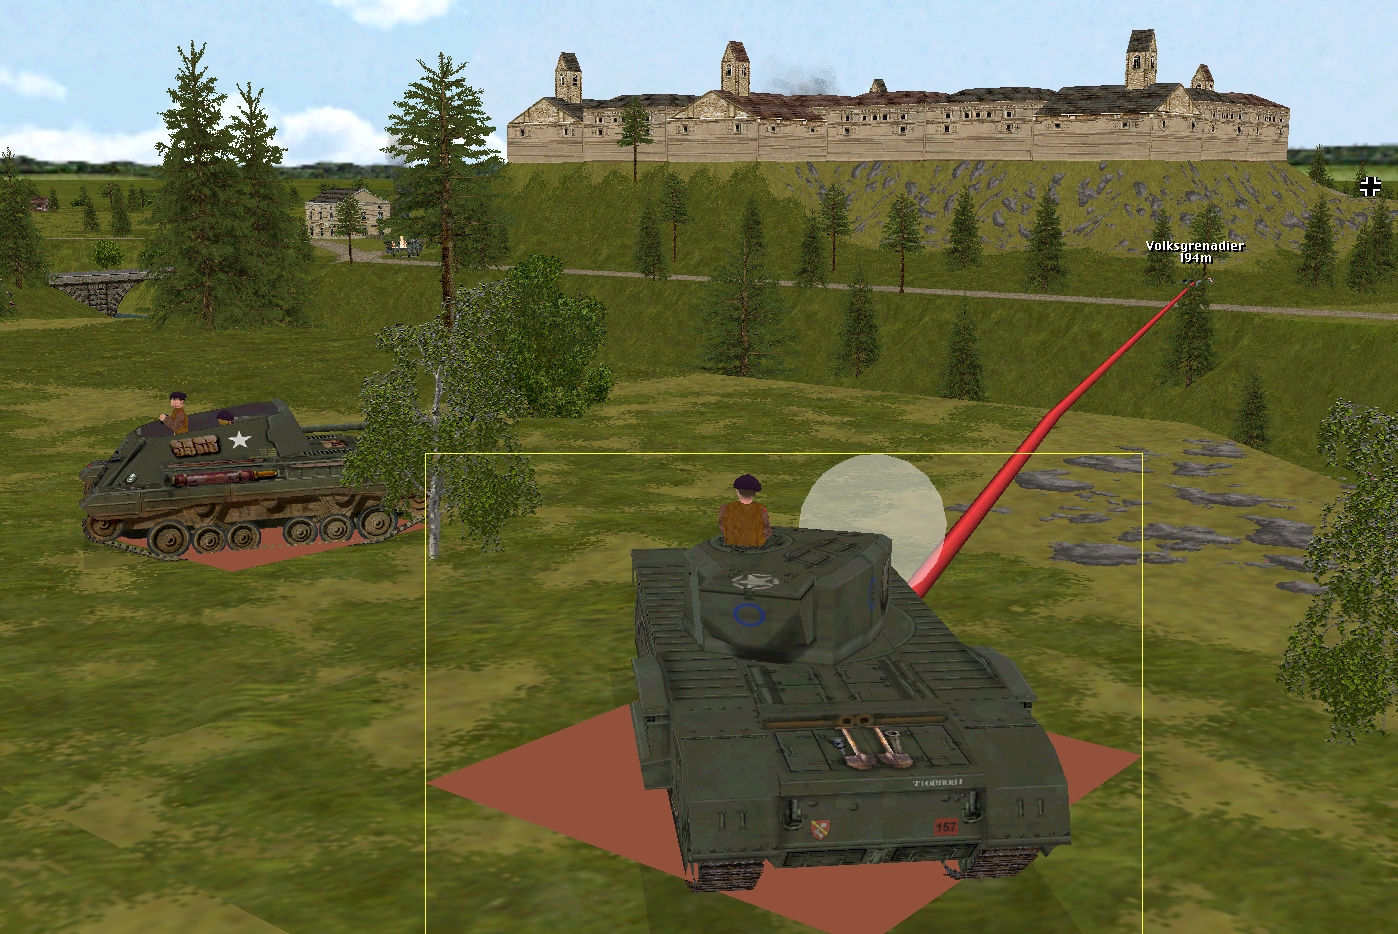
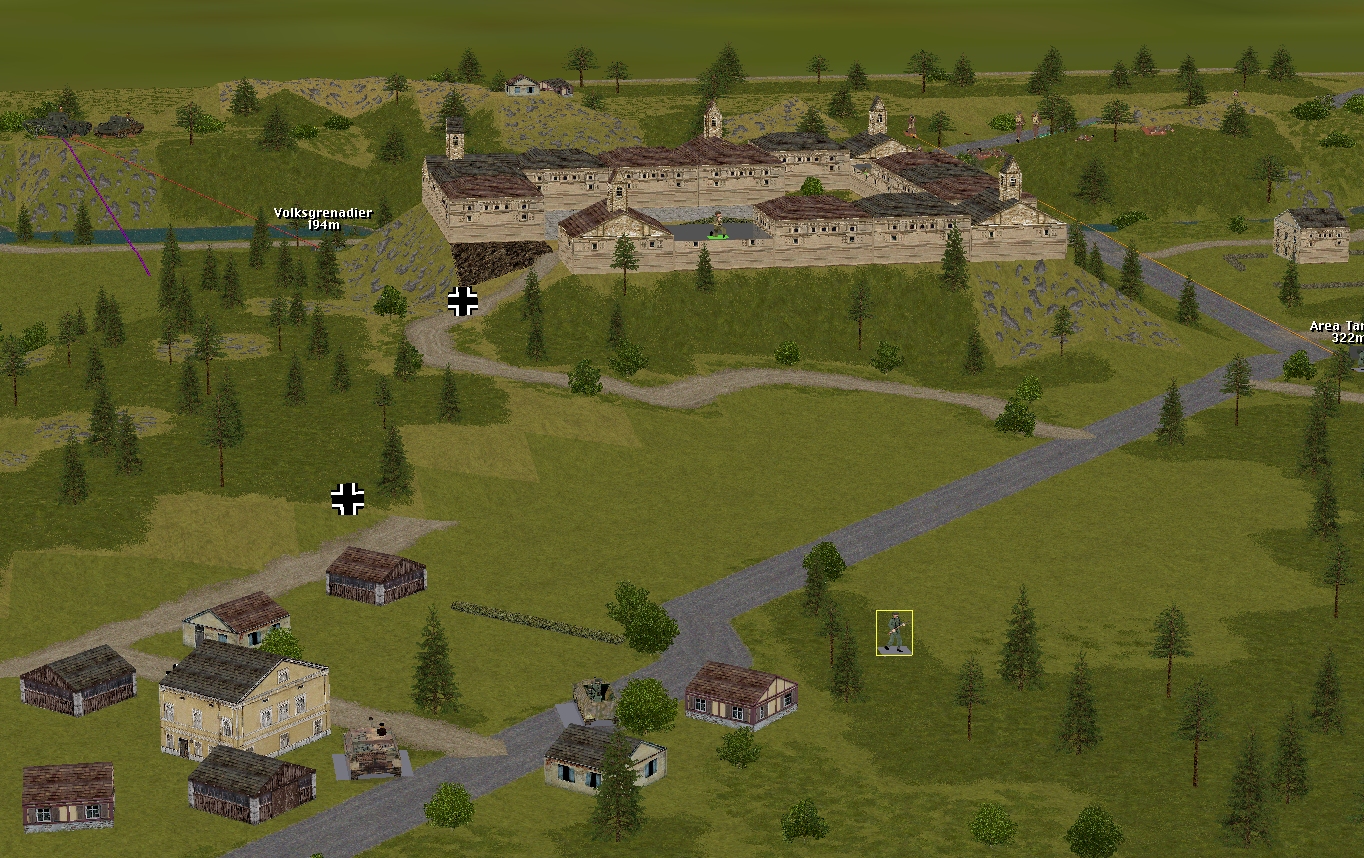
I’m not going to claim Captain Dale came within a squirrel whisker of perishing during this sixty – that would be melodramatic – but after seeing the second of the turn’s two 25-pounder spotting rounds hit the north side of the castle, I did check his status.
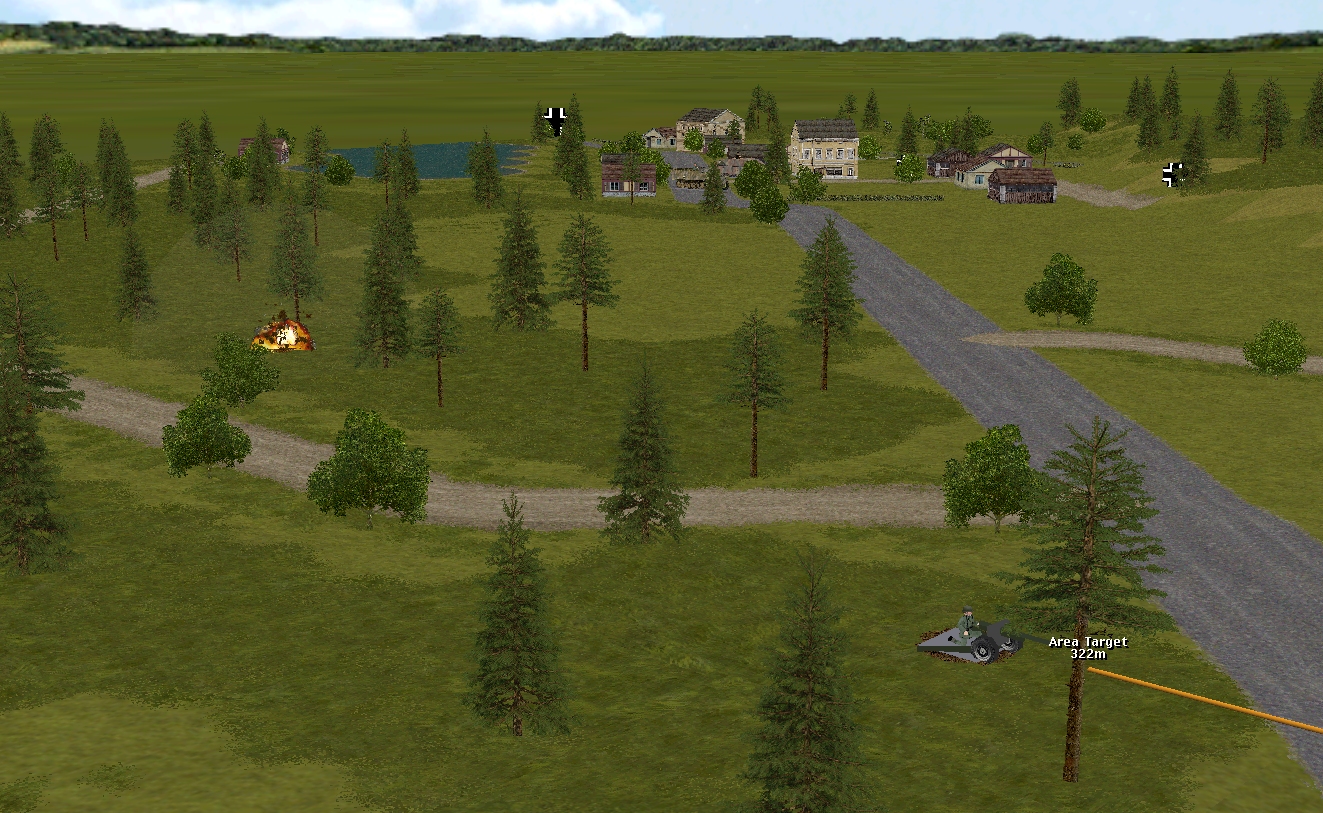
As the first spotting round also landed some distance from Tuck’s aim point, it’s unlikely the 88’s inactivity was down to discombobulation. The German gun probably didn’t fire this turn because the targets at the west end of the road bridge – Marian and his men – made themselves scarce.
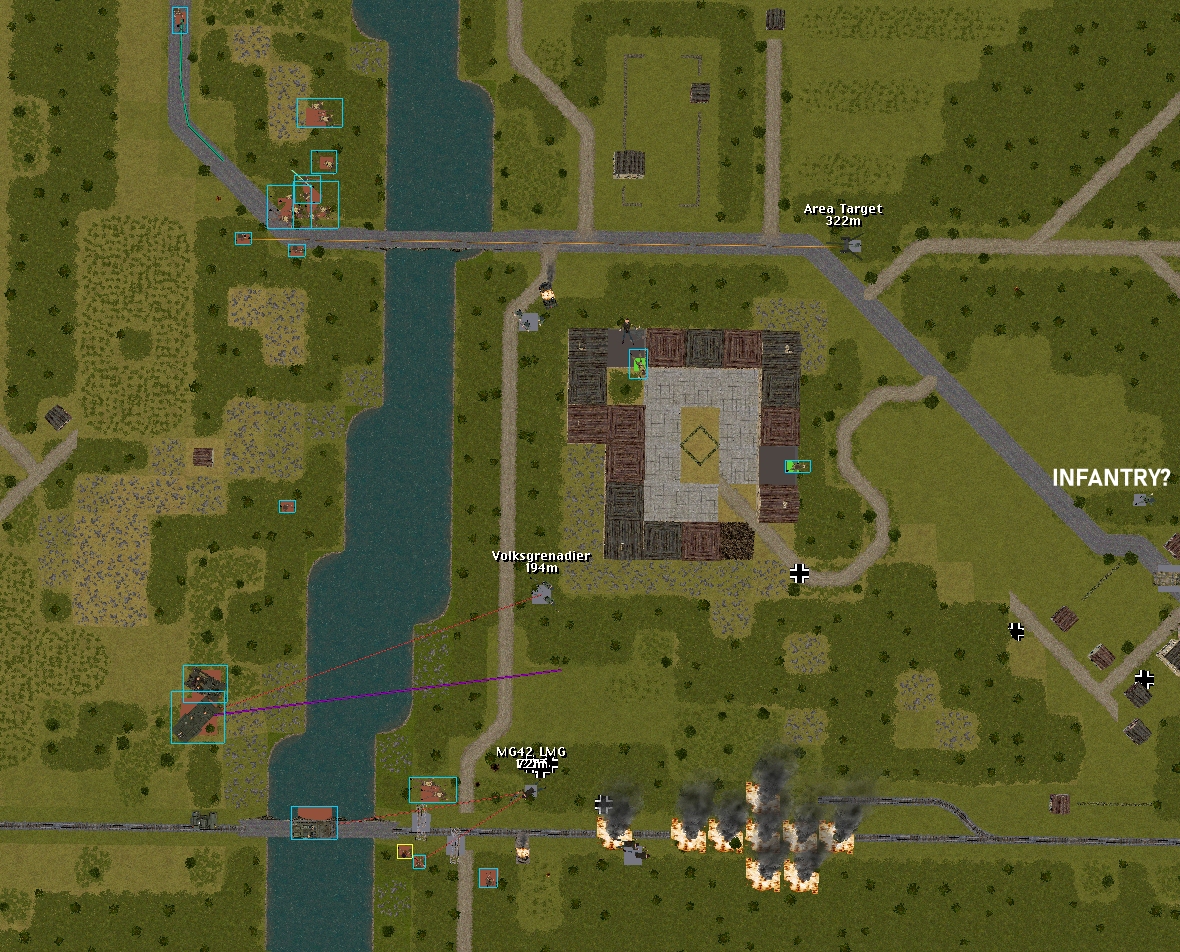
The situation at the end of the turn:
Judging from Tuck’s info panel, the off-map battery is still 25 seconds away from unleashing hell on 29, 4, 5.
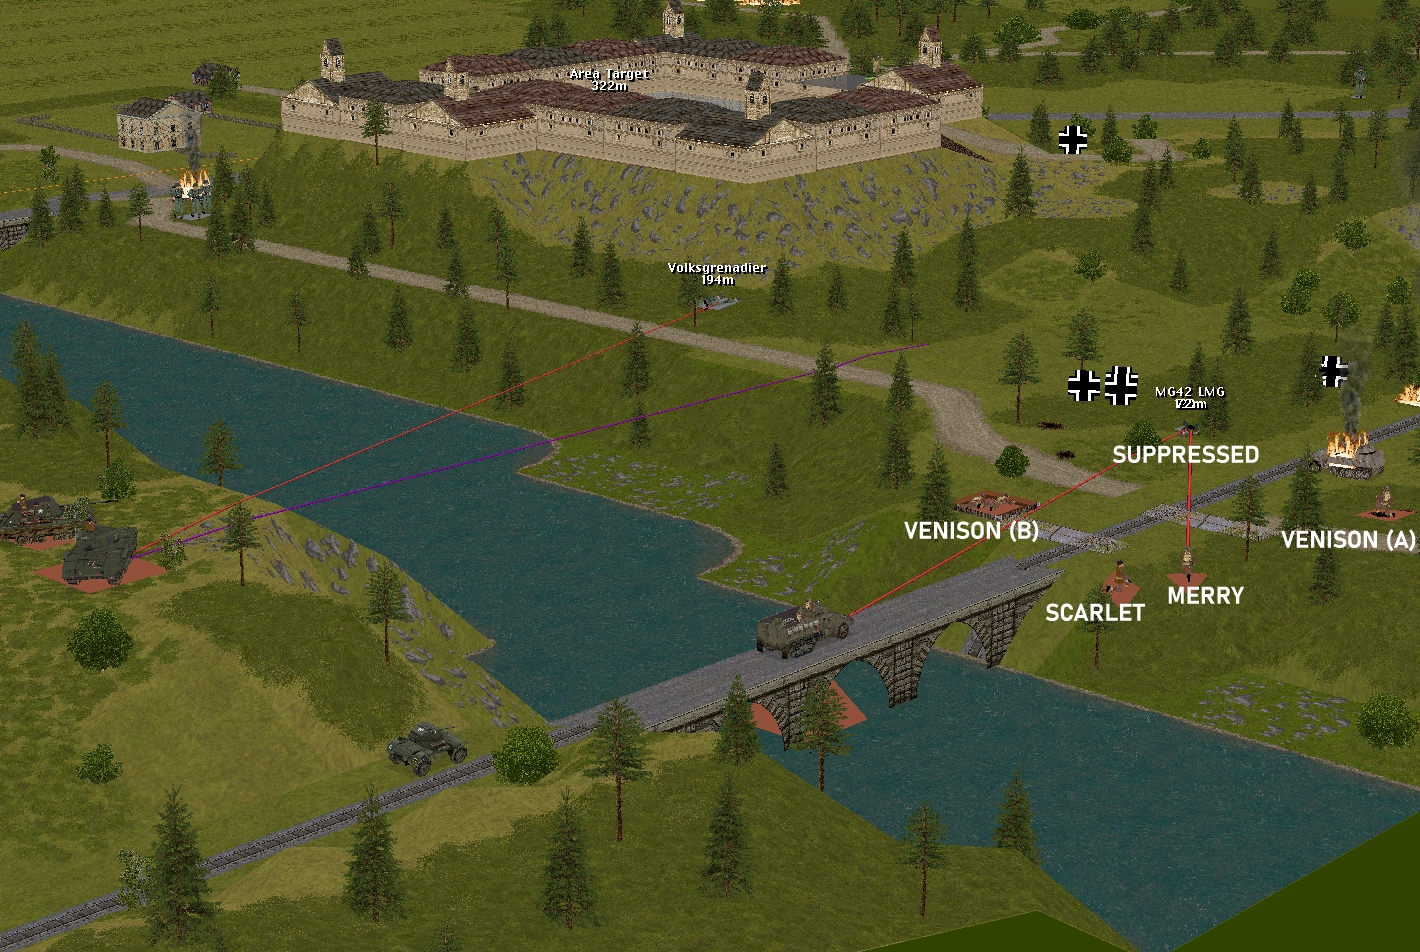
The Volksgrenadier squad that attempted to move down the riverside road last turn seems ready to try again now the fire from across the river has died down.

Turn 12 orders here, please. Commenters are cordially invited to suggest moves for the following six unit groups (First come, first served. A maximum of one unit group per commenter. I’ll try to execute the turn as quickly as possible after all orders are in.)
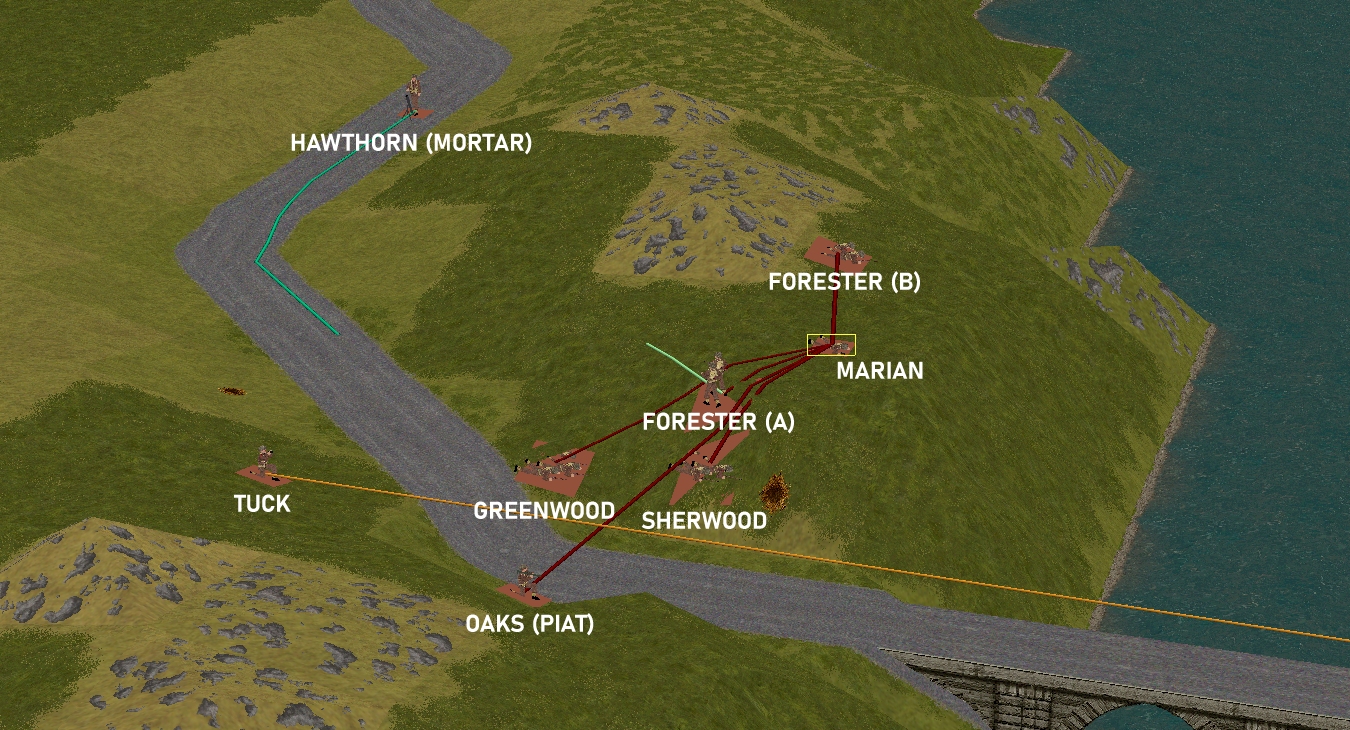
(See screenshots for unit locations)
****anyone****
– Merry’s men (Lieutenant Merry + Sergeant Venison’s rifle squad + Corporal Fletcher’s M5A1 halftrack)
– Marian’s men (Lieutenant Marian + 3 x rifle squads + PIAT team + 3 inch mortar team)
– Sergeant Bowman’s Archer TD
****subscribers only****
– Captain Hood (Six-man company HQ + arty spotter Lieutenant Tuck)
– Sergeant Johns’ Churchill VIII
– Captain Dale’s party (Six POWs armed with pilfered rifles and pistols) + Corporal Whitehand’s team (Two POWs armed with a pilfered Panzerschreck)
Please start all order comments with ‘ORDER’ and any later revision comments with ‘REVISED ORDER’. This will help me distinguish firm instructions from suggestions and advice.
ORDER: Sgt. Venison’s (A) 2-man fireteam
MOVE FAST eastwards to [4,2,3]
SNEAK a short distance north so they have a viewing arc from northwest to northeast but remain amongst trees
ORDER: Sgt. Venison’s (B) 4-man fireteam
(Opposite of last turn)
MOVE somewhere on the upper floor to have a viewing arc from north-east to east
TARGET MG42
ORDER: Cpl. Fletcher’s halftrack
(Continue to target MG42)
UNBUTTON
WAIT 30 seconds, then MOVE fowards 10 metres east
ORDER: Lt. Merry
MOVE FAST into the vacated foxholes at approx [3,4,3]
TARGET MG42
ORDER: Sgt Scarlet’s disembarked crew
WAIT 30 seconds, then MOVE FAST to outside the west half of the southern wall of the signalbox
On reflection, it might be wiser to let Lt. Merry pick his own targets.
REVISED ORDER: Lt. Merry
MOVE FAST into the vacated foxholes at approx [3,4,3]
FACE northeast.
ORDER:
Sergeant Johns’ Churchill VIII – Continue Fast Move to 10,3,3 (as far east as possible without falling of the cliff!) Rotate East.
Sergeant Bowman’s Archer TD – Pause 15 sec to allow the Churchill to pass, then Reverse to 10,2,2. Rotate East.
Note to self – A Pz IV appeared in the SE cnr of the village during turn 6 and hasn’t been seen since. Did it just go to the rear entrance of the Black Squirrel (the front car park appears full) or is it heading for the rail bridge I wonder?
(Strangely, Bounce the Bogen featured briefly in my dreams last night: we insta-failed because we hadn’t got a tank across the river before the end of turn 12.)
Tim,
could you remind us of the barbed wire obstacle rules: Can Fletcher’s half-track zig-zag through? Are they merely a speed bump for proper tanks?
ETA: Is Sgt Venison unable to target the MG42 from the foxhole he’s in?
Venison may have stopped firing on the LMG because of ammo concerns. His half of the squad is down to ‘5’ The other half – the lads in the signal box – has ’26’.
The halftrack will need to wiggle between the wire obstacles. The Churchill and Archer can just roll over them.
Am I right in thinking Venison could resupply at the half-track?
Are there any rules on how close infantry units can approach squares on fire?
Resupply from vehicles isn’t possible in CMx1. On the bright side, infantry never run out of ammo completely. ‘1’ ammo is followed by ‘low’, a state that means squads and teams only fire in self-defence.
No unit will enter a burning area so the six blazing railway squares and four flaming forest squares on the map are all out of bounds.