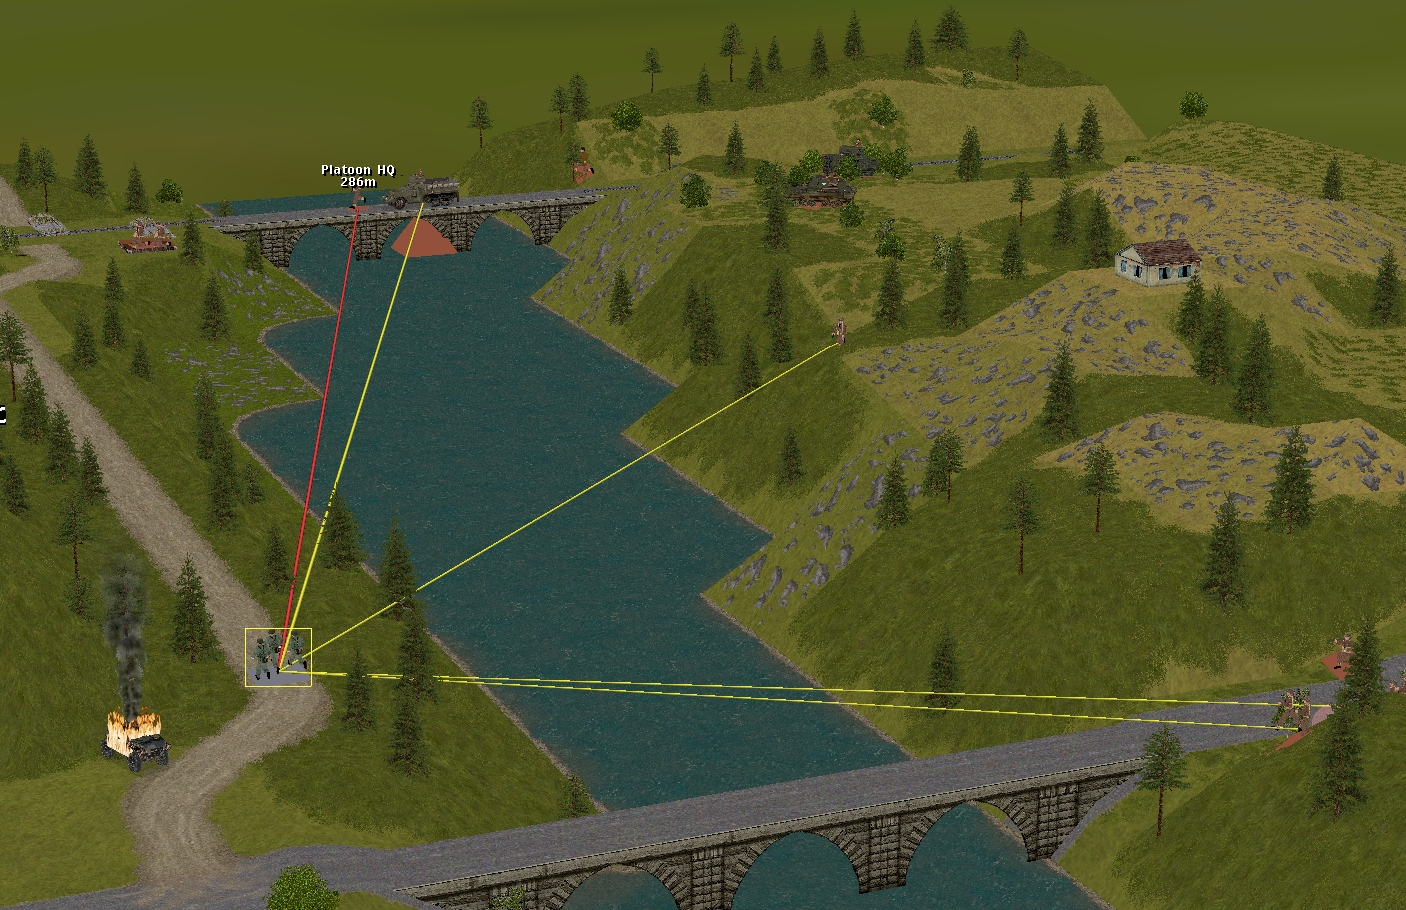
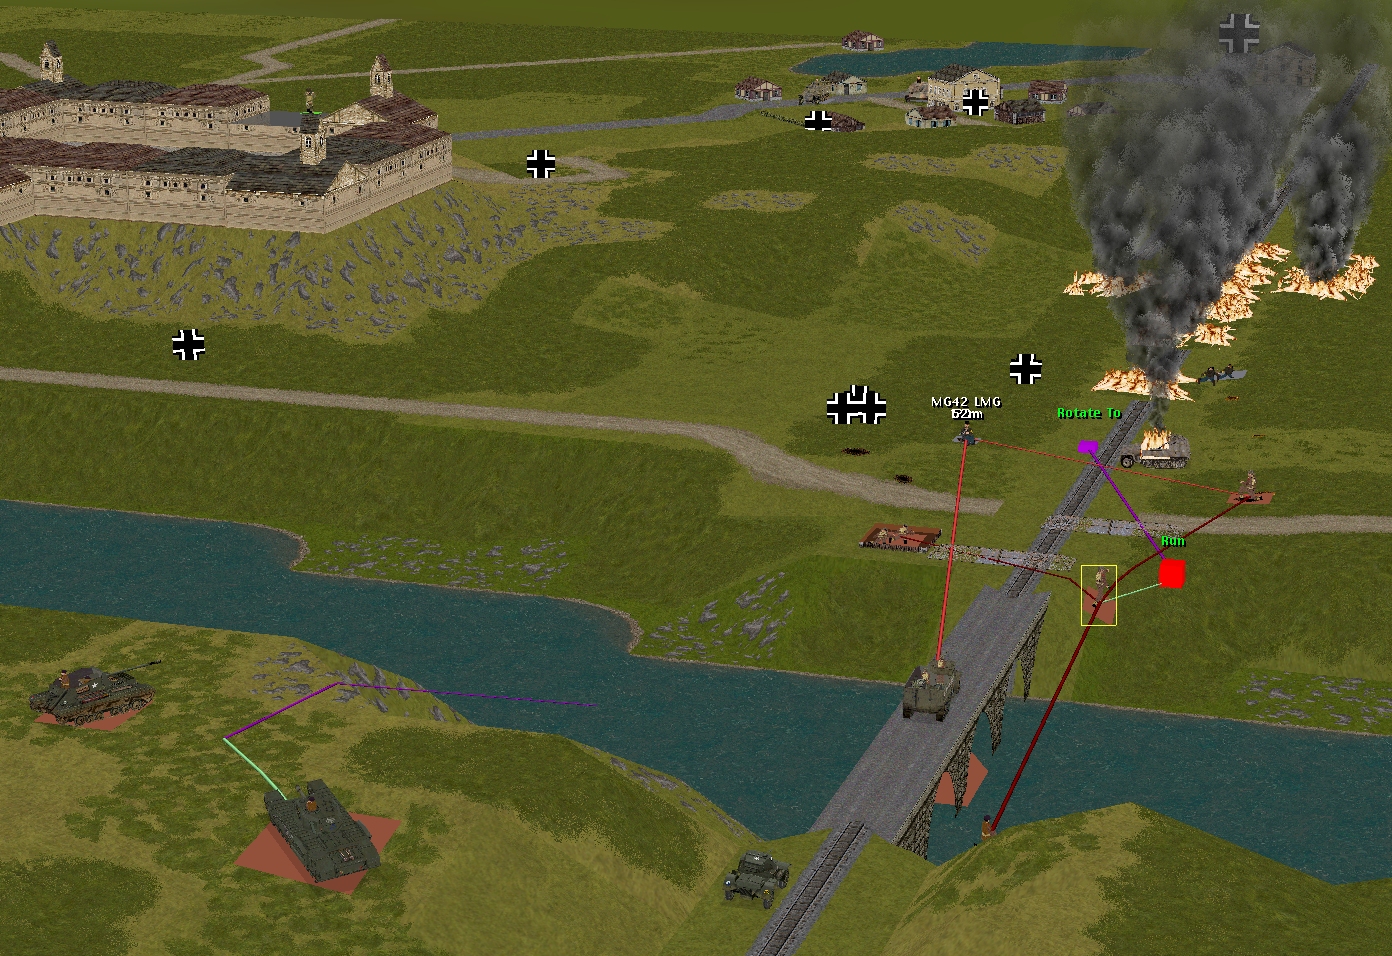
Three HE rounds traverse the River Bogen during this sixty-second slice of Combat Mission: Beyond Overlord. The first across is 76mm in diameter and, apart from upping the pace of a gaggle of retreating German OAPs, achieves little. The second is an 88mm havoc-wreaker…
It flies over the helmeted heads of Sergeants Forester, Sherwood, and Greenwood, exploding harmlessly on a grassy slope circa 34, 2, 1.
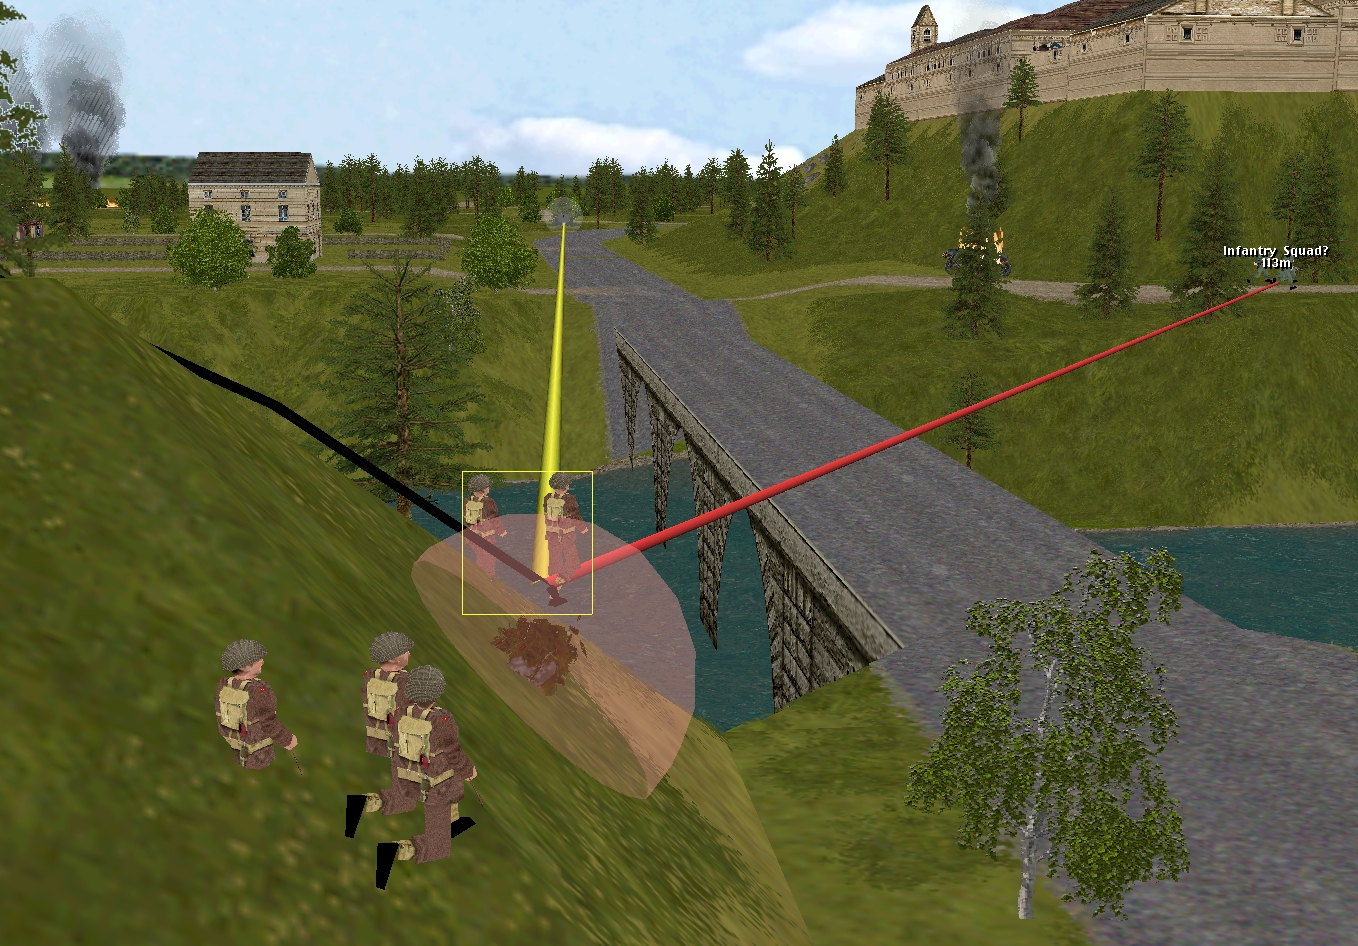
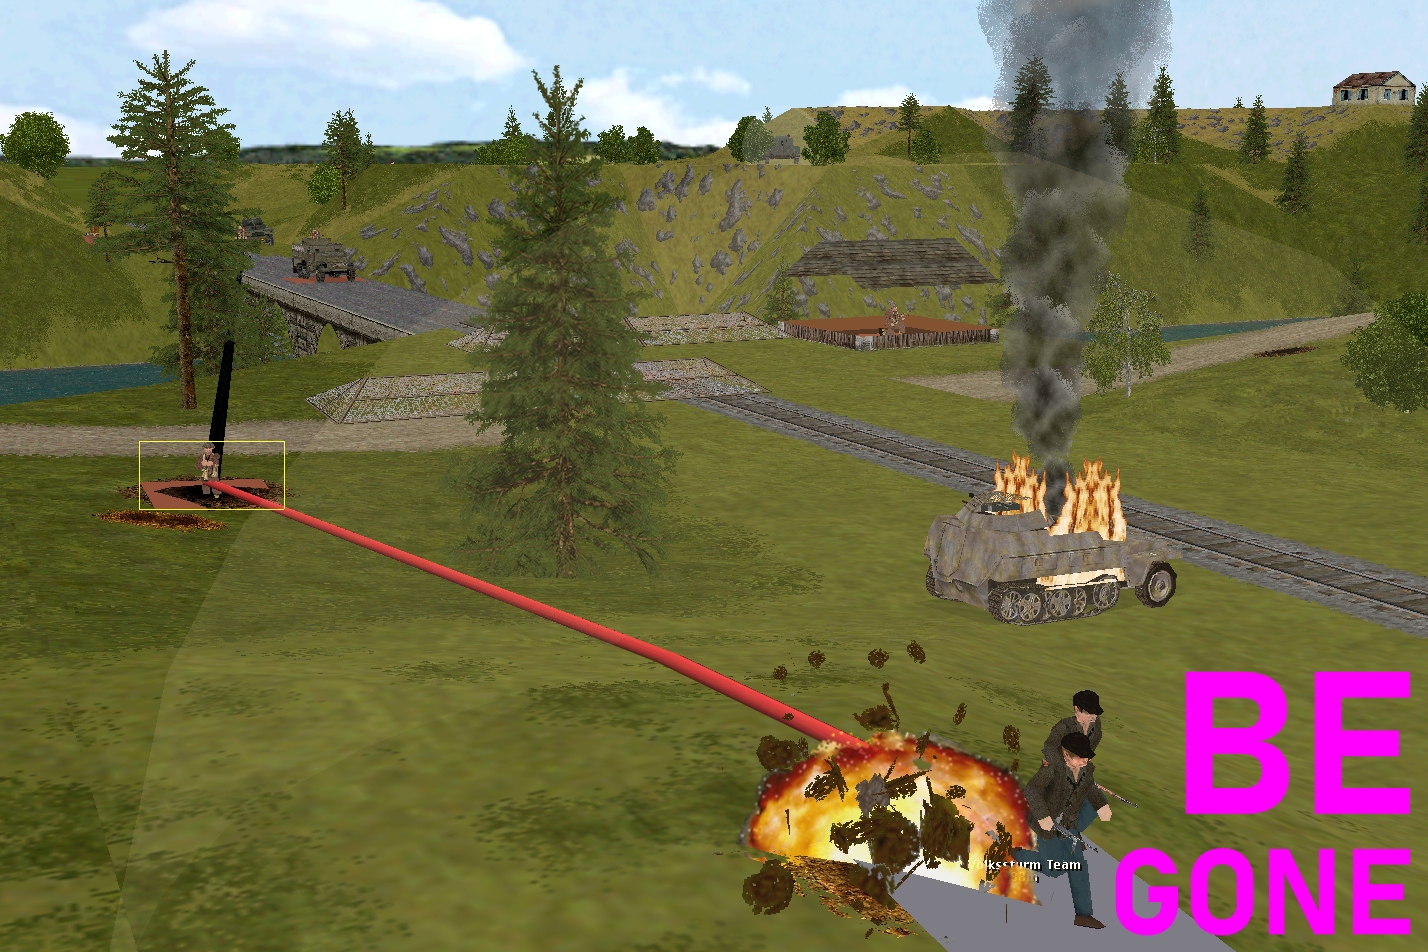
HE round number 3 is another 8.8cm Sprenggranatpatrone L/4.5. Its brief chrysanthemum of flame and shrapnel leaves one Tommy spreadeagled, bloody, and lifeless at the western end of the road bridge.
The good news is the casualty – one of Forester’s men – is the only Brit lost during Turn 10.
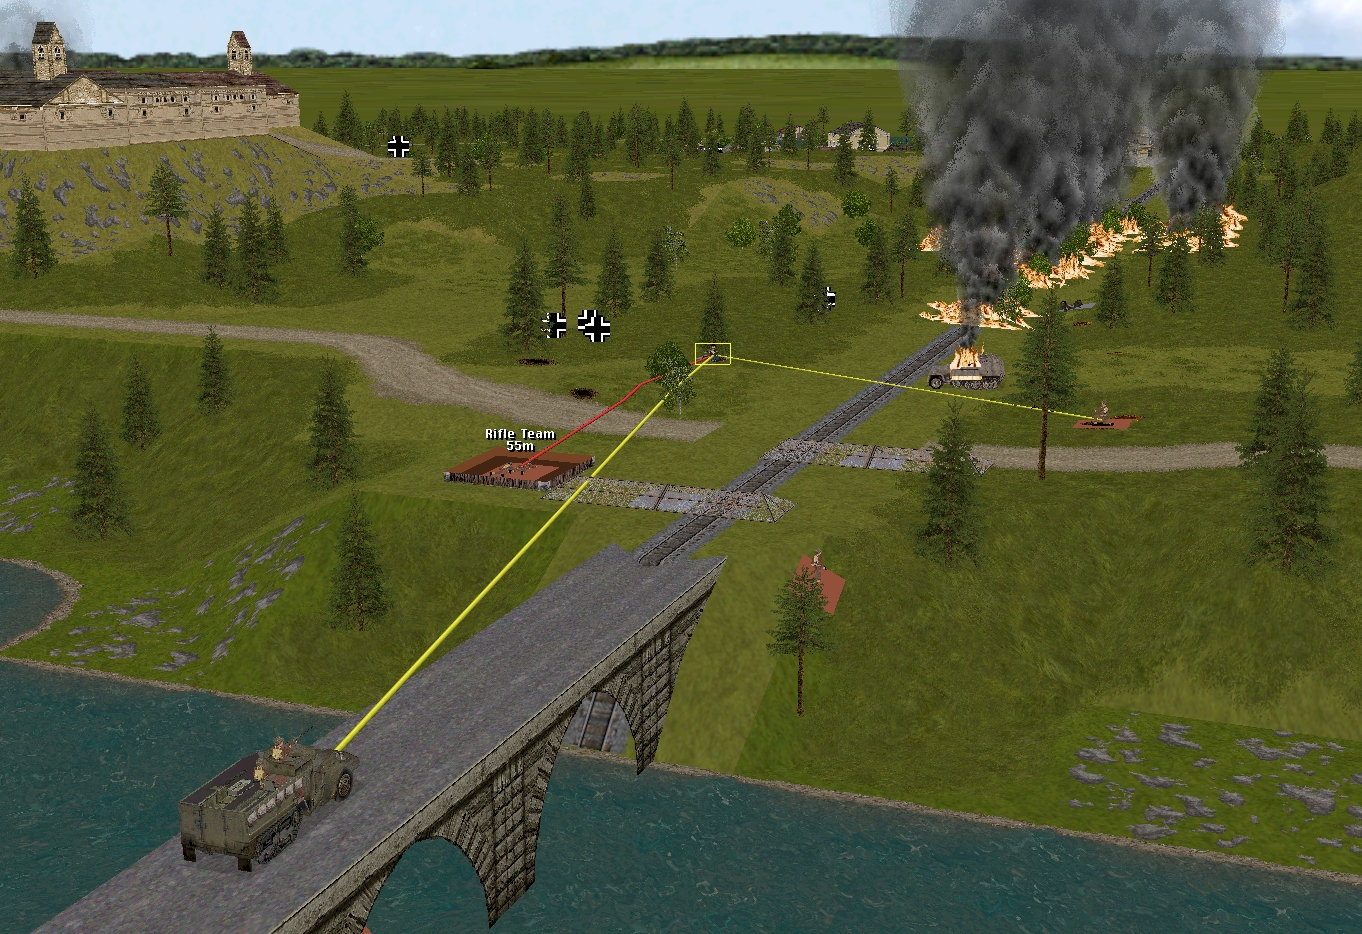
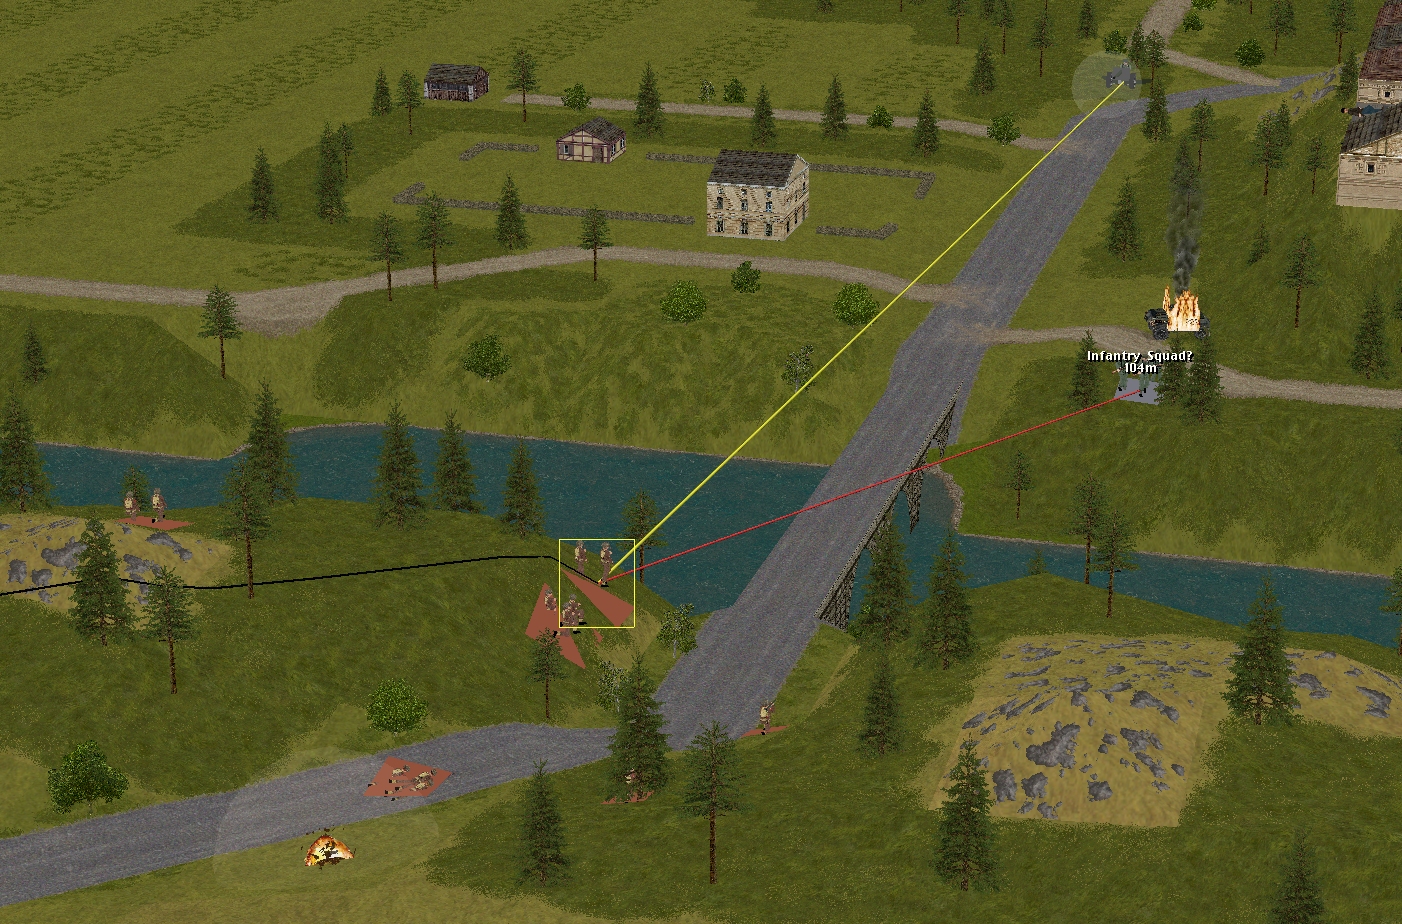
At the railway bridge things go relatively smoothly for the Bouncers. By the end of the turn, Venison’s teams occupy the signal box and the vacated foxhole, and enjoy the benefits of a nearby HQ (Lieutenant Merry).
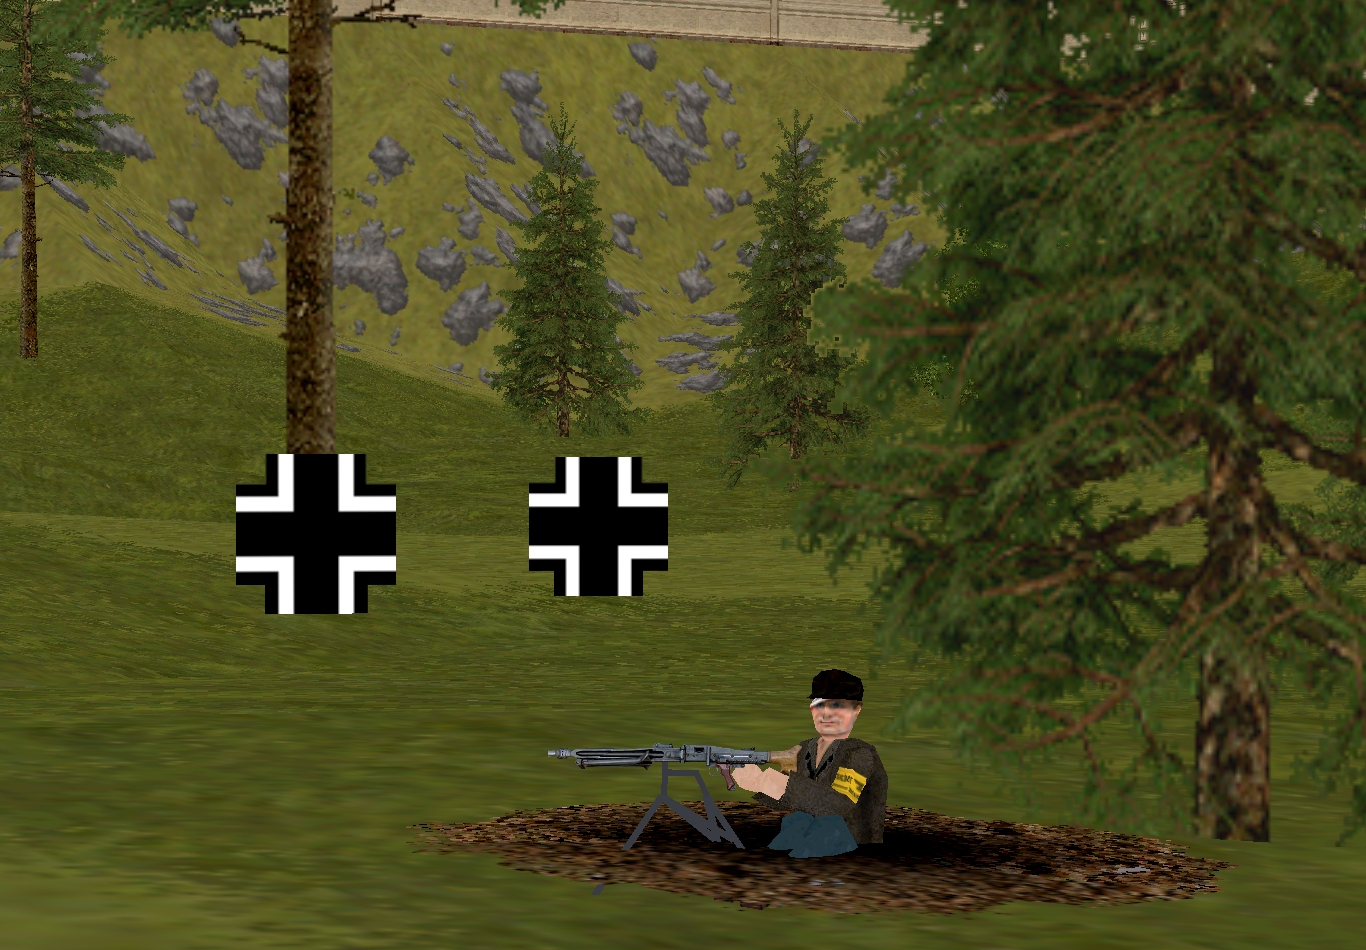
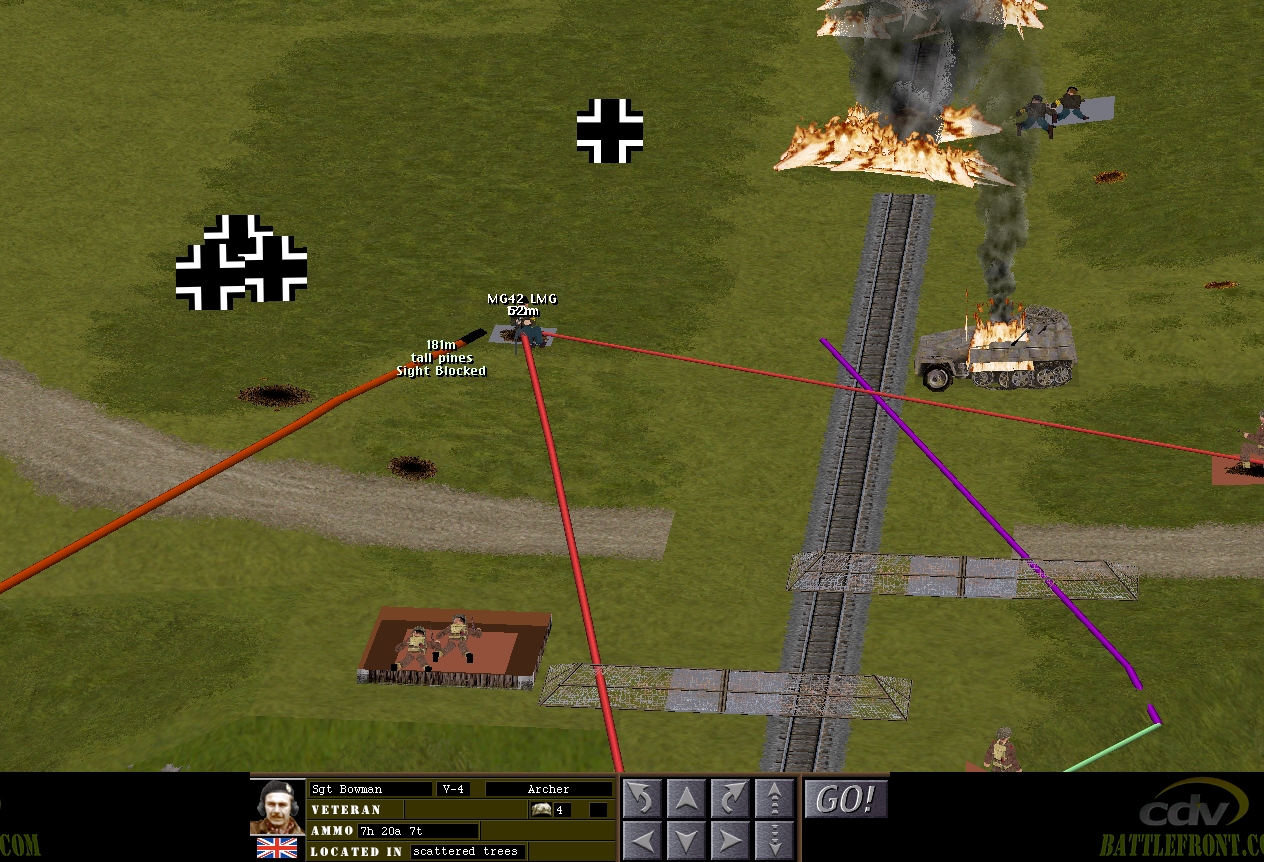
In the closing moments of the sixty a foxholed MG 42 opens up on the lever cottage. Hopefully the combined firepower of the halftrack and the Brit infantry will quickly silence this new threat. Unfortunately, the Archer can’t quite see the nest from its current position.
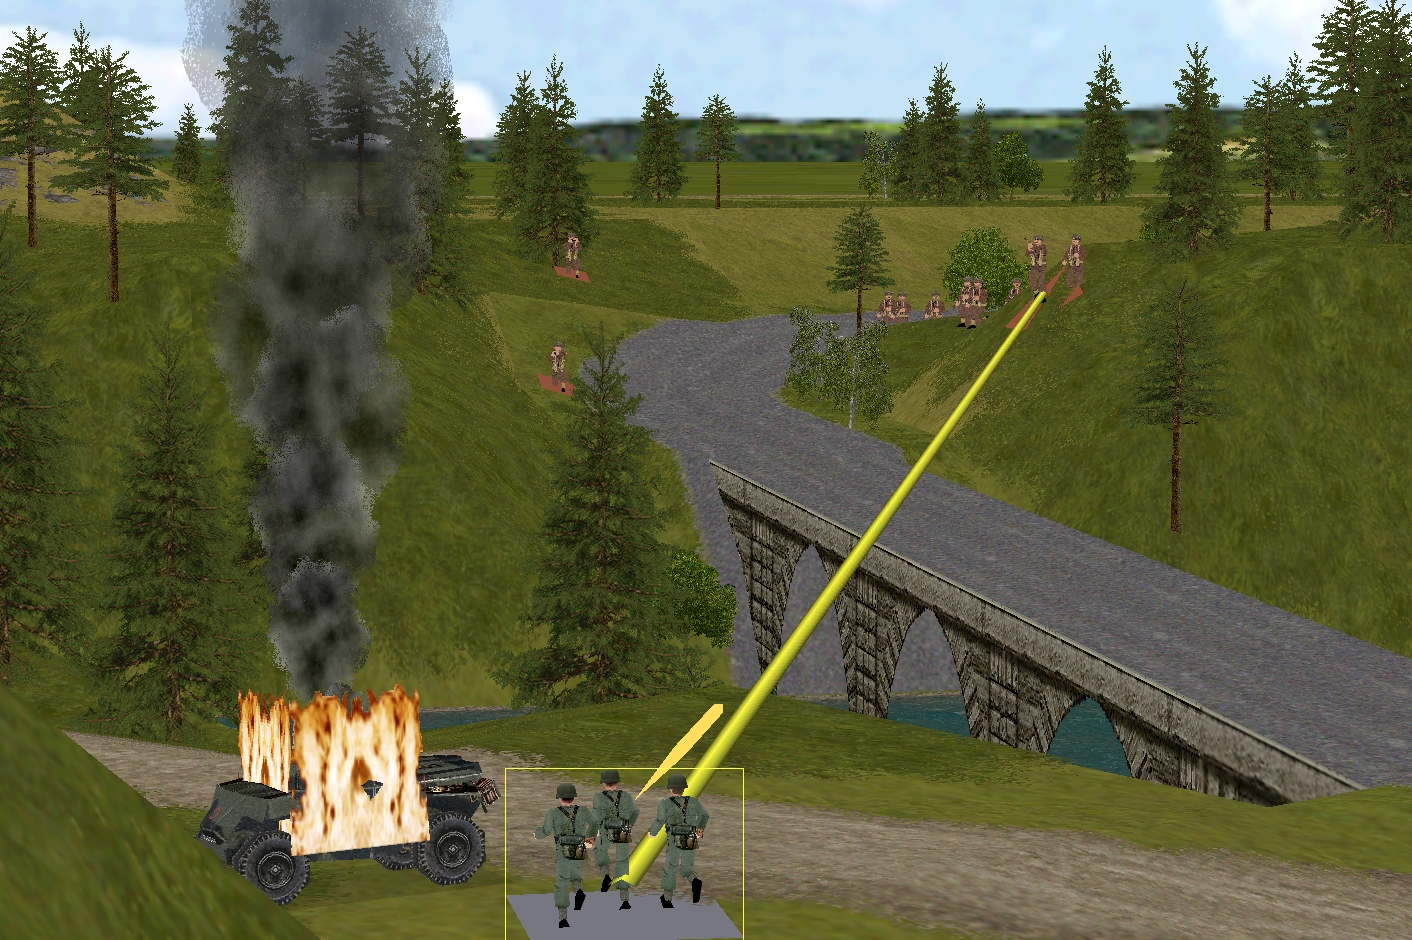
In the vicinity of the road bridge things begin to kick off at T+25 when a Volksgrenadier squad emerges from the woods close to the crackling Humber.
Swiftly engaged, it isn’t long before these dashing debutantes are under fire from four different directions The incoming is sufficiently intense to prompt a volte-face and a hasty retreat.
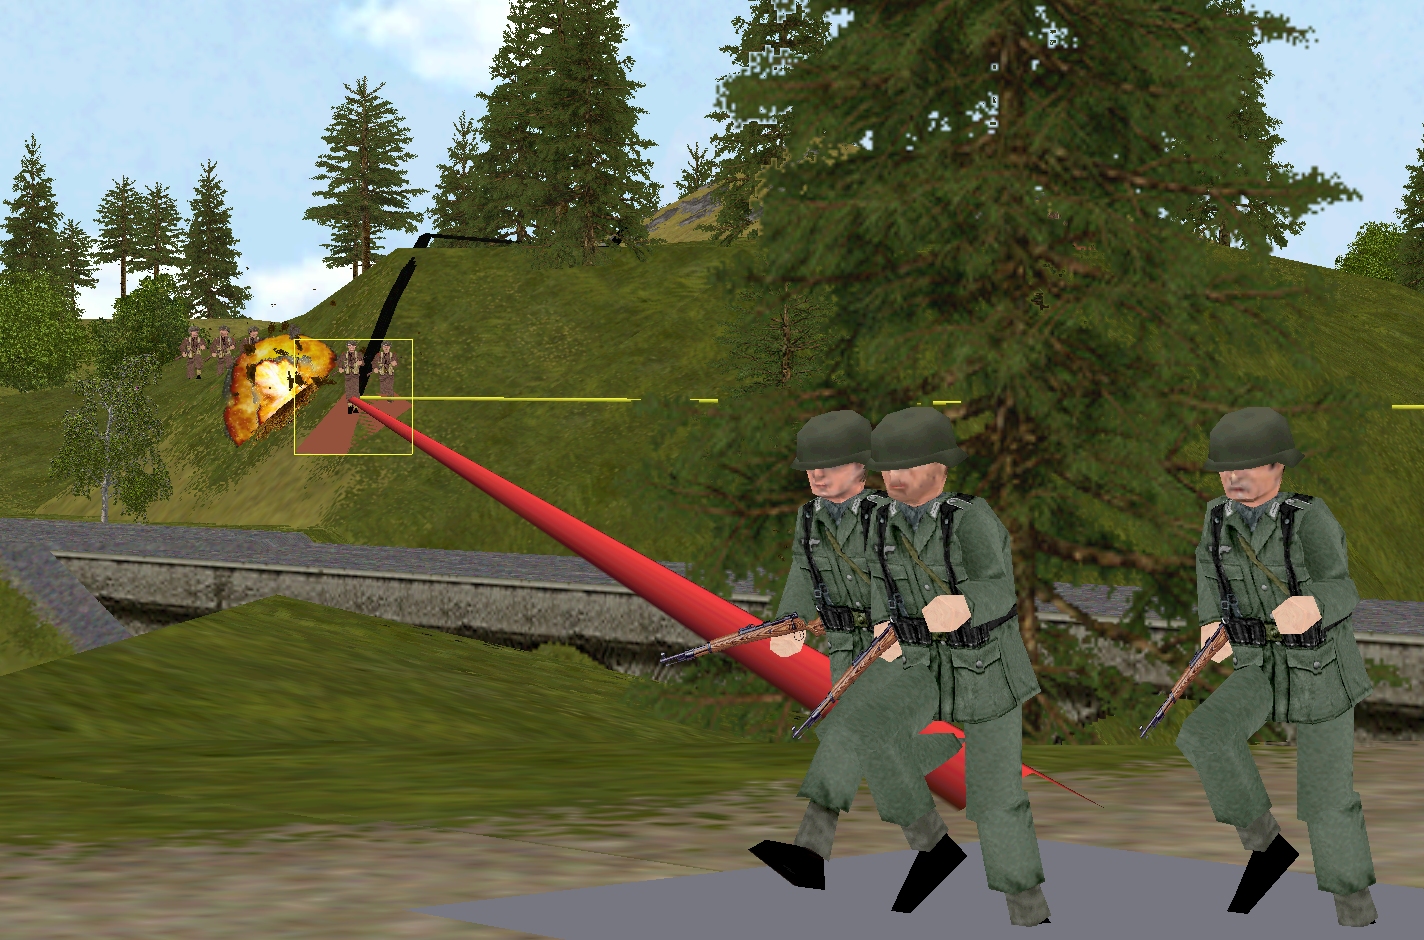
The 88 opens fire approximately midway through the turn. As previously mentioned, its first contribution isn’t on target, unlike its second which reduces Forester (A), the half-squad aiming to cross the bridge, to four men.
The two puffs of muzzle smoke at 29, 4, 5 were observed by arty spotter Lt. Tuck. At the end of the turn his ammo panel indicates that things should start getting extremely unpleasant for the German big gun at the end of the next turn.
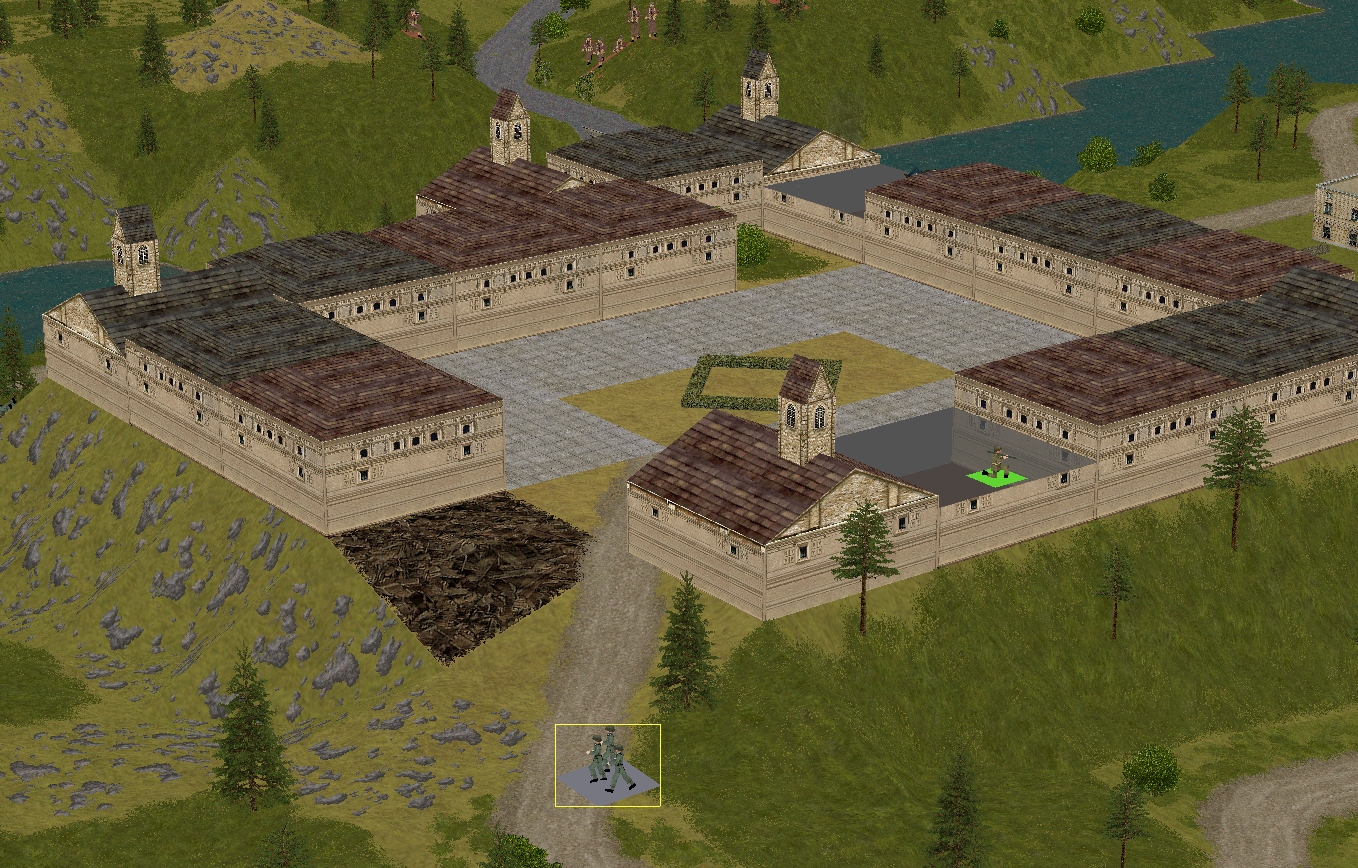
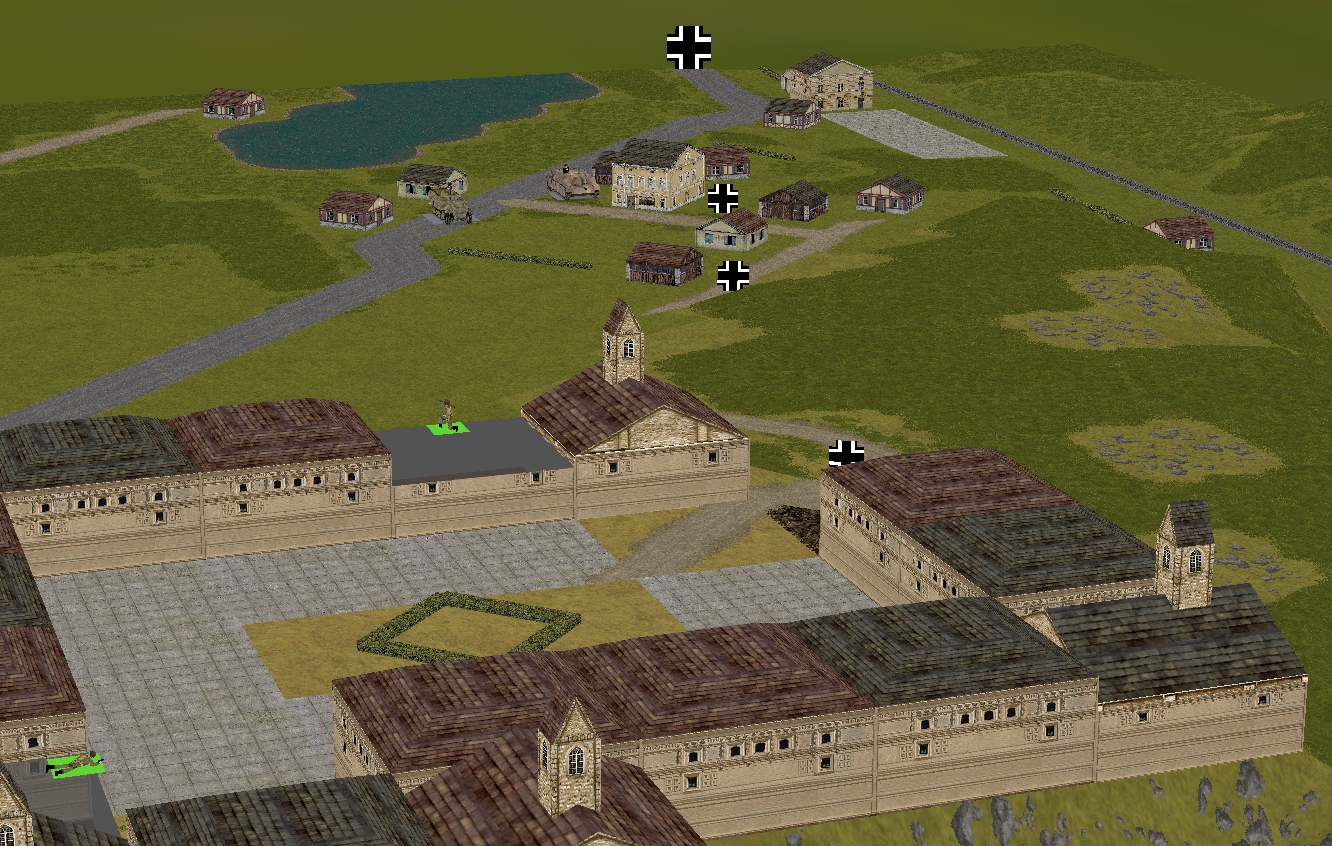
The Jerry squad on the move near the castle gate vanishes eight seconds into the turn. From their last-known position and angle my guess would be that they are headed for the rail bridge not the castle courtyard.
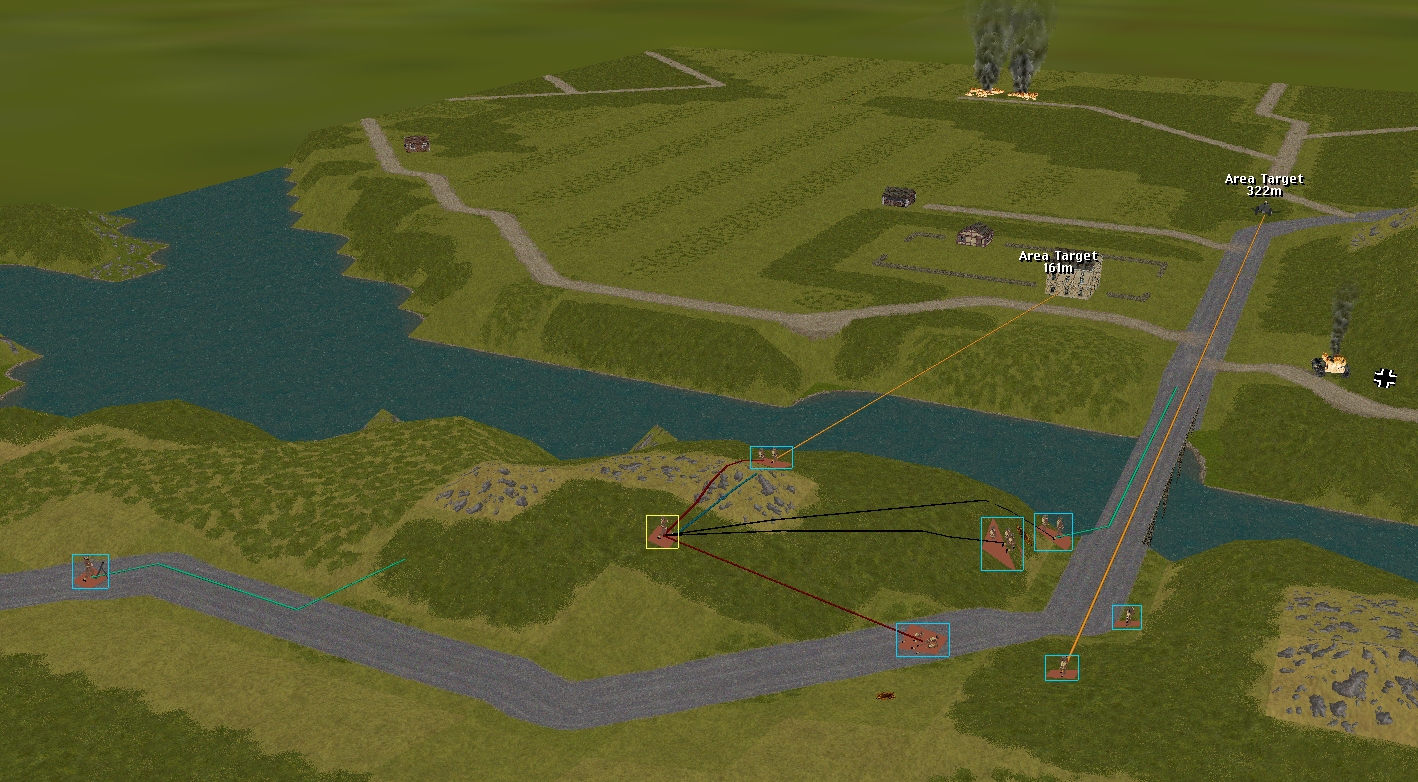
The situation at T+60:

Turn 11 orders here, please. Commenters are cordially invited to suggest moves for the following six unit groups (First come, first served. A maximum of one unit group per commenter. I’ll try to execute the turn as quickly as possible after all orders are in.)
(See screenshots for unit locations)
****anyone****
– Merry’s men (Lieutenant Merry + Sergeant Venison’s rifle squad + Corporal Fletcher’s M5A1 halftrack)
– Marian’s men (Lieutenant Marian + 3 x rifle squads + PIAT team + 3 inch mortar team)
– Sergeant Bowman’s Archer TD
****subscribers only****
– Captain Hood (Six-man company HQ + arty spotter Lieutenant Tuck)
– Sergeant Johns’ Churchill VIII
– Captain Dale’s party (Six POWs armed with pilfered rifles and pistols) + Corporal Whitehand’s team (Two POWs armed with a pilfered Panzerschreck)
Please start all order comments with ‘ORDER’ and any later revision comments with ‘REVISED ORDER’. This will help me distinguish firm instructions from suggestions and advice.
ORDER: Sgt. Venison’s 2-man fireteam
TARGET MG42 – they’re probably doing this already
ORDER: Sgt. Venison’s 4-man fireteam
TAKE COVER somewhere in the western part of the signalbox
ORDER: Cpl. Fletcher’s halftrack
BUTTON UP
TARGET MG42 – they’re probably doing this already
ORDER: Lt. Merry
CAUTIOUSLY TARGET MG42 – try to maintain cover of being in defilade
ORDER: Sgt Scarlet’s disembarked crew
(He’s shown off by catching a 20mm round in his teeth, let’s see how he manages other calibres)
MOVE FAST over the bridge to where Lt. Merry is now
ORDER: Marians Men.
Forester A – Withdraw to 34,4,2. Hide.
Forester B – Cease fire and Hide.
Greenwood – Move to 34,4,1. Hide.
Marian – Move to 34,5,2. Hide.
Sherwood – Cancel any movement or fire orders and Hide.
Mortar team – Change destination to 34,2,2 continue along road.
ORDER : Churchill
Move to 10,3,3, Rotate East.
Tim,
a) is Captain Archer(?), former doyen of the Daimler Armoured Car, commandable in any way?
b) does the half-track have any options for survivability we should be aware of? eg. hatches to turn in/out of.
The Daimler crew, Sgt Scarlet + 2, are commandable, but bear in mind that they are ‘rattled’ due to their close call, and poorly armed (three revolvers). I can’t remember if pedestrianised vehicle crews in CMBO have artificially reduced spotting capabilities to discourage ‘gamey’ tactics, but I wouldn’t be surprised if that was the case.
The M5A1 halftrack can button/unbutton. Currently it is unbuttoned.
So our infantry have to contend with 60 seconds of 88 fire before the arty starts to land.
Attempt to suppress the gun with all available small arms?
Or run and hide as best we can?
I suspect the 88 will be firing a bit longer than another 60 secs given the previous inaccuracy of the arty.
Recommend Forrester to run back into the trees and head west a couple of cells, also cease fire/hide any units currently firing or that are moving into the LoS of the 88.