The warriors that traverse the rail bridge during Turn 8 are all sprinting Tommy infantrymen. The munitions that whip across its mossy stonework are far more diverse. Speeding 9mm, .303, .50 cal, 20mm, 40mm, and 95mm rounds ensure the south-west corner of the map is a dangerous place to be this sixty.
It would have been even more dangerous had Lieutenant Tuck chosen not to cancel the Brit’s first 25-pounder barrage moments after it began. After issuing his ‘cease fire’, the Comment Commanders’ arty spotter hurriedly packs up his radio and high-tails it for 26, 3, 5 – a wooded spot that should allow him to call-in fire on the road bridge and ‘88’.
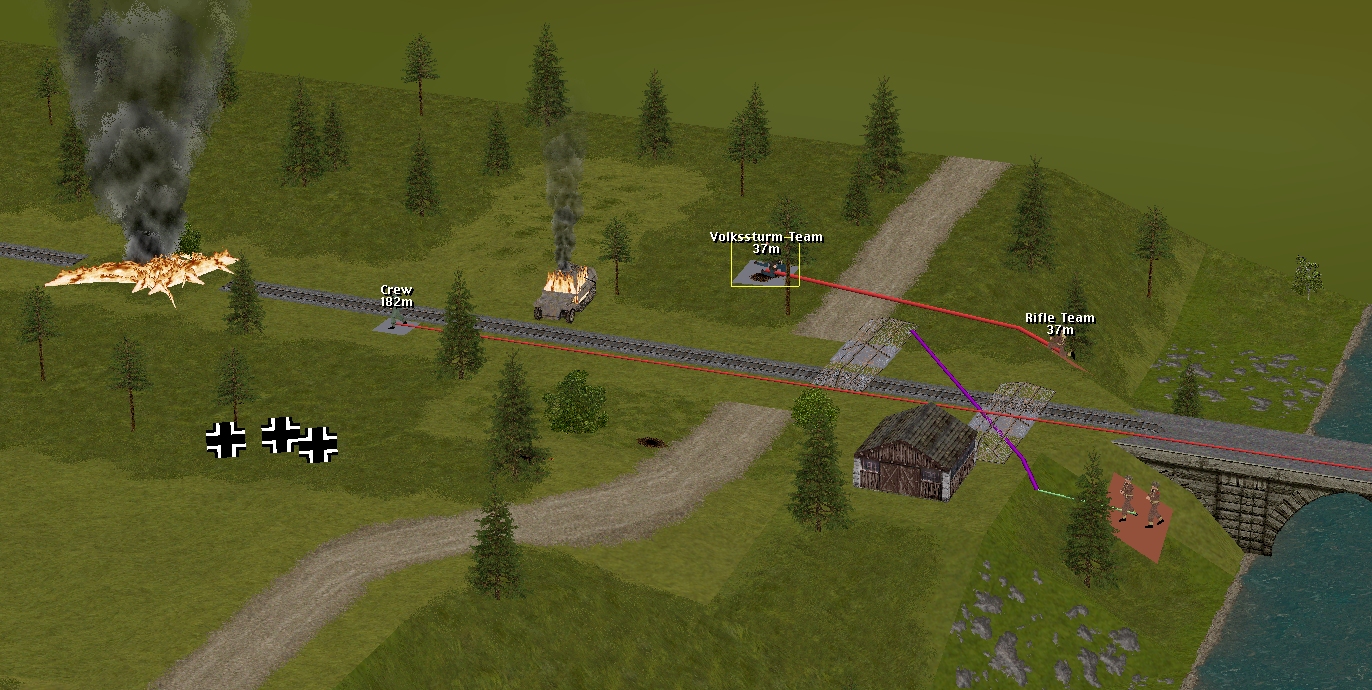
When the turn starts, down at the rail bridge the Daimler armoured car and the M5A1 halftrack are fully occupied hosing the retreating signalers, while Venison’s half-strength half-team swaps lead with the nearby Volkssturm team that mauled it last turn.
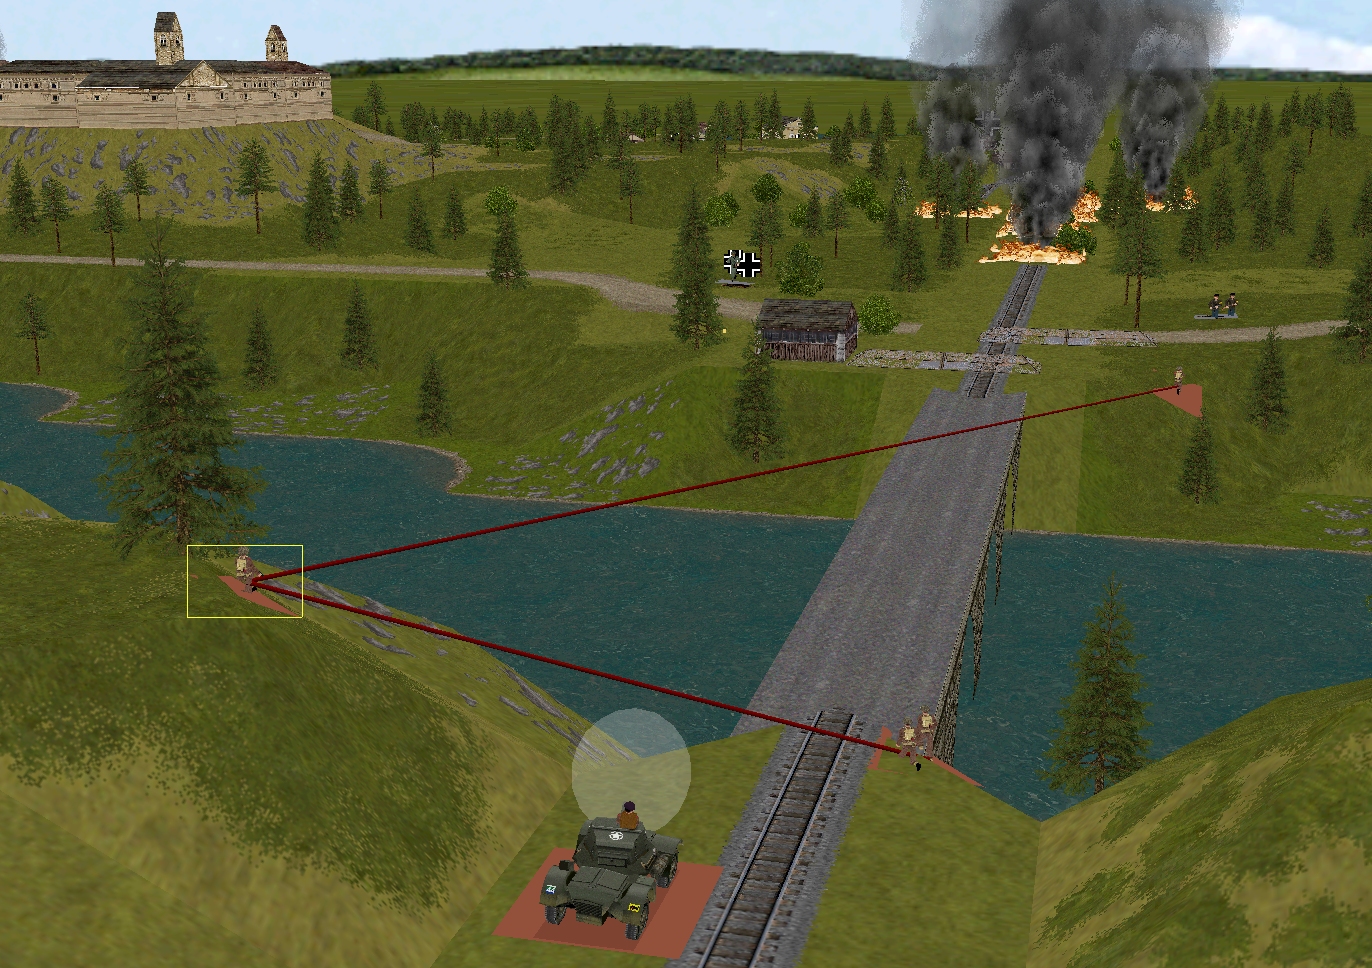
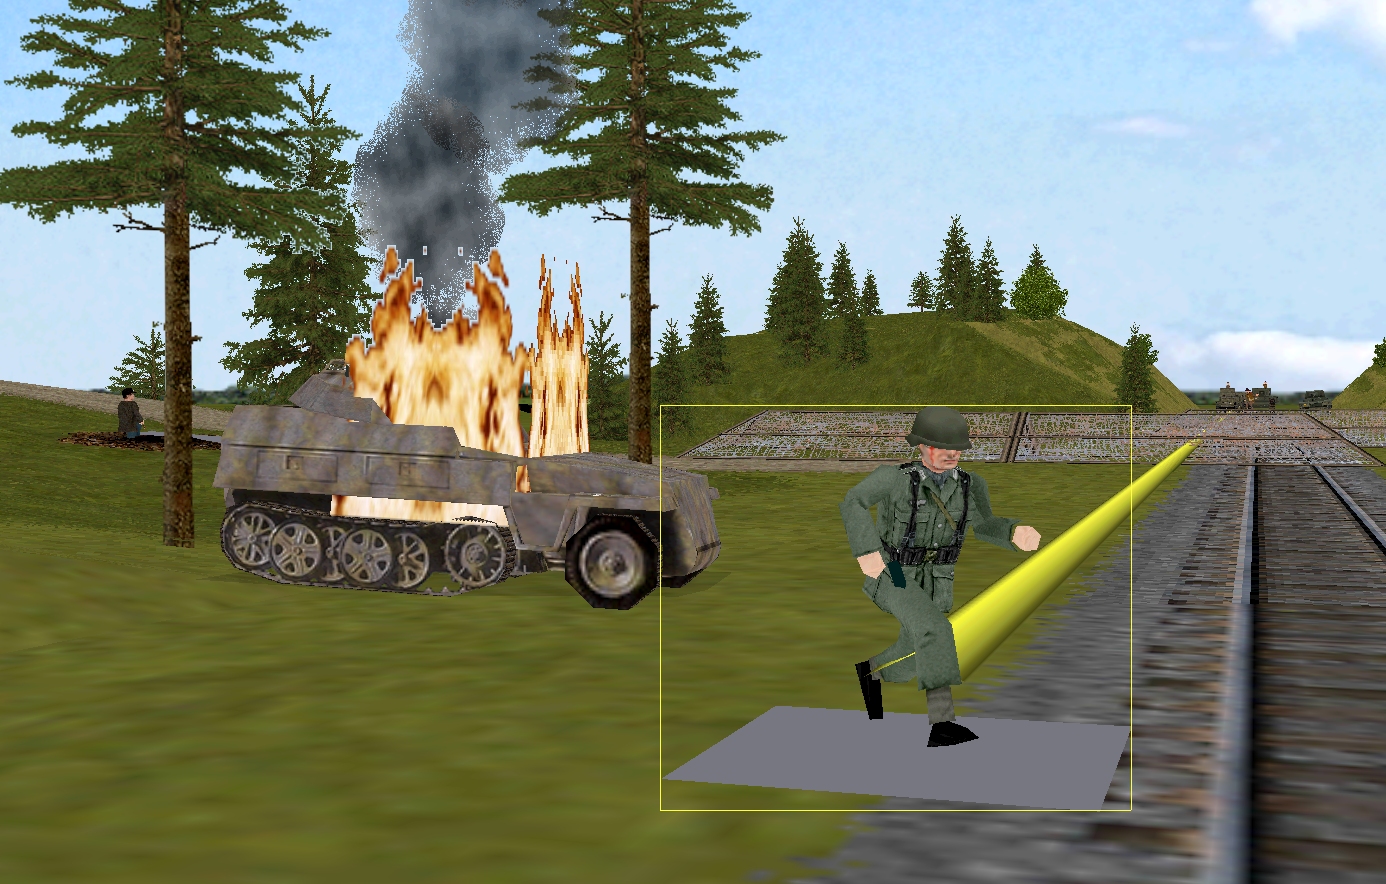
Determined to help their stalled comrades, the remainder of Venison’s squad commences a dash over the bridge the second the clock restarts.
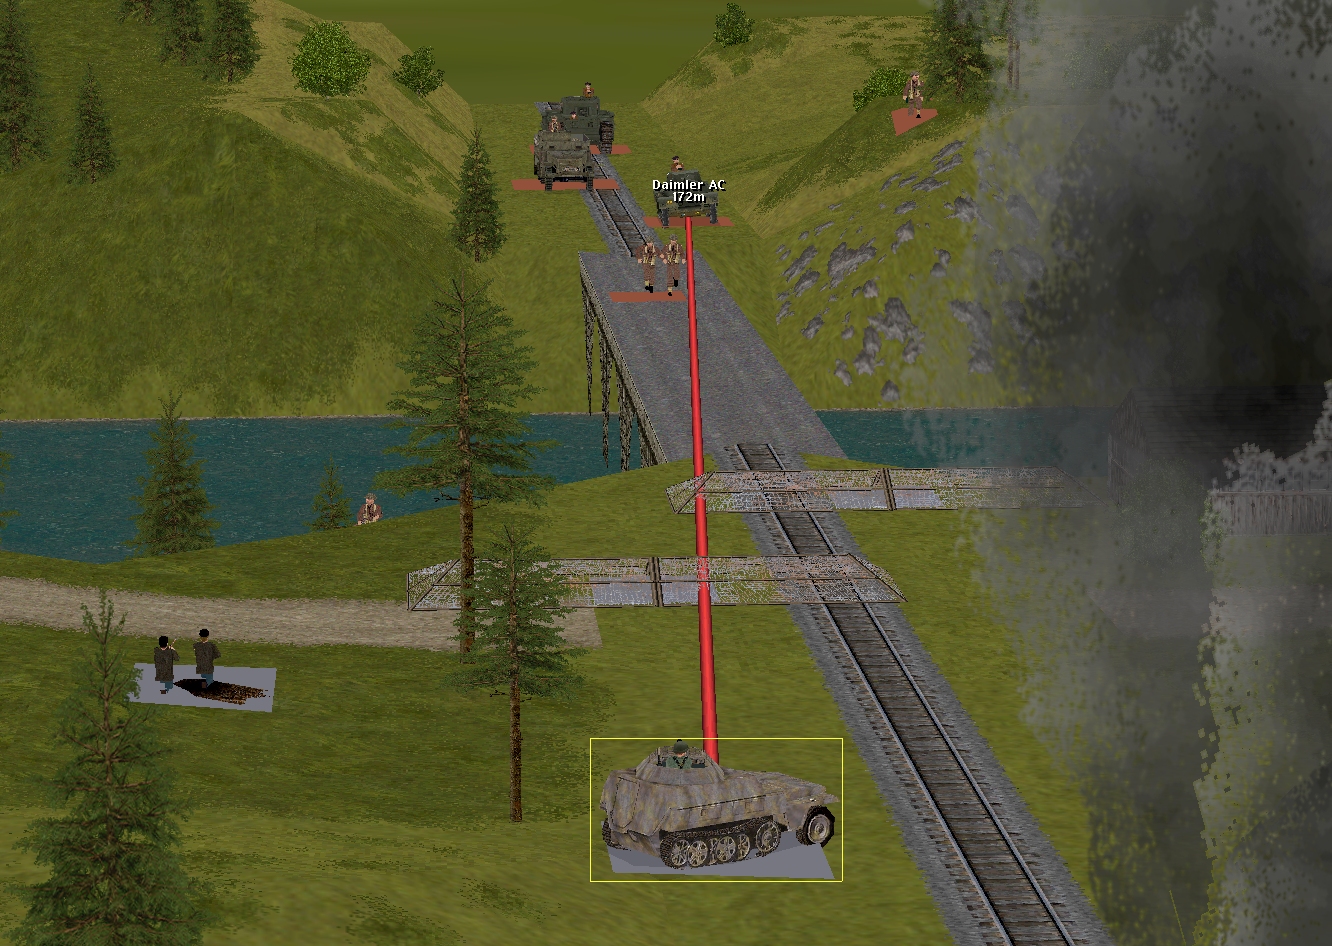
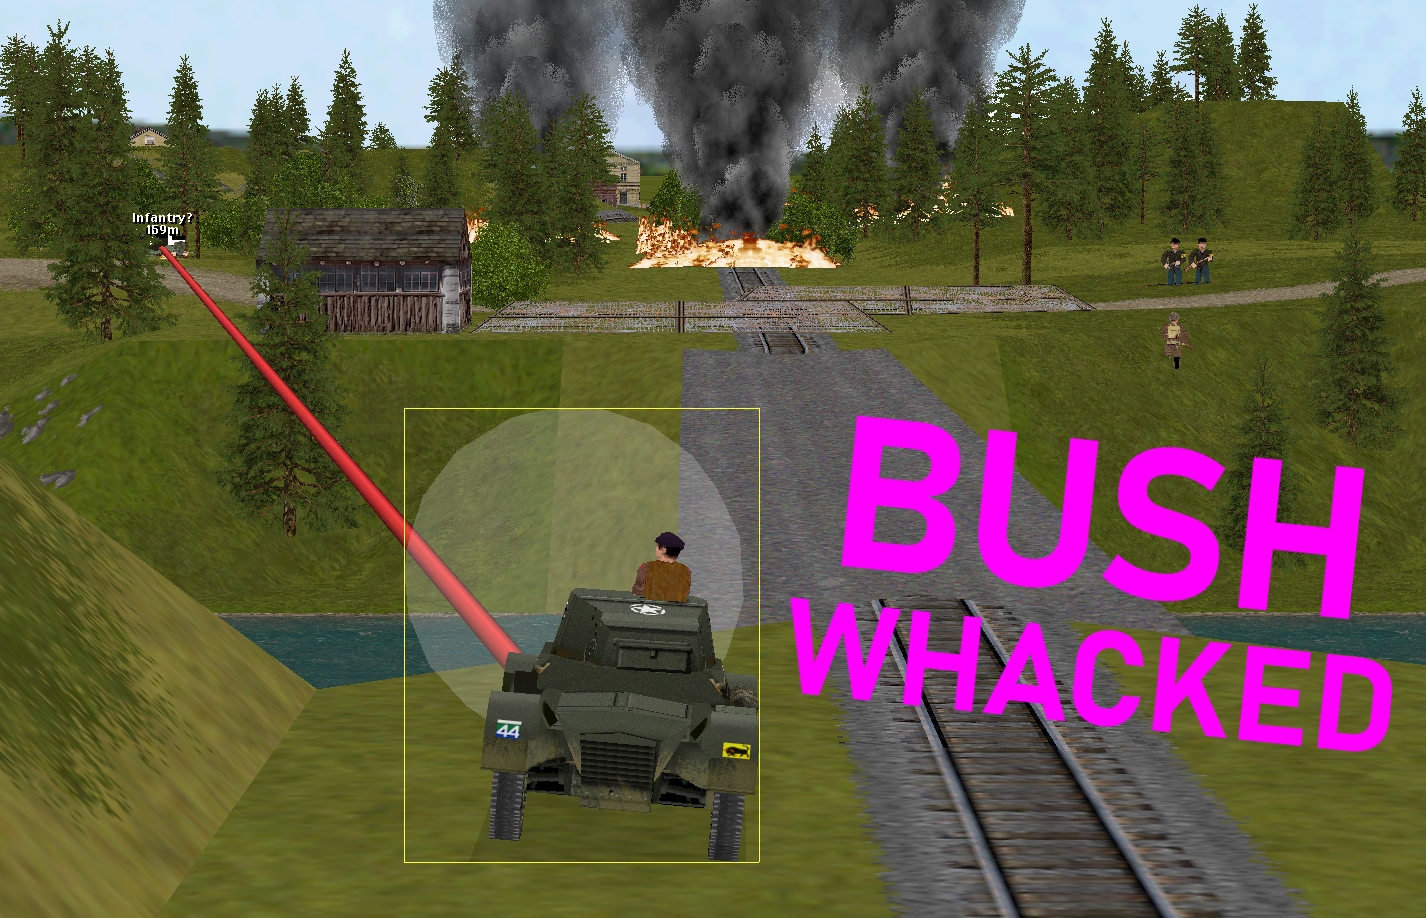
They are roughly a third of the way across and the turn is about 35 seconds old when a German SPW 250/9 halftrack rolls into view near the western end of the blazing oil train.
Although the Daimler isn’t slow to notice the new threat, it’s the Axis vehicle that fires first. The barrel of the German autocannon reciprocates rapidly sending a salvo of 20mm rounds through the armoured car’s relatively feeble turret armour.
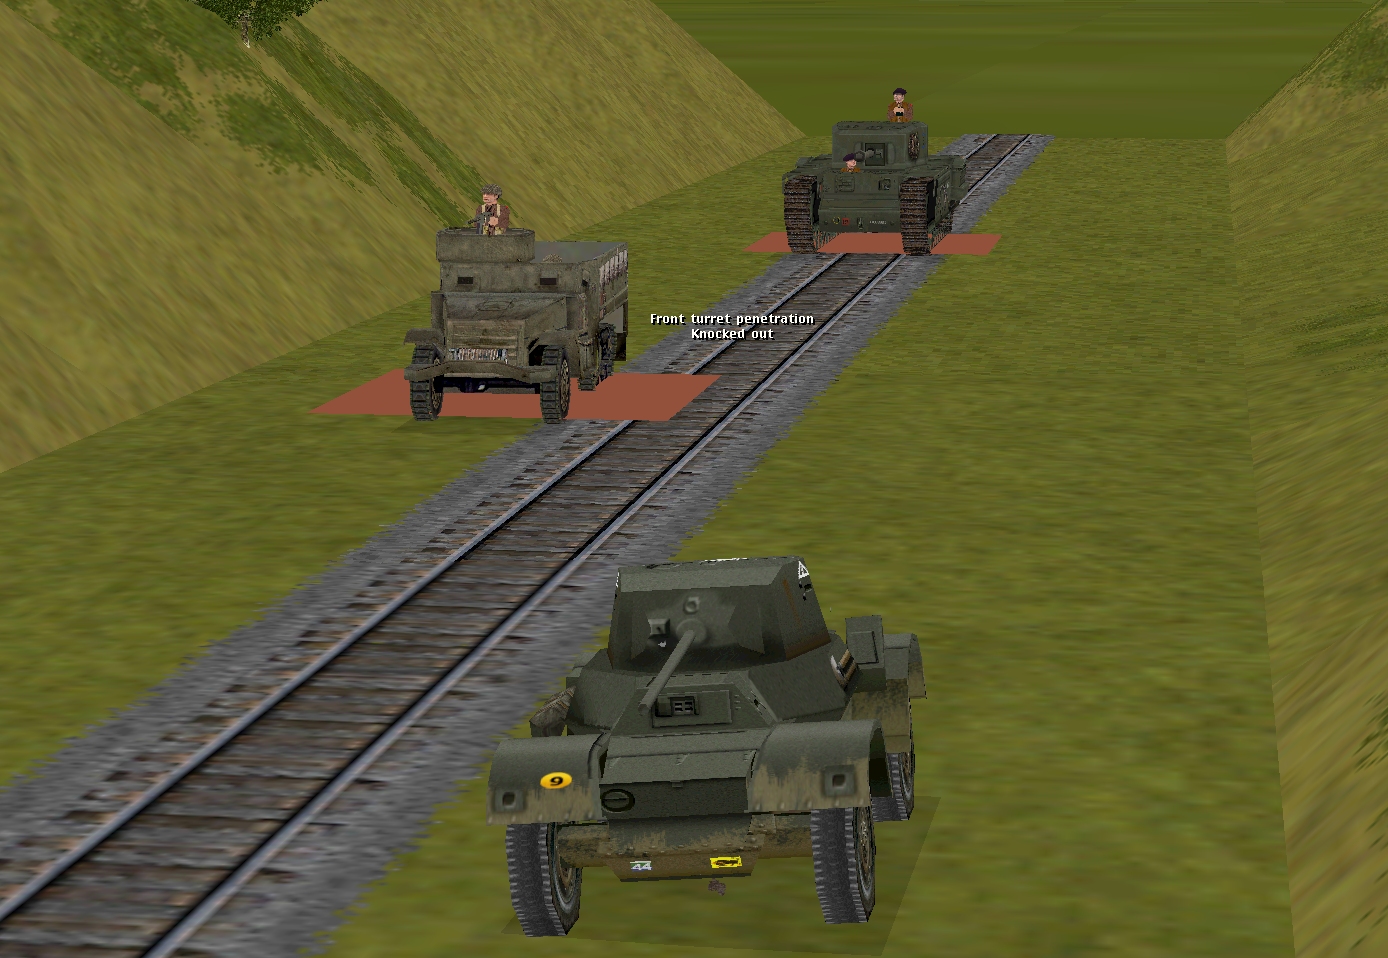
In the blink of a smoke-reddened eye Sergeant Scarlet loses his mount and comes close to losing his life!
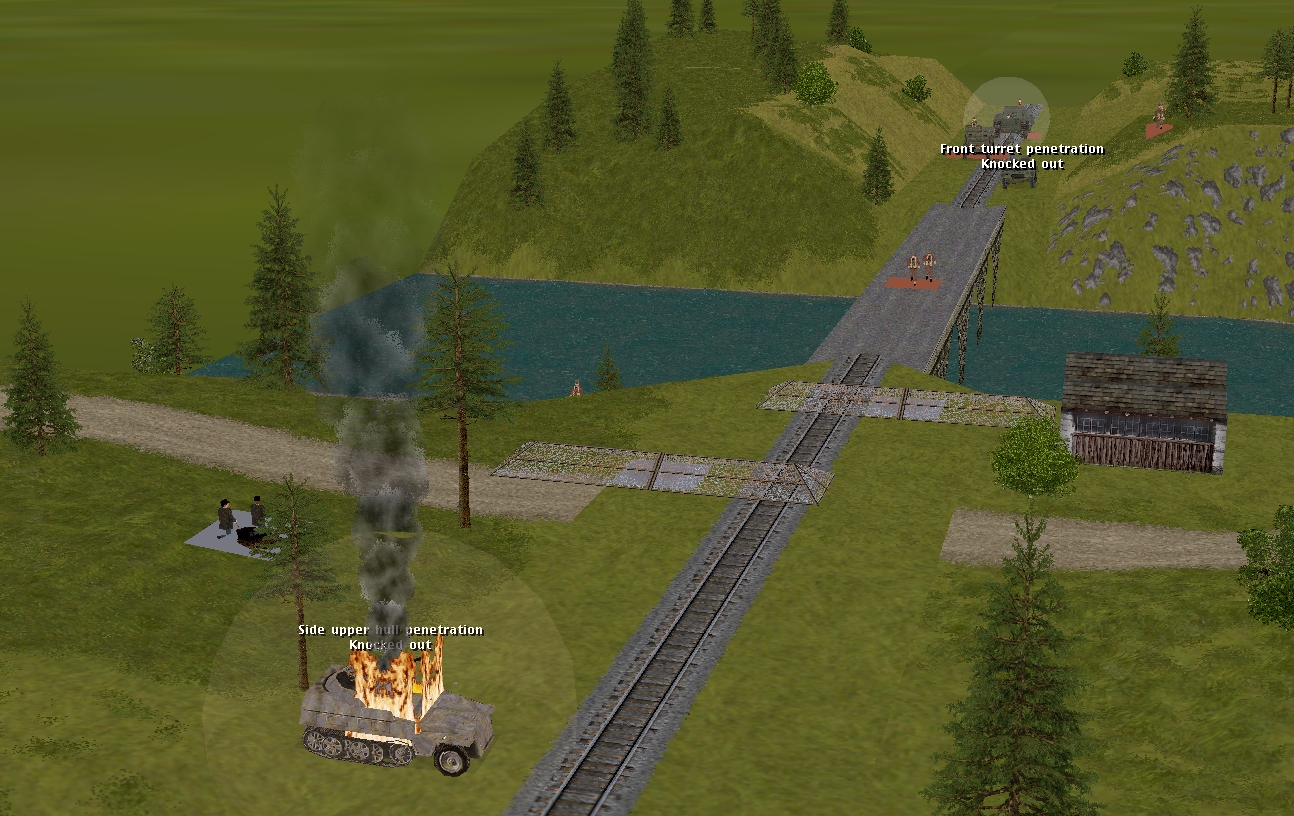
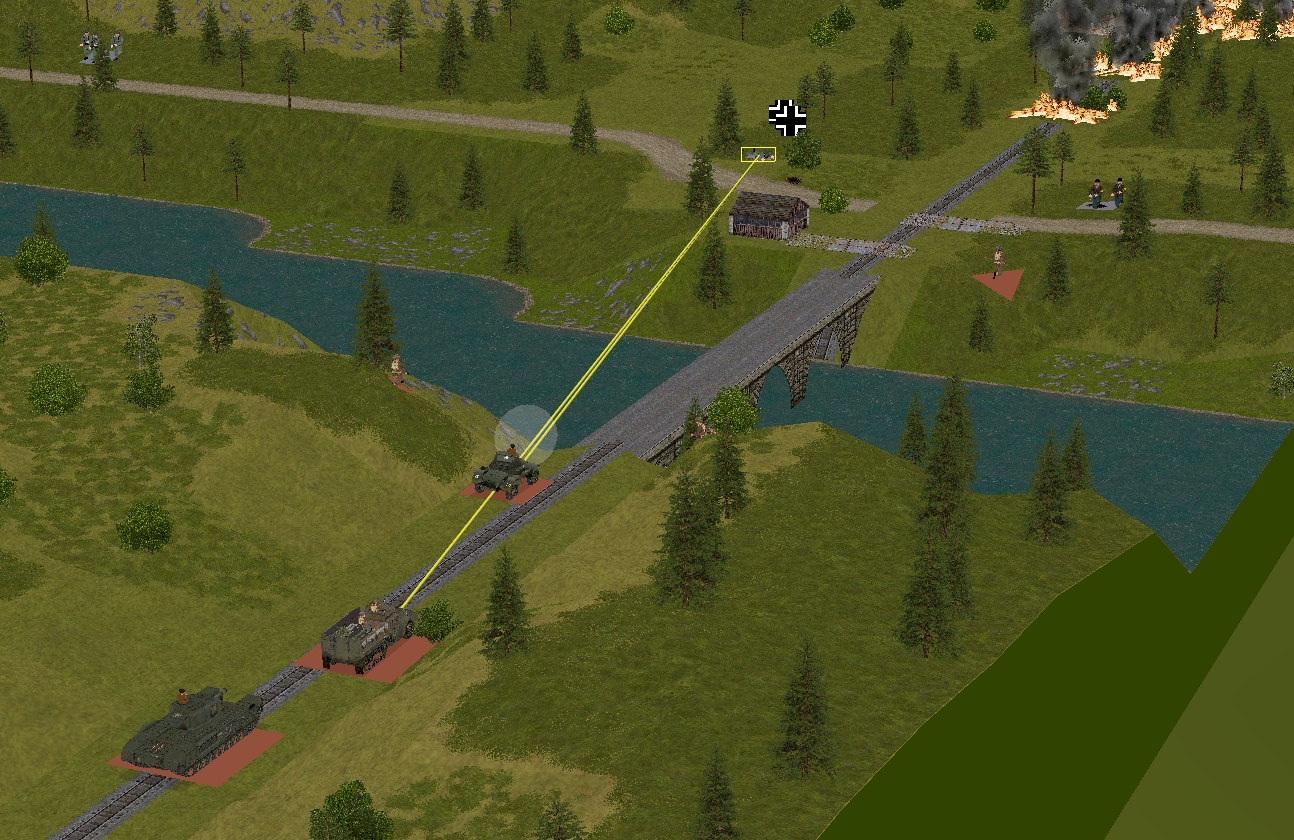
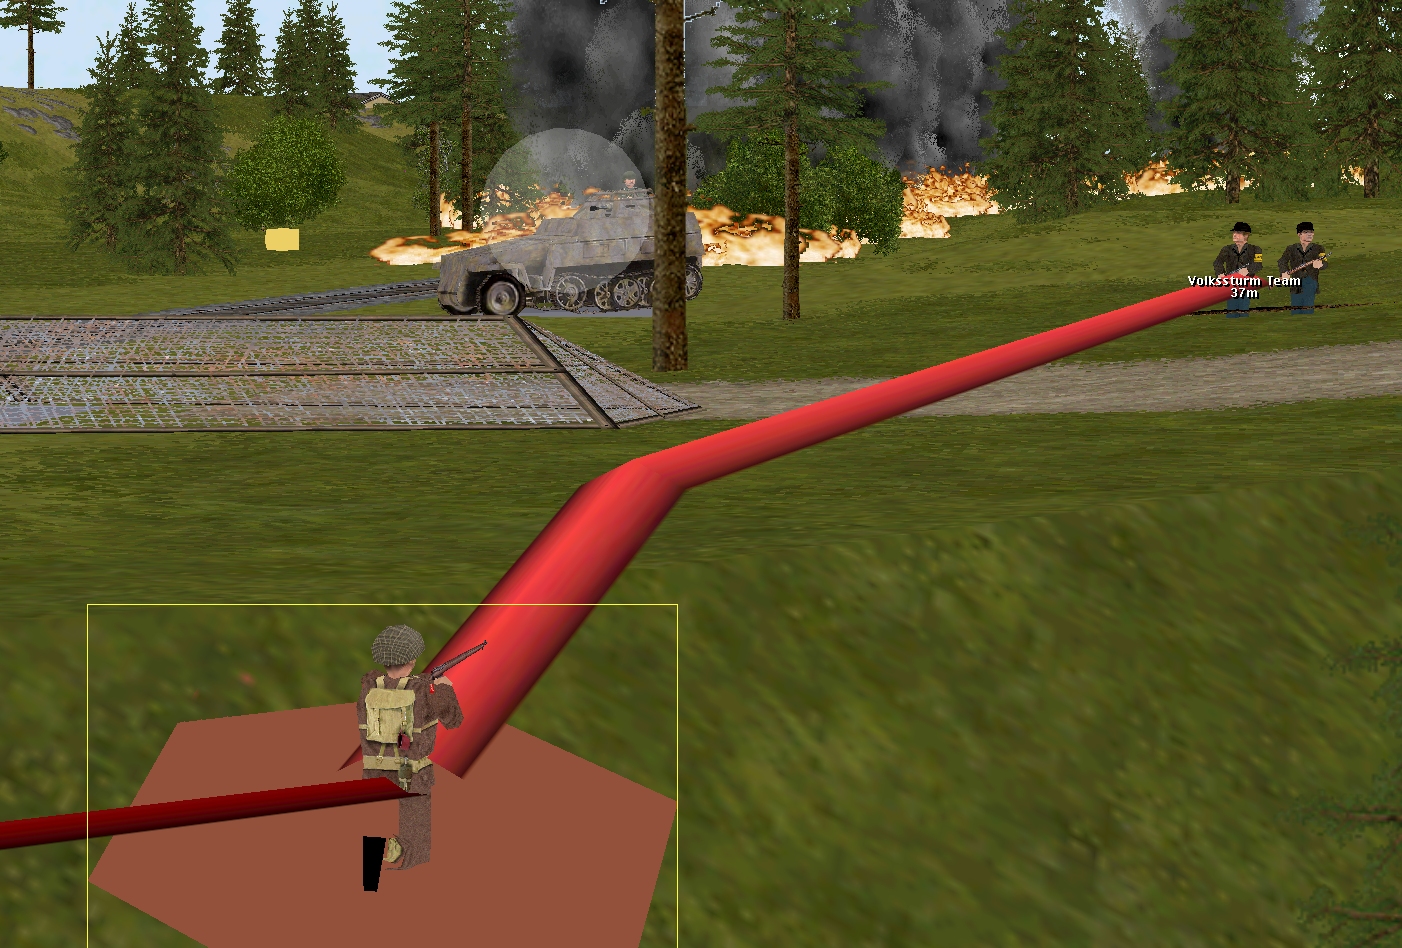
While the appearance of the squat Sonderkraftfahrzeug spooks its British counterpart (unprompted the M5A1 commences a reversing manoeuvre), it doesn’t faze the mighty Churchill VIII that’s hunting eastward along the cutting. Before the 250/9 can slink back into the glade from whence it came, it’s transformed into a blazing wreck by one of Sergeant John’s eight 95mm hollow-charge rounds.
The situation at the end of the turn:
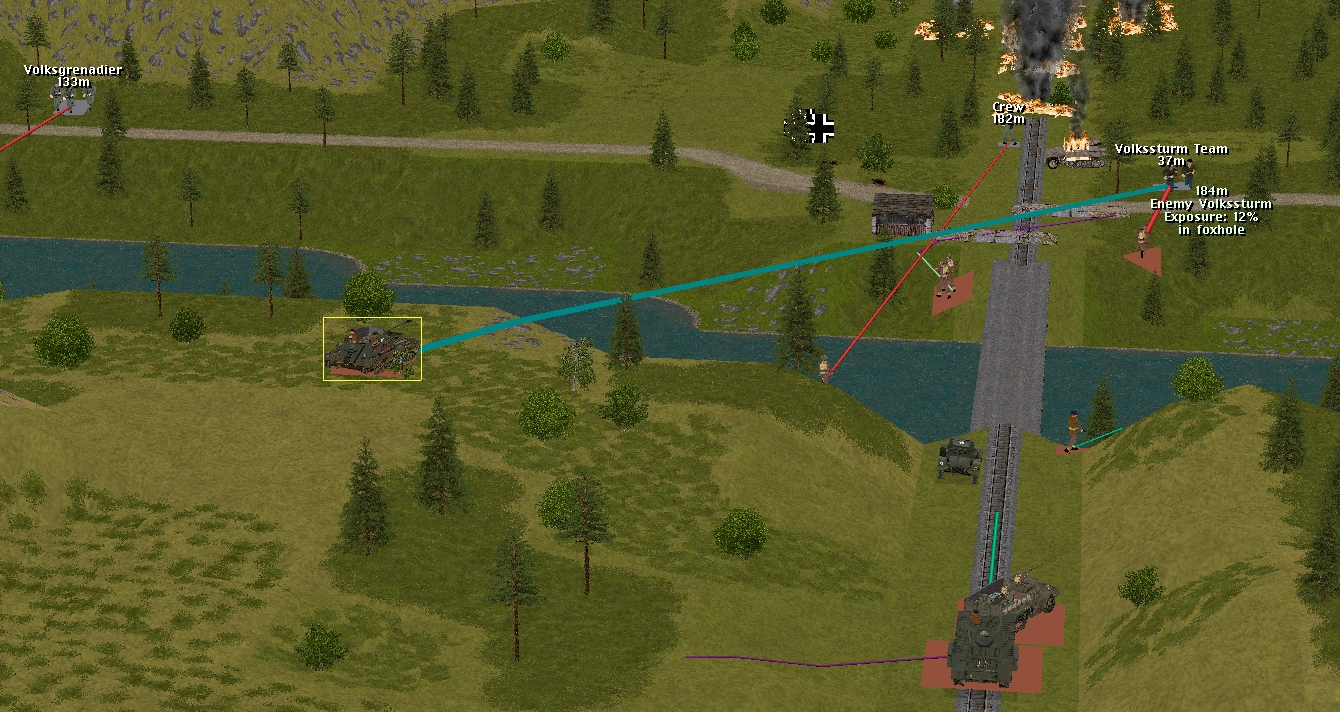
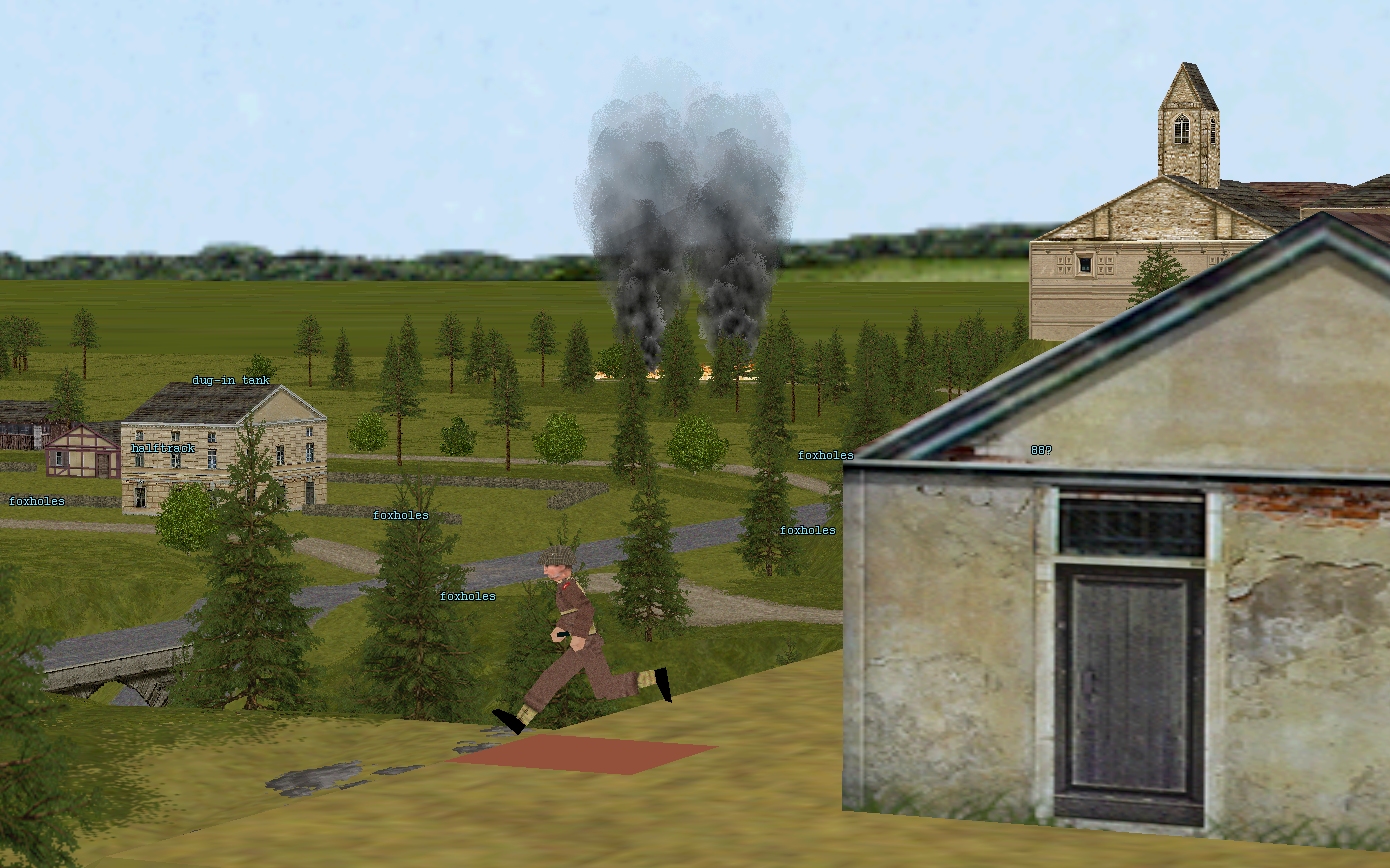
Both Venison’s half-team and the half-team that just crossed the bridge suffered a casualty this turn (this leaves them with two and four men respectively). The improbably resilient and doughty four-man Volkssturm team in the foxhole probably caused both losses! The good news is the Archer is now in position to pummel them, and, a few seconds into Turn 9, they should start taking fire from the top of the slope behind the signal box.
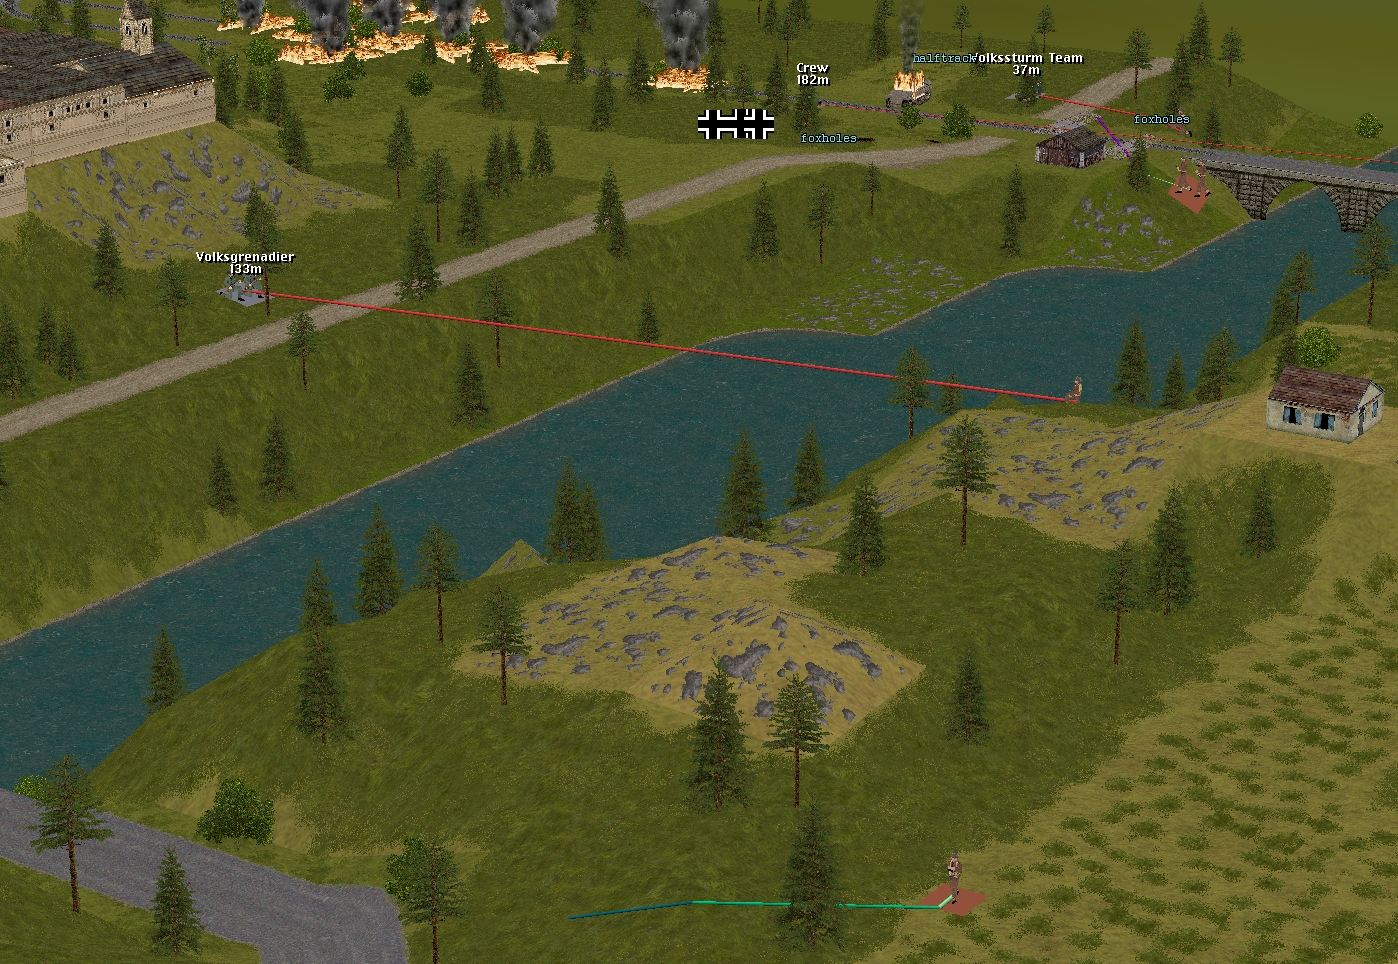
Captain Hood’s cross-river duel continues. He managed to fell one Volksgrenadier this turn, and took no casualties.
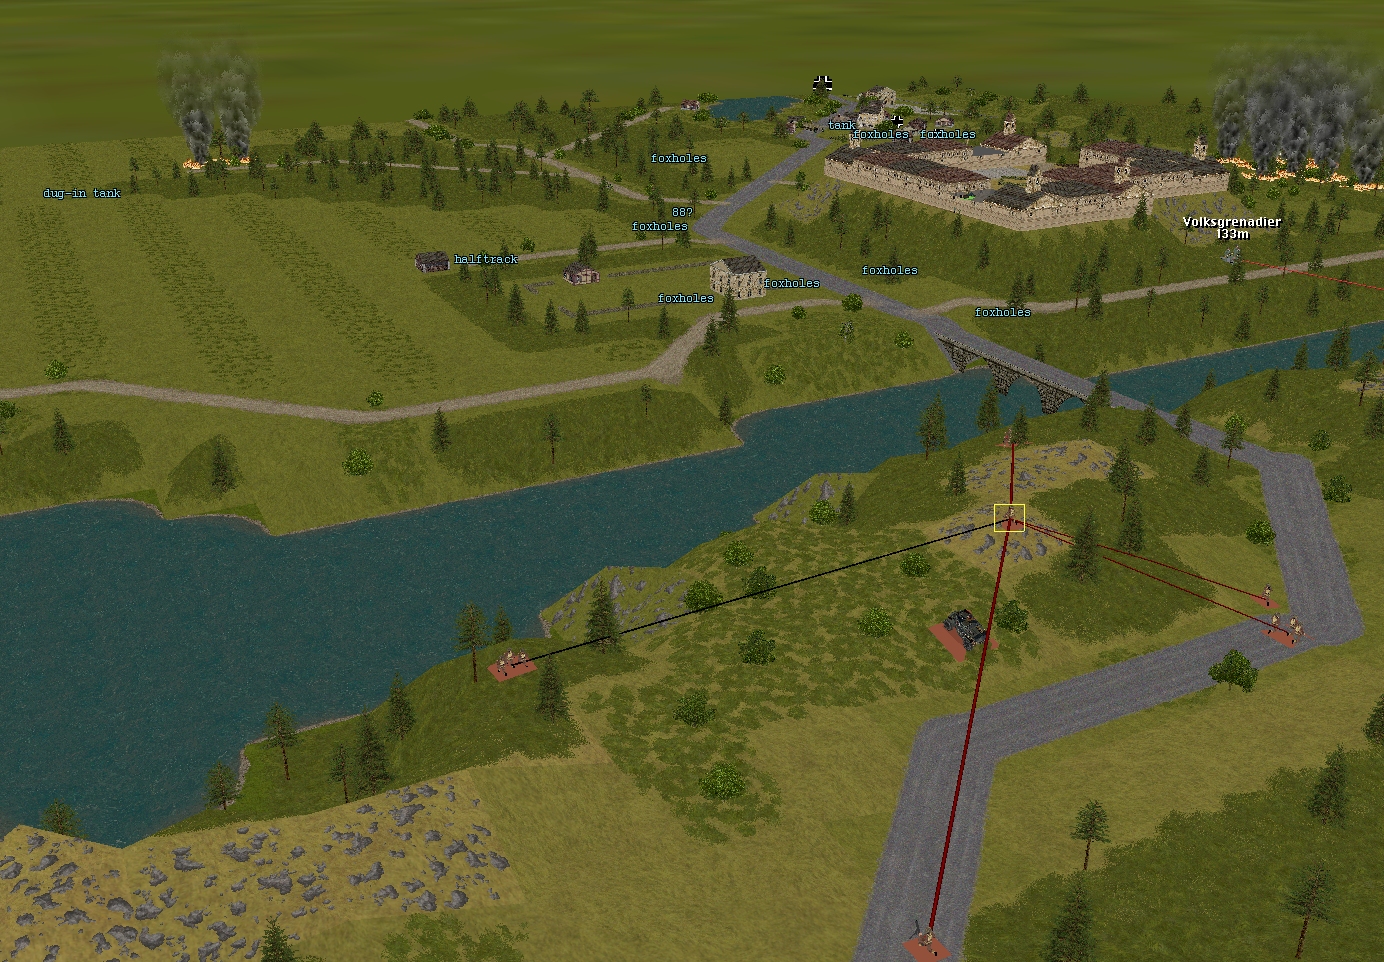
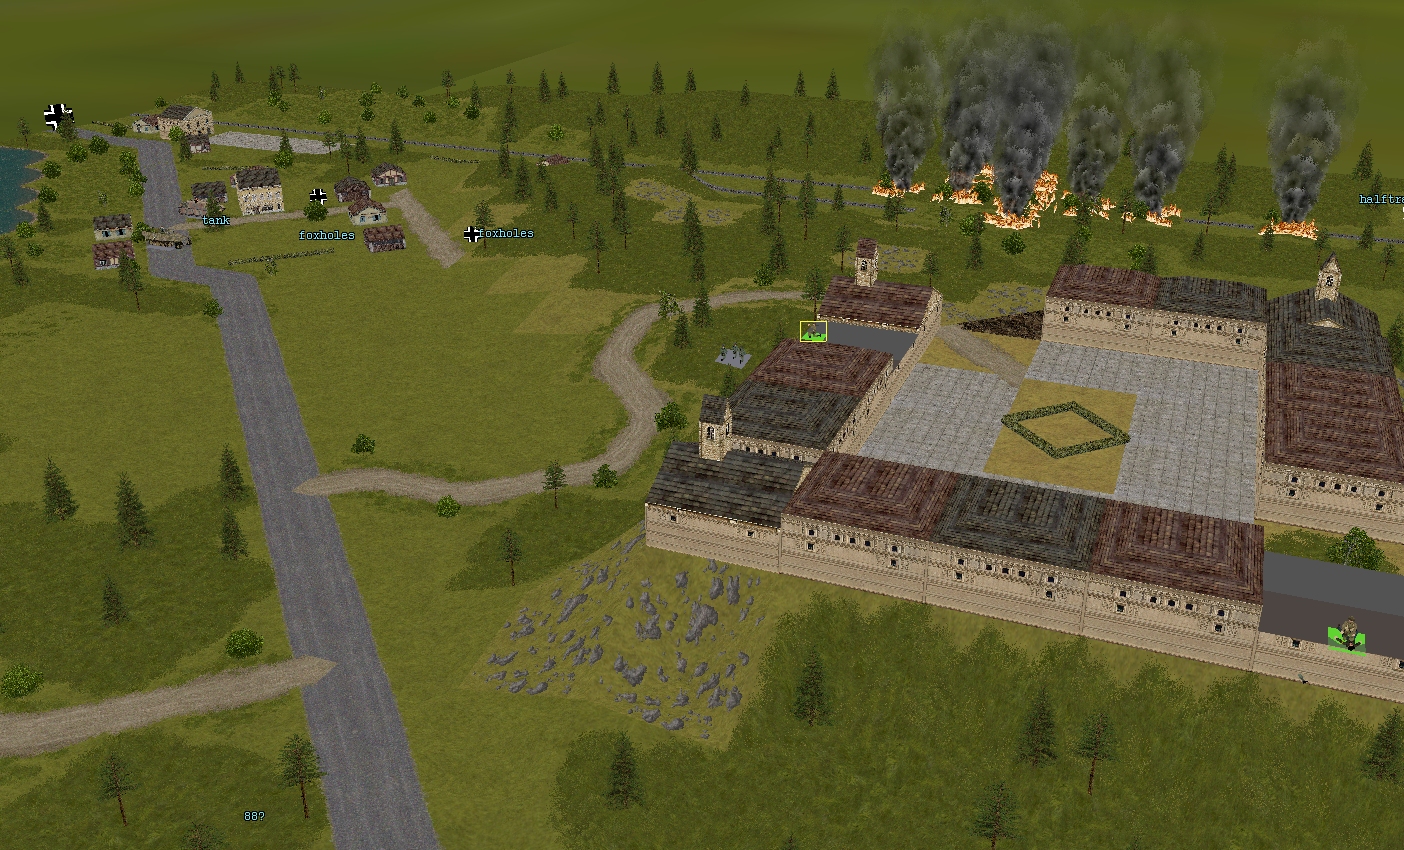
Despite plenty of vista scrutiny, the sedentary Allied units in the castle and north-west of the road bridge fail to sight anything new this turn. If there really is a dug-in tank at 55, 2, 1 it’s superbly camouflaged.

Turn 9 orders here, please. Commenters are cordially invited to suggest moves for the following seven unit groups (First come, first served. A maximum of one unit group per commenter. I’ll try to execute the turn as quickly as possible after all orders are in.)
(See screenshots for unit locations)
****anyone****
– Merry’s men (Lieutenant Merry + Sergeant Venison’s rifle squad + Corporal Fletcher’s M5A1 halftrack)
– Marian’s men (Lieutenant Marian + 3 x rifle squads + PIAT team + 3 inch mortar team)
– Sergeant Bowman’s Archer TD
– Corporal Much’s Humber scout car
****subscribers only****
– Captain Hood (Six-man company HQ + arty spotter Lieutenant Tuck)
– Sergeant Johns’ Churchill VIII
– Captain Dale’s party (Six POWs armed with pilfered rifles and pistols) + Corporal Whitehand’s team (Two POWs armed with a pilfered Panzerschreck)
Please start all order comments with ‘ORDER’ and any later revision comments with ‘REVISED ORDER’. This will help me distinguish firm instructions from suggestions and advice.
ORDER:
Sgt Bowman’s Archer to target the visible volks-inf across the river. If we can split it, give me 30 seconds worth of fire on the visible enemy, followed by another 30 seconds on the suspected location.
Someone needs to stop these spunky sauerkrauts.
(Any are welcome to countermand if a better use can be found for the unit)
ORDER: Corporal Fletcher’s halftrack
Basically, a repeat of last turn but with a bit more haste this time.
MOVE FAST onto the (northern side if poss.) bridge keeping the signal box between them and the path taken by the retreating Panzerschreck unit; approx [2,5,4] I reckon.
Definitely something amiss with either the website or my Firefox browser.
Checked the homepage while not logged-in: only today’s Where am I? article, and the Latest Comments are two of mine to BtB:Turn 7 from yesterday.
Log-in now and this article + Tim’s comment are visible, and the Latest Comments has two from Phlebas to Where am I?
Apologies. I’ve been trying to get to the bottom of this issue, but no luck so far. If THC looks a little odd tomorrow it’s because I’m experimenting with themes. Blocksy, the current theme, could be the culprit.
If it happens again would you mind checking to see if you can access ‘missing’ posts through the ‘next post’ button at the bottom of the previous post.