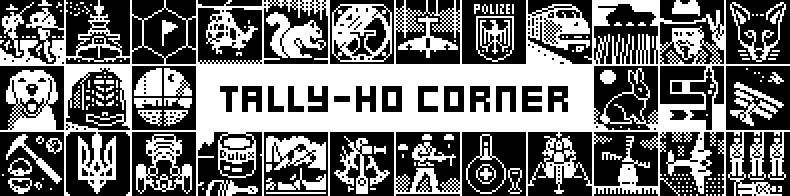
The Brits attempt to cross the Bogen in Turn 6. Well, five of them do. Not long after Sergeant Venison’s half squad commences a daring dash across the rail bridge, they start taking fire from their ten o’clock. A party of Volksgrenadiers ambling southward on the road beneath the castle, has spotted the bid and seems determined to scupper it.
Fortunately for Venison, swashbuckling Captain Hood, who is monitoring developments from a sprucy knoll circa 18, 4, 3, decides to weigh in.
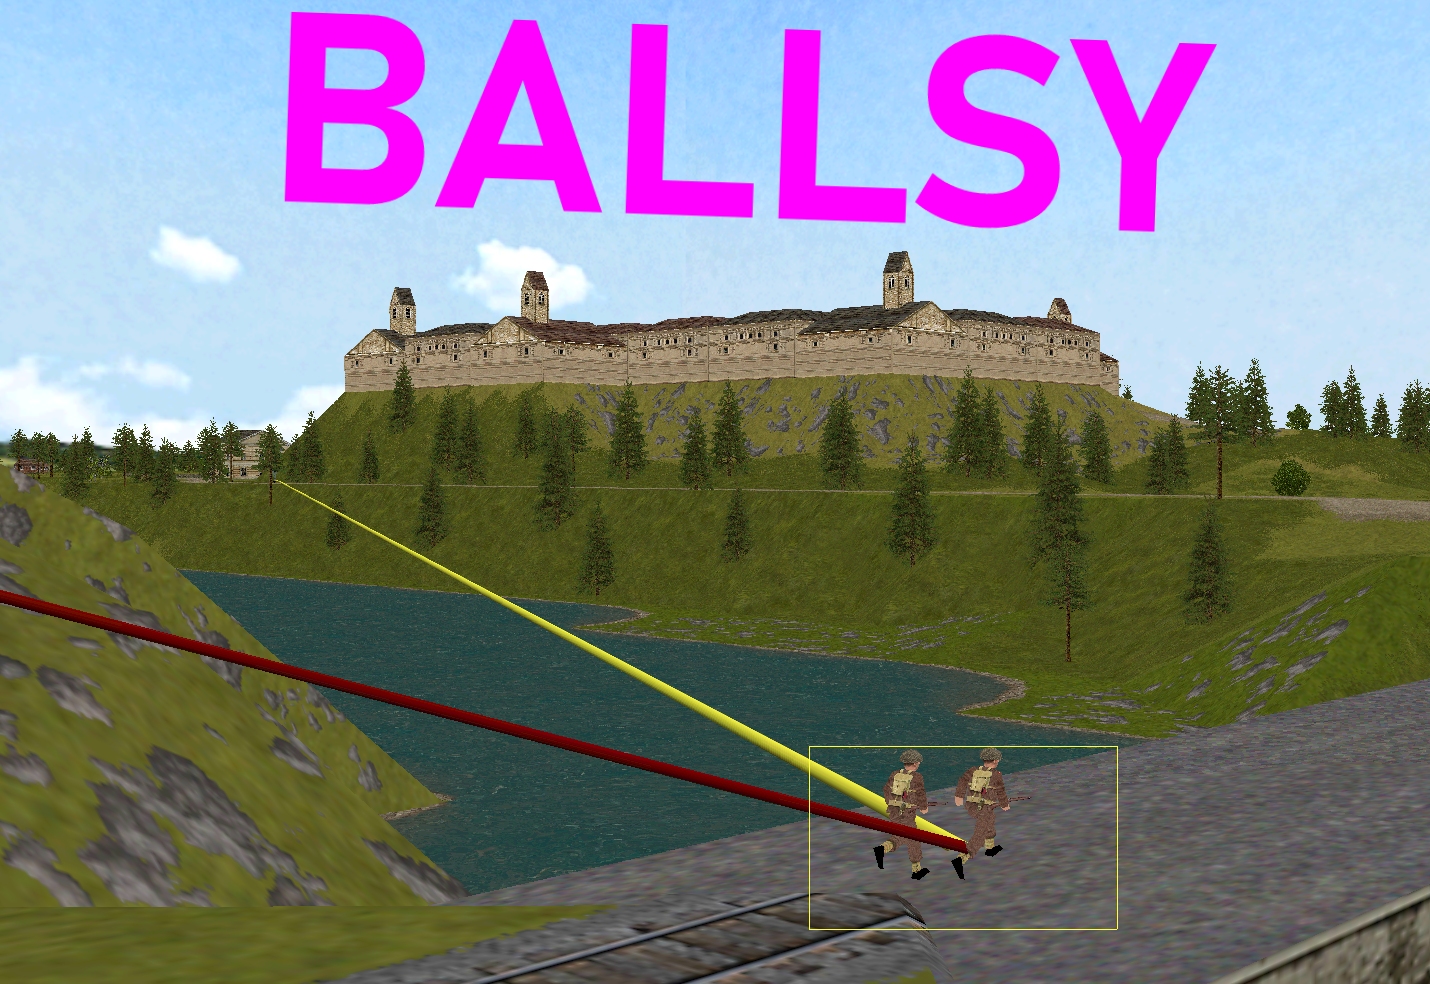
Accurate cross-river fire from three Lee-Enfield rifles drops one of the Germans and encourages the other seven to leave the road.
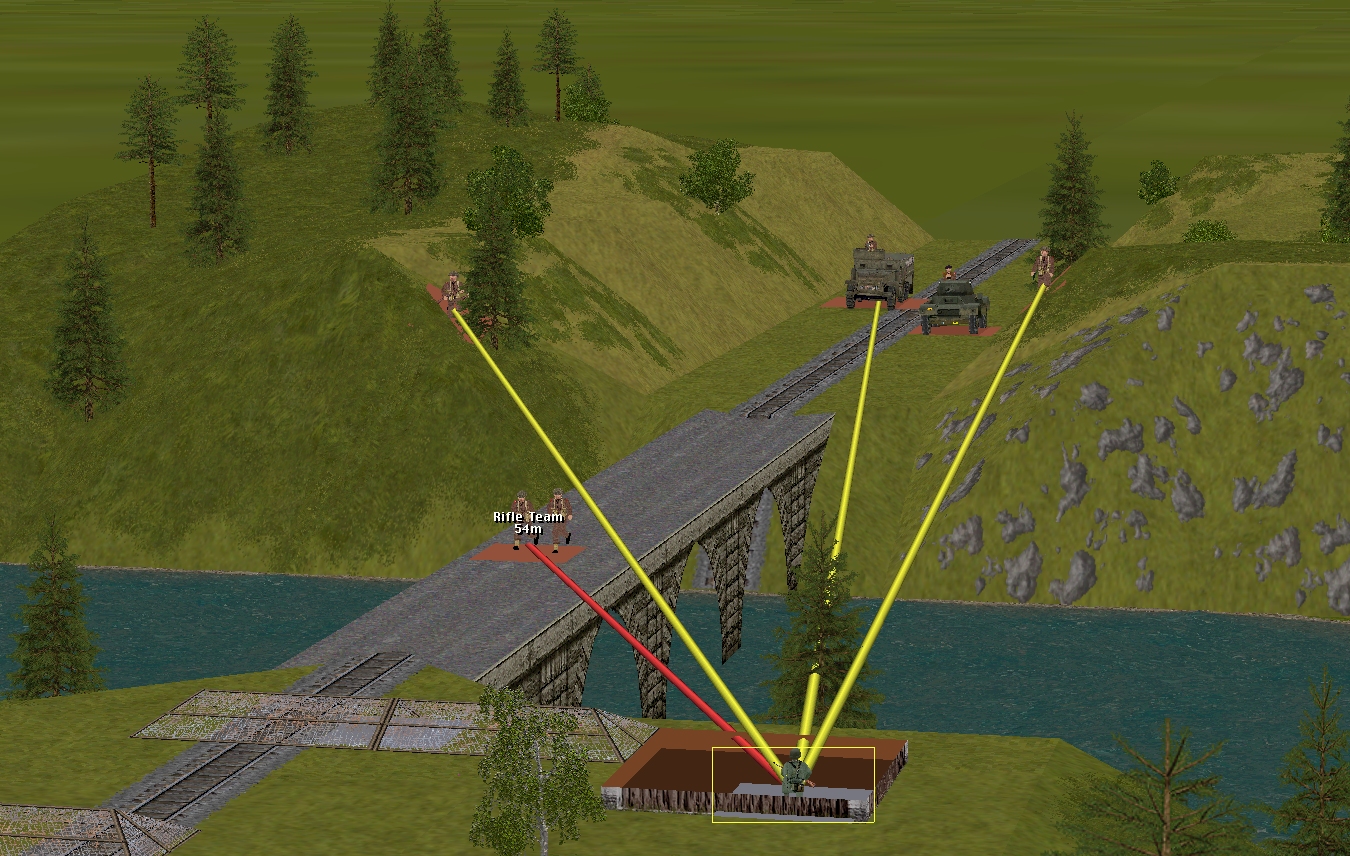
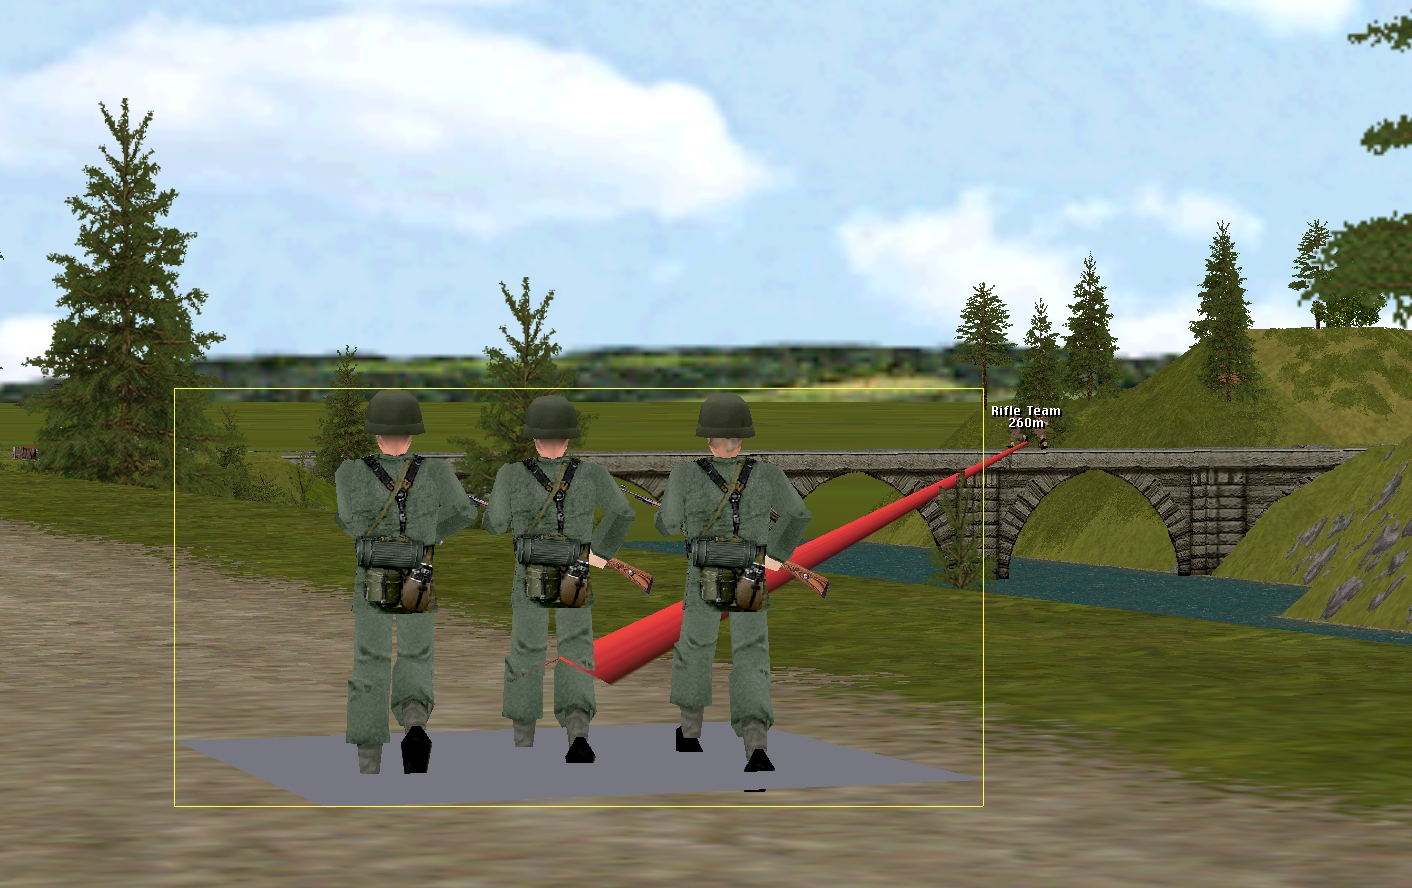
The ‘signallers’ also attempt to deter/deplete the bridge-crossers. However, their efforts are relatively short-lived. Supported by fire from the Allied halftrack, Lieutenant Merry’s HQ team, the other half-squad, and the advancing Daimler AC, Venison’s band manages to get across the Bogen unscathed.

A few seconds after Venison and his men vault over the parapet and drop onto the relative safety of the mossy slope SE of the bridge, one of the units providing covering fire sights a second threat in the signal box. Showered with splinters and broken glass, that threat – a Panzerschreck team – shows no interest in engaging either of the two Allied AFVs in its eye-line. In fact, just before the turn ends it makes an abortive attempt at retreating.
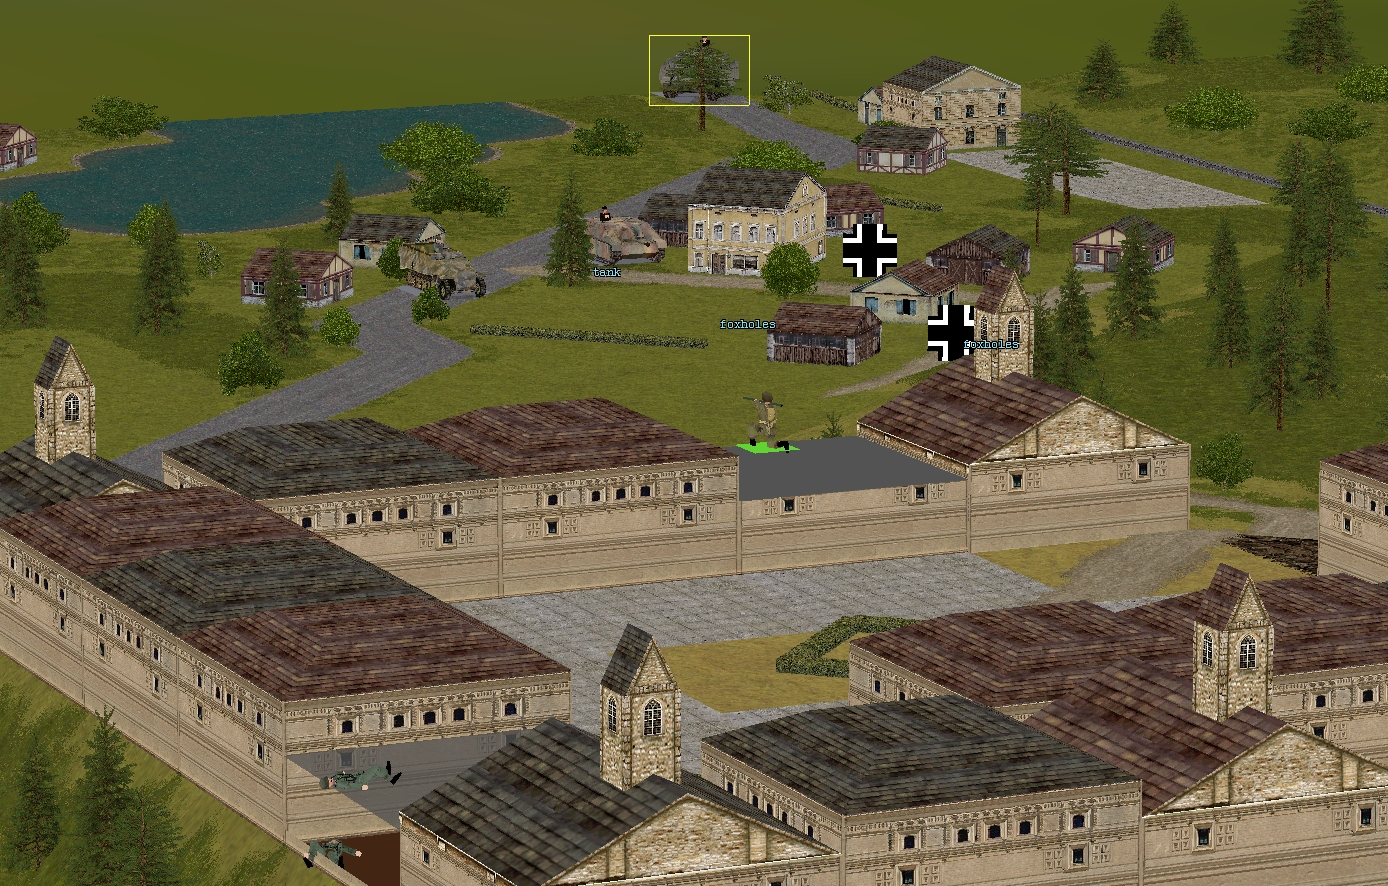
The news from the Schloss this sixty was a trifle worrying. Early in the turn Corporal Whitehand, the US Panzerschreckist, watched a Panzer IV (?) enter the battlefield near Nottingheim station, and a little later he noticed previously unseen uniformed figures in two locations close to the inn.
The situation at the start of Turn 7…
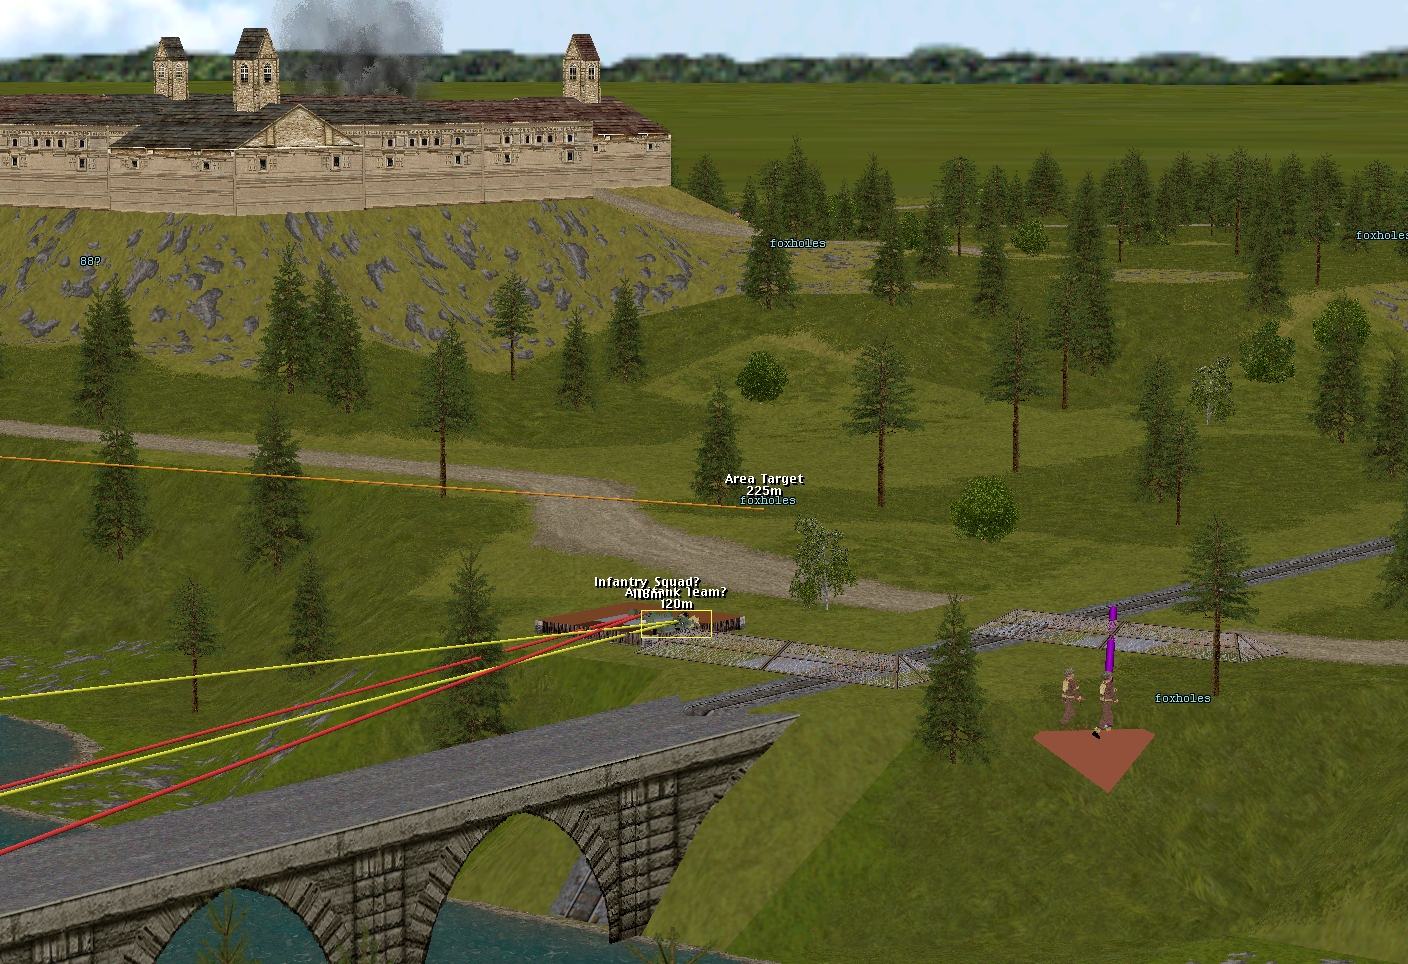
Venison’s half-squad is very close to one of the spots IDed as a foxhole location by the US POWs, but has yet to discover any excavations. The signallers appear thoroughly suppressed and should (along with Venison’s half-squad?) find themselves under artillery bombardment 26 seconds into Turn 7.

The Churchill and Archer are approaching the railway cutting.

Near the road bridge, the scout car and Marian’s squads will need to advance a little further in order to get eyes on the dug-in tank and 88 position. If Greenwood, Much, and Forester all move another ‘square’ eastward, that should do it. Heavily encumbered, Marian’s mortar team is still a hundred metres from its destination.

Turn 7 orders here, please. Commenters are cordially invited to suggest moves for the following eight unit groups (First come, first served. A maximum of one unit group per commenter. I’ll try to execute the turn as quickly as possible after all orders are in.)
(See screenshots for unit locations)
****anyone****
– Merry’s men (Lieutenant Merry + Sergeant Venison’s rifle squad + Corporal Fletcher’s M5A1 halftrack)
– Marian’s men (Lieutenant Marian + 3 x rifle squads + PIAT team + 3 inch mortar team)
– Sergeant Bowman’s Archer TD
– Corporal Much’s Humber scout car
****subscribers only****
– Captain Hood (Six-man company HQ + arty spotter Lieutenant Tuck)
– Sergeant Scarlet’s Daimler armoured car
– Sergeant Johns’ Churchill VIII
– Captain Dale’s party (Six POWs armed with pilfered rifles and pistols) + Corporal Whitehand’s team (Two POWs armed with a pilfered Panzerschreck)
Please start all order comments with ‘ORDER’ and any later revision comments with ‘REVISED ORDER’. This will help me distinguish firm instructions from suggestions and advice.
ORDER:
– Greenwood and Forester to move the one square to the east so they can see what’s going on.
– Marian himself to go to 34,3,5 (that other hilltop a bit south of Mulch) so he can spot for the mortar.
– Mortar team can stop and deploy (since they can hit anywhere on the map it matters less where they are deployed)
Woops, forgot to send orders last round, apologies!