
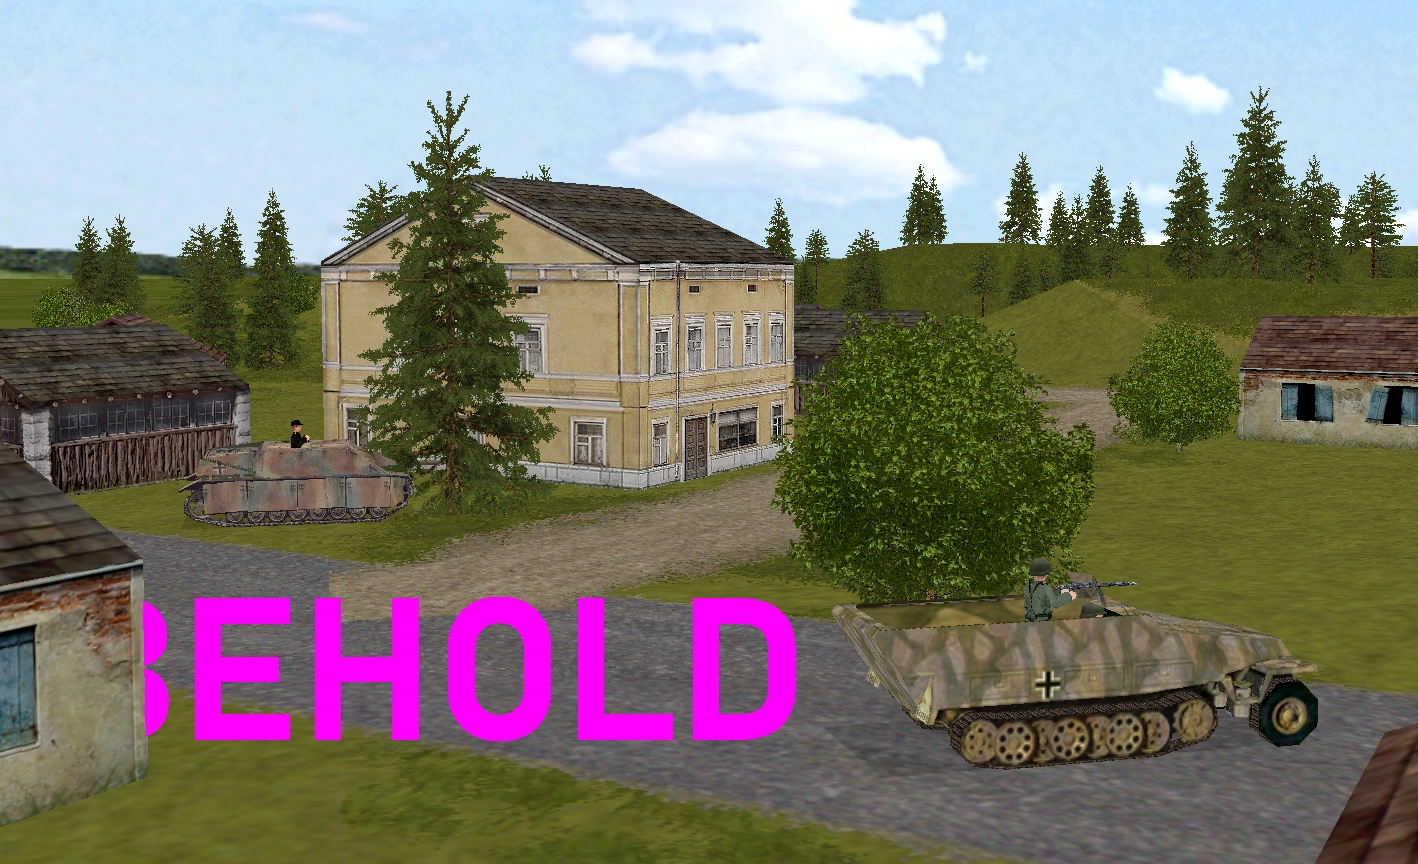
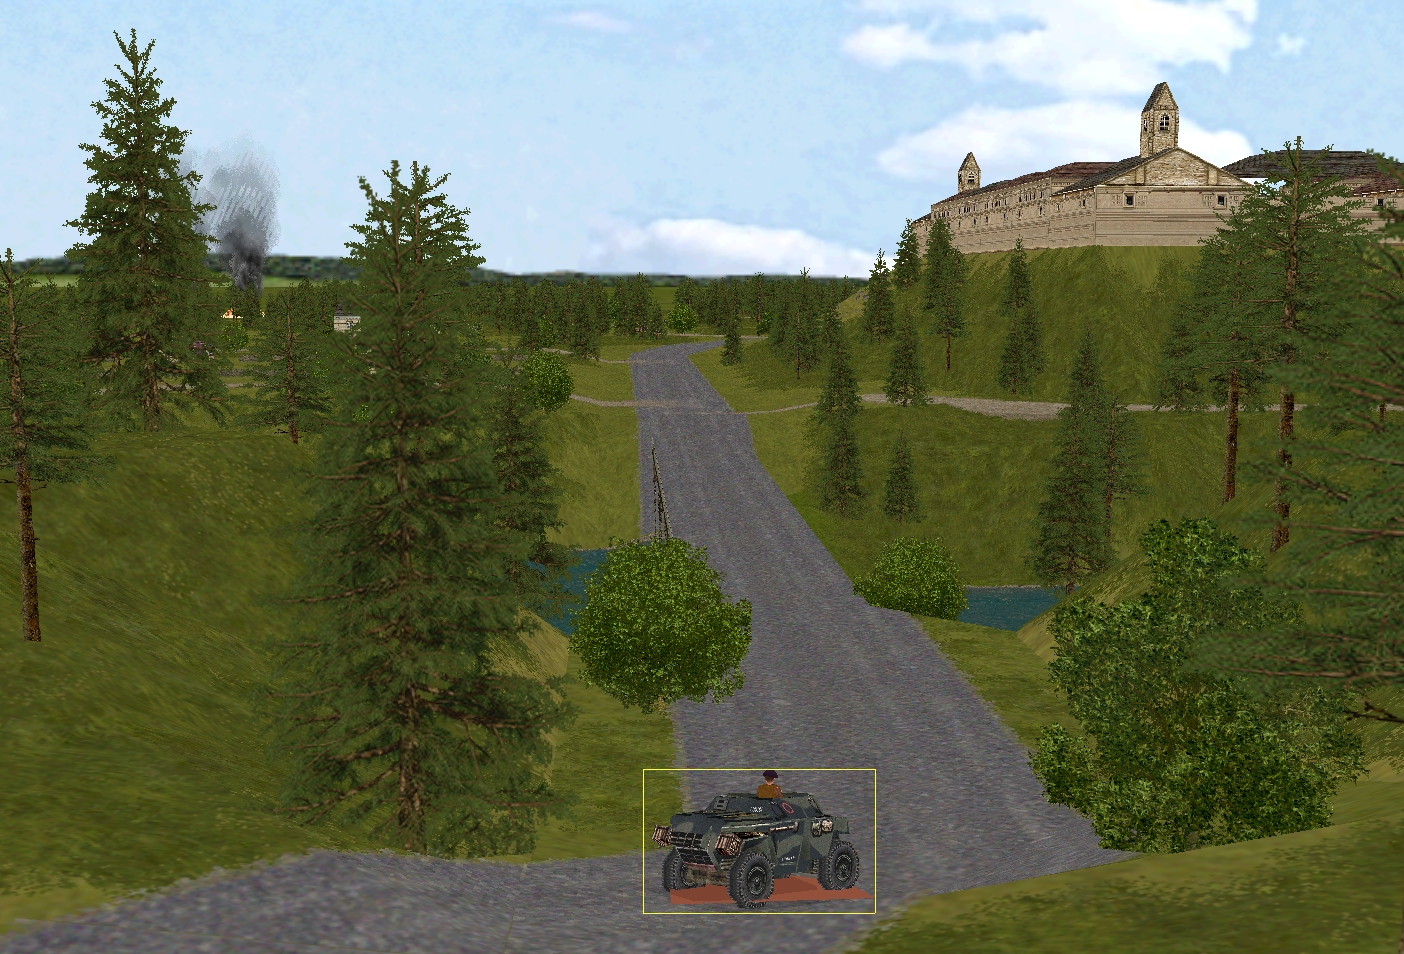
Corporal Whitehand ends turn 2 surrounded by armour. Fortunately for him the close-range stuff is bipedal, medieval, and empty, and the more distant specimens are currently unaware rogue American POWs are at large in the castle.
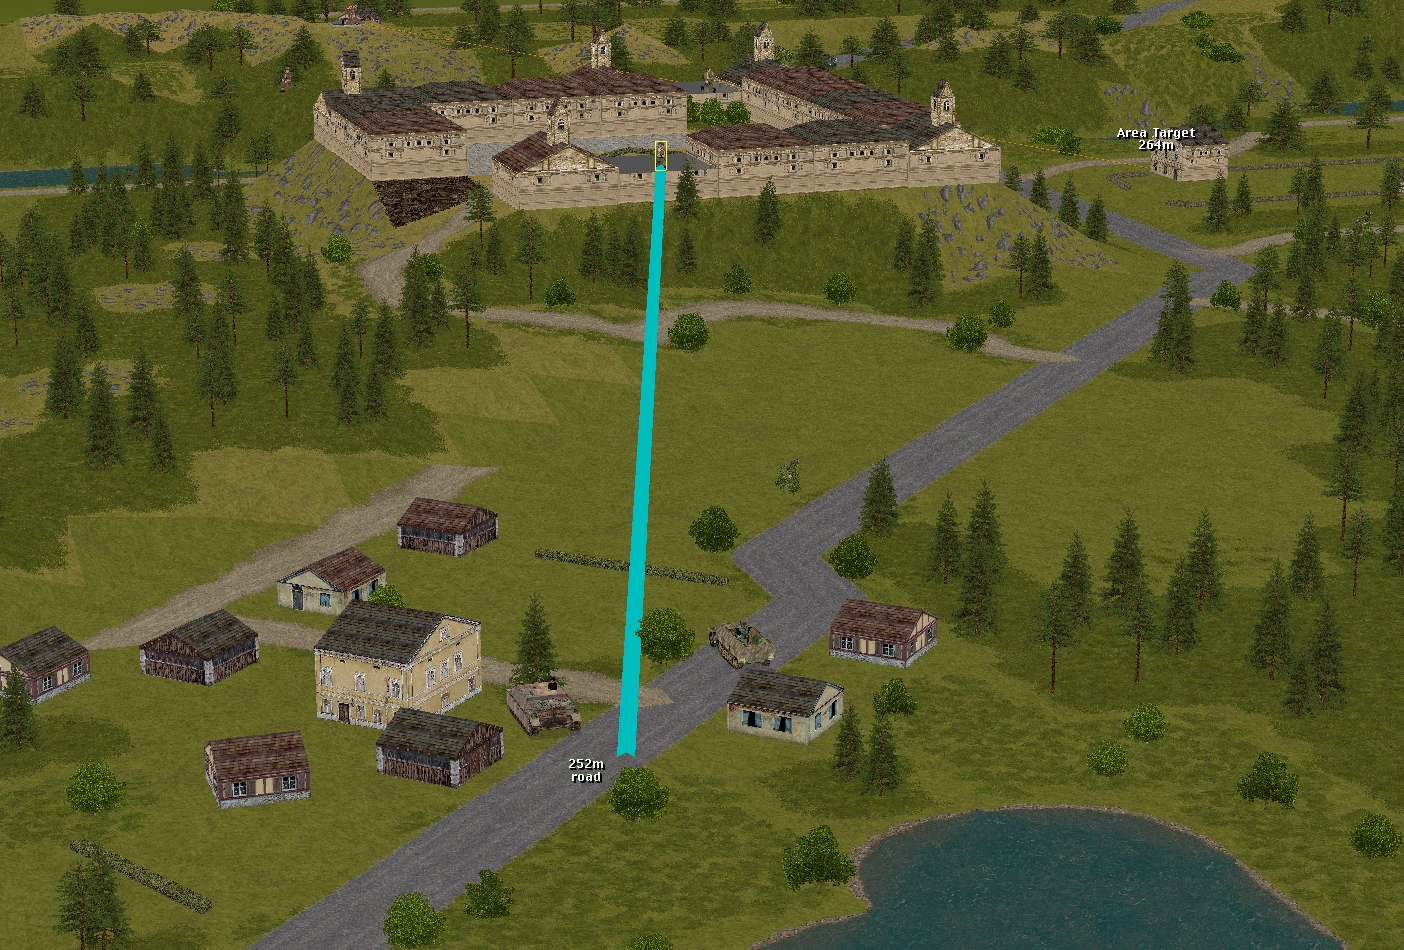
The second-storey room on the eastern side of the Schloss that Whitehand enters early in the sixty served as the castle’s museum in happier times. From its narrow east-facing window the inquisitive USAAF airman and his loader have an excellent view of the village of Nottingheim. They can make out the swans rippling the pond… the cat hunting near the hayrick… the halftrack and the Jagdpanzer idling beside the inn. 220 and 240 metres away respectively, both targets are beyond the effective range of the Americans’ pilfered Panzerschreck.
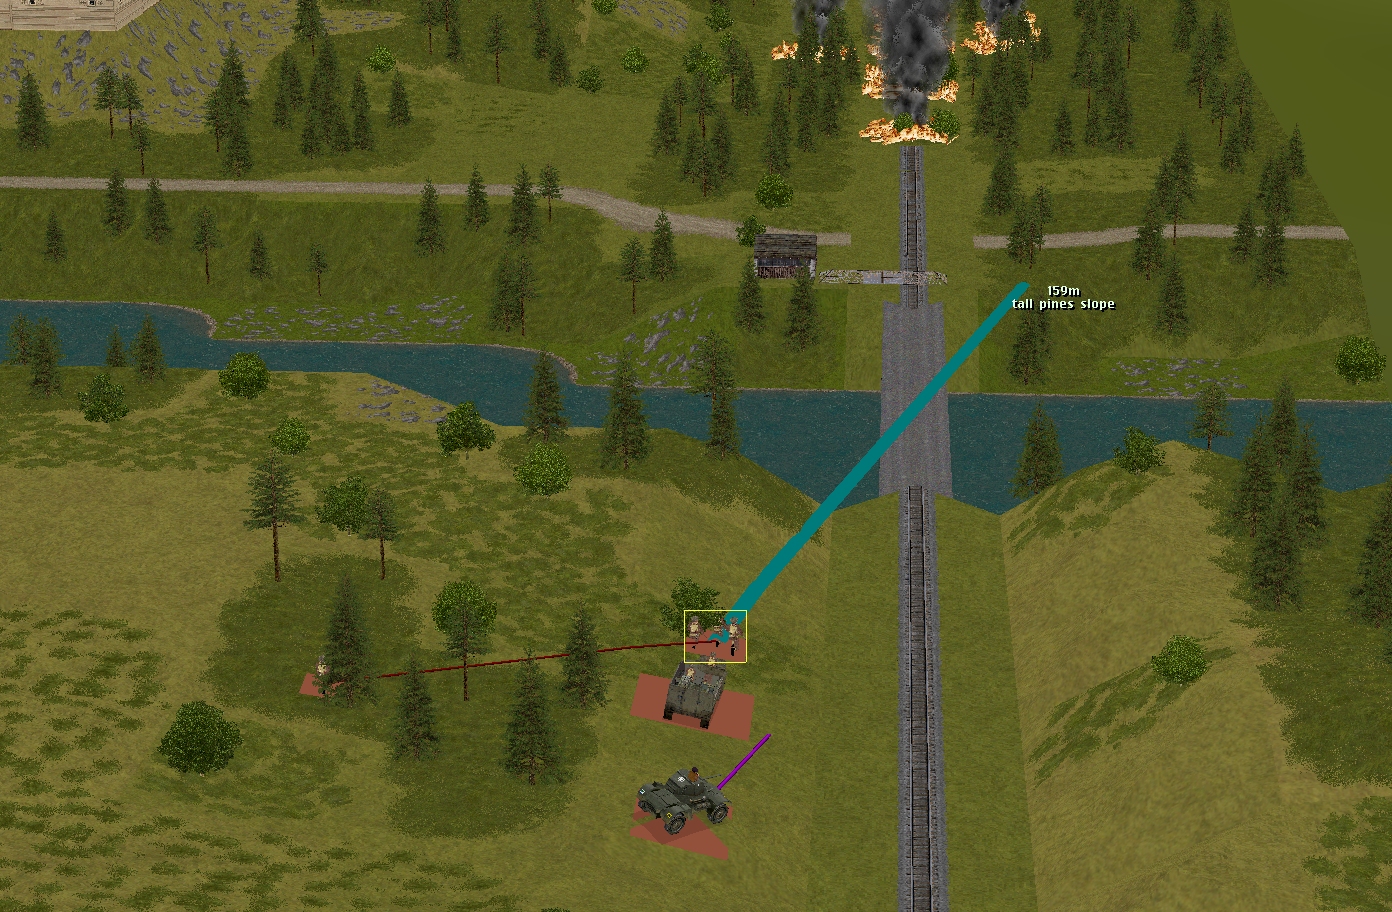
Although no other Allied units set eyes on foes this turn, advancing towards the rail bridge Corporal Fletcher’s halftrack and Sergeant Venison’s rifle squad espy a thought-provoking barbed wire barrier circa 3, 3, 4.
Impassable to wheeled vehicles, the obstruction doesn’t appear to completely block the eastern end of the bridge. It may be possible for vehicles such as the Daimler and HT to manoeuvre around its southern end.
Aware that he’s probably filling the sight of an expectant ‘88’, Corporal Much doesn’t linger long at the bend in the road at 26, 4, 5. The Humber’s hurried inspection of undergrowth on the far bank of the Bogen fails to reveal any muzzles, helmets, or disturbed earth.
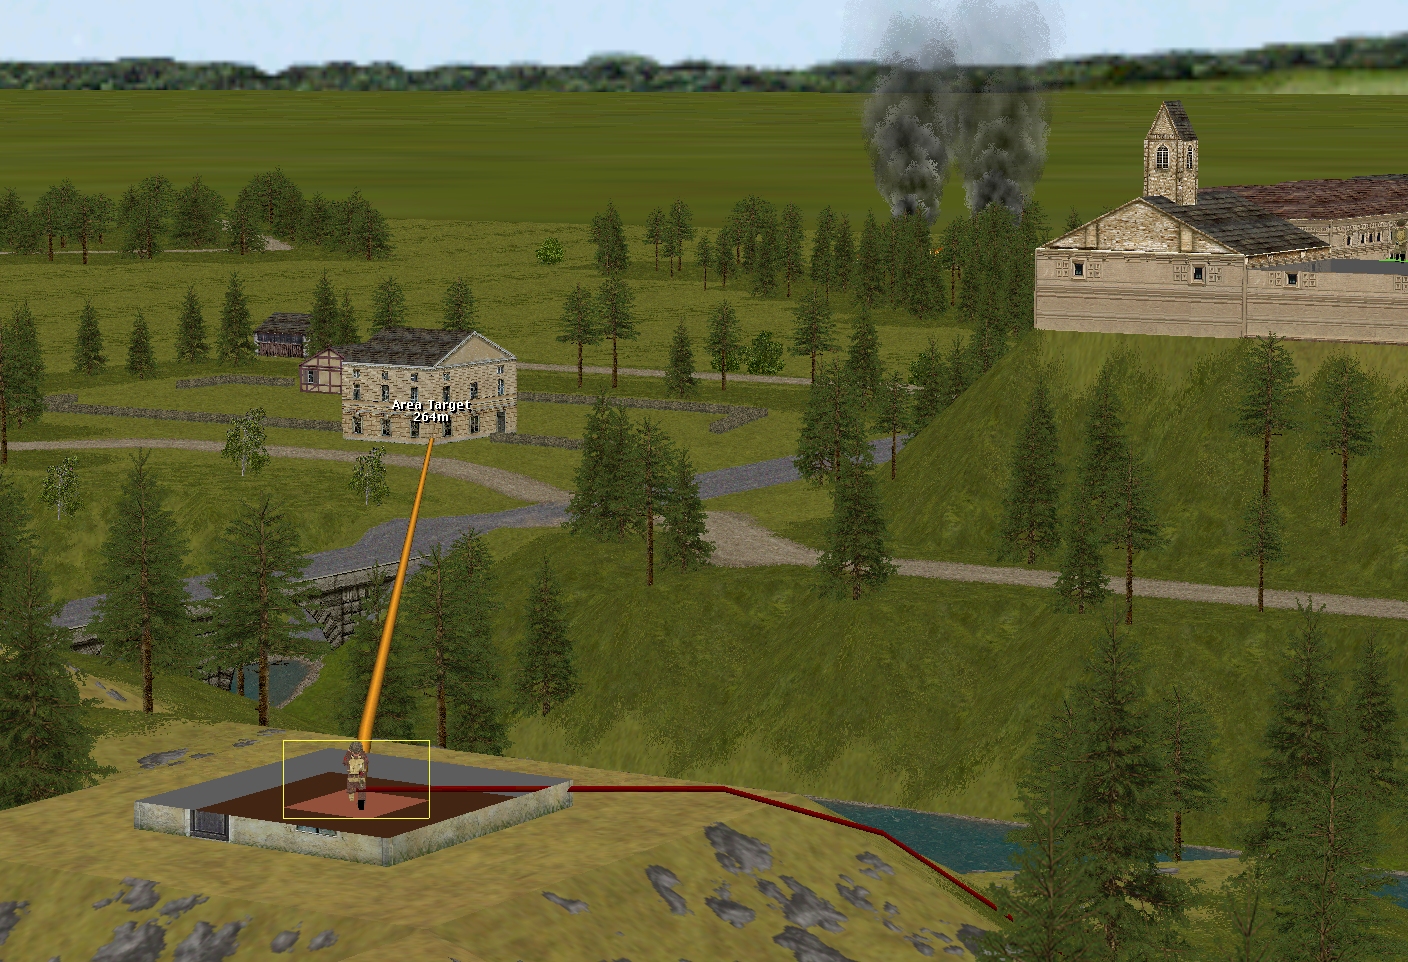
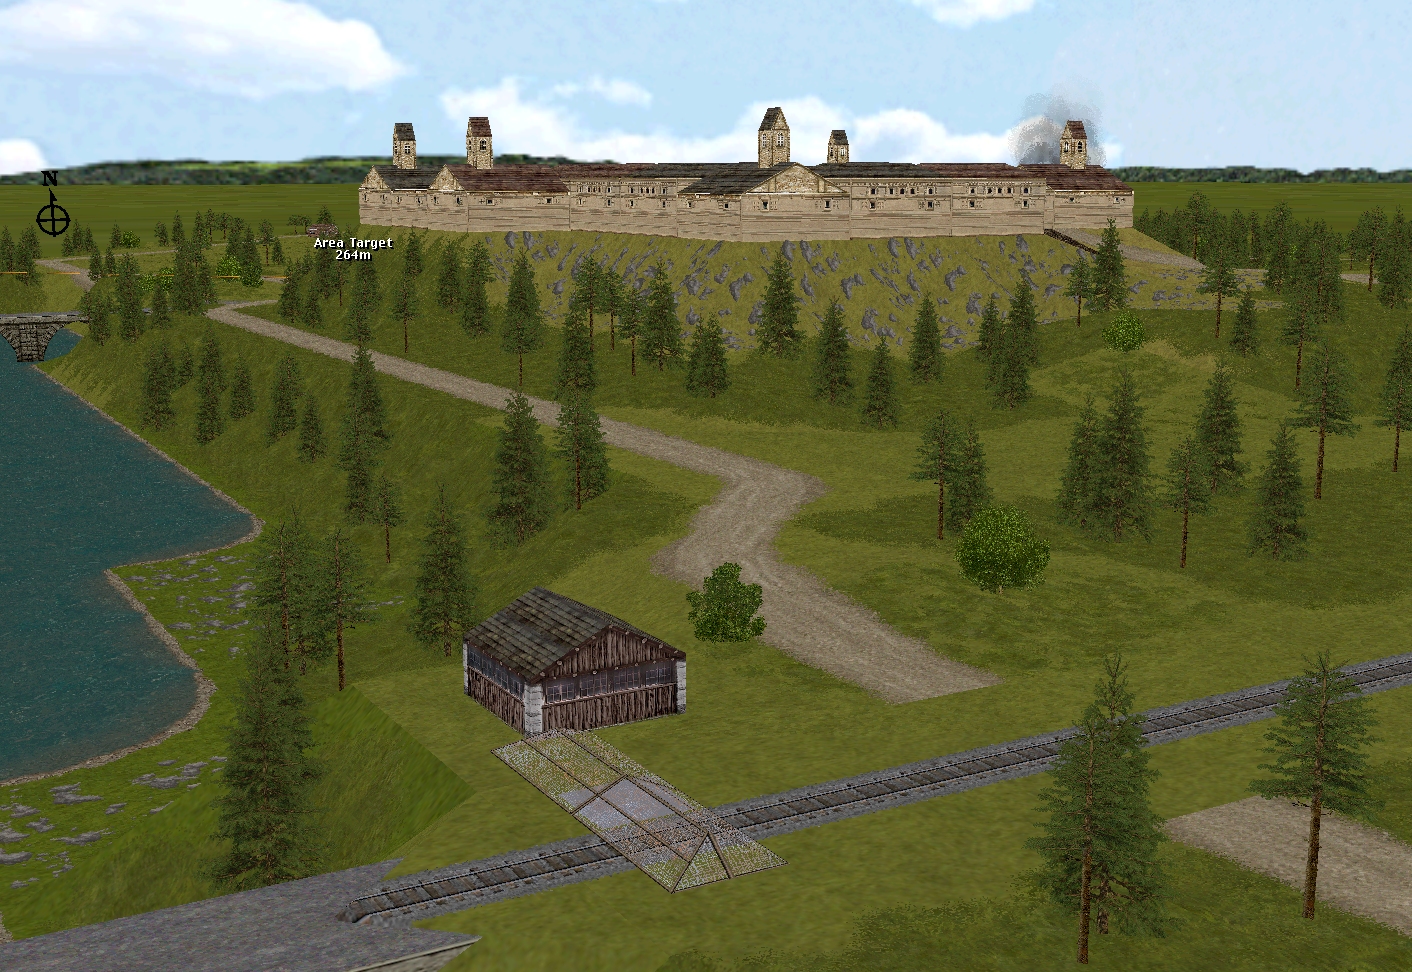
Talking of disturbed earth, there’s likely to be plenty of it close to the two-storey building at 36, 3, 2 in a few minutes time. When turn 2 ends, Tuck’s first arty bombardment of the game is just sixty seconds (one turn) away from commencing.
The situation at the start of turn 3:
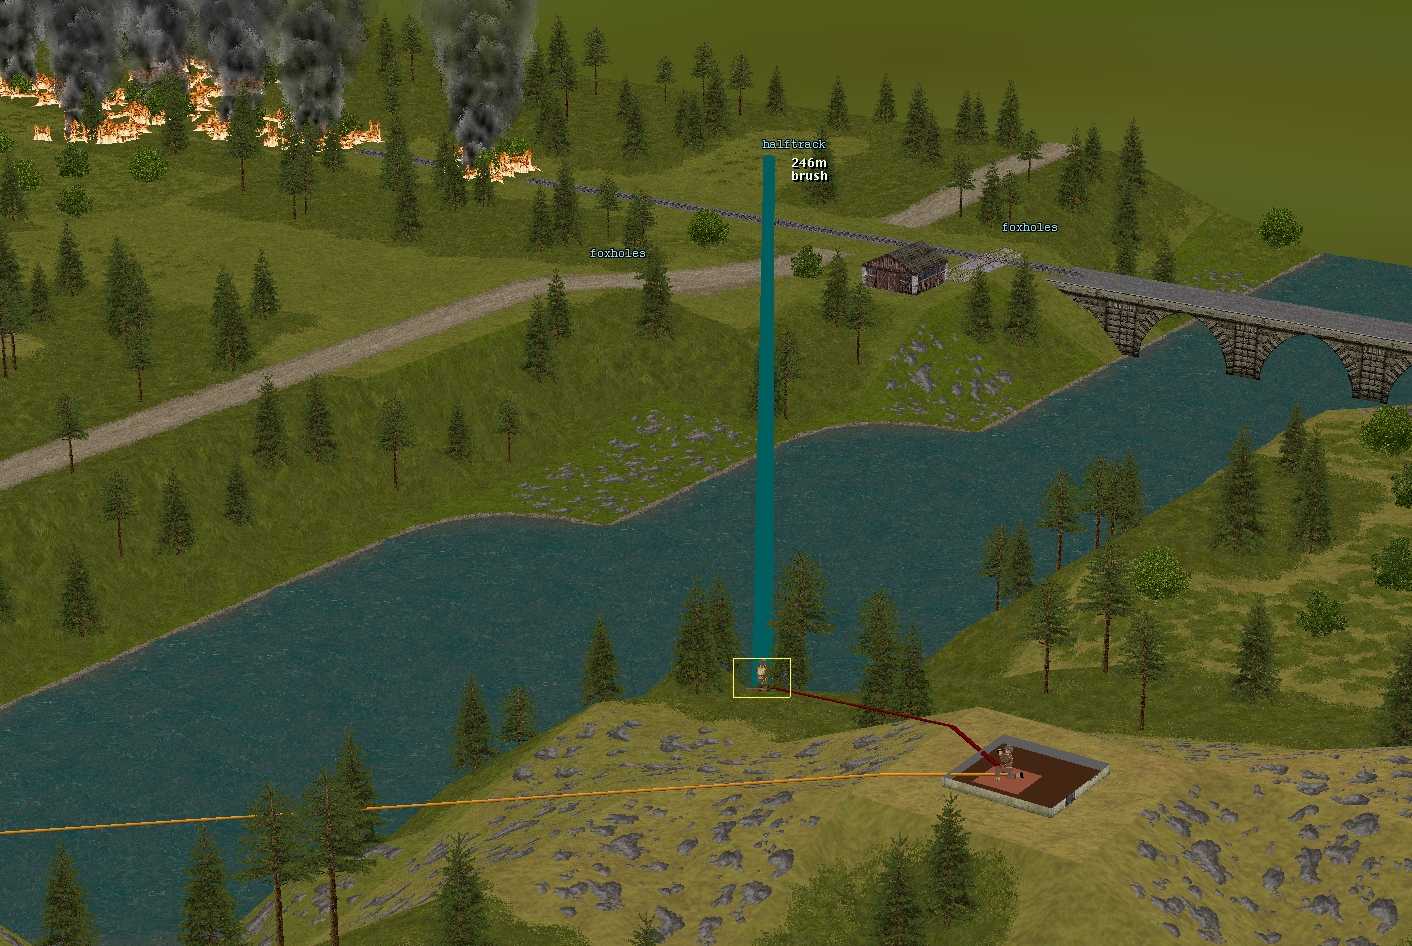
From his new position in the woods, Captain Hood has a good view of the eastern end of the rail bridge. He can see the cottage, the barbed wire, the clearing where an enemy HT may well lurk, and much of the north-south road across the river.
Venison and Fletcher’s view of the barbed wire and rail bridge cottage (3, 3, 5) is obscured by a finger of riverside conifers. Scarlet has more extensive line-of-sight. The commander of the AC can make out the end of the destroyed train, but can’t see the cottage or into the HT clearing. Hemmed in by forest, Lieutenant Merry can’t even see Venison at present.

Turn 3 orders here, please. Commenters are cordially invited to suggest moves for the following units (First come, first served. A maximum of one unit/unit group per commenter. I’ll try to execute the turn as quickly as possible after all orders are in.)
(See screenshots for unit locations)
****anyone****
– Corporal Much’s Humber scout car
– Corporal Fletcher’s M5A1 halftrack + Sergeant Venison’s rifle squad + Lieutenant Merry (Four-man platoon HQ, Venison’s boss)
****subscribers only****
– Captain Hood (Six-man company HQ) and Lieutenant Tuck (Two-man spotter team for a battery of 25-pounders. 120 rounds)
– Sergeant Scarlet’s Daimler armoured car
– Captain Dale’s party (Six POWs armed with pilfered rifles and pistols) + Corporal Whitehand’s team (Two POWs armed with a pilfered Panzerschreck)
Please start all order comments with ‘ORDER’ and any later revision comments with ‘REVISED ORDER’. This will help me distinguish firm instructions from suggestions and advice.
(Tim, could Lt.s Tuck & Merry, and Sgt Venison be listed on new lines to indicated they’re separate units available for command)
ORDER Sgt. Venison
SPLIT into two equal-ish fireteams
– Fireteam 1
MOVE to 10,1,1
SNEAK to 2,2,5 where they’d have a decent view of likely enemy locations: the building (and possibly also the foxholes) in [3]
– Fireteam 2
a dog-leg run, so please place the waypoint that they don’t do a 90-degree turn
FASTEST to where 1,5,3 meets 2,1,3
FAST to SE corner of 2,1,3
SNEAK to somewhere 2,2,3 – 2,3,3 with a view of the foxholes and building
>> could Lt.s Tuck & Merry, and Sgt Venison be listed on new lines to indicate they’re separate units available for command
As Comment Commanders seem pretty thin on the ground, I think it’s probably best if Hood and Tuck are overseen by one person going forward. Fletcher, Venison, and Merry should also be treated as one group from now on.
ORDER:
Whitehand: Sit pretty for now. I assume they won’t attempt to fire unless the armour comes within range.
Dale: I think it’s time for a bit of urine and acetic acid. Move back down to the ground floor, and in the unlikely event there’s any time in the turn left, HUNT to 28,3,2
ORDER
Hood to instruct Tuck to target the house at 3,3,5 with an HE bombardment.
It seems best to focus on the rail bridge at this time – once someone would like to make the crossing we could either switch to smoke or move the bombardment further back.
Tim,
It seems there are a few units without instructions. As we are fast approaching the order deadline I’ve taken the liberty of issuing orders for those units. If I’m breaking commander protocol then please ignore.
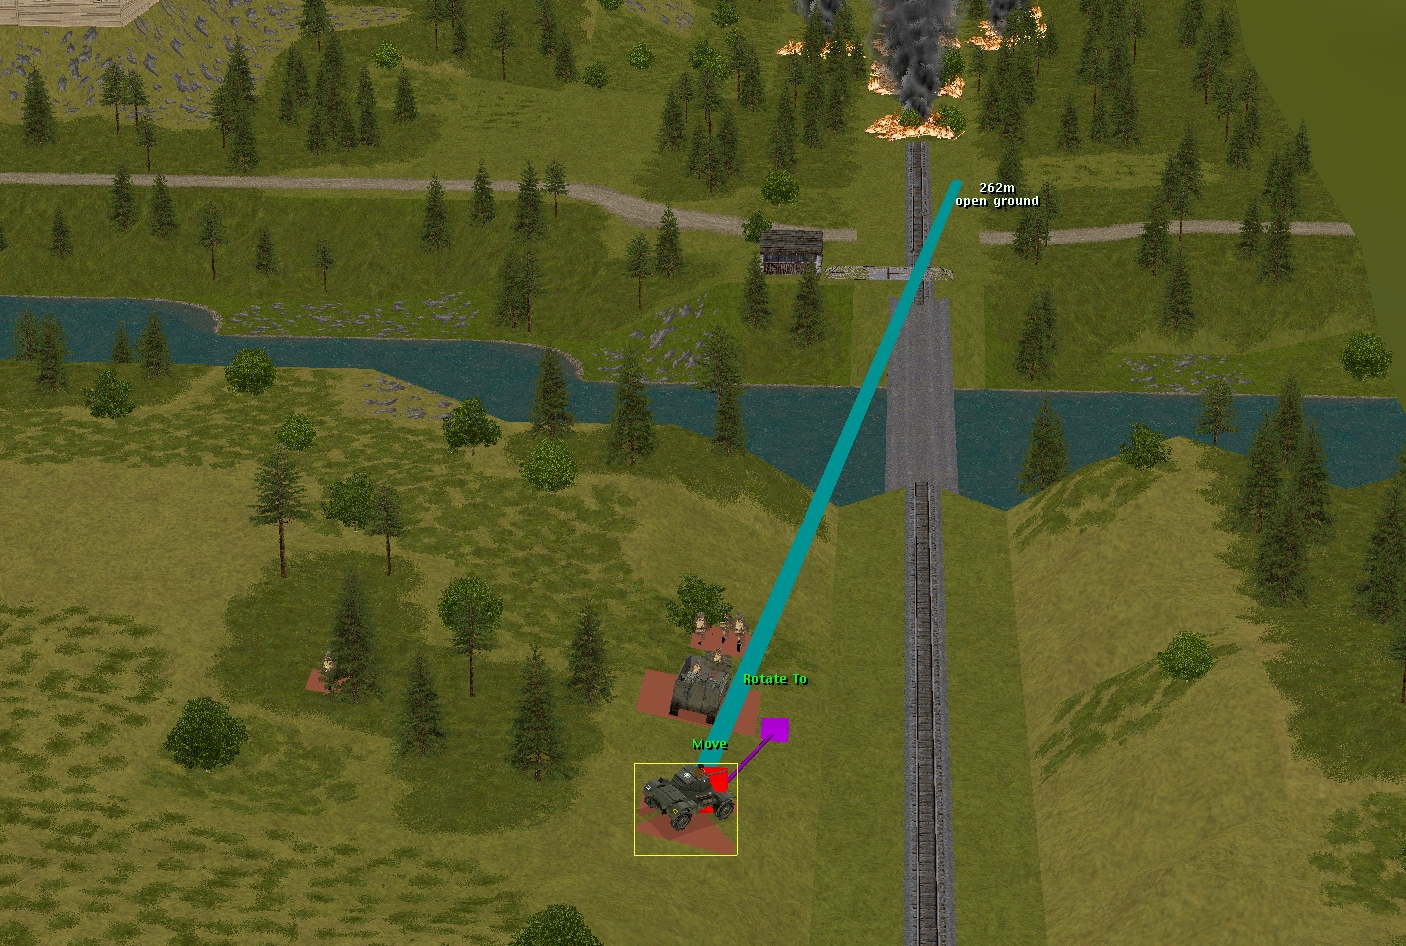
ORDER: Cpl Fletcher – Move to 1, 4, 3. Area fire on cottage 3, 3, 5.
ORDER: Lt Merry – Move to 10, 1, 1. Sneak to 10, 2, 1. Hold fire.
ORDER: Sgt Scarlett – Halt all movement. Rotate towards clearing 4, 1, 4. Area fire on suspected foxhole location 3, 3, 3.
Thanks for hopping in to handle Scarlet (in particular, since I had for the first two turns)—with a new baby in the house, my sense for the day of the week is gone.
No problem.
More importantly – many congratulations to you and your partner.
The first 21 years are the worst!
Hooray! I haven’t got anyone killed yet! (and the nasty scary tank is miles away from the Humber)
Honestly though, I’m a bit stumped as to what the Humber should get up to next.
We could use the artillery as a distraction and zoom across the bridge while the enemy has their head down, but I think driving straight at a possible 88 doesn’t sound like a good idea.
We could hold it in reserve to dash across the bridge to hold the other end *after* other units have successfully eliminated the enemy there.
We could also reverse course, and head over to the rail bridge with everyone else.
The one I’m not sure about is that I don’t know if it’s possible for an AFV to sneak through wooded areas. It might be possible to get to 27, 1, 4 without getting in view of the suspected 88, and then maybe our scout car could do some actual scouting.
AFVs or indeed any vehicle cannot move through heavily wooded areas such as 27, 1, 4.
The party at the rail bridge will need a scout once the bridge is crossed.
@Tim: Can our artillery fire smoke rounds as well as HE? I would love to belay our saturation fire on a hardened building if it means we might be able to cross the bridge unmolested by an 88.
Tuck has 120 rounds at his disposal. They can be fired as HE or smoke. You could for instance target a spot with HE for a spell then switch to smoke, before targeting a new spot with HE or smoke. Expect to expend about 12 rounds per turn/minute once a bombardment starts.
It looks like Tuck is still within command range of Hood? So Hood could spot for some arty around the rail bridge if we wanted to cover a crossing.
Yes, this is possible.
Looking at Tim’s instructions for this turn Hood and Tuck now form part of the same unit for ordering purposes. As you have commanded Hood from the beginning it’s only fair you should continue with this new grouping – assuming you wish to do so?
Some suggestions:
Scarlet’s armoured car
– probably well located to pot the half-track if it emerges
– maybe just needs finessing with a Target Arc?
Lieutenant Merry
– can move eastwards to continue giving moral support to Sgt Venison
– destination 10,2,1 but with some degree of caution?
Corporal Fletcher’s halftrack
– move south of the railway line (eg. 1,5,3) and face the cottage?
I was going to suggest something very similar + some minor variations:
The armd car looks like it still has an unspent movement order, it would be better to stay where it is. I may be wrong but I don’t think this version of CM enables target arcs?
Lt Merry-yes end with a sneak command into the wood. He may also be able to view the foxhole area circa 11,5,1 as well as the shack.
Half track – If there are any pz.schreck wielding foes in the cottage or in the foxholes circa 3,3,3 both it and the a/c are moving into its max range (150m). I’d probably go 1,4,3 until we know what we are up against. I’d also consider ending the move with an area fire command on the building. The a/c could do something similar with the foxholes.