Green Tree Games have given me permission to share an account of a Burden of Command mission ahead of the April 8 review embargo, but the more I think about it, the more convinced I am that shedding light on any of BoC’s campaign outings at this point in time would be an act of vandalism. The devs have worked so hard to give us insights into the tactical and moral quandaries faced by WW2 COs like Richard Winters, providing anything resembling ‘advance knowledge’ of an engagement feels wrong.
But if I deliberately disguise or withhold key information about the scenario in question, avoid using screenshots, and keep my account brief, perhaps I can illuminate my last BoC mission without irrevocably compromising it.
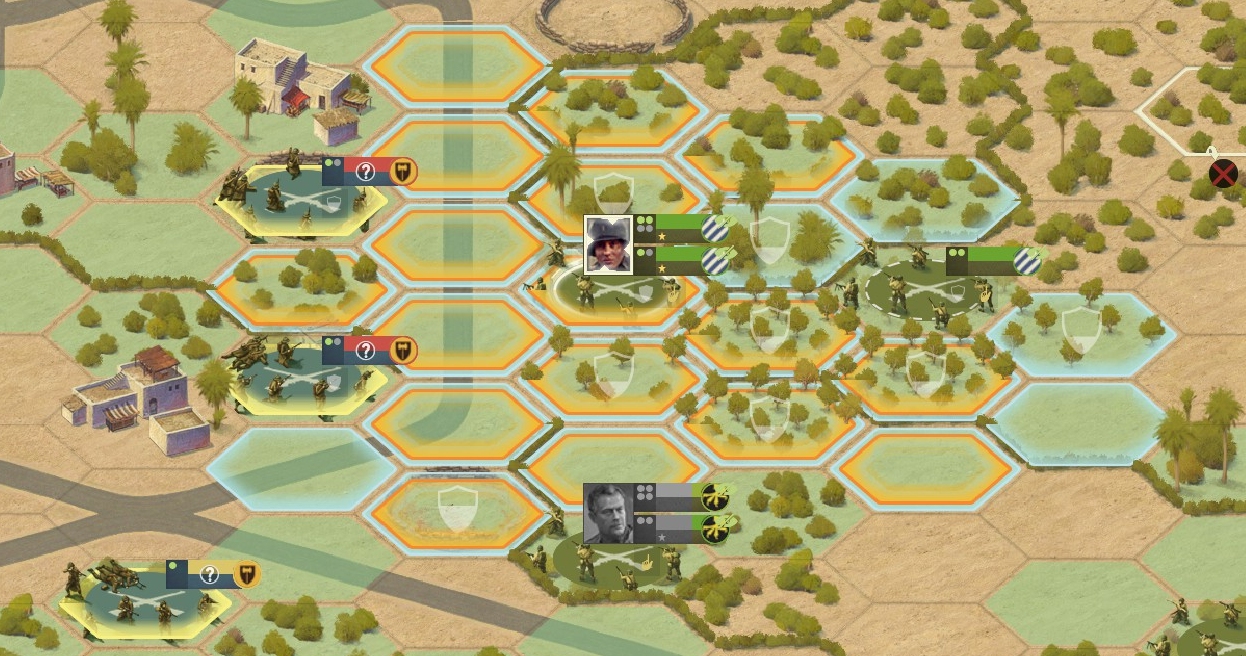
To say that mission ‘didn’t go according to plan’ would be to mislead from the outset. The truth is I hadn’t formulated anything firm enough to be called a plan when I issued my first order. Aware that my three platoons had thirteen turns in which to take three victory locations at the northern end of a largish, fairly complicated map, I knew I couldn’t dilly-dally. Aware that armoured support was ‘on its way’ I also wasn’t, at the start at least, all that concerned that my men were going into battle sans a heavy weapons platoon, off-map arty support, or the useful Captain Lamb.
However, the lack of intel on enemy positions and strength, and the number of fortified/entrenched hexagons between my units and their objectives, was perturbing.
The advance had barely got started when it began to bog down. Harried by an HMG entrenched on high ground, the three squads at the centre of my trident thrust quickly lost momentum and shape.
While attempting to flank this progress preventer, my right-hand platoon blundered into the kill zones of two previously undetected enemy rifle squads, and was soon in a jam far worse than the one it had hoped to alleviate. Its plucky leader was dashing hither and thither attempting to remove suppression and bolster morale, when an incoming round suddenly removed his mugshot from the portraits at the top of the screen. My first leader casualty of the campaign, this unexpected blow hit especially hard because, deep down, I knew I’d been using Lt ******** recklessly before the fateful shot was fired.
Keen to restore momentum, I turned my attention to the western side of the battlefield. Perhaps I could relieve pressure by gaining ground on the left. Aggressive maneuvering commenced and was going reasonably well until Lt ********, the platoon leader funding actions on that flank, stopped a bullet too.
Now I was really in the brown stuff. With the halfway point in the scenario fast approaching, apart from losing two of my three squad shepherds and discolouring the morale bars of many of my units, I’d achieved virtually nothing. Overcome by regrets and pessimism, I confess I did go in search of a ‘restart scenario’ button at this point. Of course, I didn’t find one. As Green Tree Games spurn this traditional blush sparer, I had no option but do the soldierly thing – grit my teeth and press on.
Using my avatar and two ‘acting’ platoon leaders I set about pulling back vulnerable units and steeling waverers. All thoughts of taking the VLs had vanished (In BoC, failing mission objectives doesn’t necessarily bring the campaign to a grinding halt), but after some remedial work, maybe I could get some revenge for my two dead or WIA lieutenants.
I was just about ready to push again when two Stuart tanks rolled onto the screen. Seeing the effect their Browning MGs and 37mm main guns had on the closest enemy infantry squads, and the number of reachable hexagons they lit up prior to a move, all of sudden snatching a VL or two before the mission deadline expired didn’t seem quite so impossible.
Working with the light tanks, the Cottonbalers quickly gained ground. When enemies weren’t in view, I used the Stuarts’ recon-by-fire capability to investigate suspicious hexes, and, aware that time was scarce and resistance was thinning, I let demoralised squads skulk, so that platoon leaders could spend their precious order dots on the bolstered movement and bayonet charges of squads still in good order.
Amazingly, when the last turn ended, all VLs were in Allied hands, and I found I’d achieved both a Major ‘Mission’ Victory and a Major ‘Men’ Victory (In BoC, if you take high losses while achieving your mission objectives, this is reflected in the important ‘men’ verdict). Even the post-battle texts and choices weren’t as harsh or heart-wrenching as anticipated. It turned out neither of my two platoon leaders was seriously wounded. Do BoC stars like Lt ******** and Lt ****** lead charmed lives, I wonder?
Of the various hard lessons I learned at *********, I sense the most important might be ‘Never abandon hope in Burden of Command’.
How about a series of Communal Combat Mission Shorts?*
Comment commanders vote from a short list of options presented with minimal info and don’t get the results for a week. For example:
Day 1 – Squad is fresh and not in combat. Does it:
a) advance direct on objective
b) provide overwatch for friendlies
c) move cautiously to cover?
Day 2 – Squad {no comment if this is the same squad as yesterday} is under sporadic fire. Does it:
a) charge the enemy
b) retreat
c) hold position and return fire?
– – – – – –
* If anyone from TenCent is interested in purchasing the idea, bidding starts at 1 billion usd or a packet of Ceylon Orange Pekoe tea.
Tim,
What a personal pleasure to read your account. Gave me chills honestly after all these years to read you recounting your (mis)adventures. And your writing is always top notch with that slight sardonic cast. I can definitely see you being a UK leader in WWII 😉
I hope your leaders survived the scenario? And thanks for not save scumming. FEEL THE BURDEN.
Luke
Luke
Morale +1. Thanks.
“I hope your leaders survived the scenario?”
They did, but one of them was hit again two missions later.