
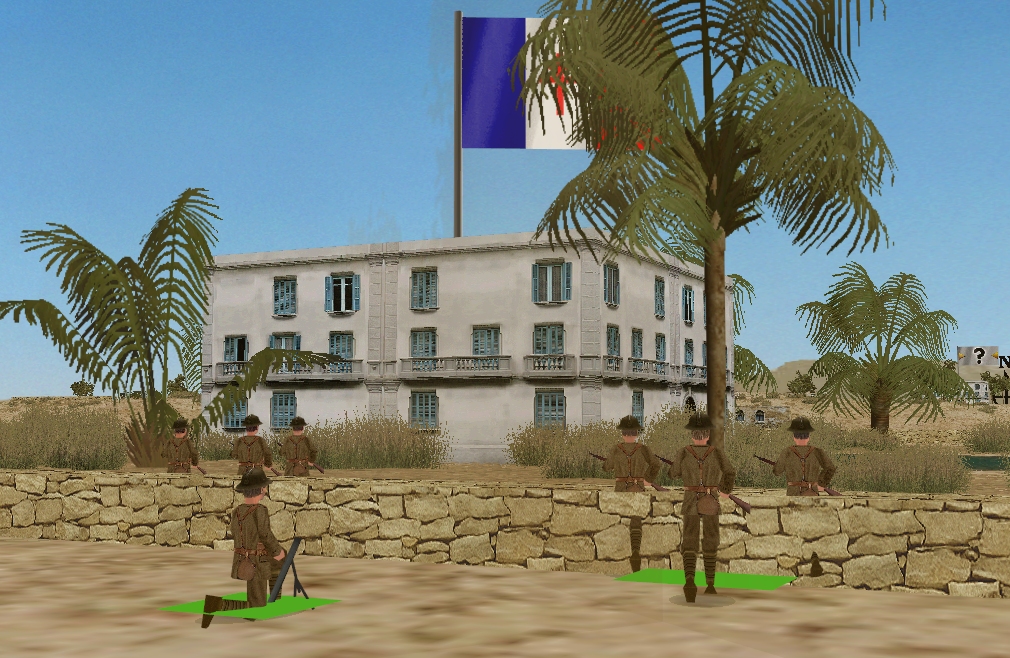
Turn 3’s most exciting incident? Probably, Team GB’s Corporal Baldrick almost putting his hand on a Deathstalker scorpion while vaulting the villa wall at M32.

Although the dust clouds in the NW corner of the maps seem to grow denser this turn, and appear to edge closer to Mosque Hill, neither team spot anything resembling a foe during this sixty-second burst of WeGo action.
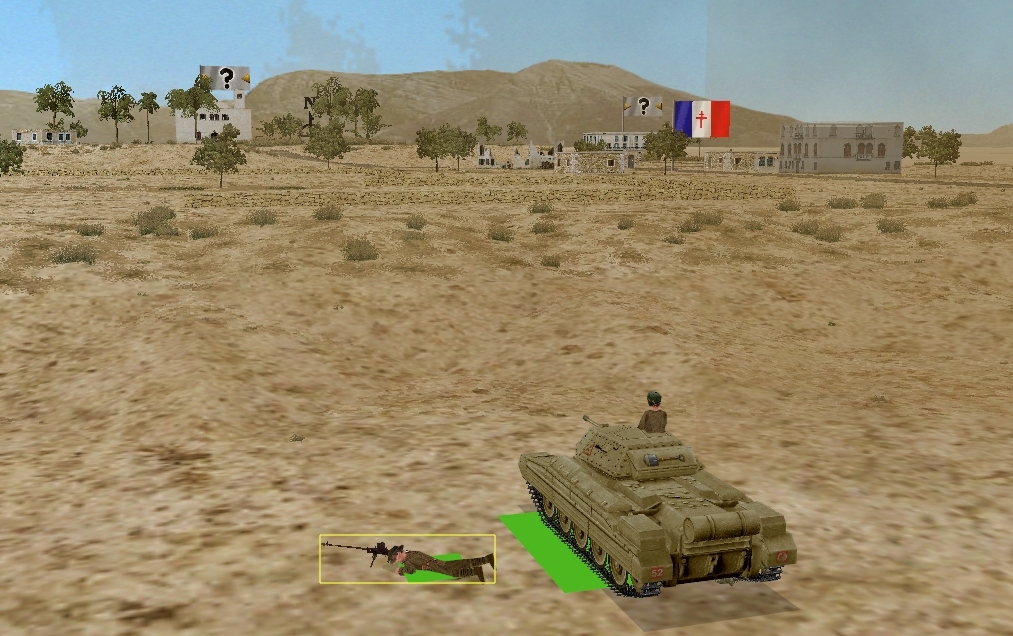
There’s a ripple of applause from spectators watching the French event when Gallic infantry reach the closest VL, and another when the Crusader arrives at its final waypoint and offloads its AT rifle team.
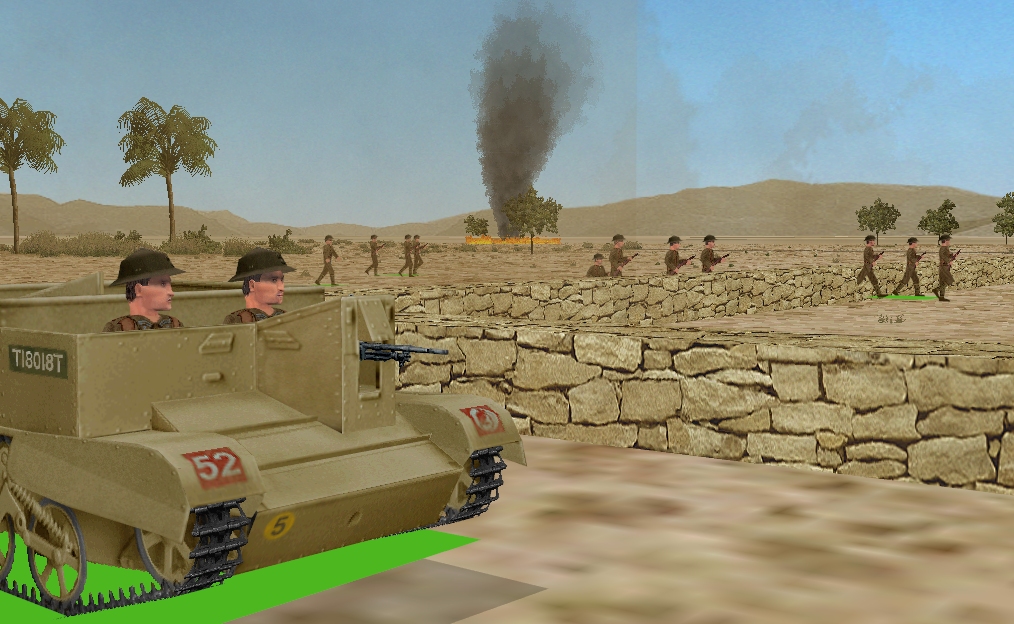
What do the Tricolore wavers make of their Bren Gun Carrier’s bold advance down the eastern wall of the villa? There’s the odd murmur of concern, but most of the crowd seem to approve of the move.
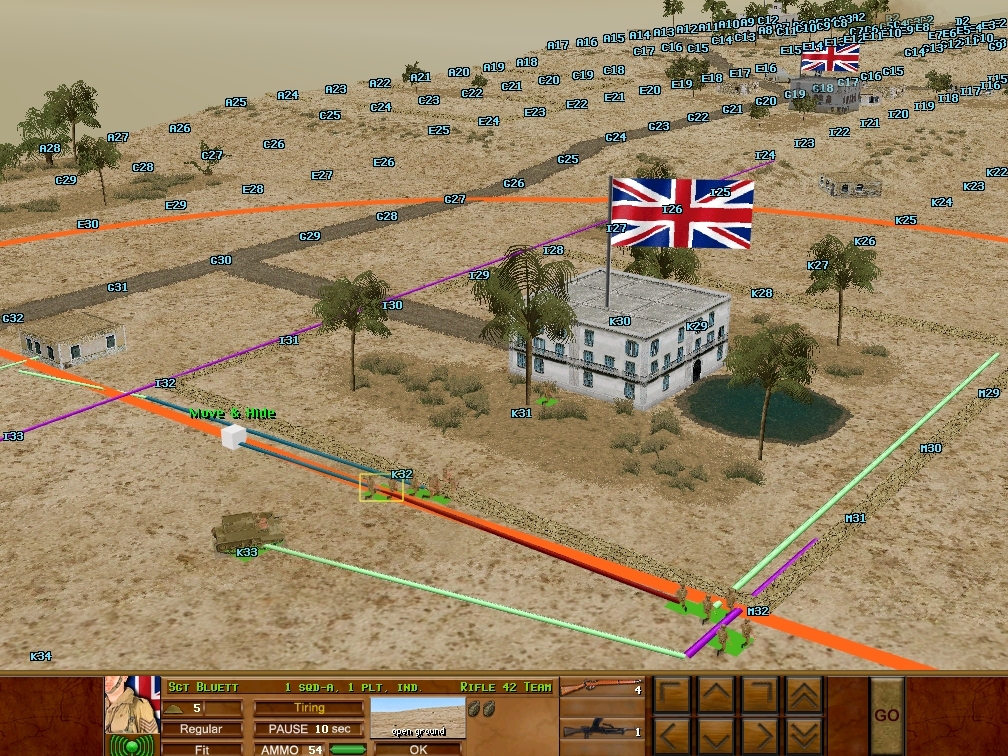
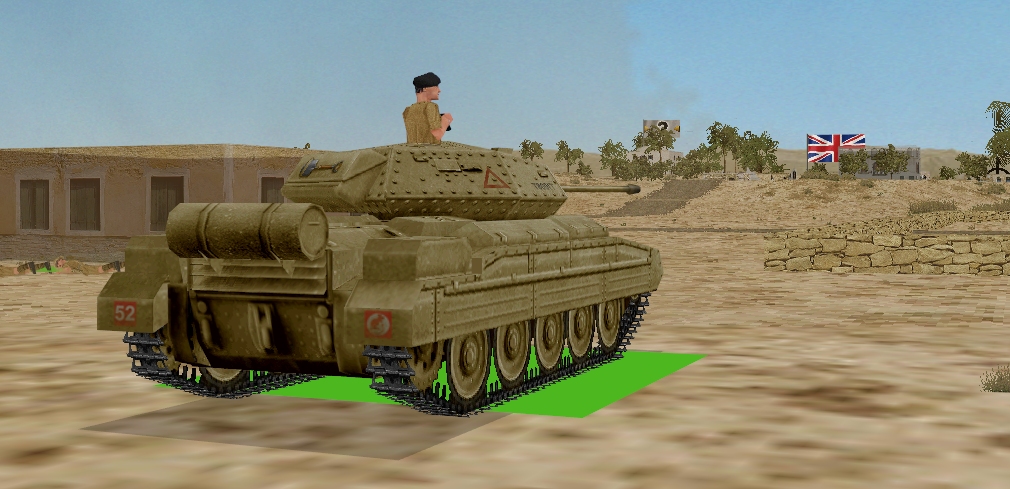
The British Crusader also delivers its fare this turn. As newly-created Tommy half squads scamper for positions SW and NE of the villa, the Brits’ anti-tankists make their 16 kg burden comfortable on a cushion-padded window ledge at H32 and prepare for action.
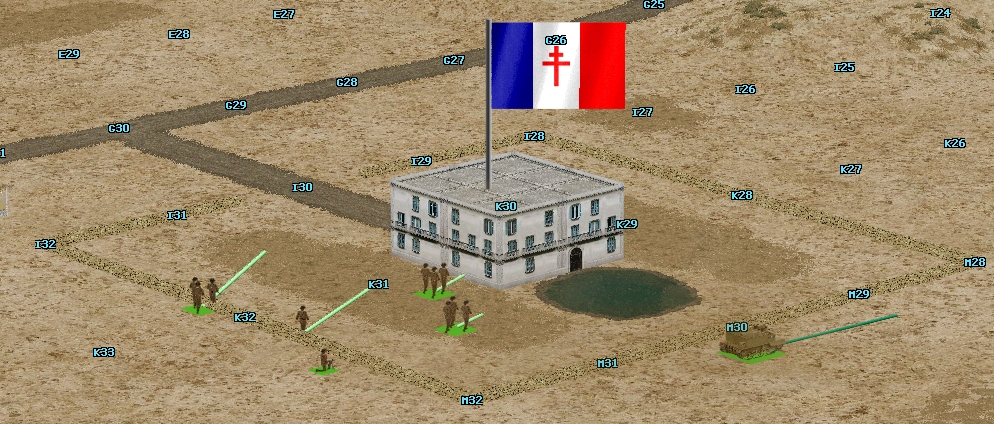
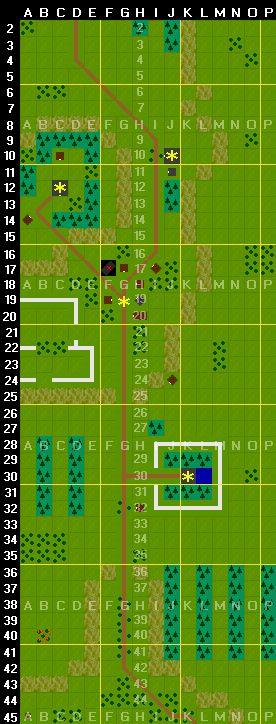
The situations at T+60:


“the Brits’ anti-tankists make their 16 kg burden comfortable”
We woudn’t have to put up with metric measures like this if the UK contingent hadn’t kowtowed at the inaugural session of the Federazione Internazionale di Combat Mizzione.
Strange, it’s usually the French who come up with le Fédération Internationale du Thing, no matter who invented Thing.
Good on the Italians for getting in on the action.
I’m being unfair on the FICM as pop-up facts like this are the responsibility of the host broadcaster. (The BBC could’ve sent a team to produce their own content but nooo)
Look forward to turret rotation speed in seconds per 100 gradians, and the length of a SMLE in Thermidors.
Team GB Discussion!
As a member of Team GB, I am definitely not at home today because of a North American bank holiday, so the only possible conclusion is that I’m writing this at work.
With that out of the way, oops. I should have specified that the order canecelling applied to the AT team, too—would have liked to keep them on the tank for now, but I guess we’ll leave it.
Given that they’re now dismounted and I don’t think I want to spend a turn remounting them, maybe I send them to the top floor of the villa after all, at least for now, for some spotting. Either that, or they dash for the house at J24, and thence up the hill to H20 at either a run or a sneak, depending on whether we have enemies in sight.
I’m less sure what to do with the tank. I don’t like where the Frogs have sent theirs, with the Germans seemingly going fast toward Mosque Hill, and in force, but the opposite side of the map seems to have very little to recommend it—limited cover and concealment, and no objectives.
Might one suggest considering an additional instruction for the roof bound pipe luggers?
As they will not wish to be disturbed while brewing up avoiding the premature initiation of what would become quite a fracas may perhaps help them avoid unwanted attention.
Obviously should some uncouth neighbour cause contretemps with the sunbathing soldiers then a swift riposte would only be appropriate.
I wouldn’t want to remount them anyway at this point. I think we take our recon squad ahead, and the AT team can be behind them, moving on alternate turns. That way if we run into the enemy light armor we have a plan.
Once the half squad reaches the building I’ll work them forward, while the bren team covers both. Might we want to hunker the tank down behind the house with a keyhole out? Should we encounter the enemy armor I would much prefer they shoot at our infantry than our tank.
I think I’m generally on board with that. Squinting at the dust clouds, it looks as though there might be something coming along the road through the village, plus something moving for Mosque Hill. I think, in hunkering down, it would be better to have a keyhole view of the road than of the hill—anything coming down the road presents an immediate danger to our infantry.
The French thread reminds me that the pilot in town activates next turn, and we should probably make some plans to either get him out of Dodge, or get into Dodge before the Germans find him.
I have become painfully aware of how this wall does not conceal the low-low profile of the carrier all that well. We have to consider our options
Indeed. The elevation advantage from the village would not help matters either, I assume.
Hopefully we will have some firmer idea of enemy positions after this turn, with the Crusader shooting and scooting, and the infantry occupying a higher viewpoint in the building. This could give us some idea of when enemy units would be approaching the building, I guess? Then you could maybe roll back out of sight and prepare for an ambush.
Having said that, could the building at J24 provide enough concealment? Assuming you could make a dash to lurk in the SE side of it without being spotted and potted. Or maybe that’s a dumb idea.
Another thing to consider is that we will need to get Charles de Gaulle’s buddy out and away from the village at the end of this next turn (i.e. start of turn 5), and we will need to do it pretty bloody tout de suite. Having a carrier much closer to the village could well be an advantage for an evac.
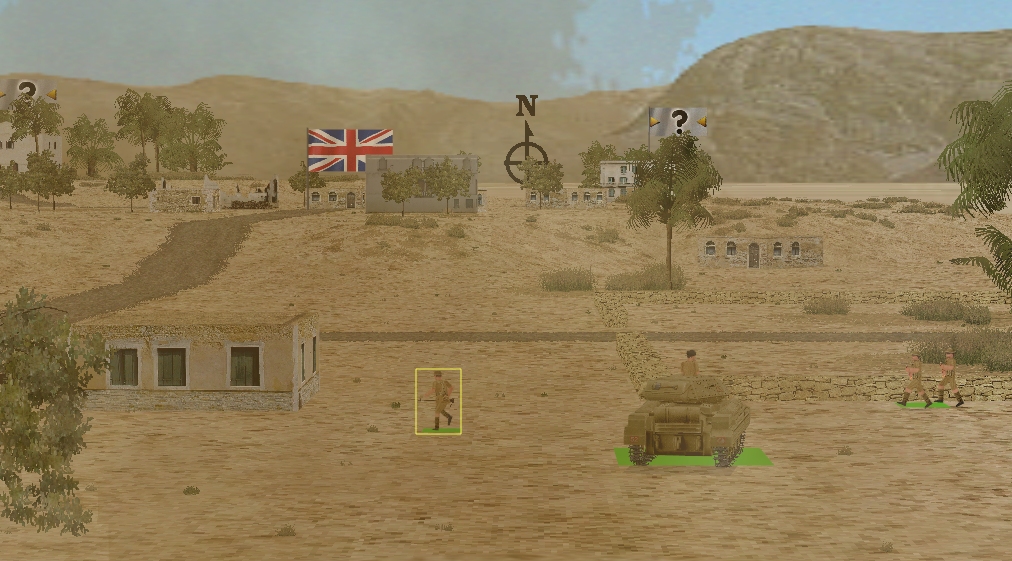
French pilot here; I believe turn 4 is the activation for me. Best to move at speed directly south, or slowly and down that line of trees? I’m at H20 and could maybe try a dash to J24 building, then wait for extraction by carrier, or just book it when things get hot and there are higher priority things for them to shoot at.
Good to hear from you, comrade. We’ll have you feet up and tucking into a steak frites at the local bistro as soon as we can. (Might be a camel steak)
To me the line of trees doesn’t look like it provides all that great concealment, with full visibility from many of the main village vantage points. But I’m basing that off the 3D view, and maybe CMAK will model the cover differently.
My vote is probably for a dash to J24, but I guess we’ll have to see what heat we’re getting from the village, and from what direction. It also depends on what Gobser is planning with the Bren. I should also reiterate that these are just thoughts, as I am in no way qualified to quarterback this mission.
Yes, it would seem so. I am thinking about a dash towards the building. It has potential to both allow me to recon the situation on the move, being a difficult target (I hope) and gain some cover + to get a jumping off point for our daring rescue.
However there are two concerns for me:
1) Getting shot (I am not sure that I will hiy though, if I move non-stop and if the enemy do not anticipate this)
2) Dust. It has potential to lower visibility for our troops quite a lot and reveal my position. But this might be great too, if the enemy thinks that the dust clouds are from a tank rather than from what I really am. This could potentially lure them in
@Tim ORDERS for French Bren Gun Carrier. Move as fast as possible to J25 with purpose to get into cover from the northern part of the map.
If it is possible to hold fire when going – that would be perfect. Hopefully, you or the AI can adjust the waypoints to avoid obstacles and to avoid turning on the stop
I think that’s a good call. The dust lure could also take their eyes off the west side of the map, which is good for me.
@Tim FRENCH F3 ORDERS:
AT: FAST to A26, HUNT to A24, target arc A10-J20
Crusader: SHOOT C24 and SCOOT C27, target arc A10-J20
(In case it’s not obvious, by A24 and B24 I mean above the slope but behind the wall, kind of the border between row 24 and 25)
@Tim FRENCH F4 ORDERS:
Not sure of the limitations of the French pilot, fastest possible move to J24 house please, but if that’s beyond the movement capabilities, hold in place.
@Tim GREAT BRITAIN GB3 ORDERS
Crusader:
Reverse to roughly I33, so that the building at H32 intervenes between the tank and the mosque. If possible, I’d like a view at the road up to the mosque starting at roughly E17, and will accept partial concealment from the mosque building proper if needed.
Target arc from C12 to J10.
AT rifle team:
Target arc 180 degrees north, extending to G24.
@Tim BRITISH GB2 ORDER: the lads shall remain in position like a mountain, thank you. My God man, that was a close call with Baldrick back there!
See you next week (Lord willing)
—
BRITISH TEAM NOTE: As for Baldrick’s cunning plan, he said he hopes Churchill’s cousin and stand-in (Aleister Crowley) will be available soon from the depths of the Scandinavian forests. If he remains hidden, there is no spotting – and certainly no spotting for the mortars, since only the HQ (in range) can do that. Perhaps it might be best for him to leave the building (before it gets stormed and searched by DAK troops) and relocate and re-hide to a new position (but staying close enough to claim the victory points)? Either that, or just make a desperate run for it in a Southerly direction, perhaps to the villa?
PS: If our AT team was let’s say, on the top floor of the villa, please remember they cannot give spotting orders to our mortars (only HQ can do it). And since Baldrick’s mortars are hidden from view with no LOS behind the villa, they cannot fire until our HQ team has Enemy eyes-on. Cheers!
@Tim F1 ORDERS:
Finish all unfinished previous orders, then:
Squad 1 move to I27
Squad 2 move to K28 (behind wall)
Squad 3 split squad, send halfsquad 1 to the upper floor, halfsquad 2 to J28 (behind wall)
HQ move to I28 (behind wall)
ORDER GB1
Squad at K32 splits. Bren element FAST to K30 ground floor, SLOW and HIDE to floor 2. Thompson element waits.
Bren squad at J32 FAST to J29 and HIDE behind the wall.
Thompson squad at H33 waits.
Bren squad at M32 FAST to the wall at M28 to combine with the other half on arrival.