

While it’s theoretically possible that the distant dust clouds spotted by both teams during Turn 2 have been raised by restless breezes, stampeding camels, or whirling dervishes, by far the most likely culprits are Afrika Korps AFVs on the move.

Apart from those ominous brown smudges in the NW corner of the map – which become visible circa T+20 – this is another uneventful sixty-second slice of WEGO action.
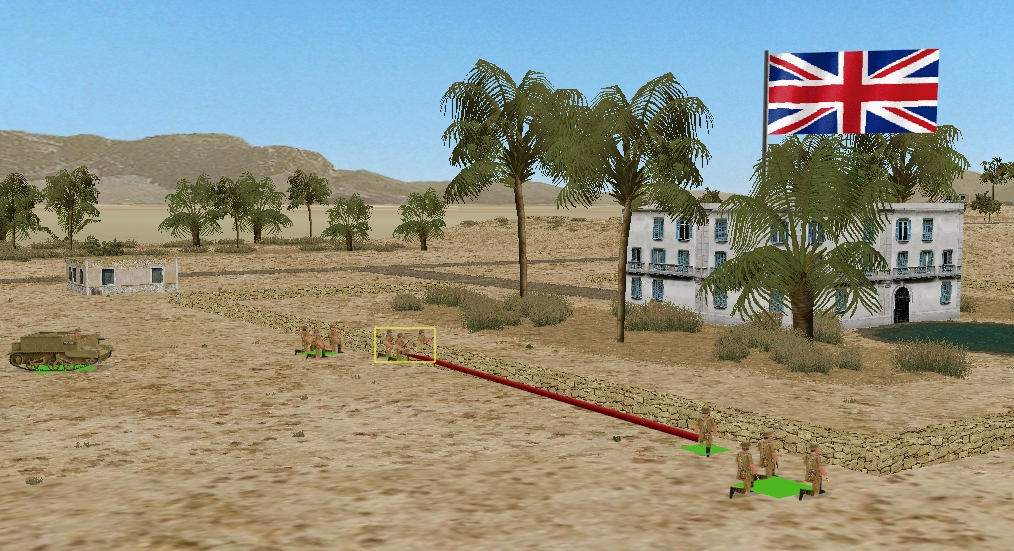
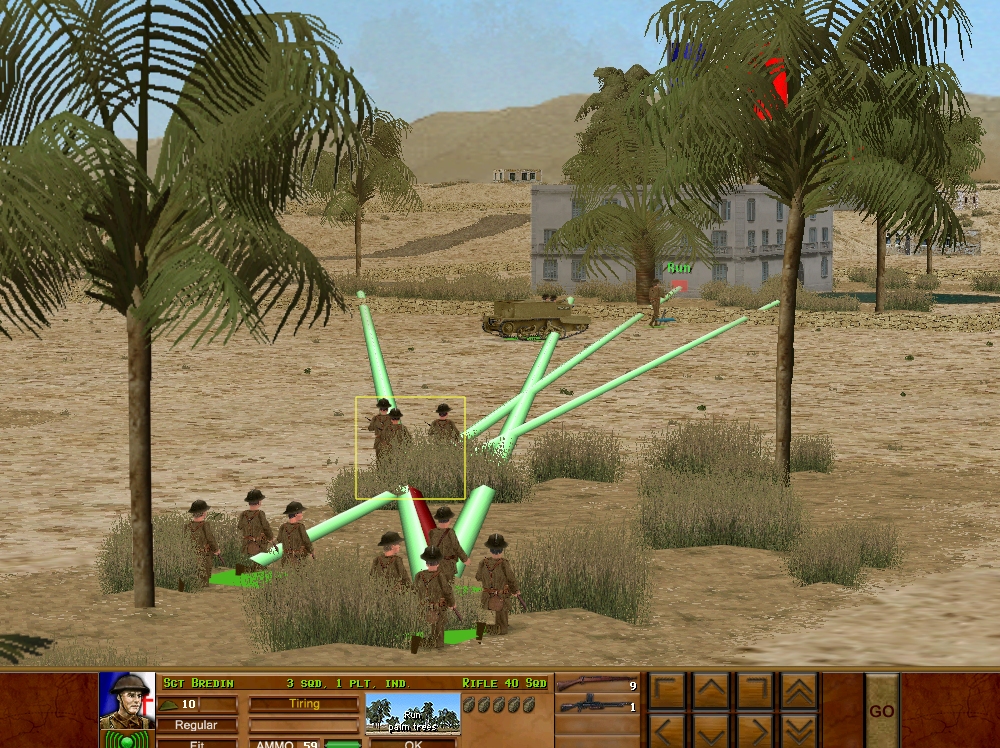
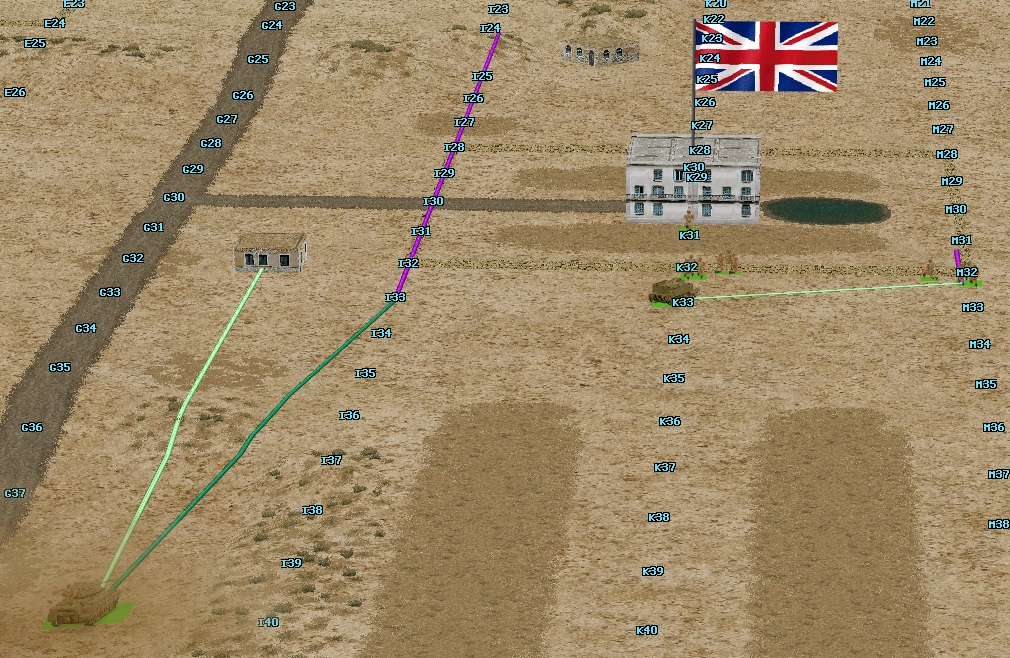
The British infantry squads, HQ, and mortar team, arrive at their destinations a tad breathless. When the clock stops, Team GB’s Bren Gun Carrier is pivoting in preparation for a move to M32 – the SE corner of the villa compound – while their tank…
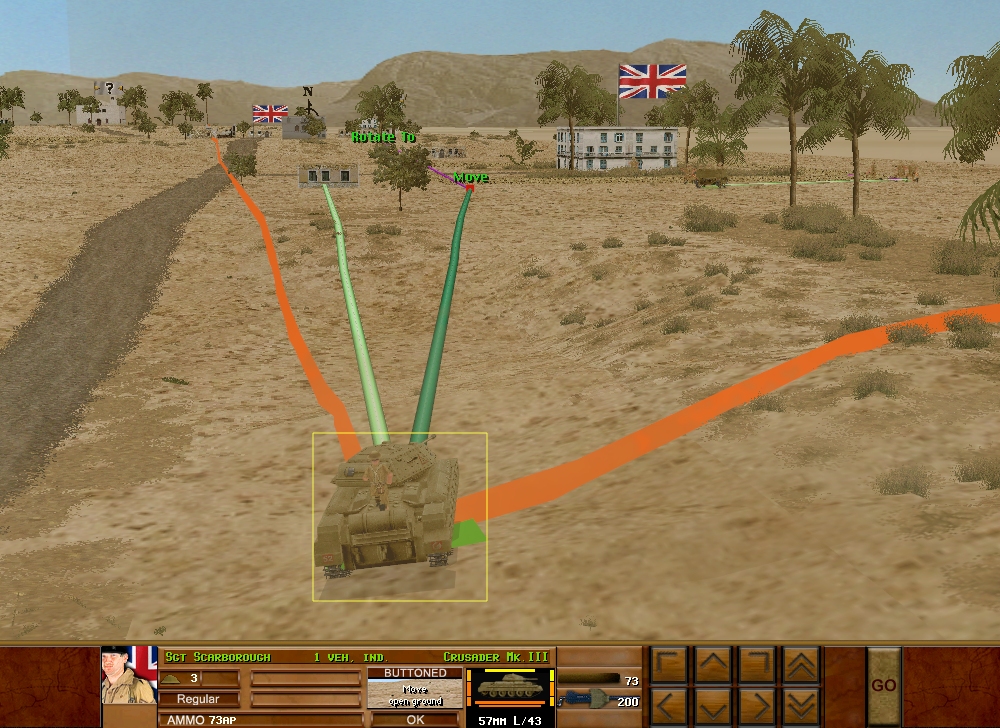
…is labouring northward, bound for I33.
On the Franco-German battlefield, Turn 2 ends with the French mortar team taking up a position in the lee of the villa wall, ‘tiring’ infantry about to commence a diagonal dash into the villa grounds, and the Bren Gun Carrier thinking about a move up the eastern side of the VL. Meanwhile, on the other side of the north-south road, the Gallic Crusader is…
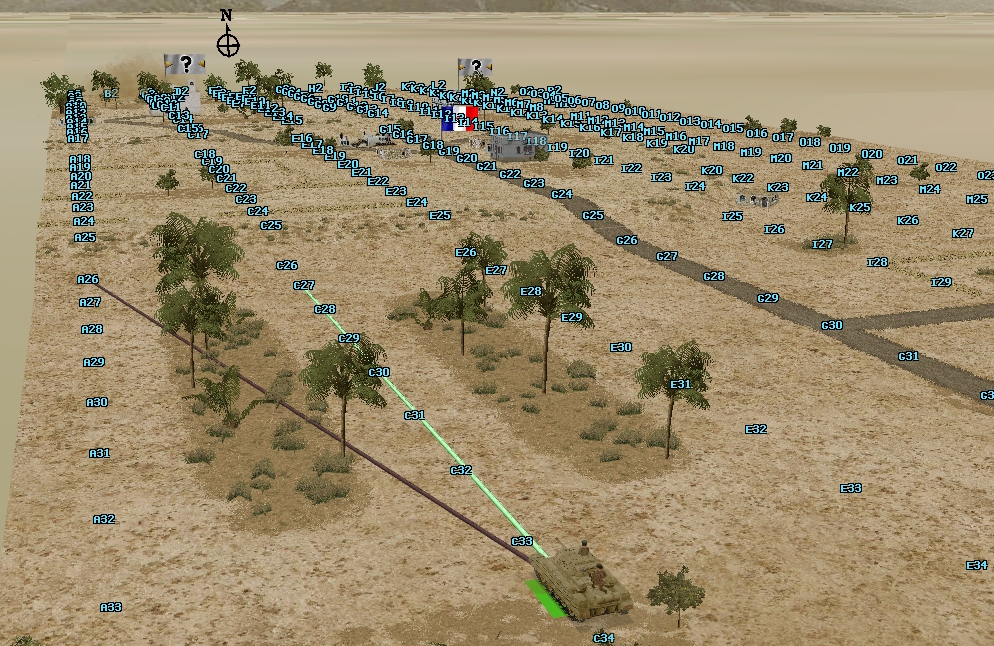
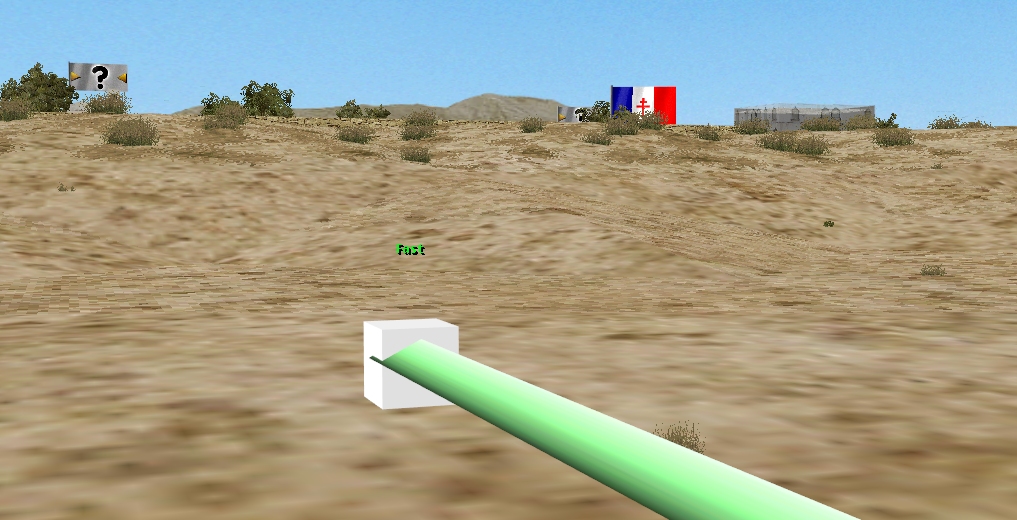
…hurrying towards C27 – dead ground close to the row 26 slope.
Positions and orders at T+60:

Excellent. With our boys in cover we should have time to rest a bit and decide the next move.
First up, I think it’s unlikely we’ll want to open up at extreme ranges, so I’m thinking a 360 target arc at 160m or so for everyone, maybe 60m for the HQ
Secondly, that slope at G or H 25 could give some cover on an approach up the hill. I’m thinking of advancing the left squad along the wall and into / behind the small building at H32, resting, then racing forwards under cover. If I can split a squad it will be less risky to run them over one at a time. From there we can decide to send them over the top, or get to the wall on 24 for flanking fire.
Third, perhaps after a short rest the HQ could move behind the larger building with the mortar team?
@Tim Is it possible to split squads? Are the trees at J29 and 31 blocking any infantry Los?
(Sounds like a GB discussion thread to me!)
Our Crusader is playing Matilda today, looks like. I thought it was significantly further along the road (G35ish), such that moving to I32 and disembarking the AT team for the H32 building would have been a ‘this turn’ kind of thing. At least I’m back into a place where I can react quickly.
Given that the dust from enemy AFV activity seems to be concentrated northwest, I wonder if the right spot for the tank now is on the east side of the villa—a building and a stone wall to use as cover, with better lines of sight to the north, and to the eastern side of the village and mosque. That would also perhaps suggest disembarking the AT team to cover the road south from the village in the event that a German halftrack or armored car shows up. Perhaps they also head for the H32 building, from which they can cover the infantry advance north. With the tank available to cover the northeastern side of the map, the building and dead ground below the hill at about J24 may be a good spot to stage an assault into the town.
It would be nice to have eyes on at least some element of enemy forces next turn, but I’m not sure how best to accomplish that. I suppose the AT rifle team could go upstairs in the villa, with a ‘cover armor’ order to make sure they don’t attract attention without some chance of earning back the potential cost of doing so.
TL;DR: two thoughts. 1) don’t expect too much from the AT rifle, 2) prefer concealment of our force to observing the enemy
“A manual on the Boys published for the Home Guard in 1944 gave the expected performance against armour:”
Zero degrees (impossible, given our foes):
22.3 mm at 91m, 20.9 mm at 270 m, 18.8 mm at 460 m
40 degrees:
8.8 mm at 460m
Our foes:
“The Ausf. J model had a solid 50 mm (1.97 in) plate on the front and rear. the sides were still vulnerable to enemy weapons, including anti-tank rifles at close ranges.”
And the armored car:
“The Sd.Kfz. 232 had 15 mm (0.59 in) of slightly sloped homogeneous steel armour on the front, 8 mm (0.31 in) on the sides, and 10 mm (0.39 in) on the back”
With this disparity in mind, I think we really should resist the attempts at going head-to-head with the enemy armor in general. The Panzer has better optics than we do, so it’s much more likely to get the first shot off, and to land it, against our tank. The halftrack and armored car are unlikely to be knocked out by one shot of the ATR, and the counter fire could kill us in one burst if we’re in front of them.
By contrast, their turrets are slow, and they turn even more slowly, to the point where we might get 2 or 3 flank penetrations under 100m as they attempt to turn to fire on us.
If I had to pick a perfect location for at AT rifle, it’s B18 facing east, behind hill slope to protect it from fire from C12 and a clear flank shot at the center of town between buildings. Keeping it hidden until the right moment is essential.
Thanks to CMAK borg spotting, we really want to make sure none of their forces spot us until we’re sure we’re ready to engage. Get into nice flank ambush positions, work our way forward by leaps, and once we knock out their armor with surprise, use our tank and carrier to cover an infantry assault.
My concern is that ambush positions and evasion will be difficult, if we don’t know where the Germans are, or where they’re moving.
I’m sure we’ll find them soon enough, but flying blind, and trying to make plans while flying blind, seems like an added challenge to me.
I feel like we do know where they are. We know their composition and starting location and maximum speed. If someone was out of my sight for 3-5 minutes I wouldn’t expect them to appear beside me with no warning.
So I’m keen to wait a few minutes before poking our heads out. Spotting our foes is a T6, not a T3 problem, so I’m gonna get our boys moving and spread out and closer to ambushing our foes.
>> Is it possible to split squads?
Yes. Split a 10-man GB squad and you end with up with a Bren half-squad (4 rifles, 1 Bren, 2 Mills Bombs) and a Thompson half-squad (4 rifles, 1 Thompson, 4 Mills Bombs)
>> Are the trees at J29 and 31 blocking any infantry Los?
They do appear to impede LoS to the village and mosque areas. The squad at K32 can see a small area of terrain circa B15/B16, but the one at M32 seems to have no long-range LoS to its 10/11 o’clock.
***CORRECTION***
Under the last turn report, I suggested it was possible for a vehicle to pause at an intermediate waypoint in order to disembark/embark passengers. Having tried this and failed last turn, I think I may have been getting my CM engines mixed-up. Sadly, this isn’t possible.
A note for any other CMless participants or observers—CMAK was on sale for 3.59 Rebellious Colonial Dollars when I checked GoG today.
Following the acquisition of Battlefront.com by Matrix Games there’s a 60% off sale on Steam for the recent titles – or 60% + 20% for the lot:
https://store.steampowered.com/bundle/21942/Combat_Mission_Collection/
I’m tempted, even though I’ve hardly played Shock Force 2.
If I wanted one of the current-gen-ish CM titles, what’s the community recommendation? Most interested in WW2, could maybe go beyond if one of the others has particular positives.
I think Fortess Italy, the base game, is most interesting. Halftracks with AT guns in the back, WWI tankettes, and ancient artillery, alongside M4 Shermans, late model Pz4s, and early rocket launchers.
Plus the long sightlines really take advantage of the higher terrain resolution.
SUPER SECRET FRENCH DISCUSSION THREAD – SMELLY BRITONS KEEP OUT
Dear oh dear. I both miscalculated just how much slower the Crusader would be off the road, and completely misread the screenshots from the end of turn 1. So what now? Continue with the previous plan? I am a bit concerned with Tim’s mention/veiled warning of “dead ground”, but I am still holding on to the idea that the A-E26 area will be out of LOS of anything from the village and northwards. Thoughts?
It was more of a heads-up than a warning. Being out of LoS in this area could be advantageous. CMAK features a ‘shoot and scoot’ order type which could be launched from such a spot:
“This is a two-leg order requiring placement of two waypoints. The first waypoint (shoot) tells the unit to advance to that position and scout for targets. After several seconds the unit is supposed to withdraw in reverse (scoot) to the second waypoint which – usually – is out of sight of the enemy.”
It seems like a good spot for a hull-down shot position and reverse, as Tim mentioned a possibility of such an order. But your gunner would have to be almost perfect. I think it’d be cool, if you designated a defined firing arc for this ambush, so that your crew does not spread their awareness too thin.
But the other thing is that after a single shot like this, repeating such a move in this position might be a little questionable and I am not sure where’d you be able to shift it to.
Yep, I’ll definitely be putting up a target arc. Although I suppose if I do a shoot and scoot, that’ll be next turn, as I still need to unload the AT team this turn.
I guess also we can assess what to do next once we have a fix on where our targets actually are. Likely I’ll need to support an infantry assault, which could involve backing up a bit and covering the main road.
@Tim, is it okay to ask you to provide lines of recent movement and final positions on the top-down map for the next turns? While the screenshot I quite readable, it would be a little more handy not to cross reference several images for a general view. I understand that it is a hassle and you’d have to do at least too (one for each side), but clearness saves lives
I recall trying to do this one year and it got pretty onerous/difficult. From now on the last two screenshots in each turn report will show map coordinates, and end-of-turn positions and orders still to be executed.
(This turn your Carrier didn’t move after disembarking the mortar team, because of the unexpected pause issue I mention above.)
Thank you!
FYI, Tim, You changed the hashtag at the bottom of the article for turn 2 so it doesn’t connect with the previous two articles.
@Tim ORDERS for French Bren and Mortar:
Previous orders stand. Bren continues rolling around the villa wall. Mortar crew can smoke for a minute
@Tim FRENCH F3 ORDERS:
Continue to C27, halt, AT disembark
@Tim GB2 BRITISH ORDER: A young man in the situation room reports to Dick Cheney “The plane is 50 miles out”… “The plane is 30 miles out”… And when it gets down to, “The plane is 10 miles out,” he also asks the vice president “do the orders still stand?” And with this, Cheney whips his neck around, fixes him a deathly cold stare, snarling maniacally “of course the orders still stand, have you heard anything to the contrary?!”
In other words, orders still stand from the previous turn, thanks.
EDIT: if it makes any difference, please”BUTTON” the bren carrier, thanks.
F1 ORDERS
Continue previous orders. Hopefully have a bit of a break to catch a breath till turn ends.
GB3 ORDERS
I don’t want to outrun my infantry support, but I’m also convinced of the value of getting the AT rifle team somewhere with a potential side view of the enemy armo(u)r; maybe we don’t dismount them just yet.
Cancel current orders, move fast to I33, face north.
ORDER GB1
Give every squad (or split squad) a 120m 180 degree target arc to the front. Give the HQ a 50m target arc to the front.
Split the leftmost squad, take the Thompson element and move it along the wall to I32, then FAST it to behind the building (not inside it) and HIDE.
Take the bren element and move it to J32 and HIDE.
Split the right squad. PAUSE 30, then FAST the Thompson section to the inside corner of M28 and HIDE.
The rest of the troops get some rest.